Ceramic Sculpture Projects
Art-15 / Art-38A
Fall 2023
Slabs_____________ Color...................
Over View:
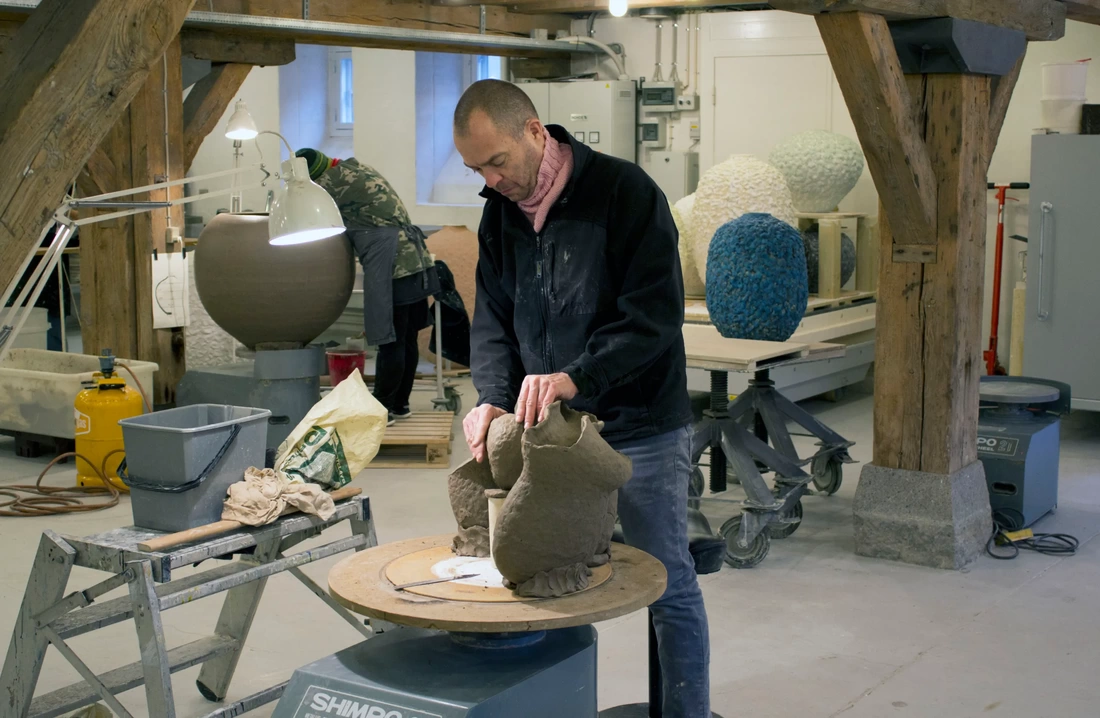
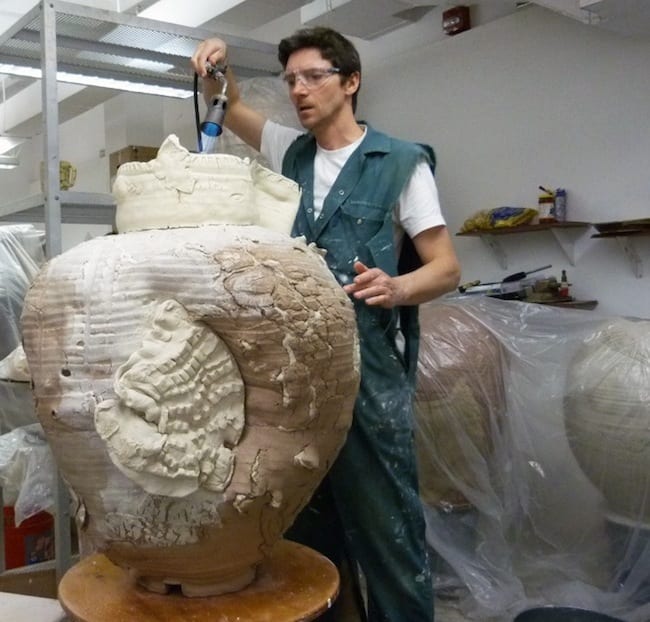
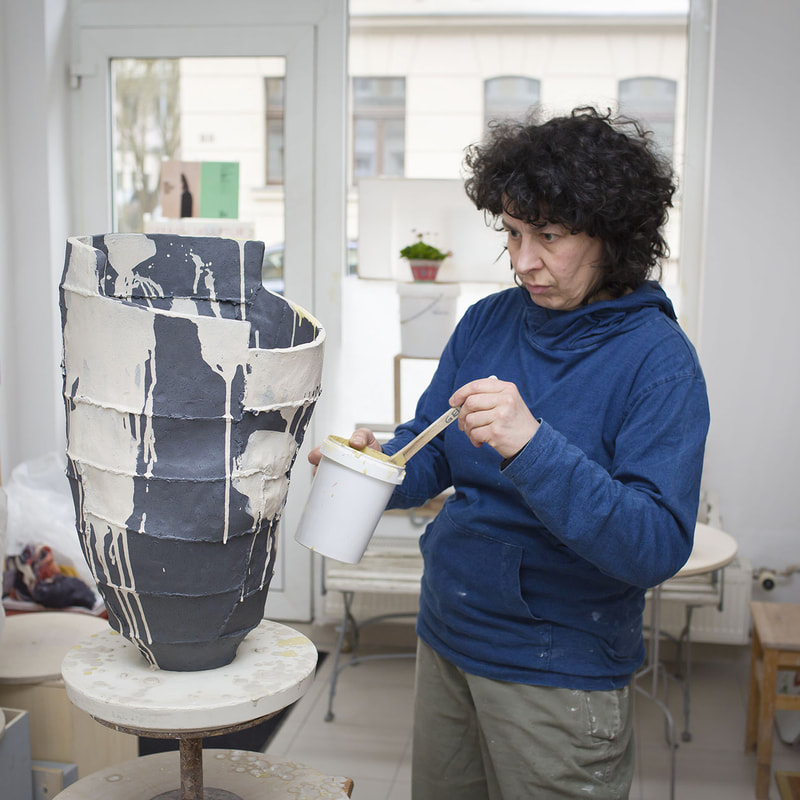
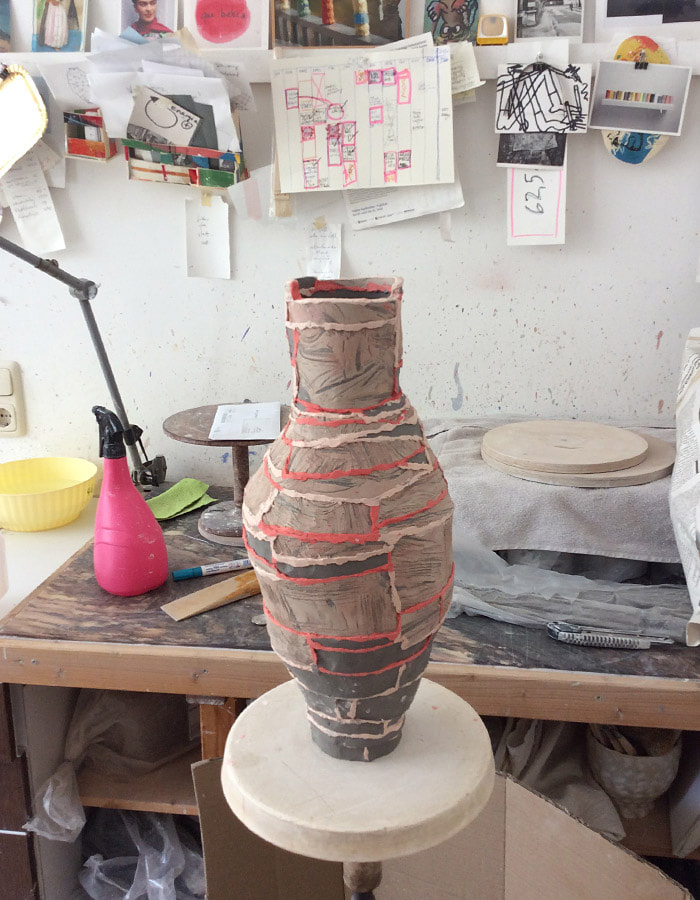
In this assignment you will be workin with one of the basic and fundamental ways to work with clay, slabs. Slabs are a basic method of taking clay and shaping it into flat sheets of clay and then using those sheets of clay to build with. As you may know clay can be used in various stages of hardness, or wetness depending on the effects you're looking to achieve. In this project you will use slabs in varied levels of moisture (soft and hard slabs) to execute the sculptural project. It's important to keep in mind that slabs are going to be the mode of operation in this assignment. All work must be made for slabs, no coiled or pinched forms. You may refine your slabs, but all of your work must be made of slabs entirely.
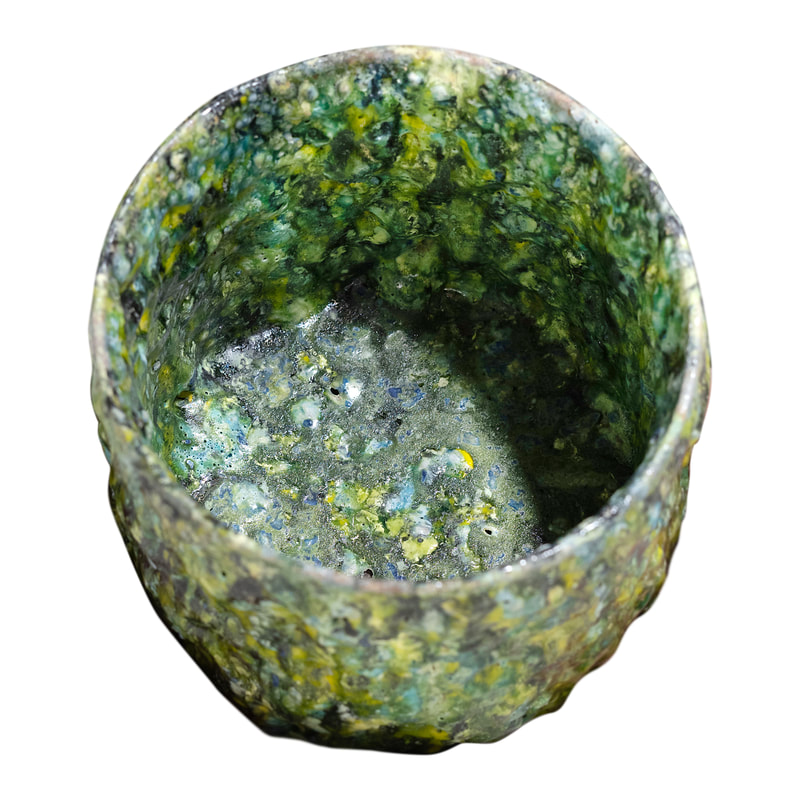
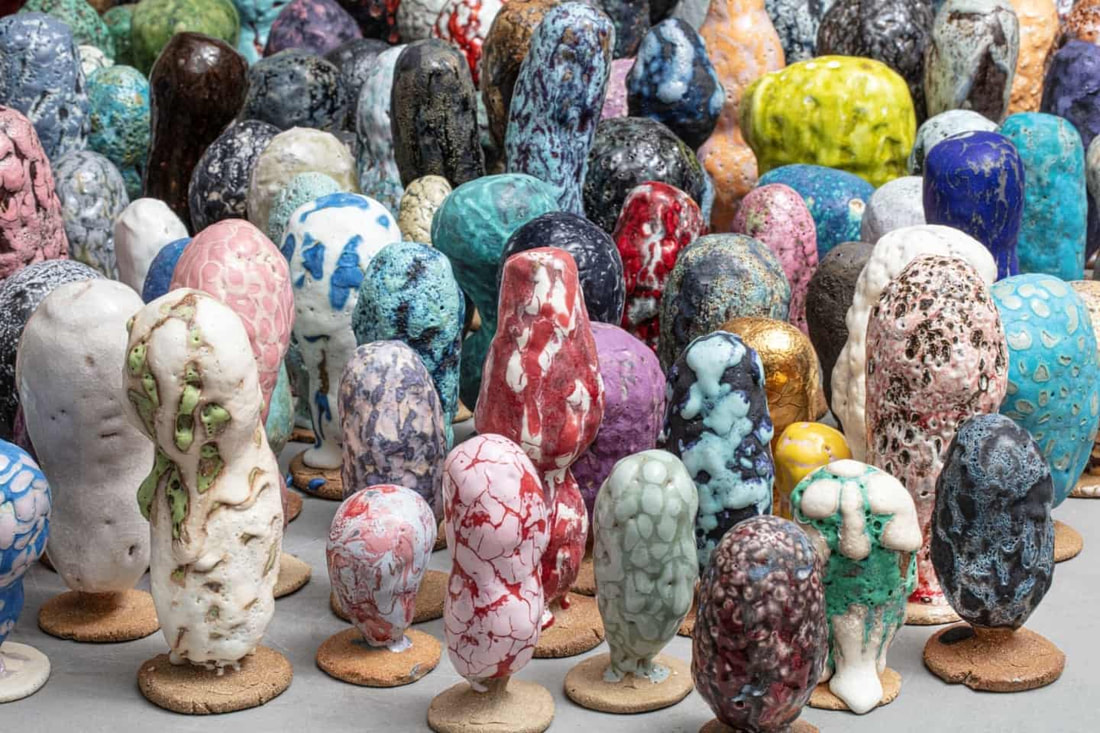
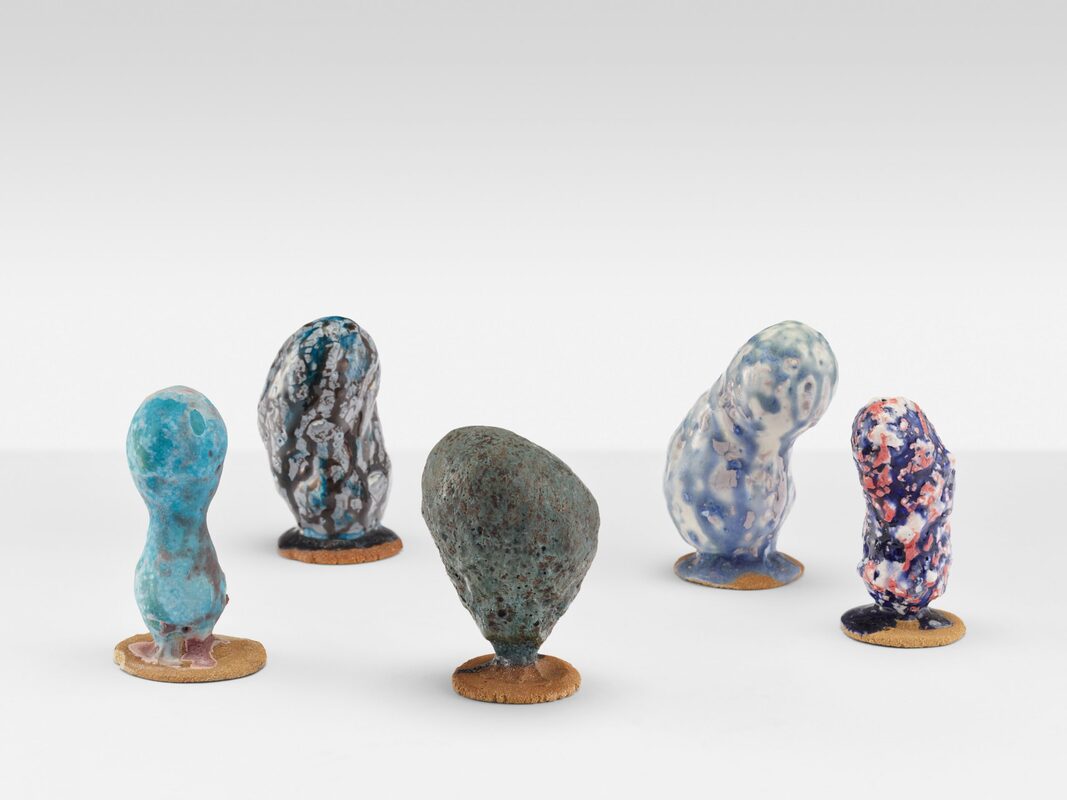
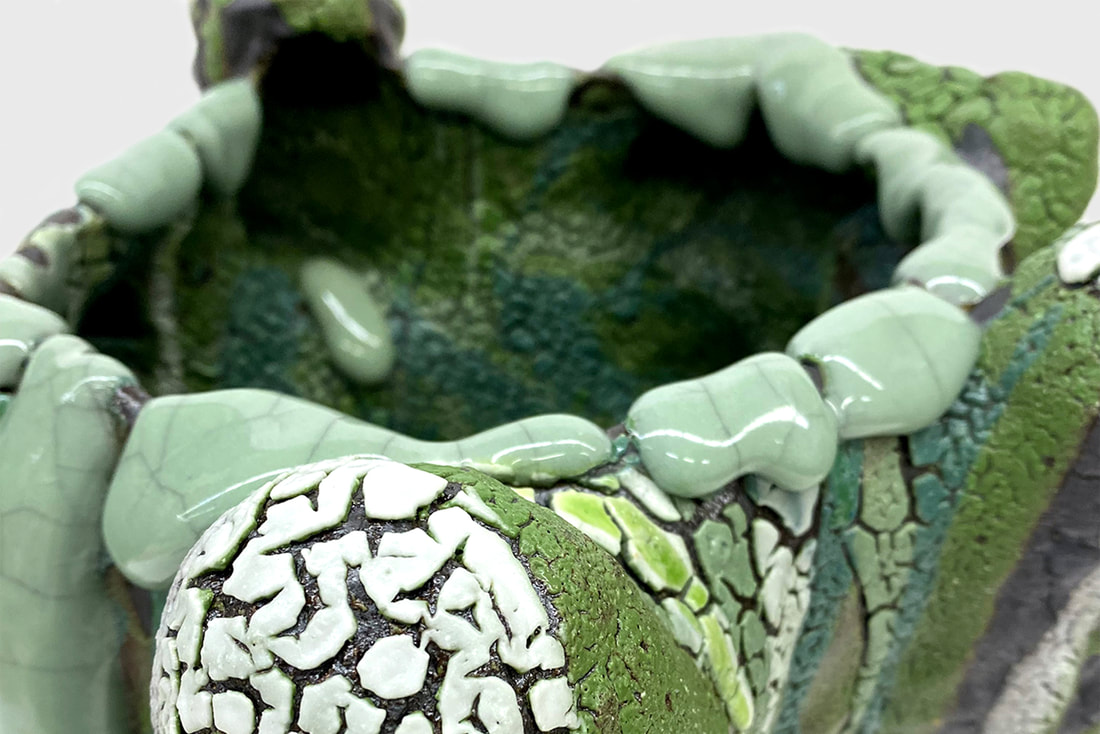
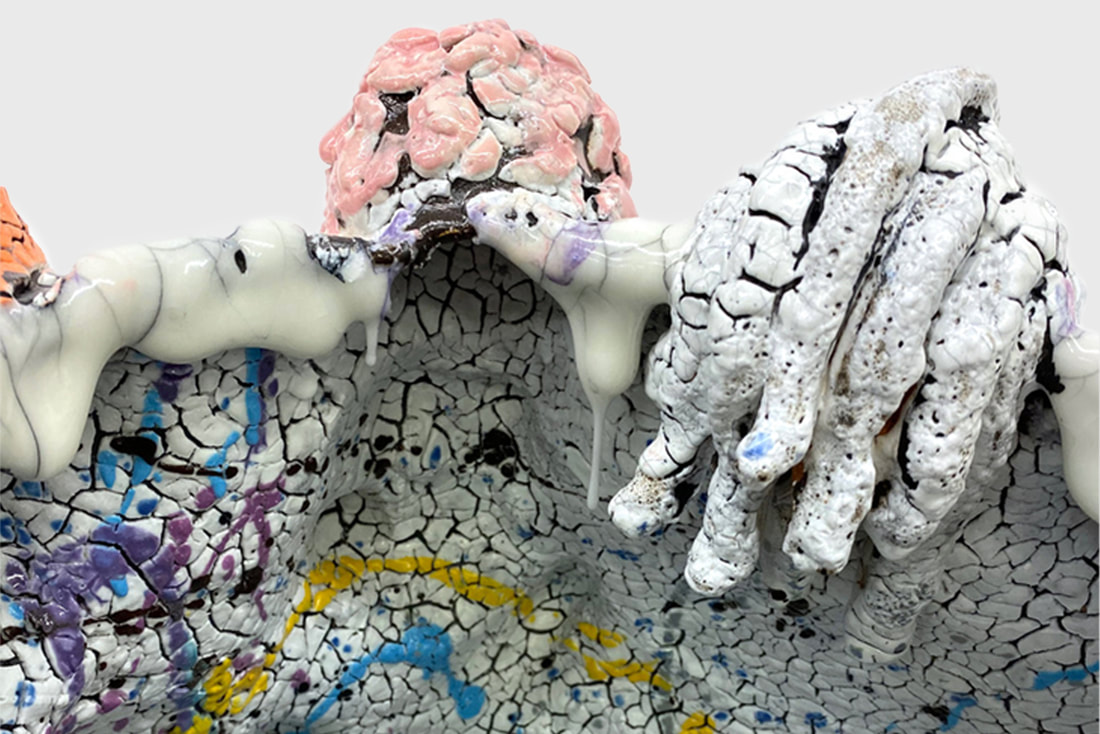
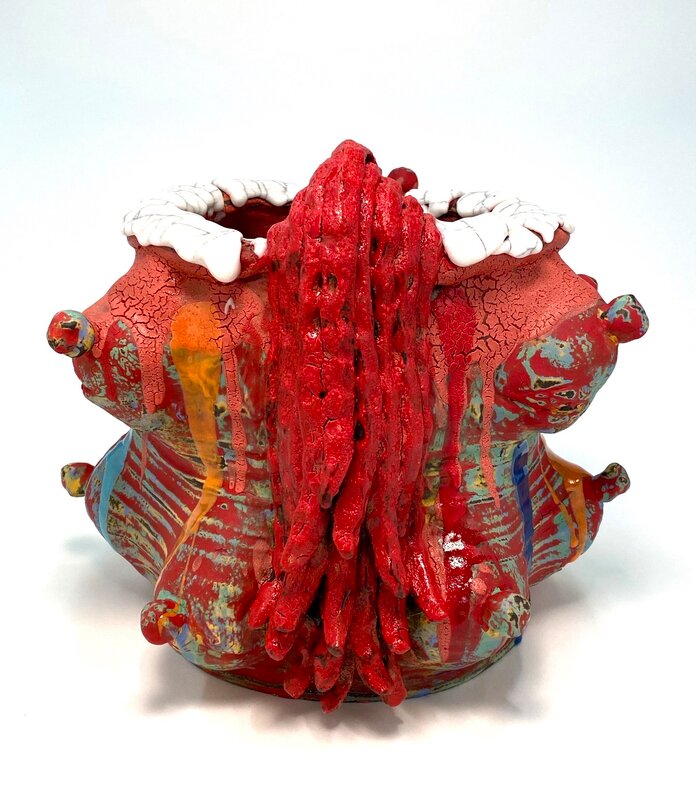
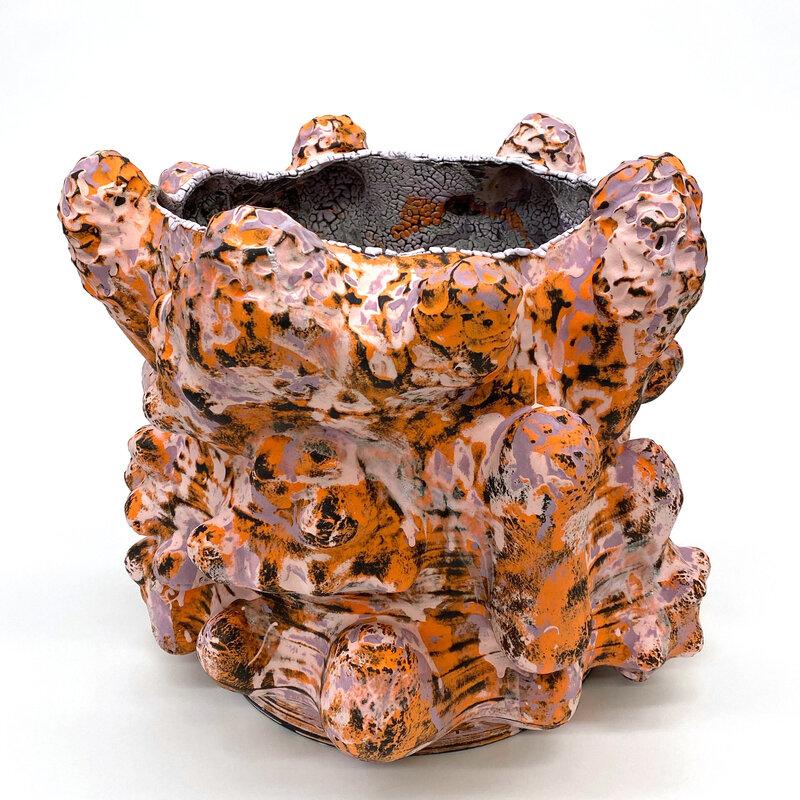
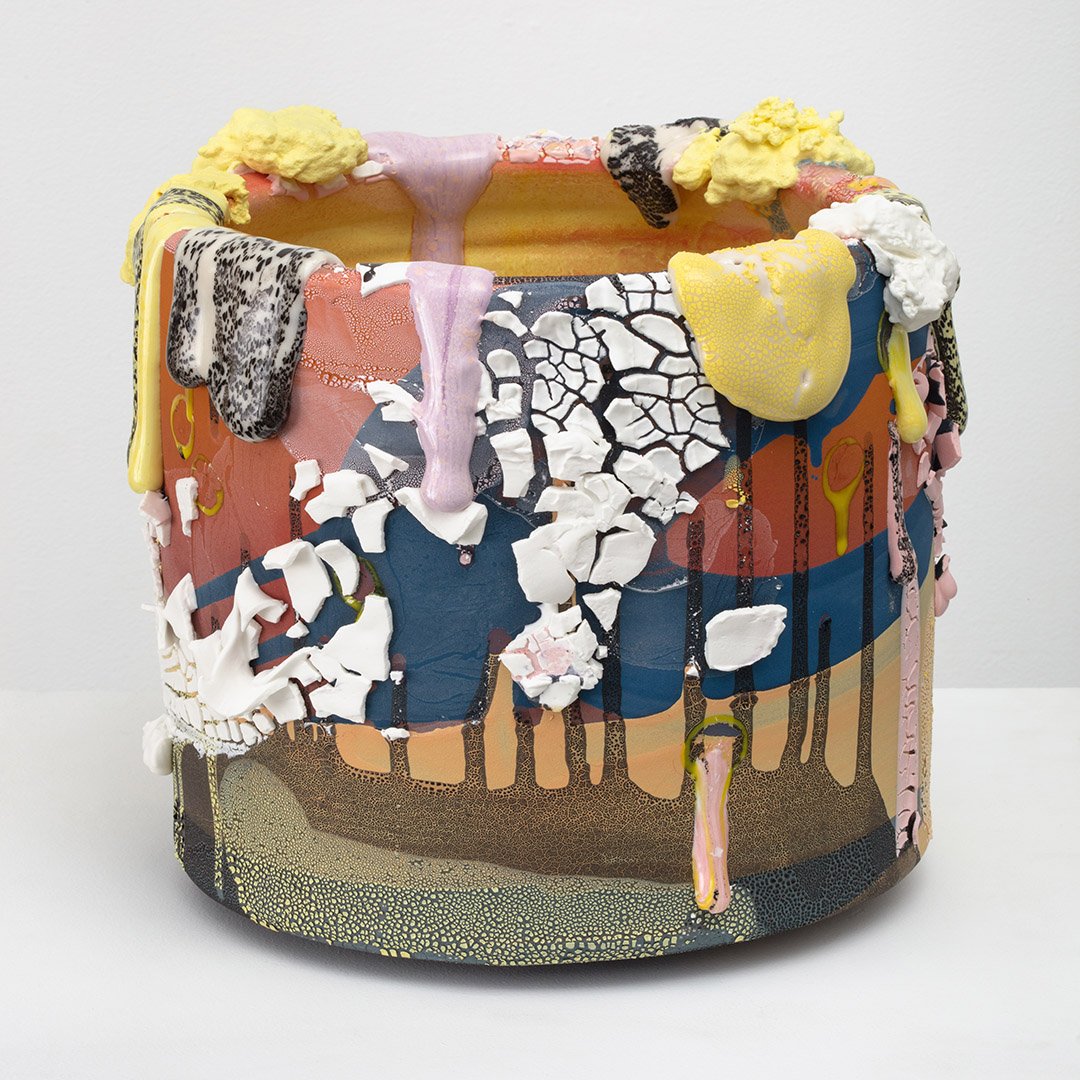
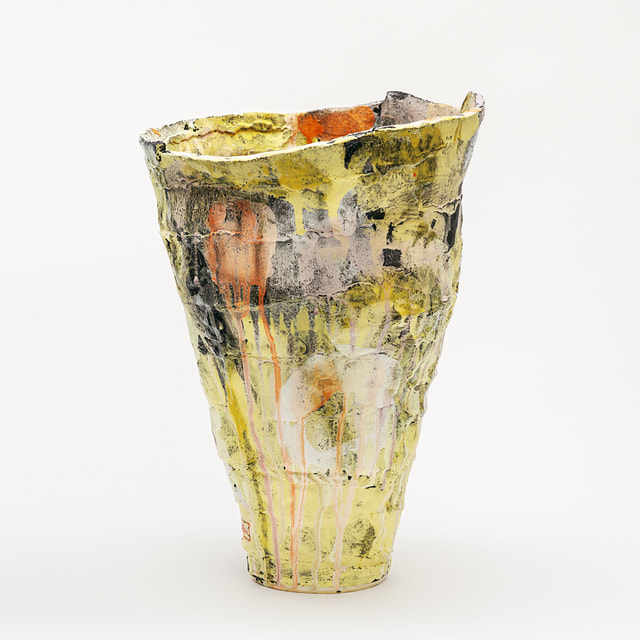
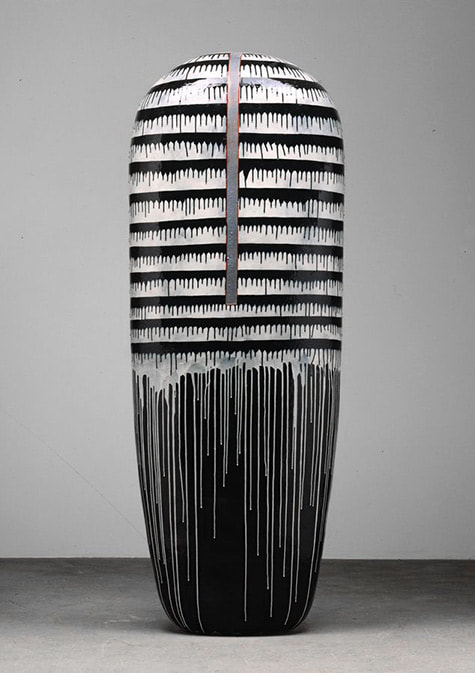
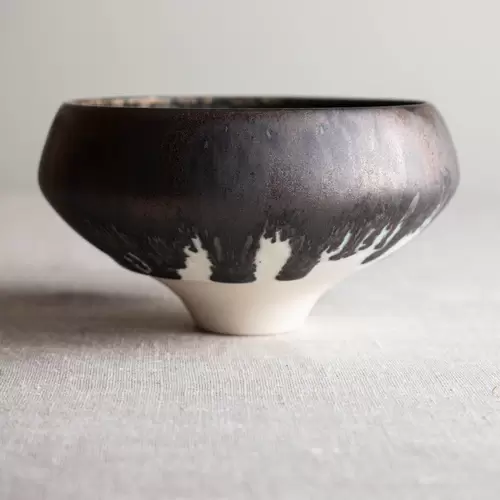
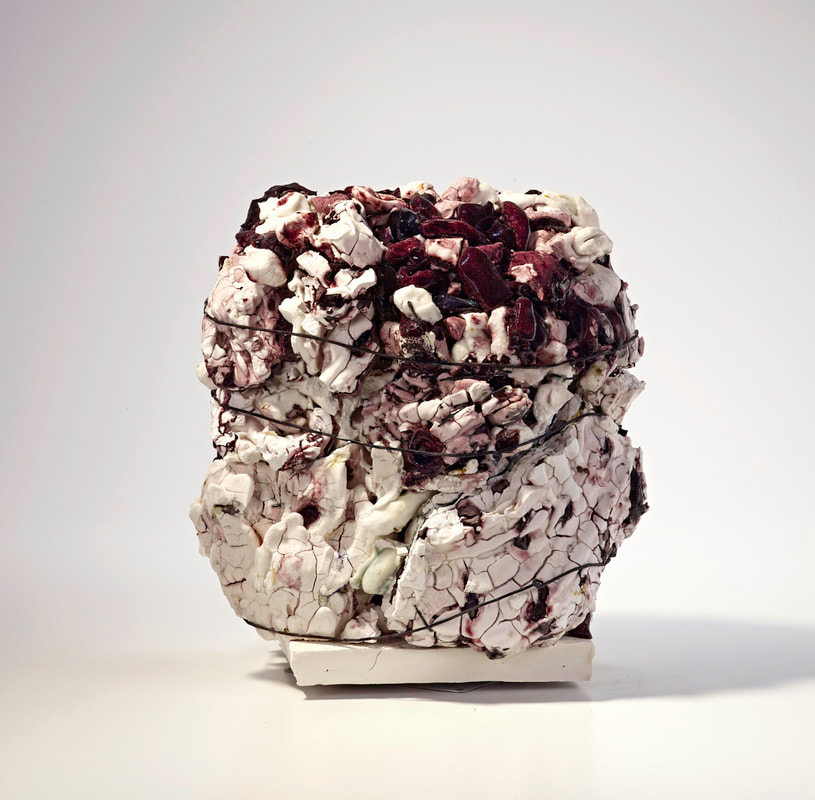
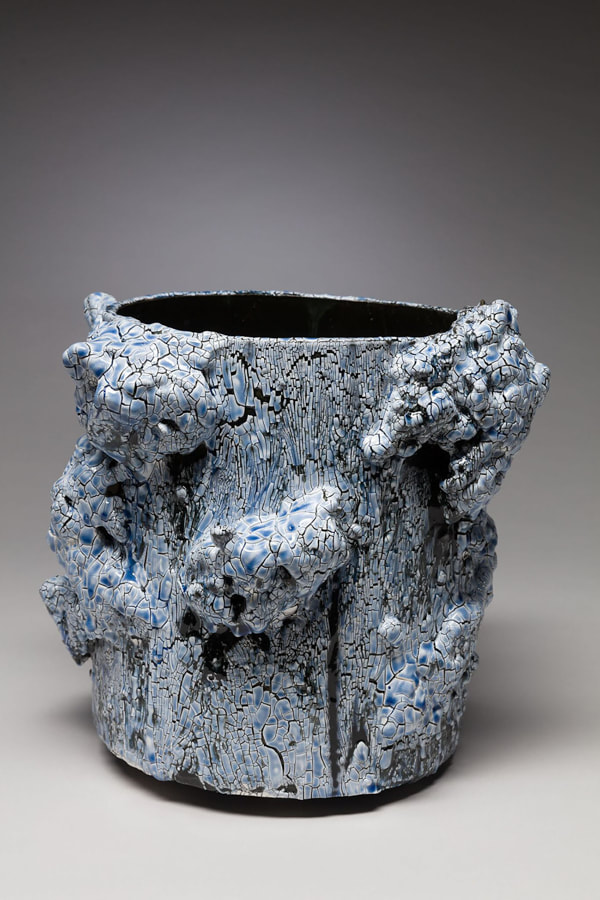
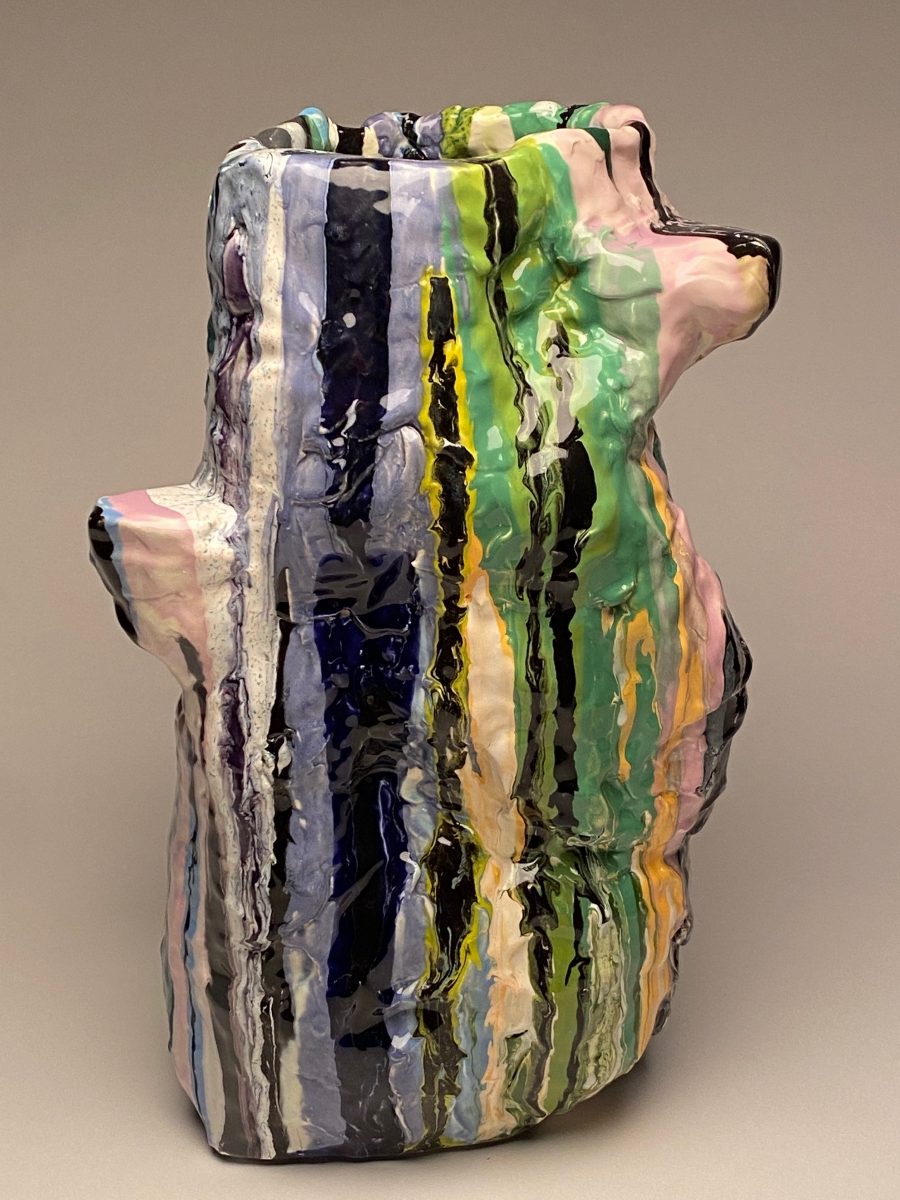
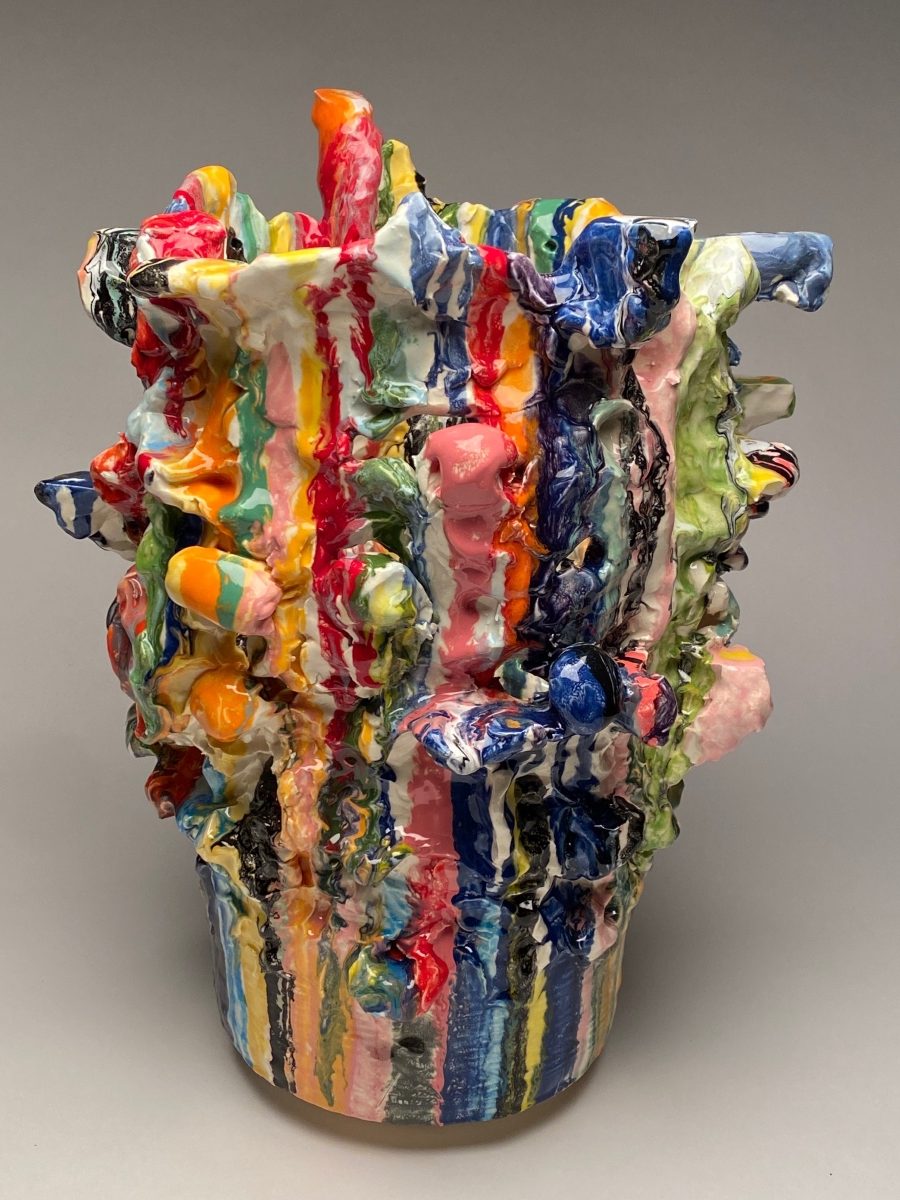
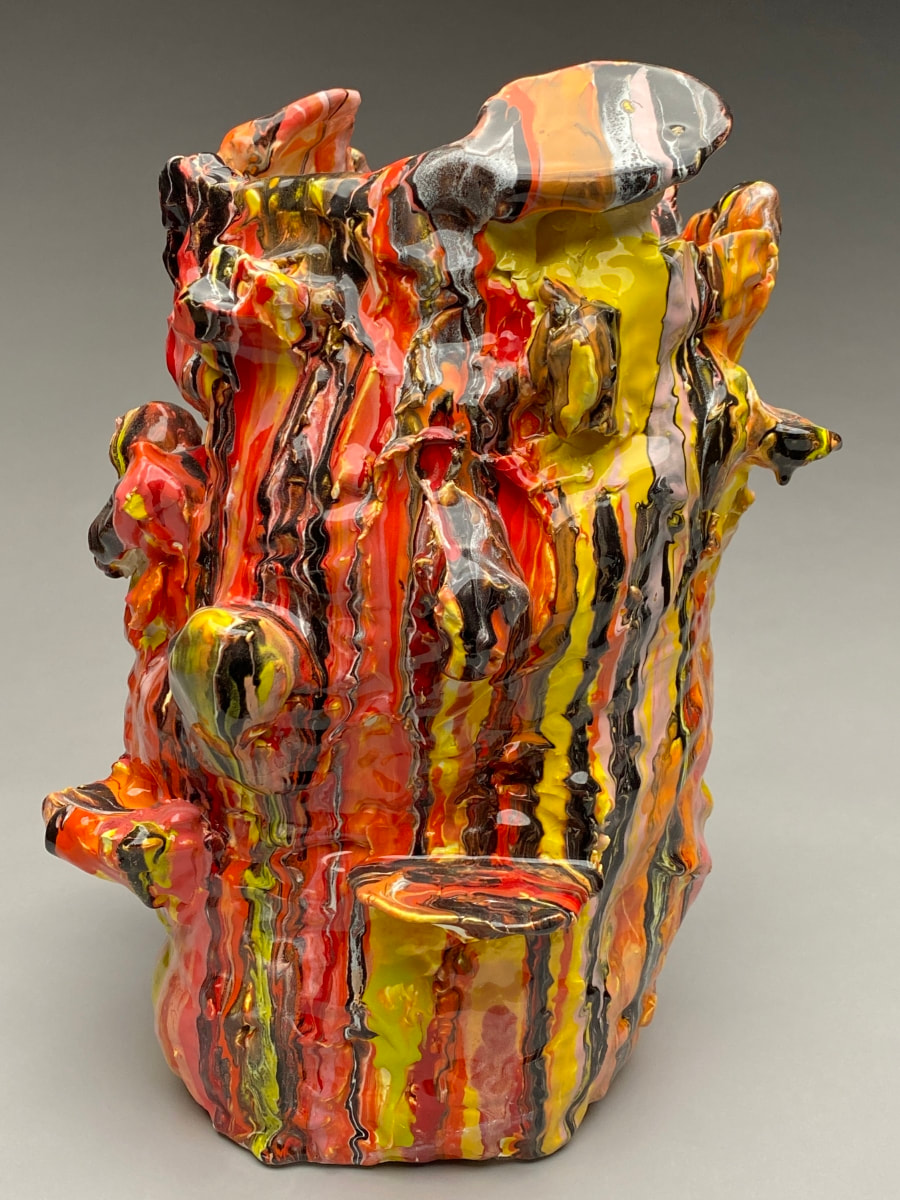
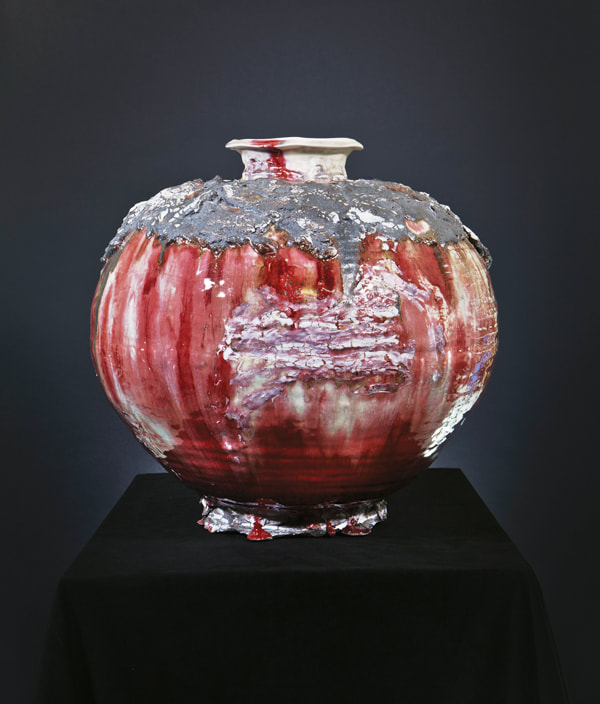
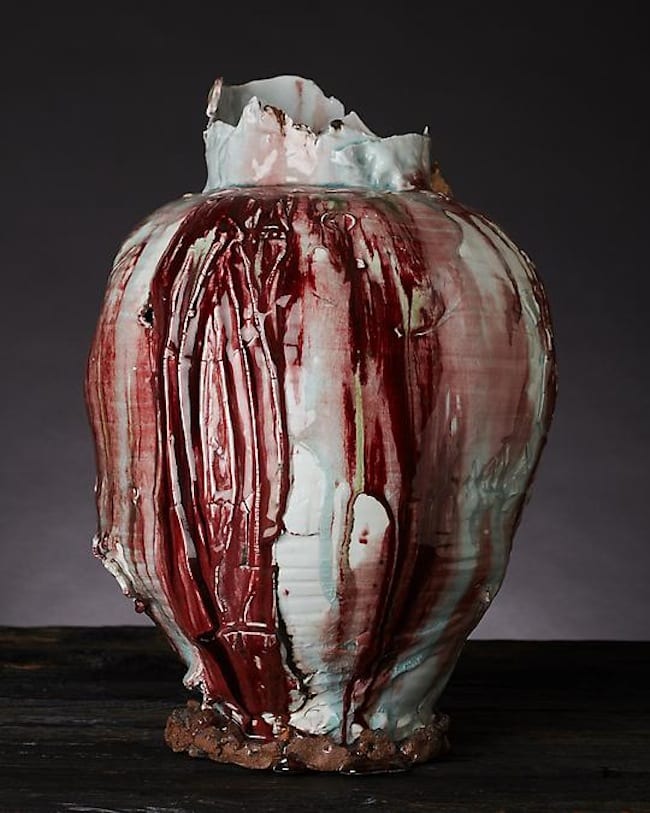
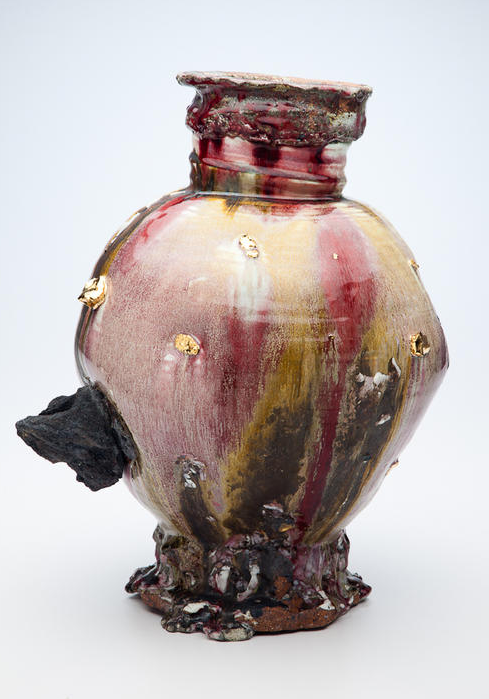
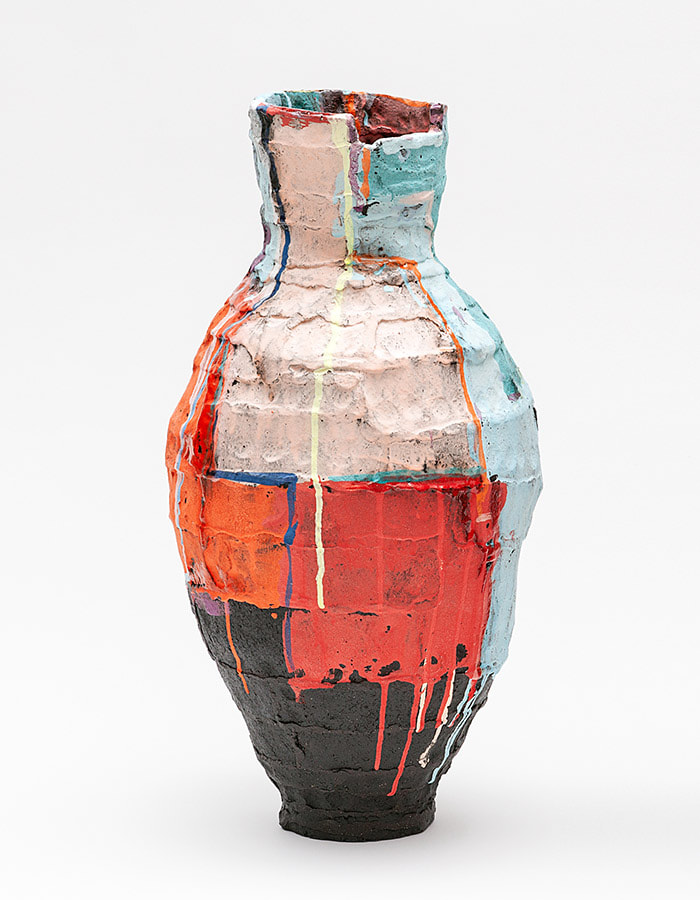
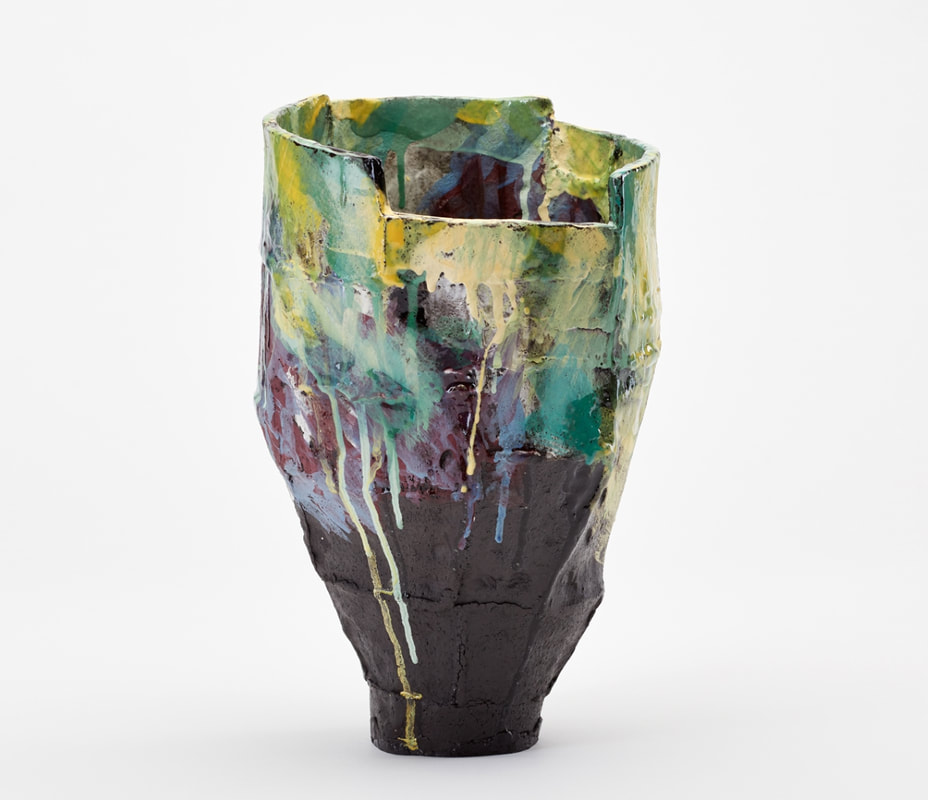
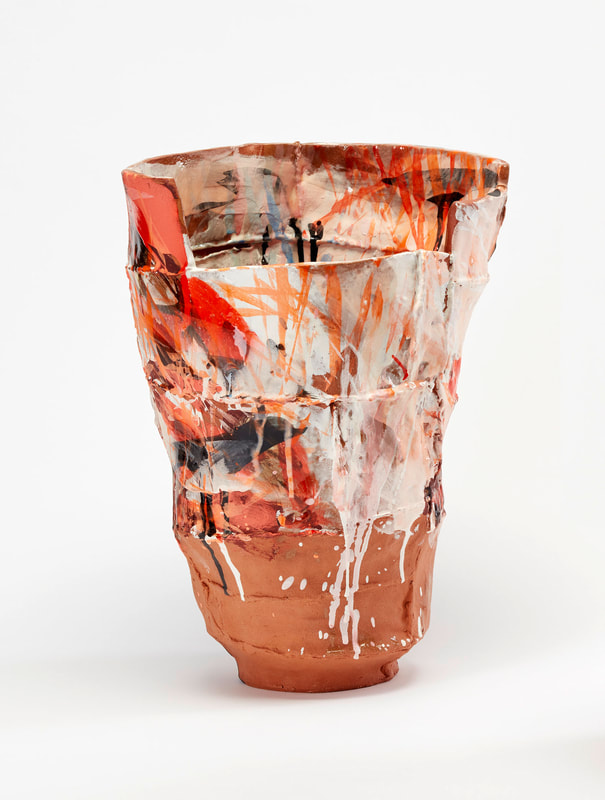
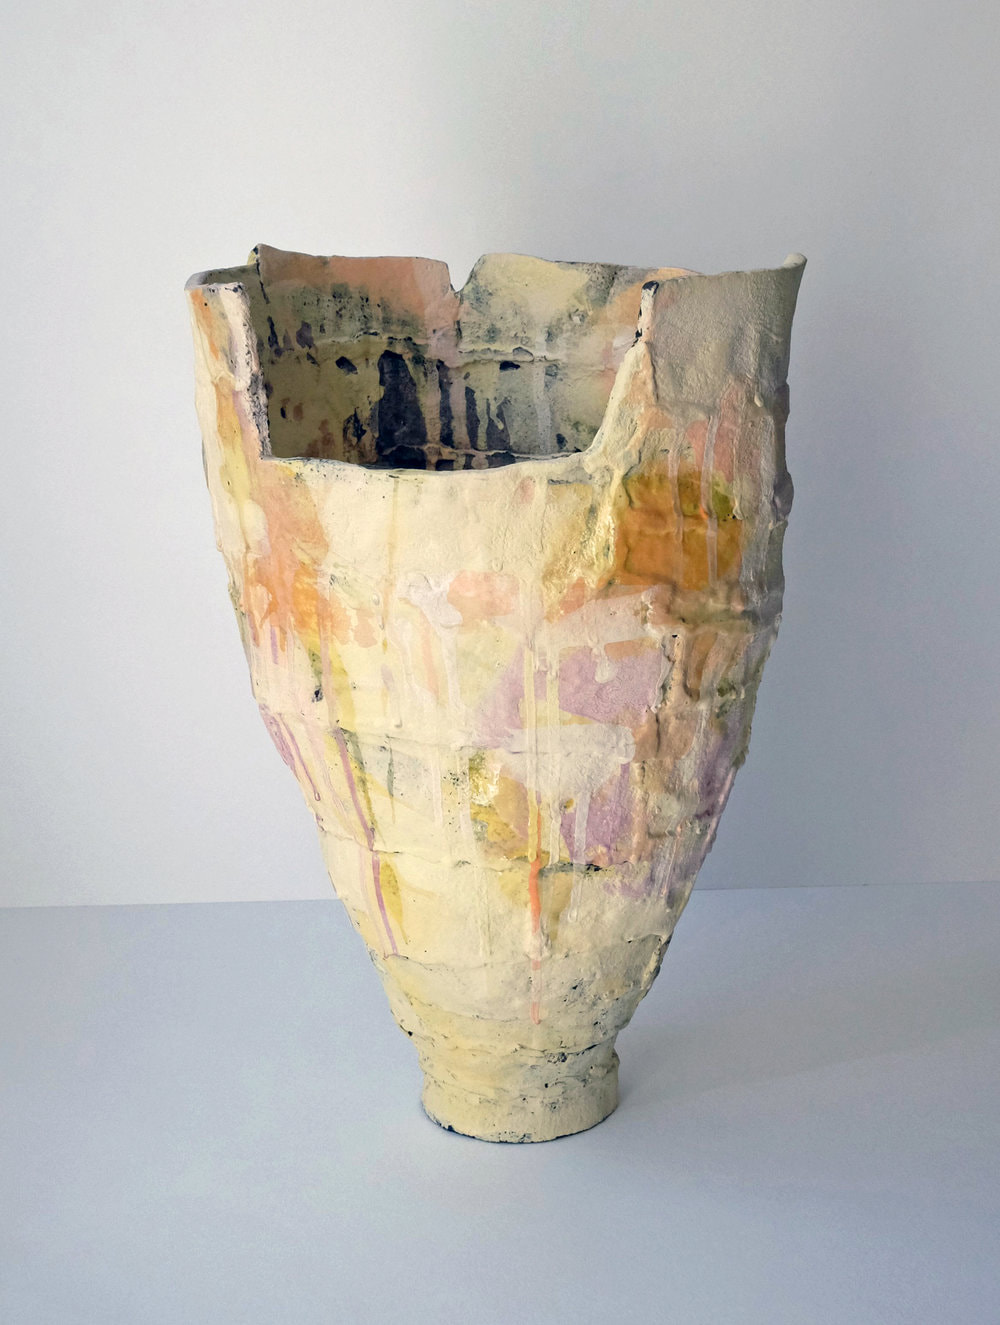
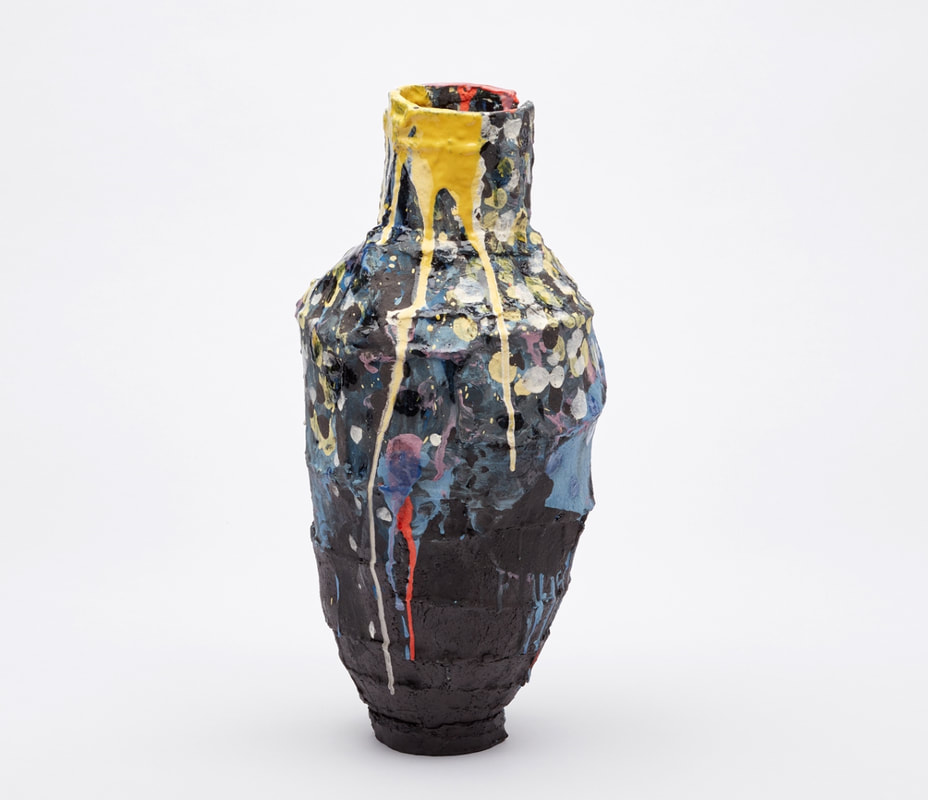
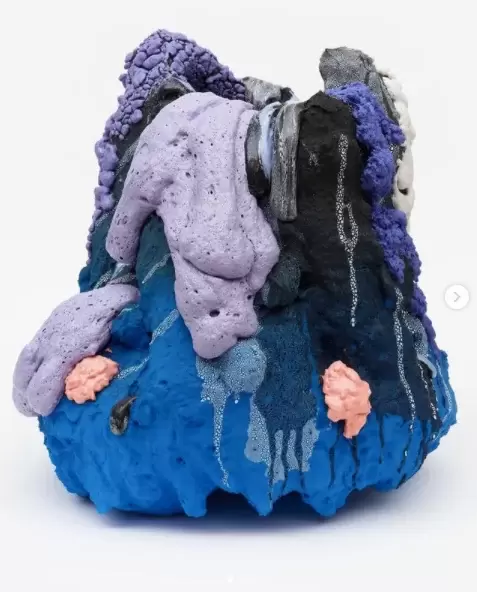
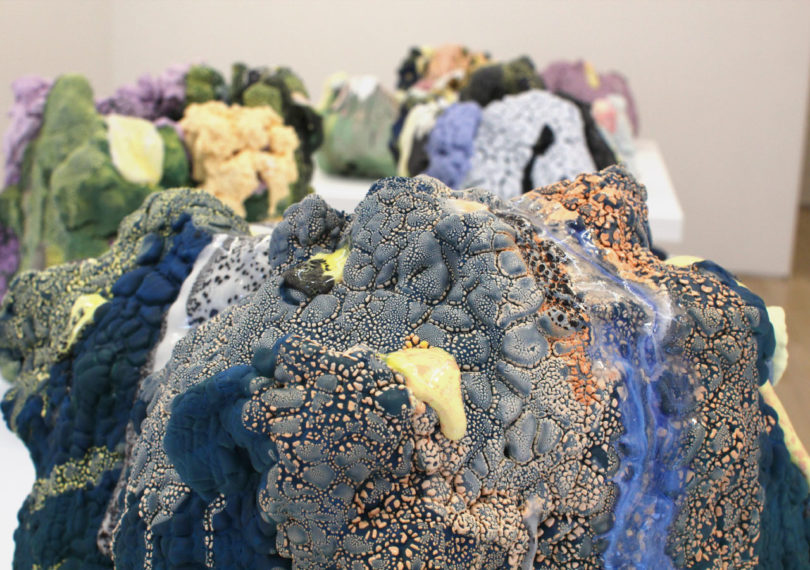
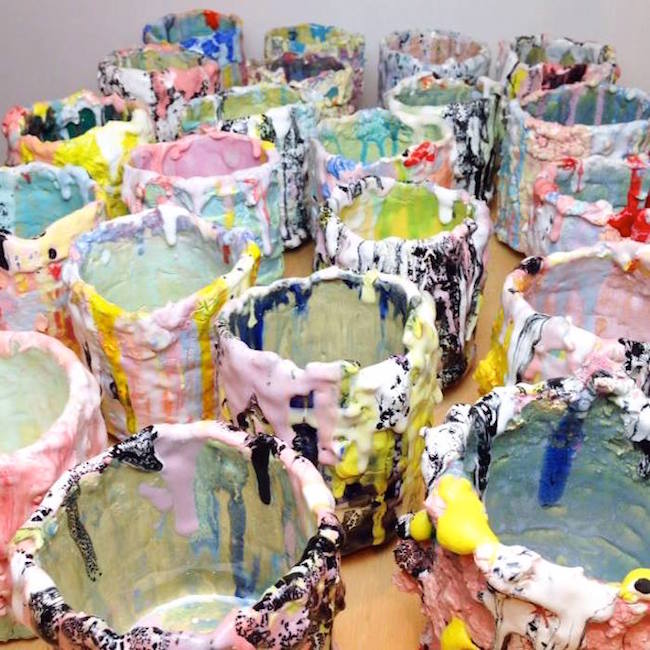
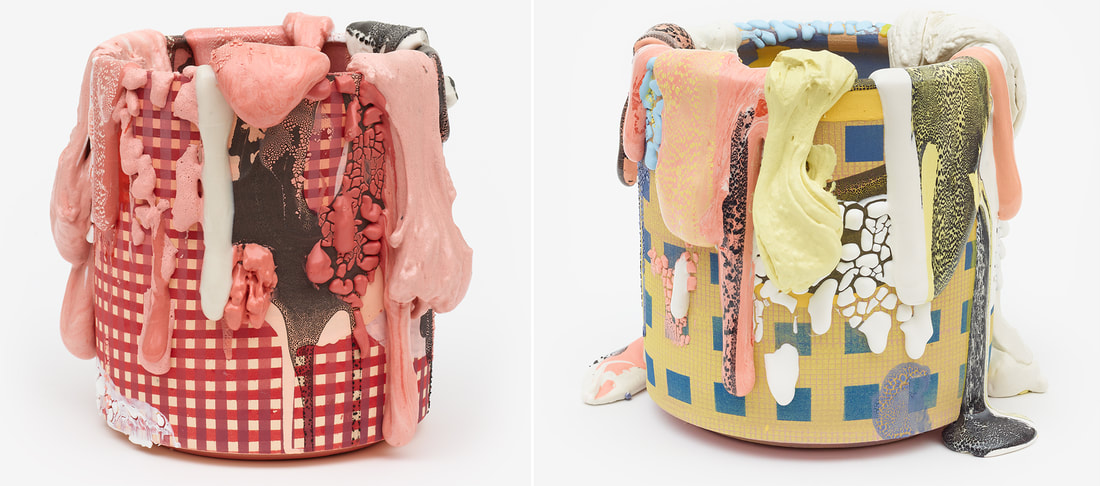
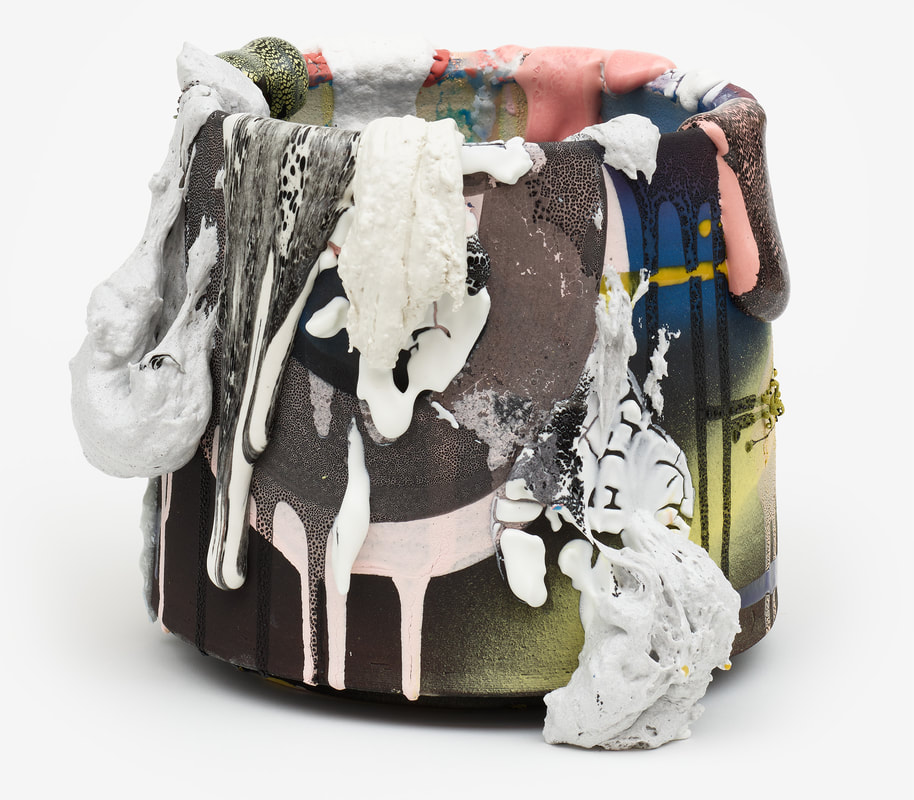
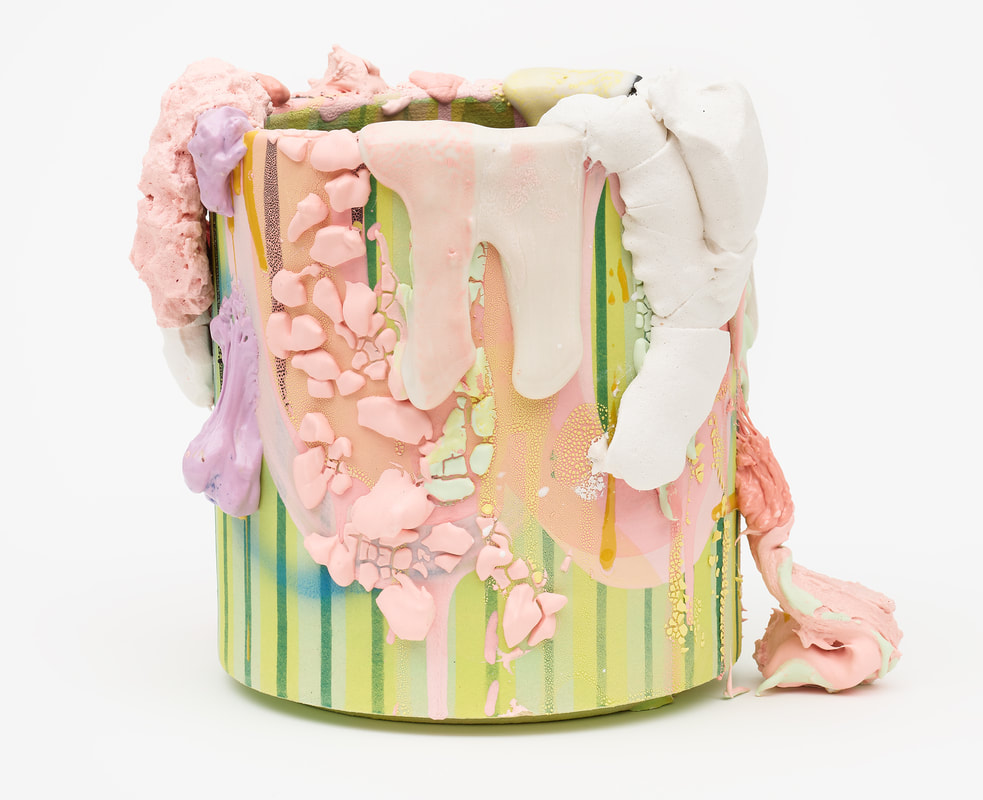
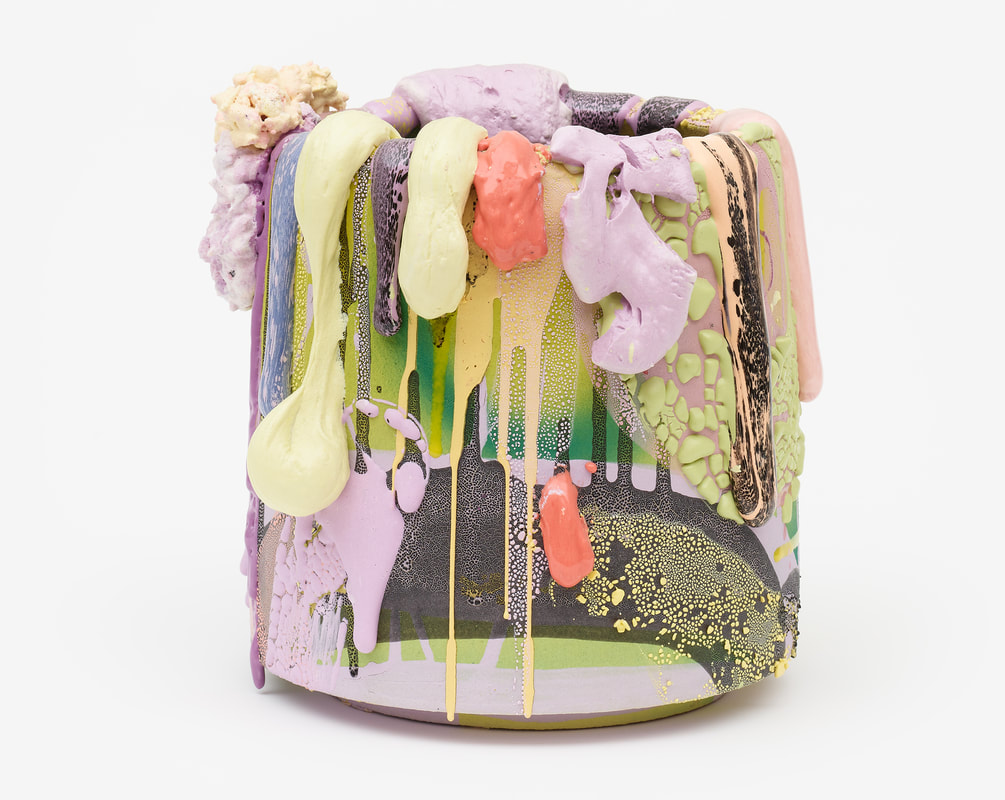
In addition to the vessel form as the element of focus, we will use the vessel form as a vehicle for glaze and color play. We will be playing with excessive amounts of glaze and color. You might think of this as an oportunity to let the glaze be wild and free. We will explore the possibilities glaze lends to the ceramic sculptural process. What happens when we over apply glaze? How does molten glaze move over a surface? How do we deal with the realities of fluid materials in the firing process? Problems..... Challenges...... Discovery!
The Project:
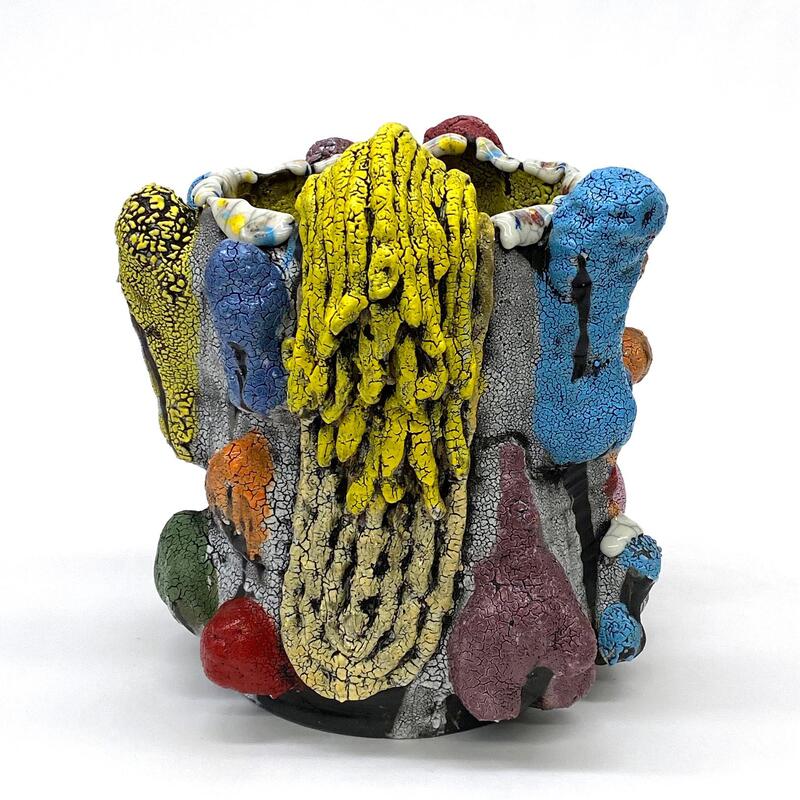
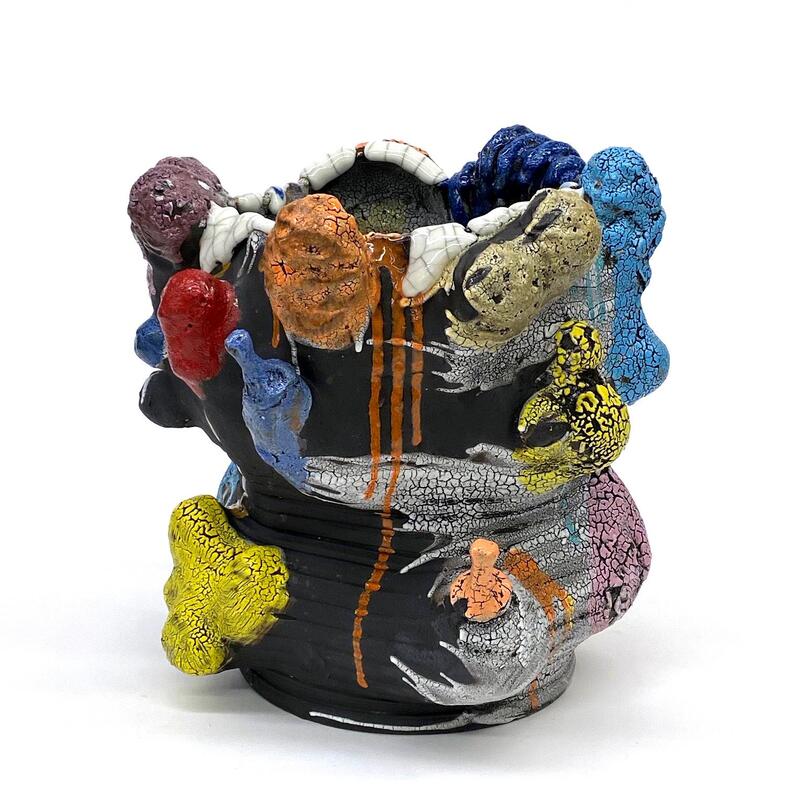
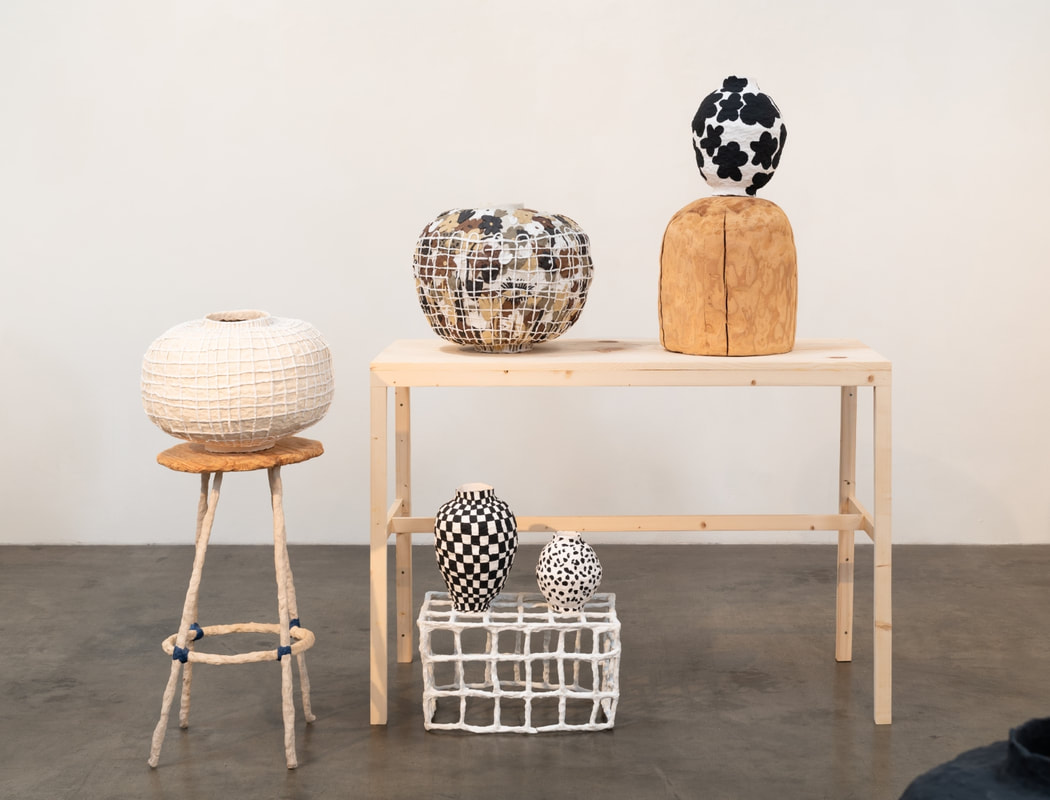
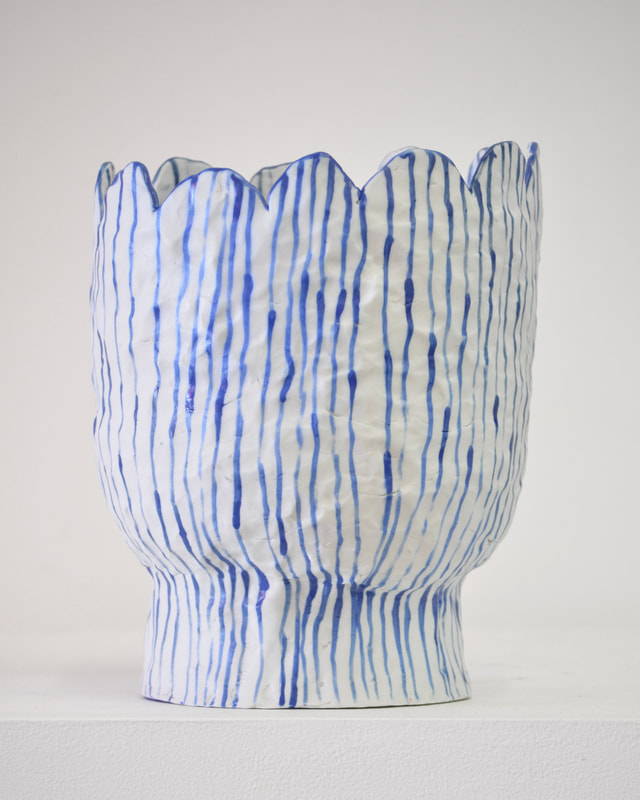
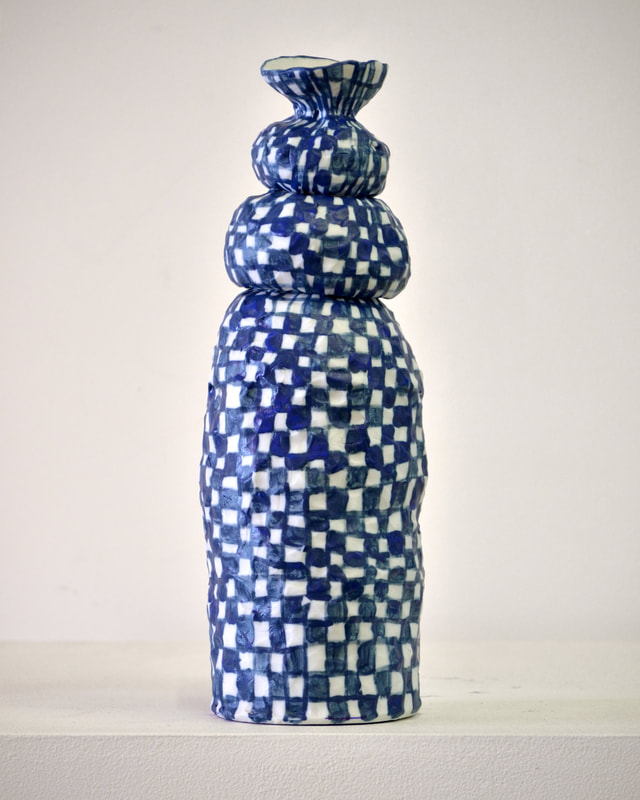
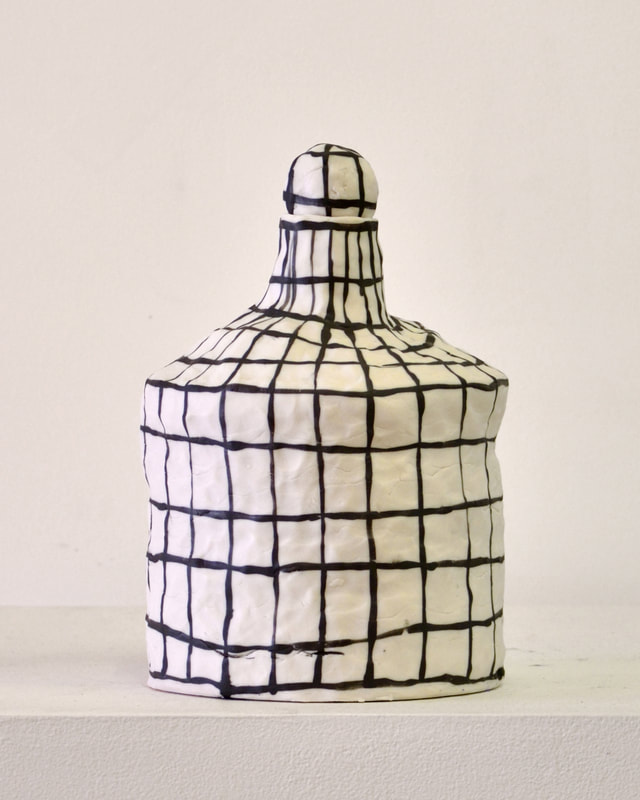
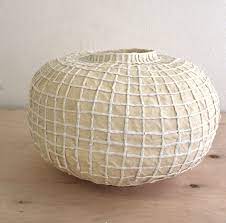
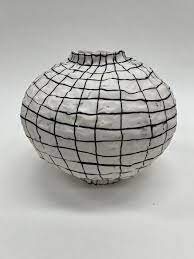
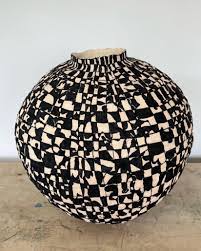
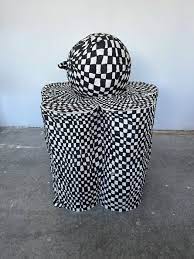
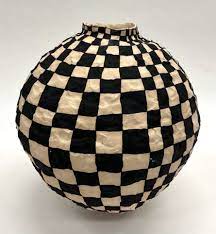
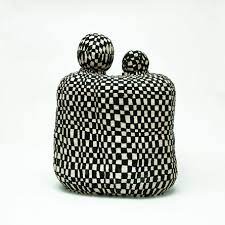
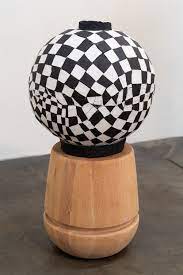
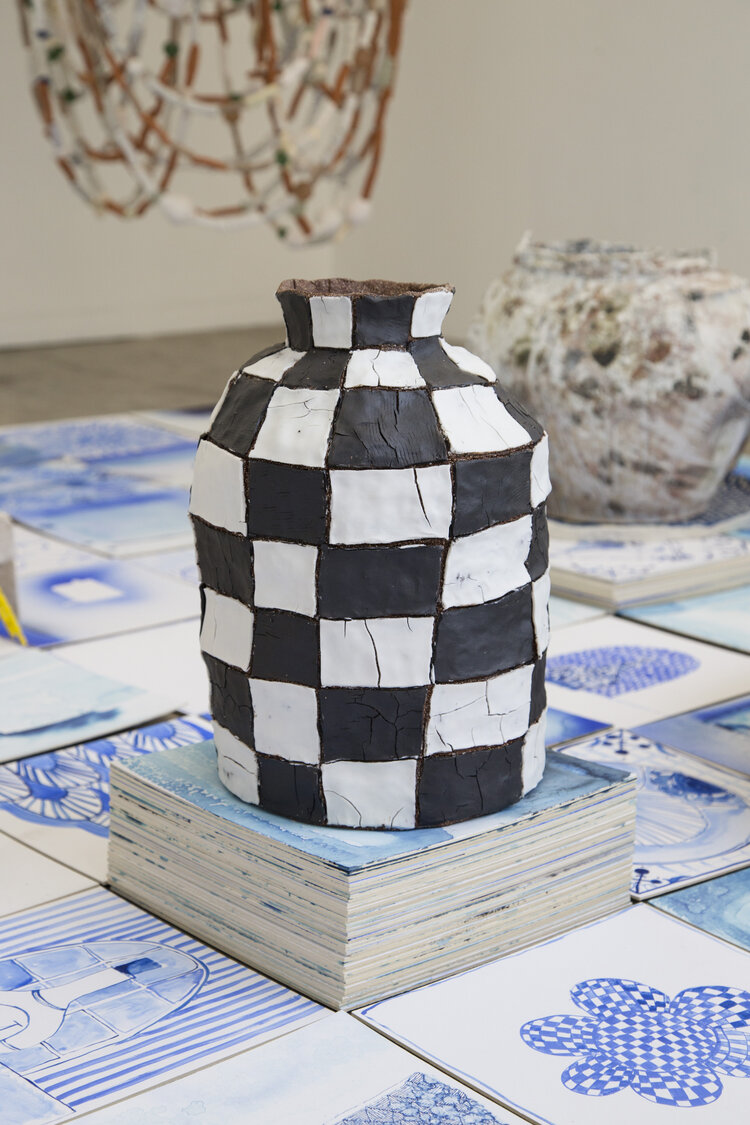
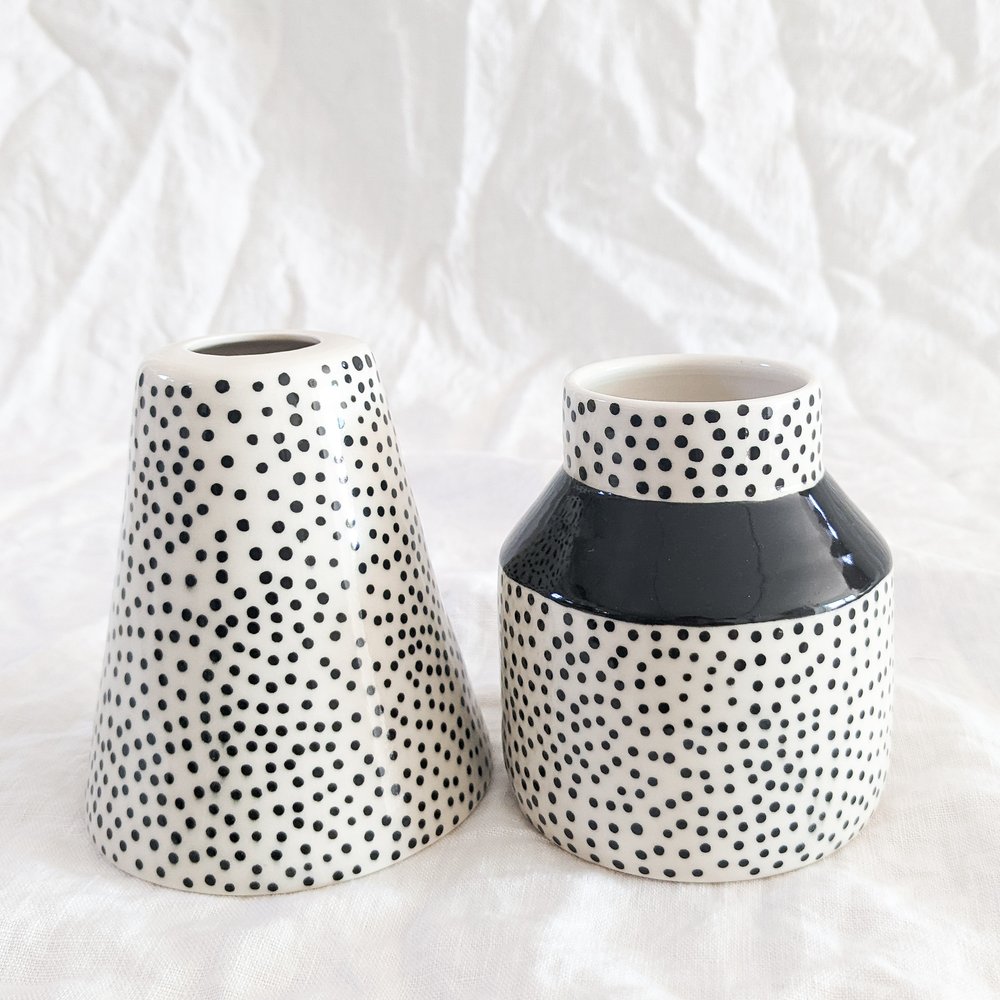
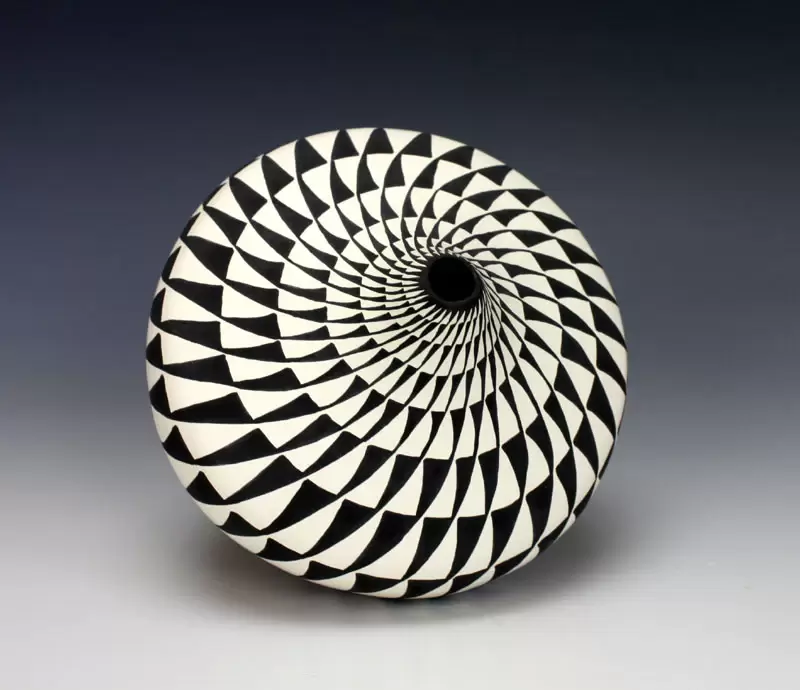
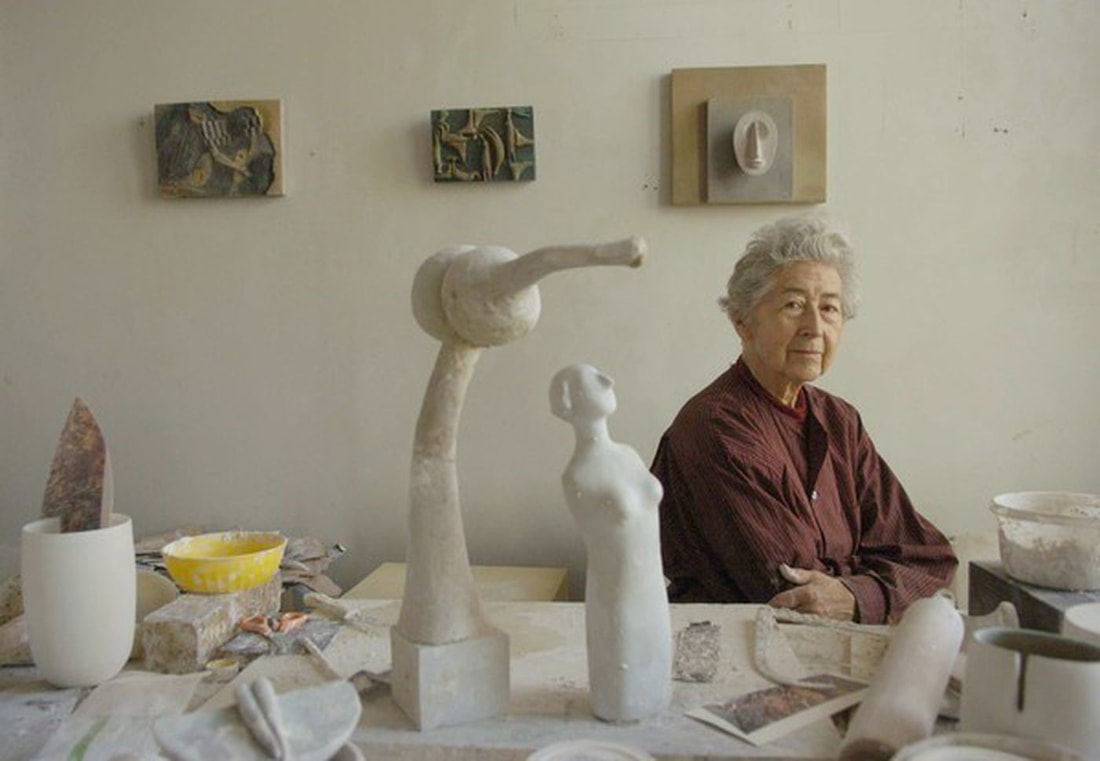
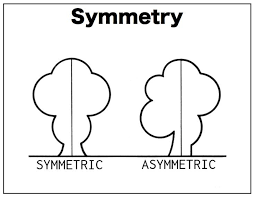
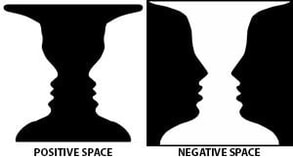
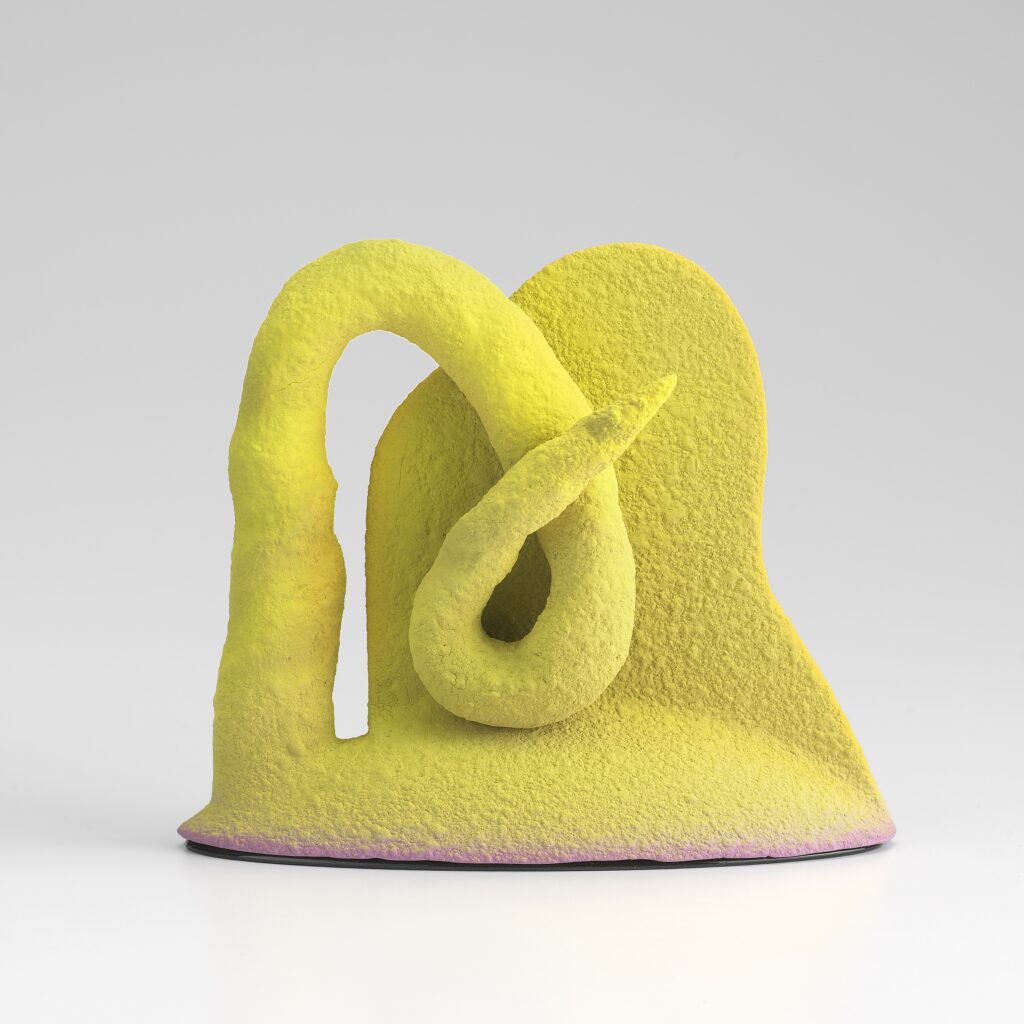
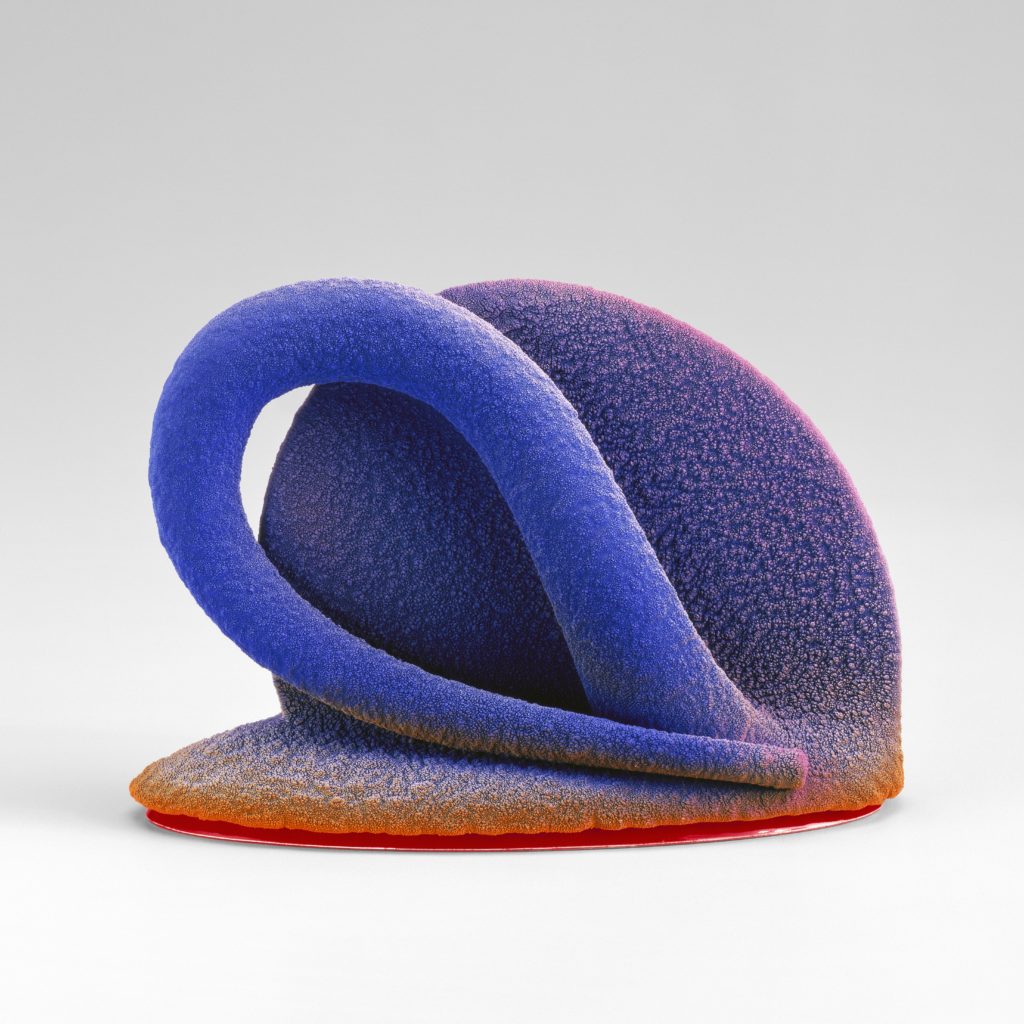
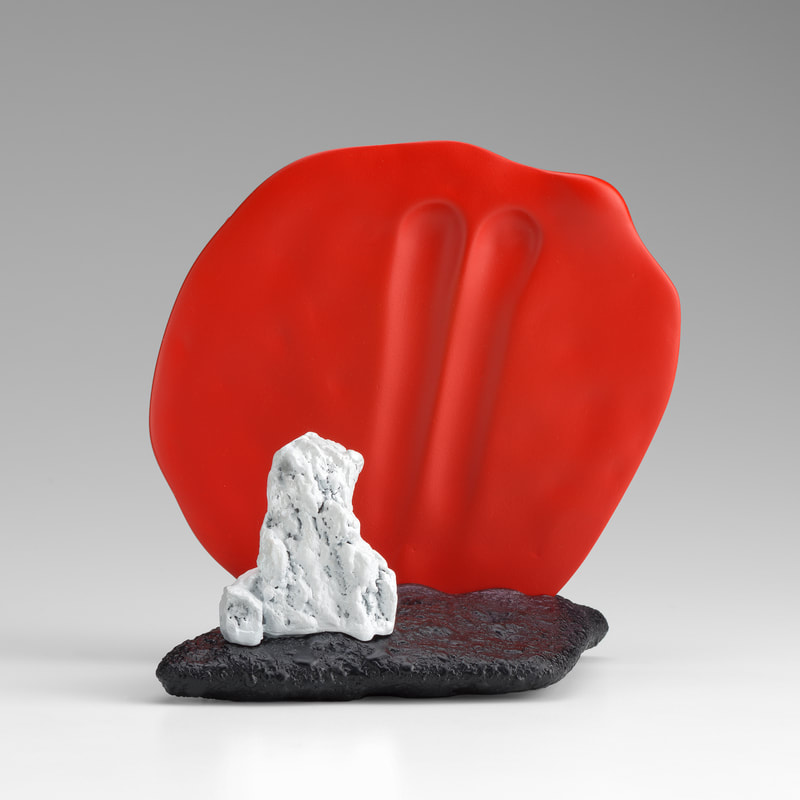
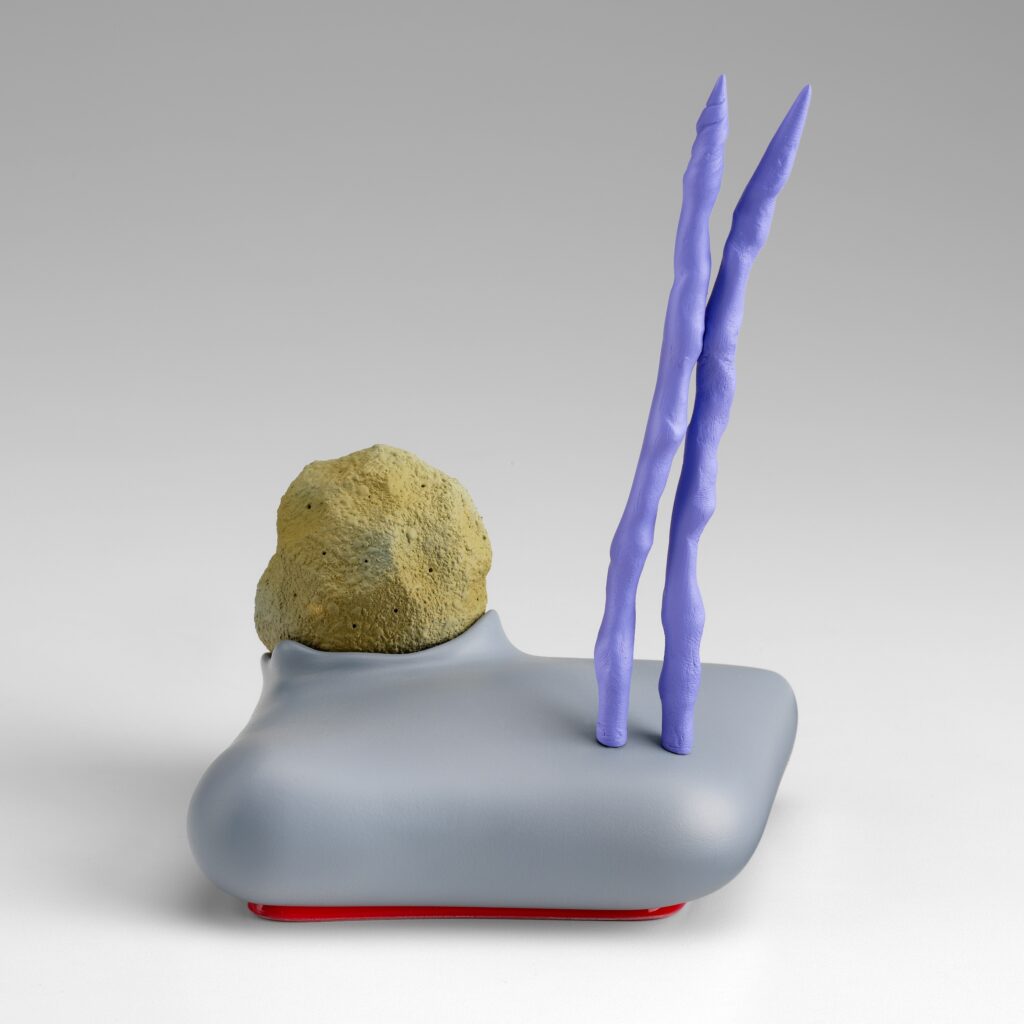
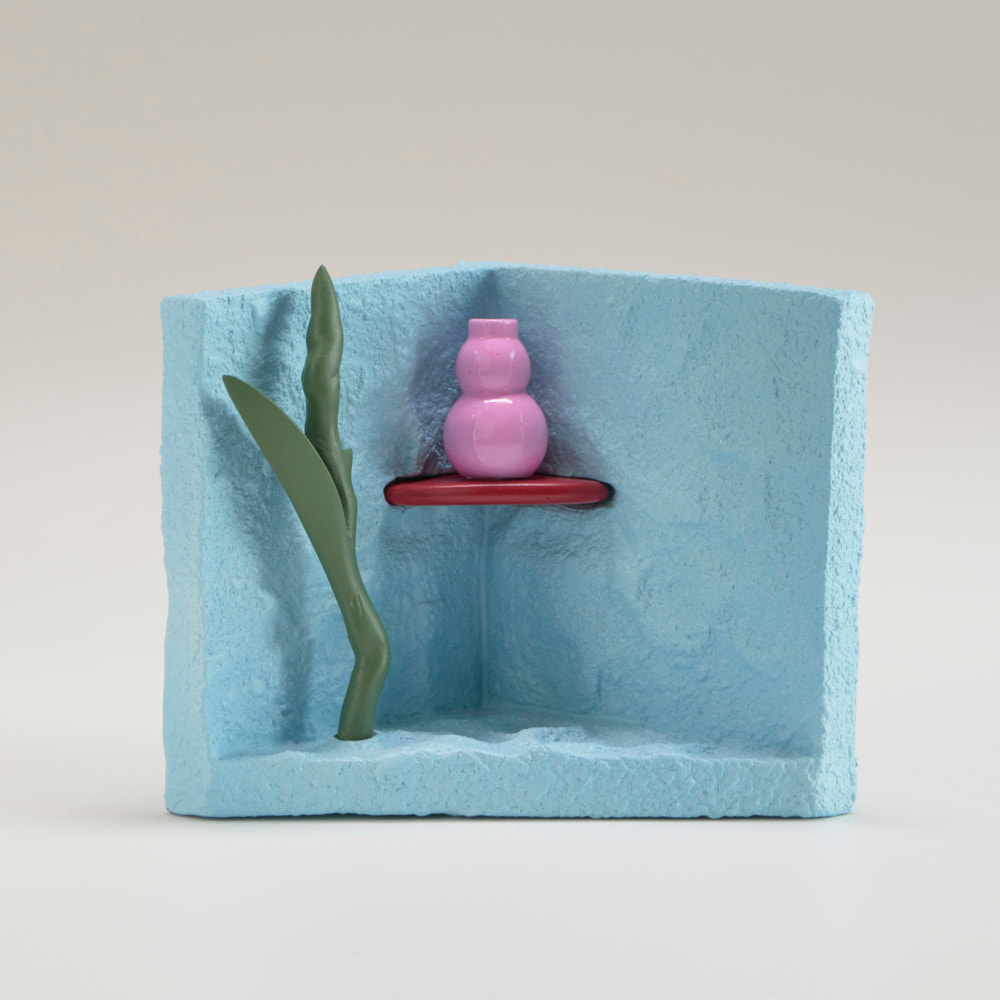
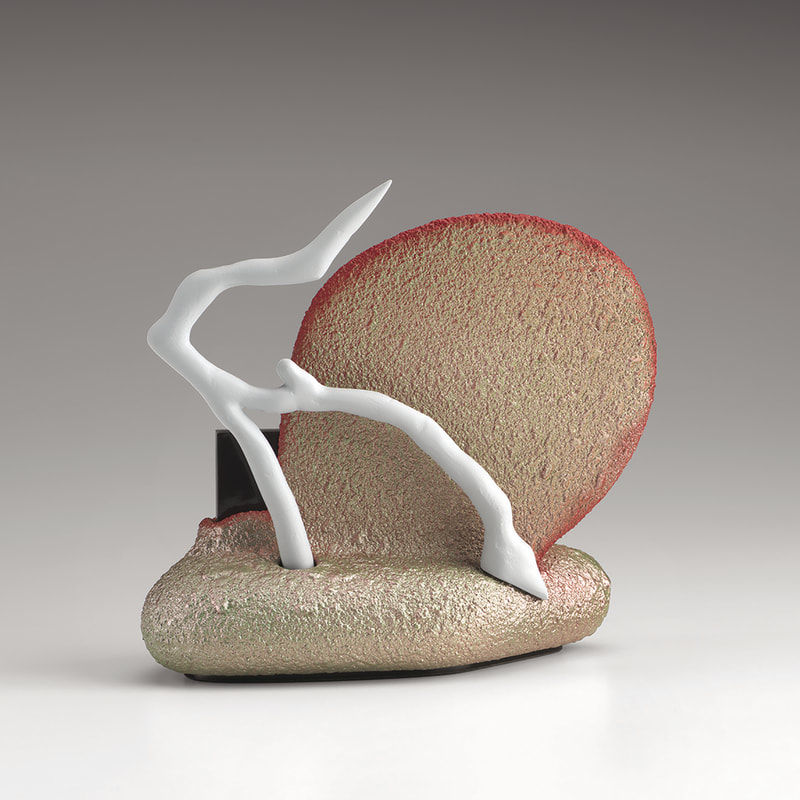
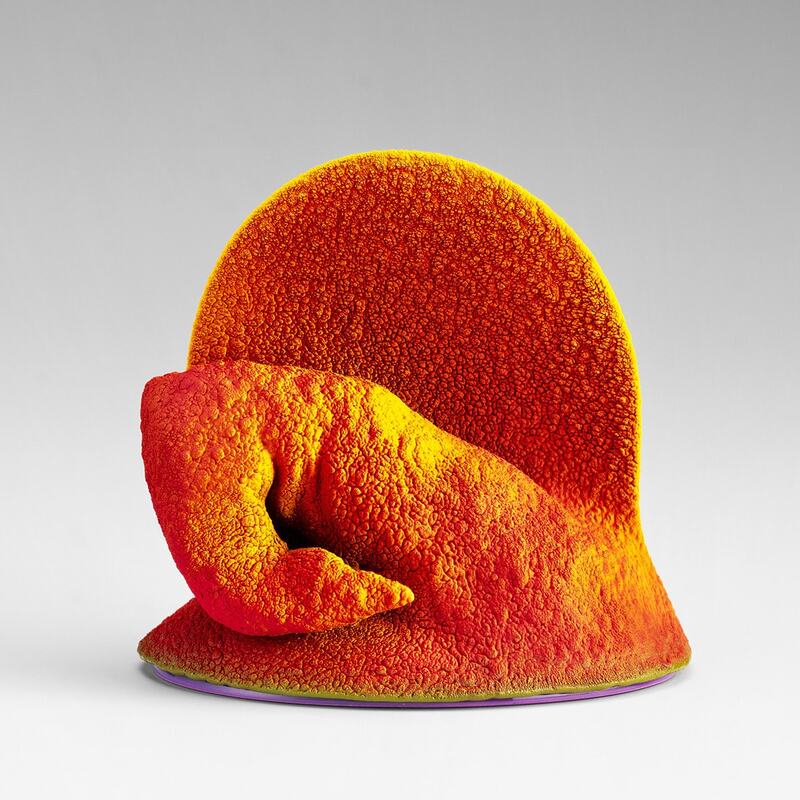
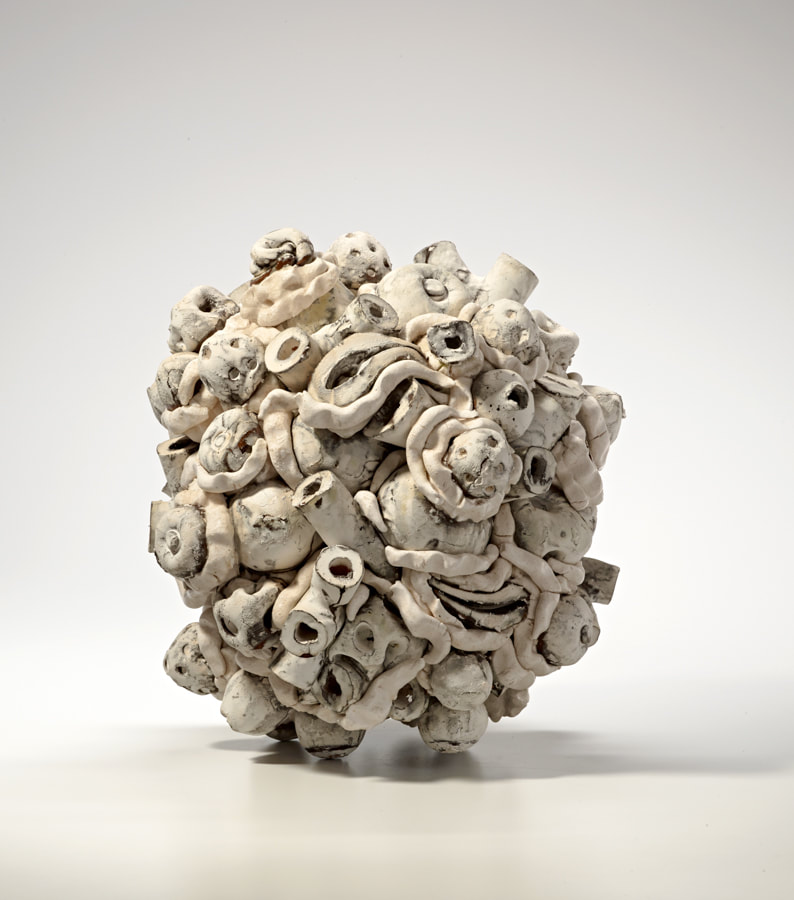
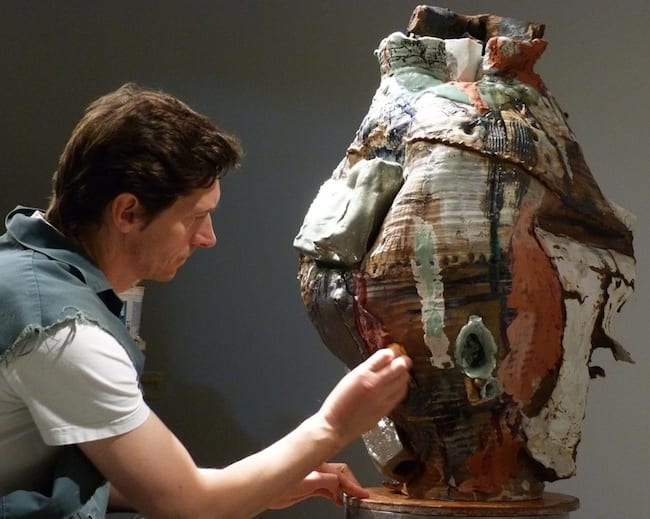
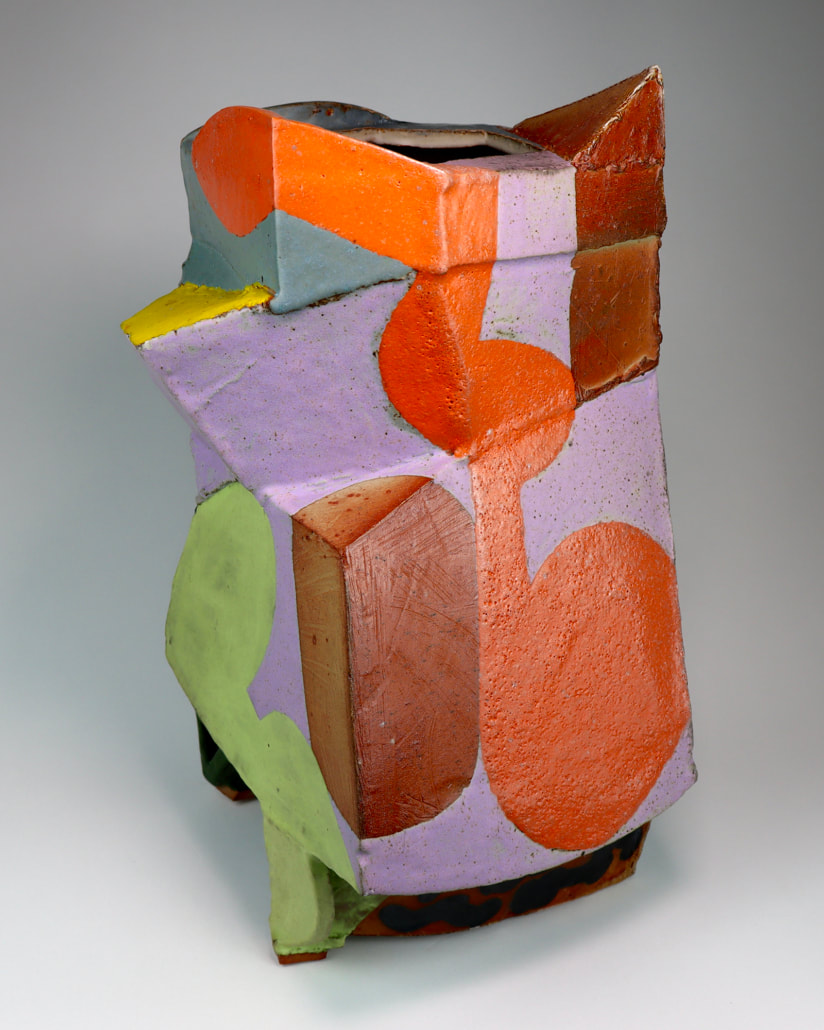
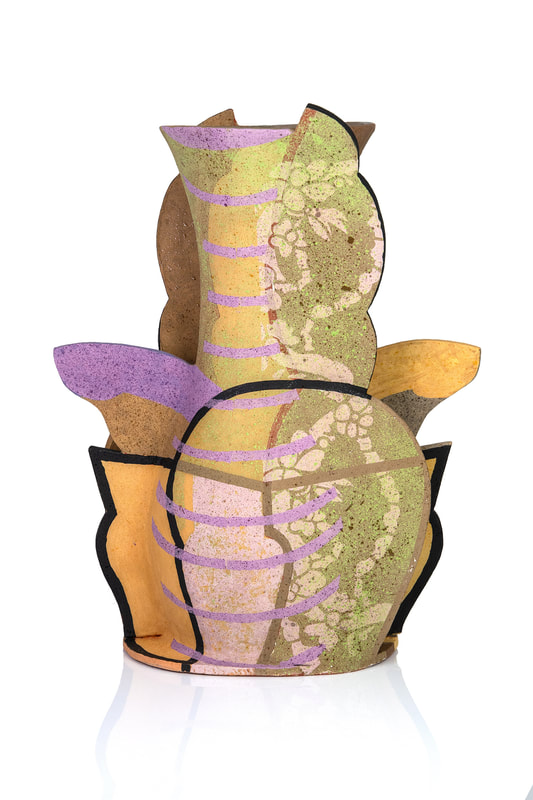
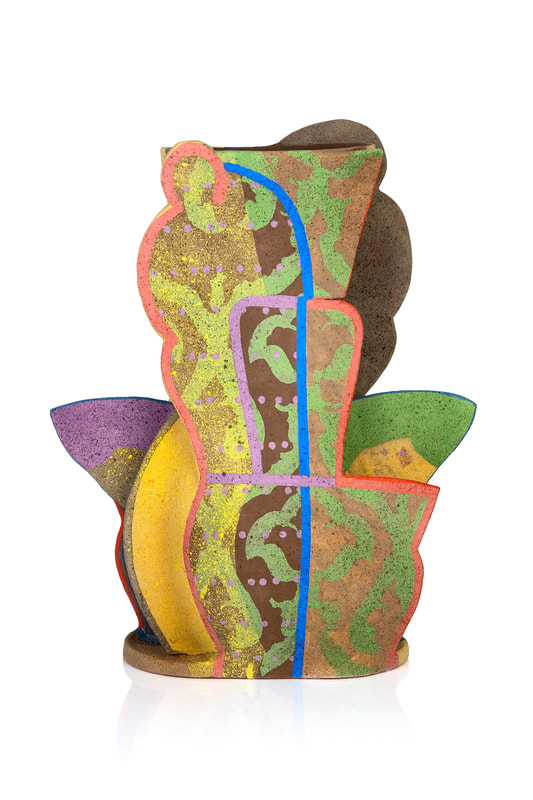
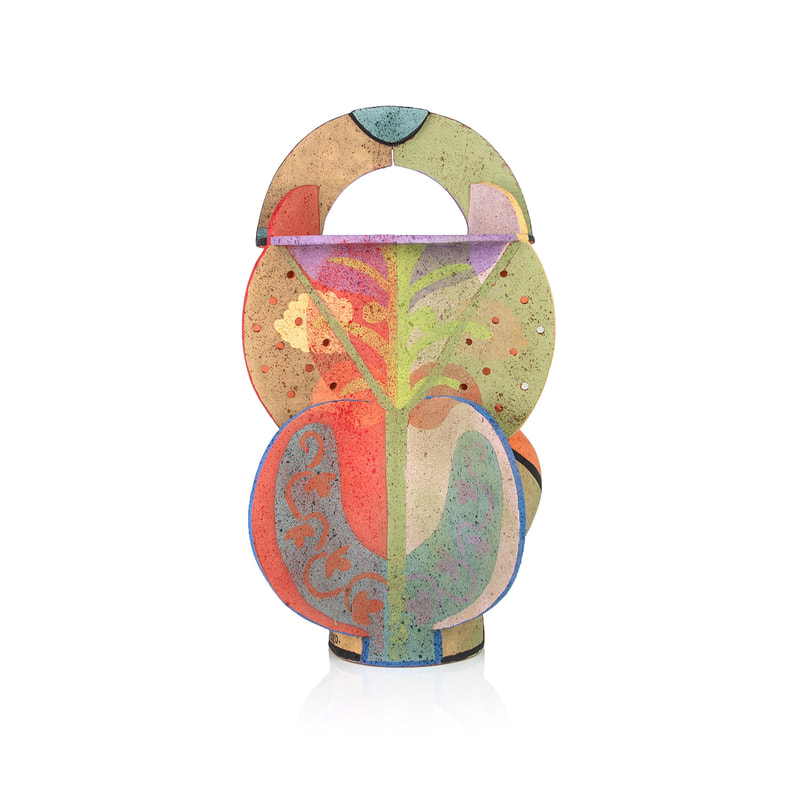
Each student will be tasked with creating 1large scale vessel. This vessel should be an opportunity to explore composition and slab methodology. Vessels could be representational a person, place or thing, but I highly encourage you to work with a purely vessel grounded approach rather than going too far down the conceptual pathway. In this project we will discuss basic elements of design such as background, foreground, rhythm, negative and positive space. These basic elements of design will be the foundations for the sculptures produced. Students are encouraged to explore possibilities, take risks in composition and seek out inspirations. Art is not created in a vacuum but rather a response to something. Seek out elements in the world you can respond to. Look at the artists references and understand this is an opportunity to both learn slab construction and to play.
Upon completion of the project students will be engaging the glazing process. Vessels will be glazed with multiple glaze basses and the focus of the glazing will center on the characteristics of glaze ( how it moves, how it melts, how it is colored and how it can be modified to achieve various outcomes.Glaze will be a major element of this project and students are encouraged; instructed, to thing of how the glaze will play out in the firing process.
Project Value:
100 Points (major project)
Timeline:
2 Weeks for wet construction.
1 Week for glaze.
Requirements:
1 ceramic vessel
1 Vessel pedestal designed to catch glaze spill.
Vessels should be between24-36" in height
Slabs are to be the only means of production
Students should incorporate into vessel composition elements of both hard and soft slabs
Students must design sculptures that are in a vertical format (tall rather than wide) do not exceed 12" in width!!!!
Each vessel must be glazed ( glaze will comprise 50 percent of this project )
Areas of Focus:
Students should focus on the discussed methodology of construction (slabs, both hard and soft).
Students should focus on compositional design considering how glaze will interact with the vessels structure.
Students should pay attention to the way clay behaves when wet and soft as well as how it behaves when dry and stiff.
Goals:
Gain a beginning level understanding of how to produce slabs using studio equipment as well as by hand.
Learn to manage ceramic slabs in various states of moisture (hard and soft slab construction).
Learn how to manage the drying and storage of ceramic works while in production.
Gain a foundational understanding of glaze and glaze application.
Gain a beginning level understanding of how glaze interacts with surface and how glazes can be used to create dynamic surfaces though contract, shift and movements of melt.
Resources:
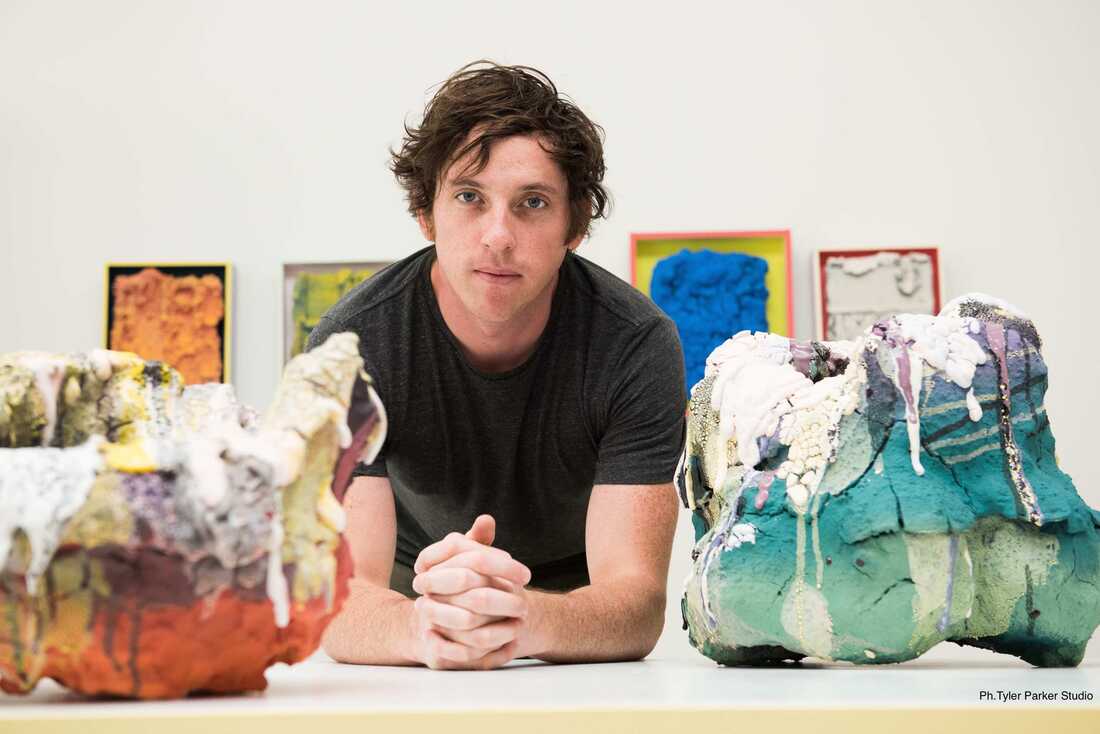
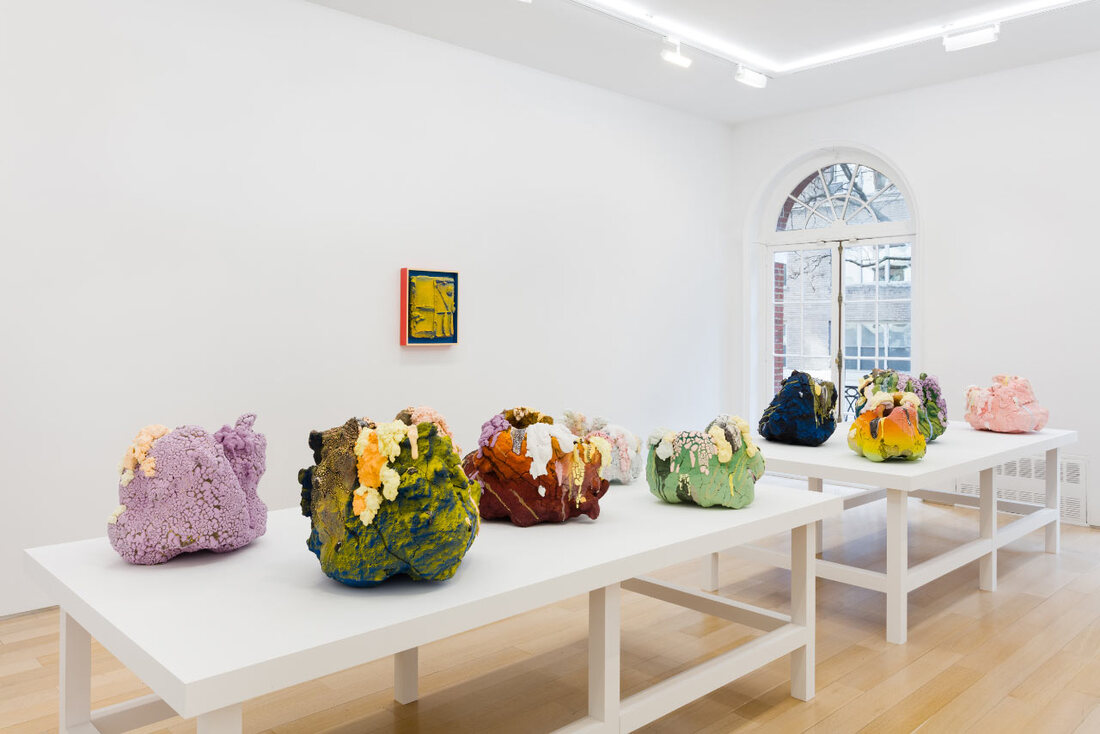
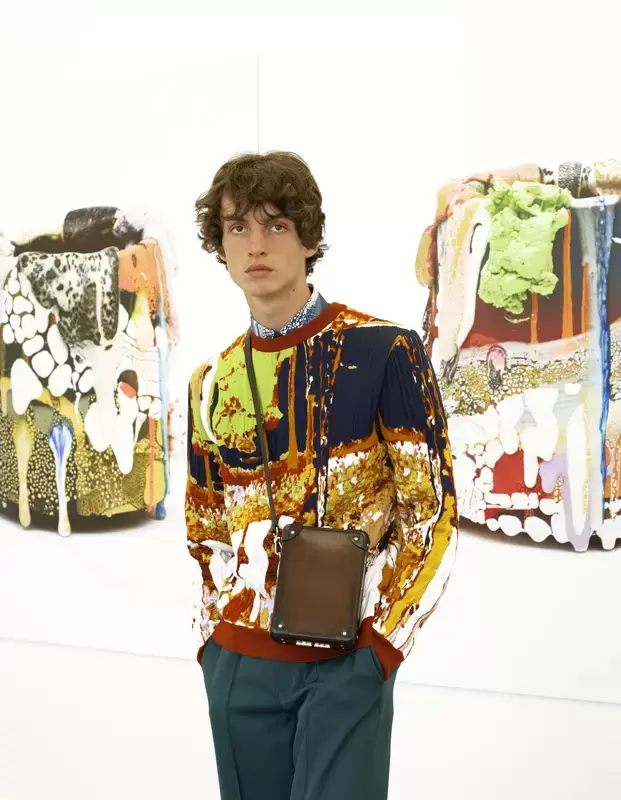
I strongly suggest you look for inspiration and see whats our there that you can respond to, take over, repurpose, borrow from, and plain old fashioned simply take and make your own. Research and searching for inspiration is essential in developing your abilities to both think of ideas and create them in reality. Do yourself a huge favor and see whats our these for you to respond to.
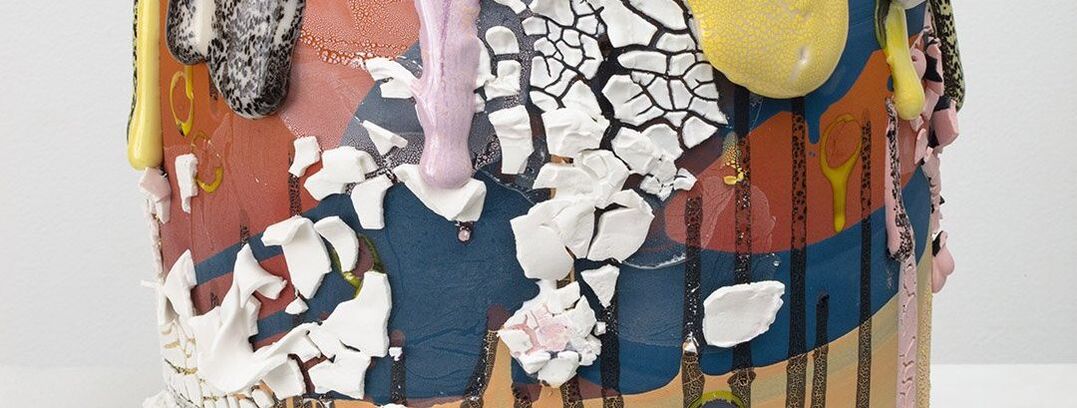
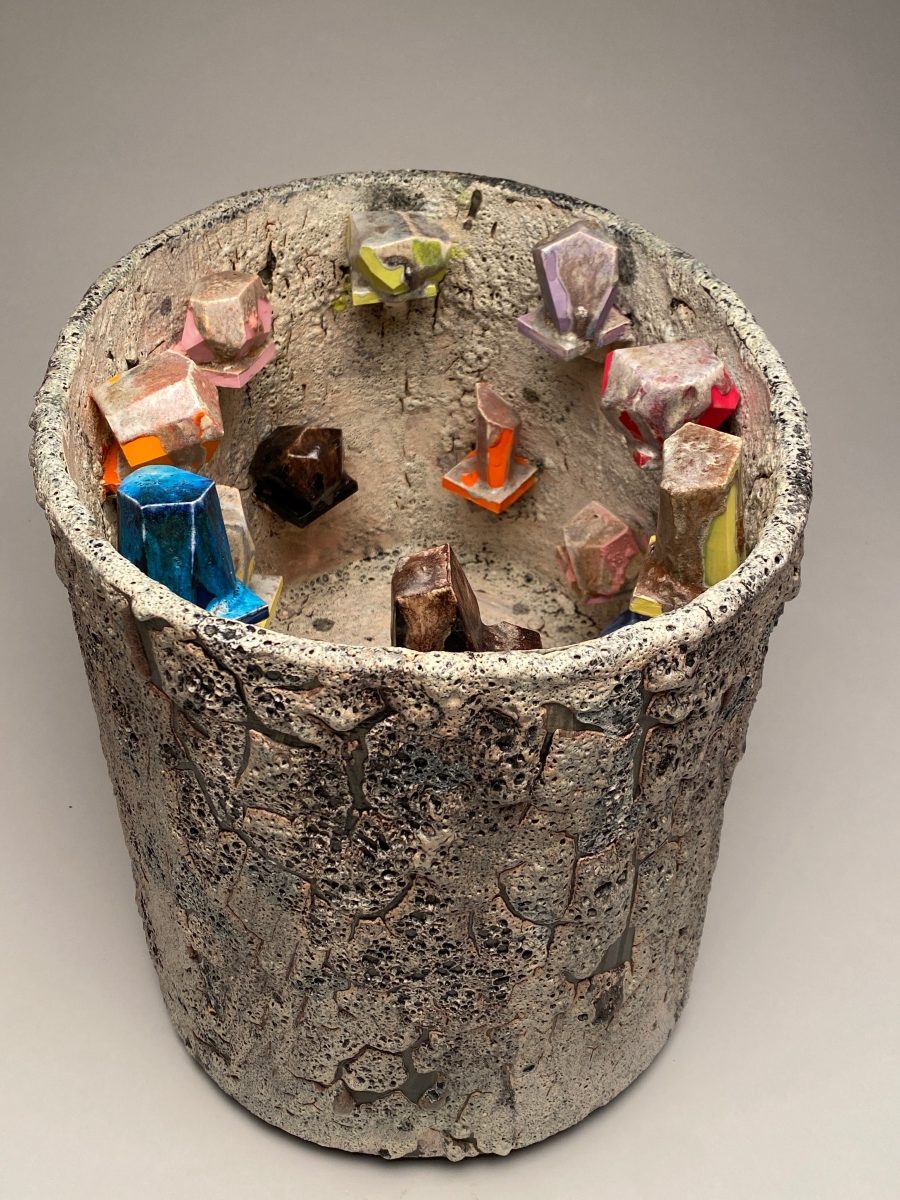
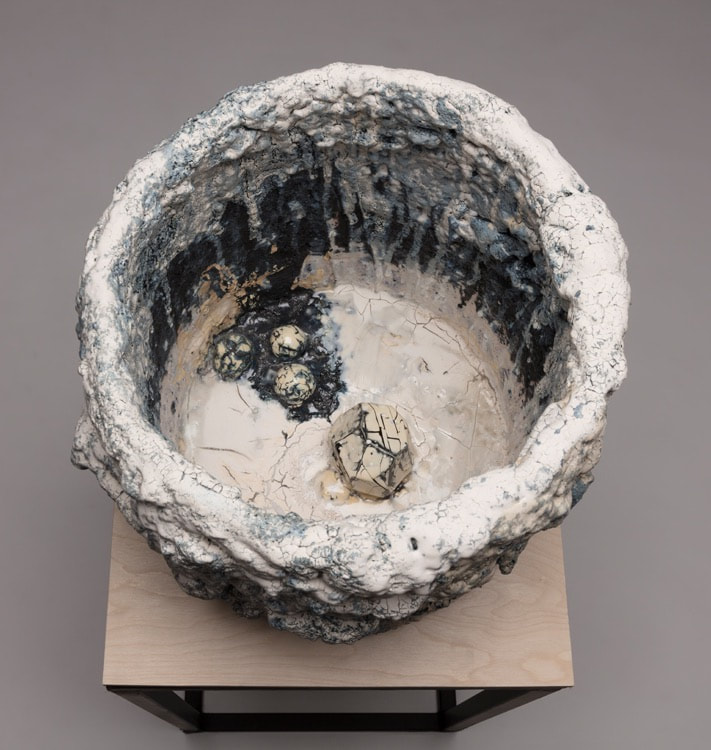
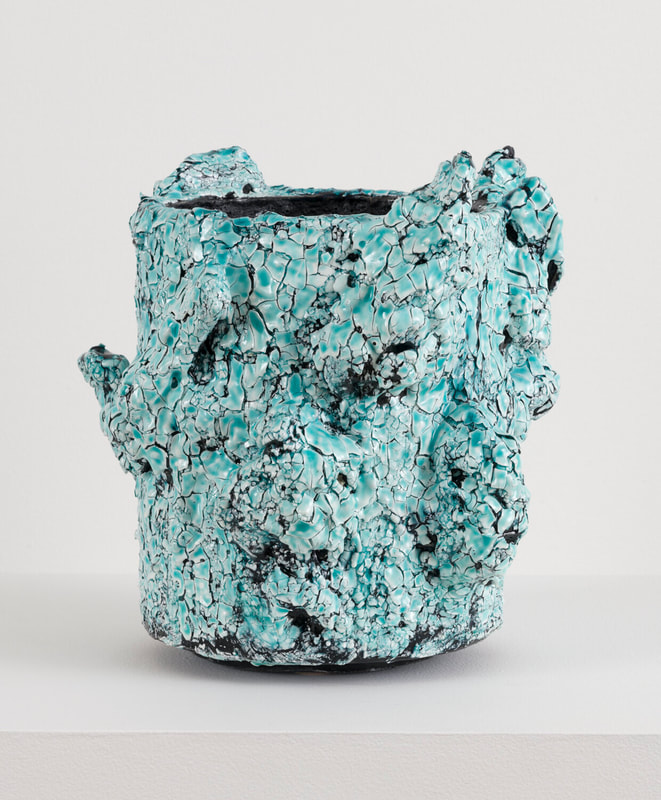
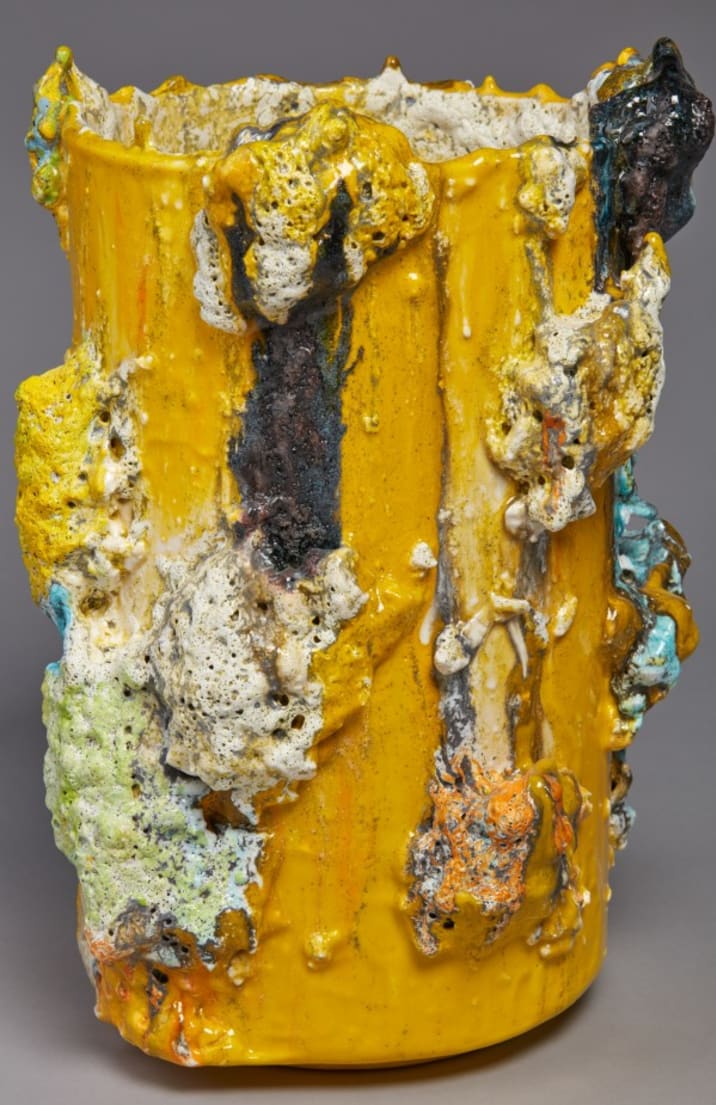
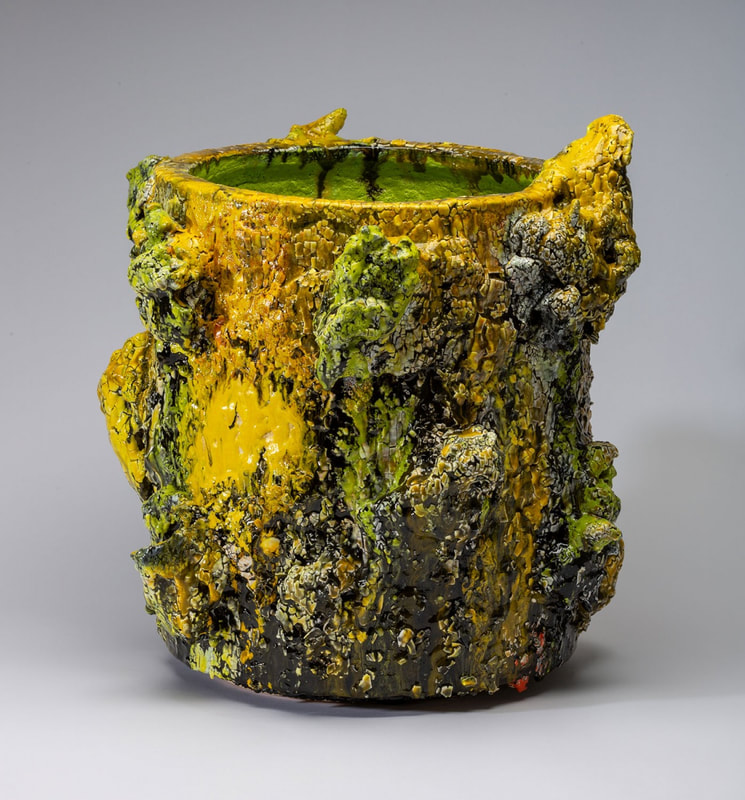
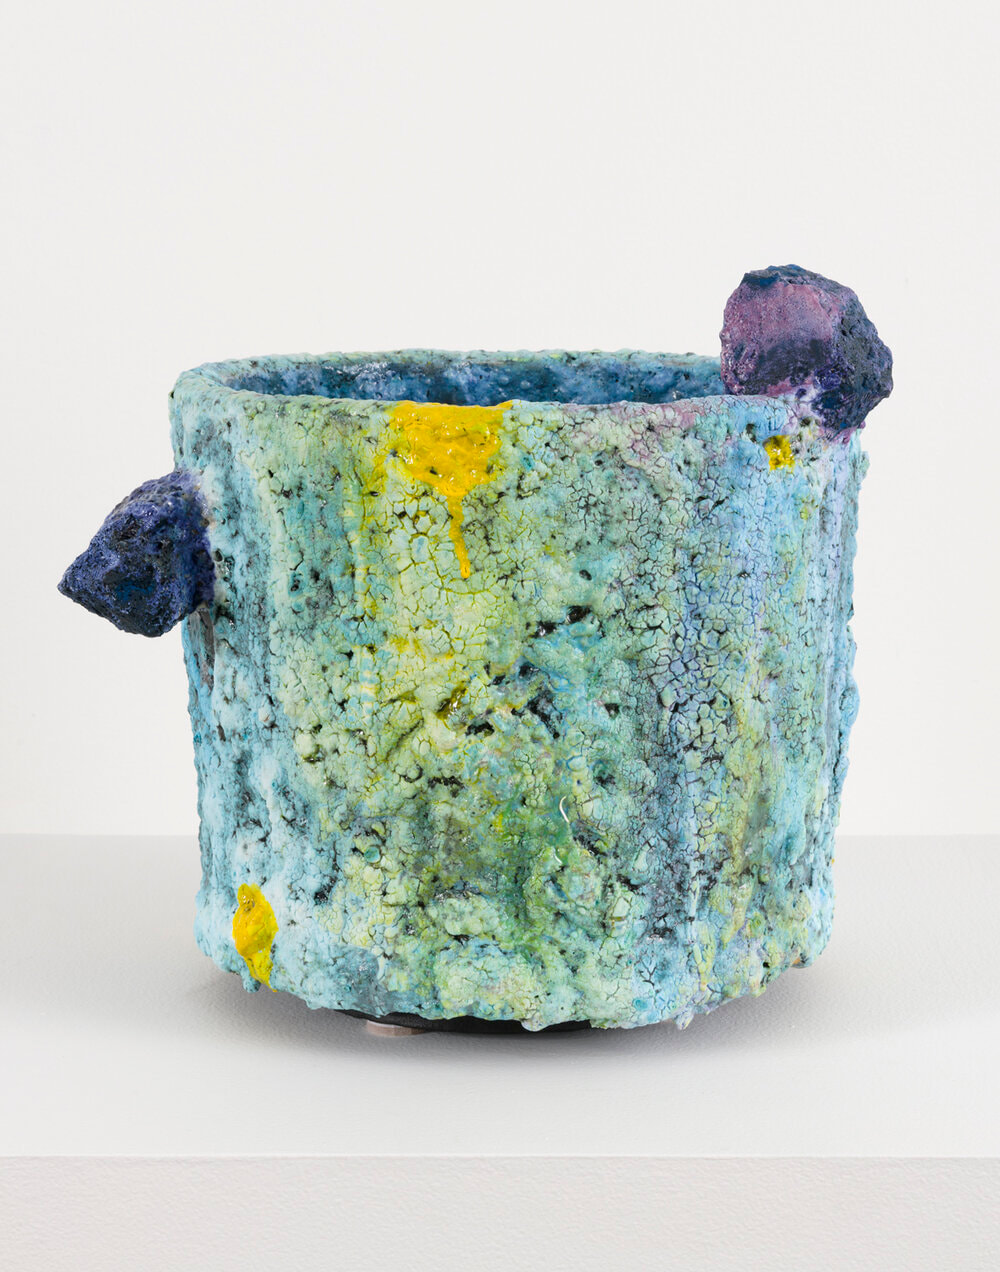
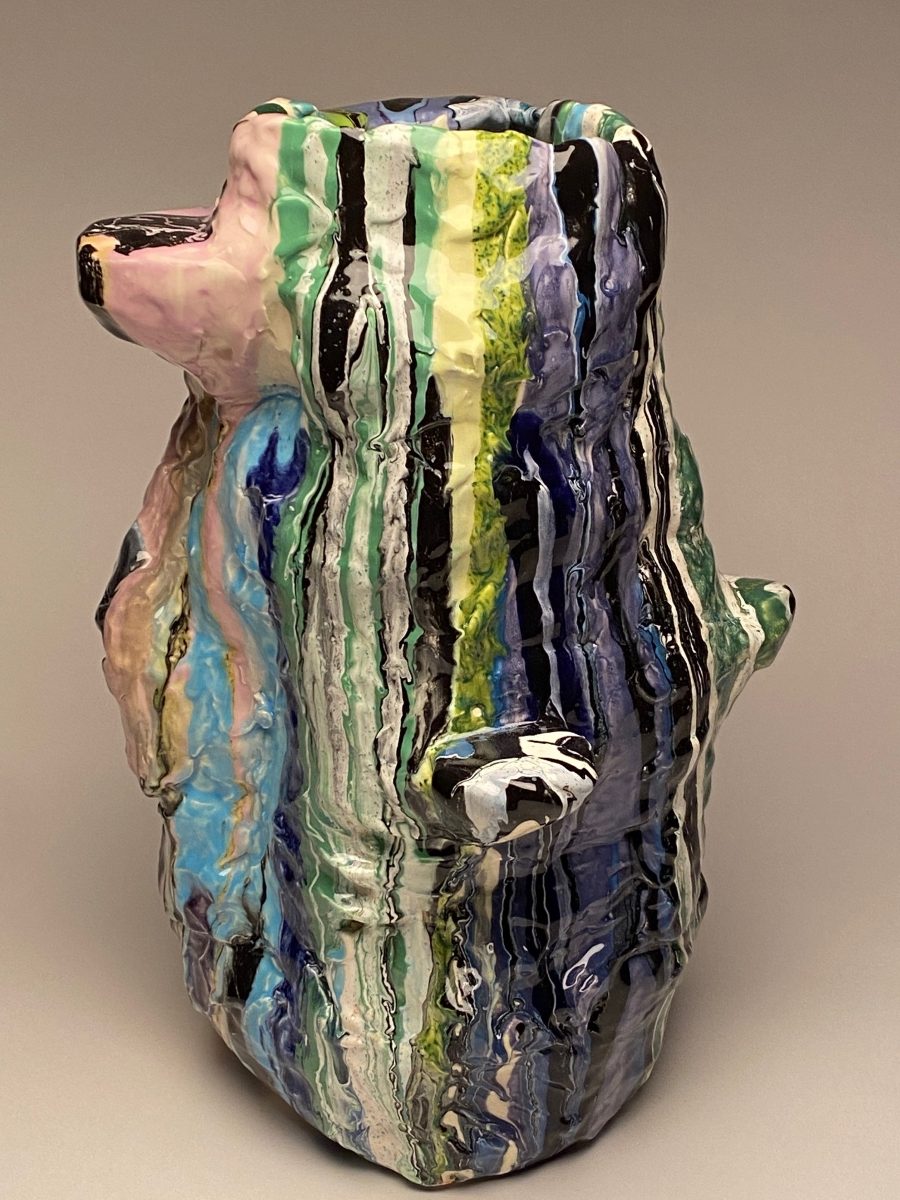
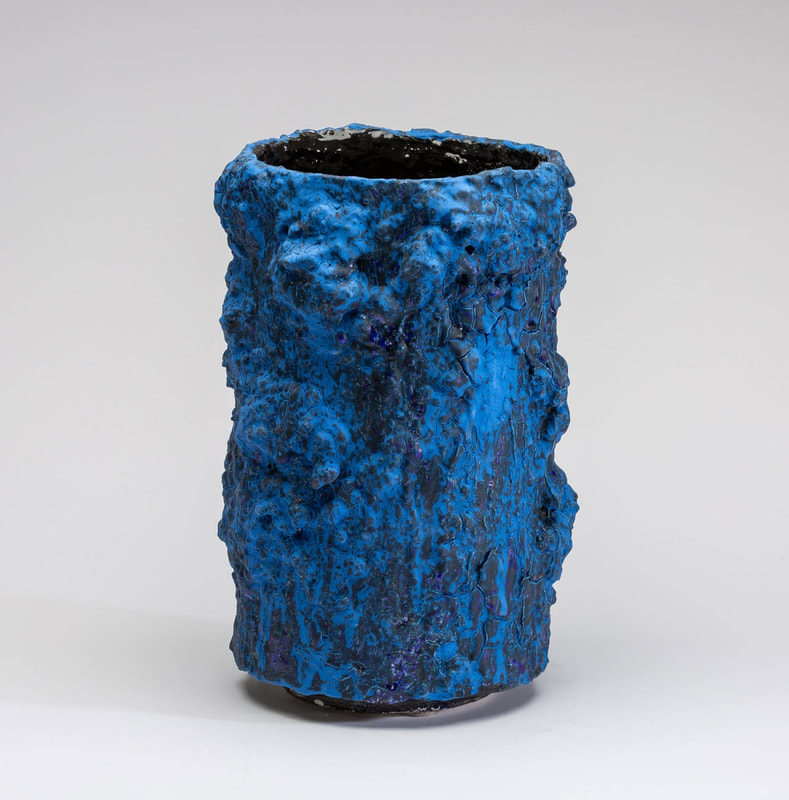
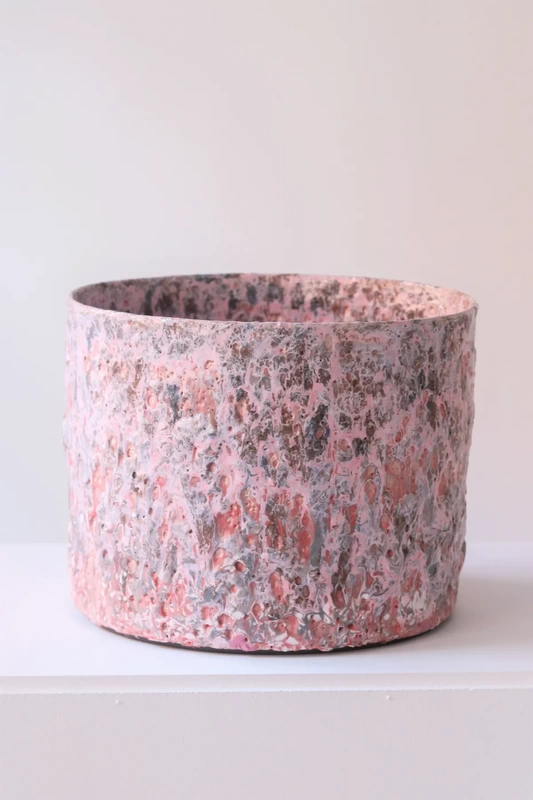
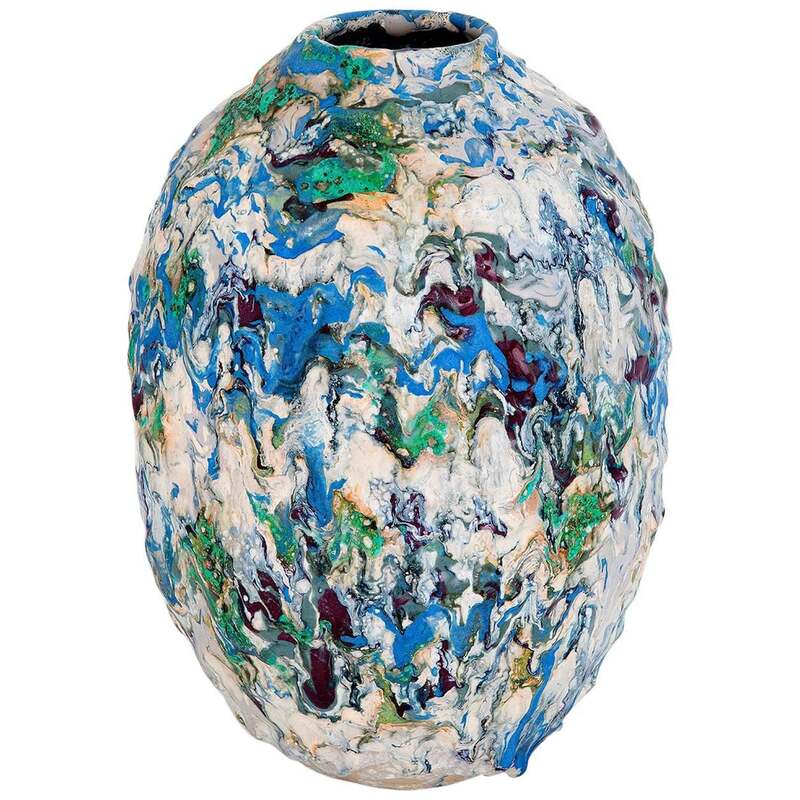
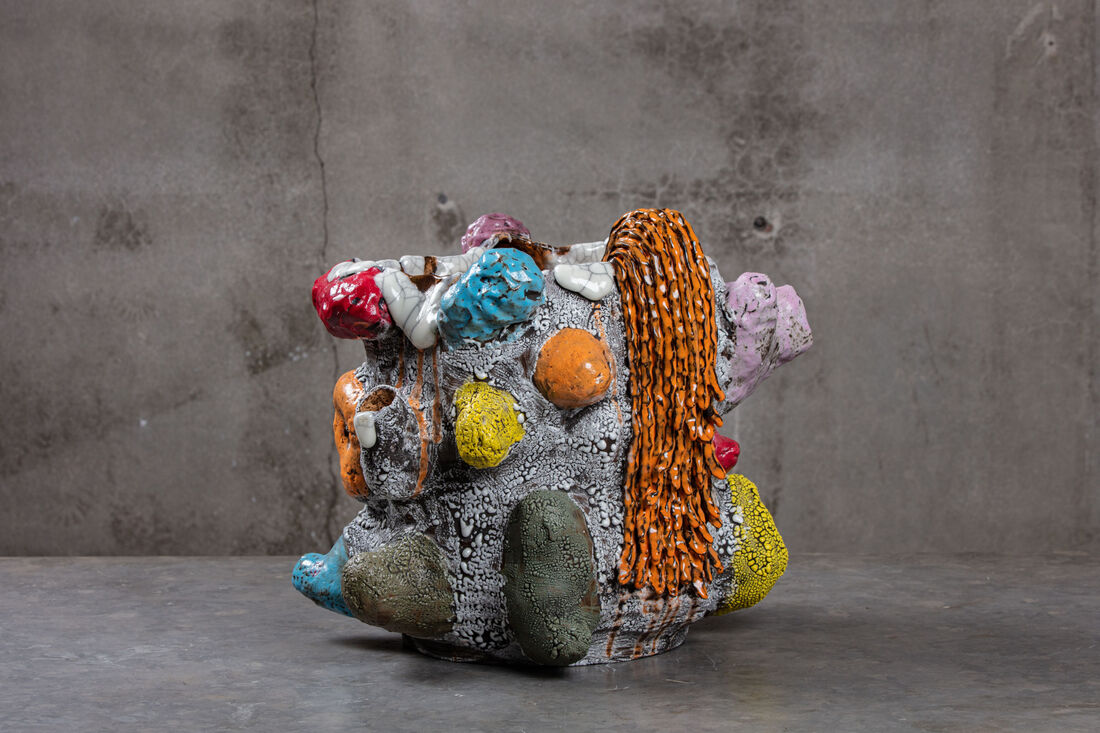
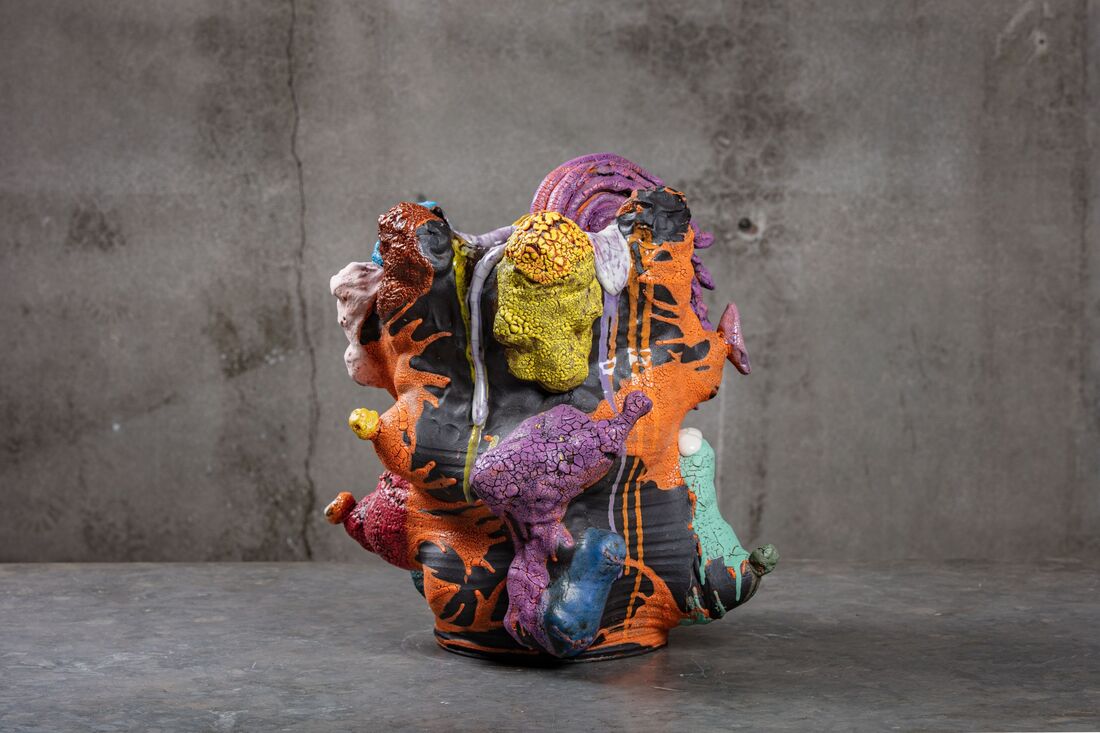
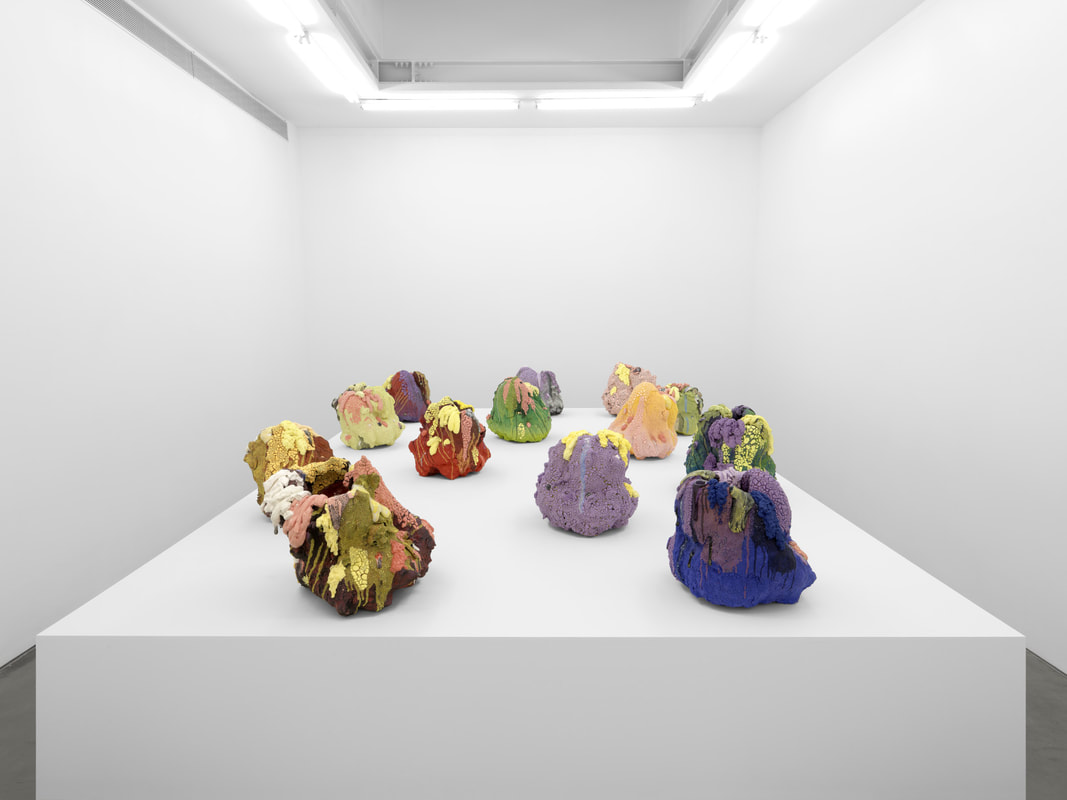
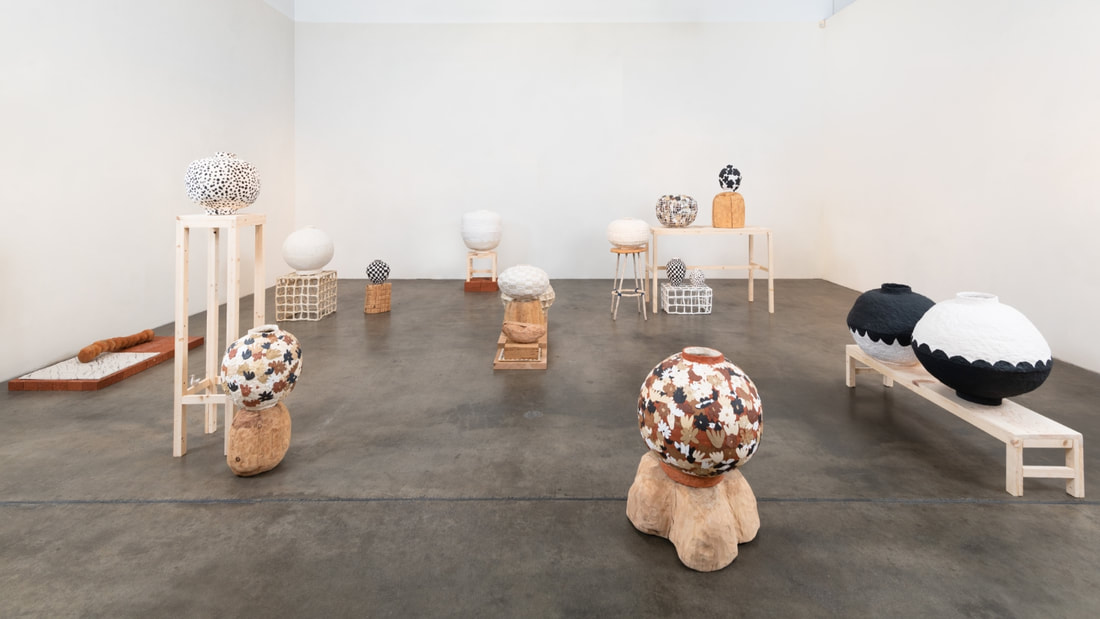
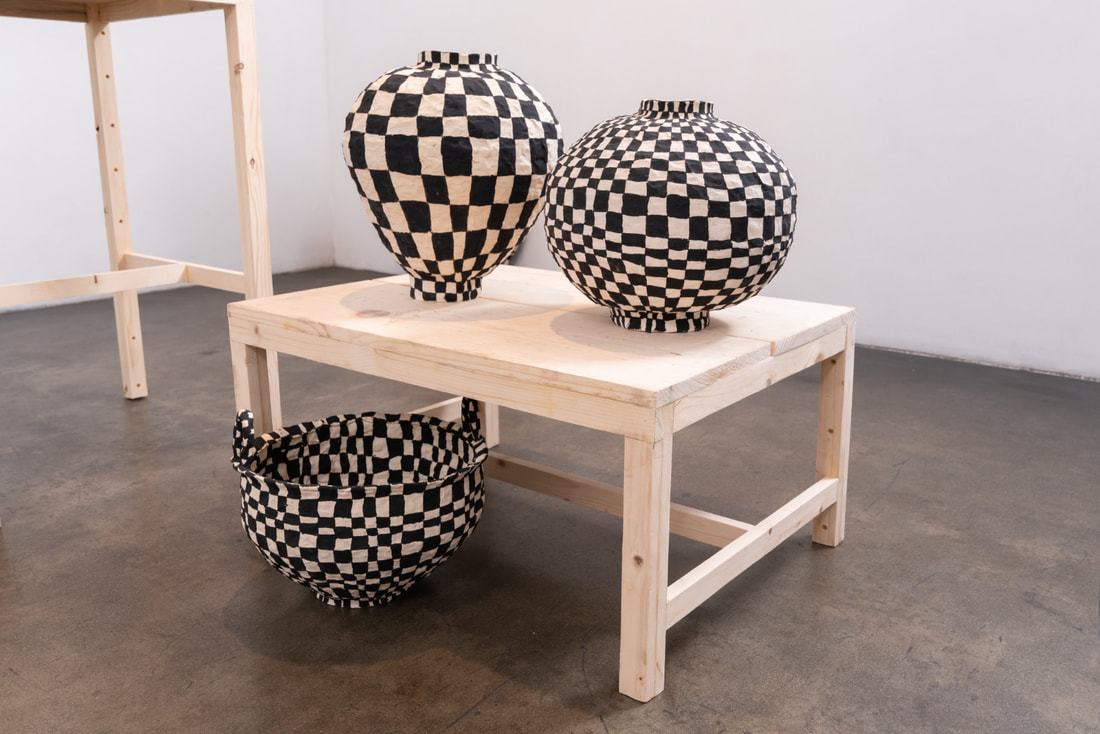
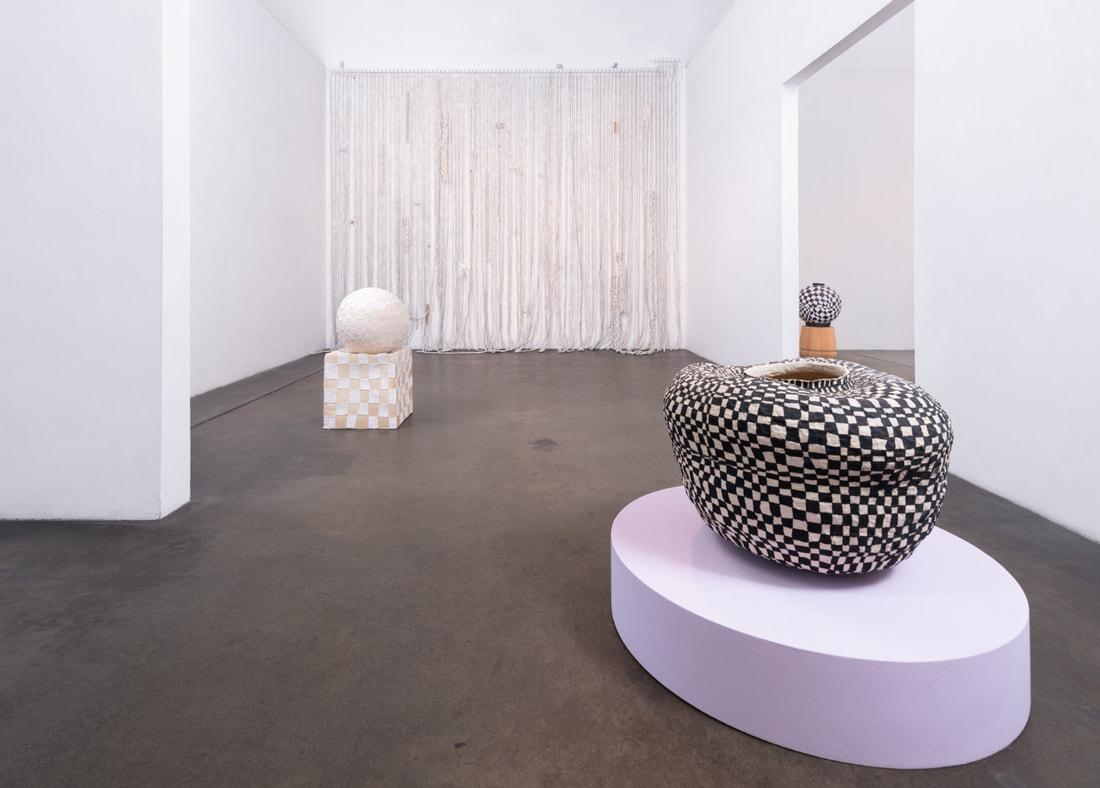
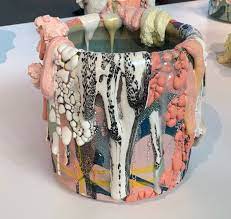
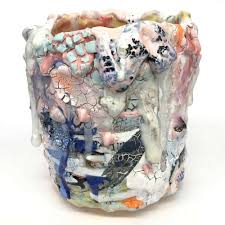
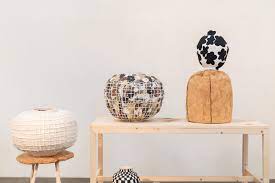
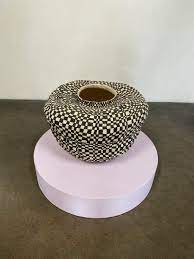
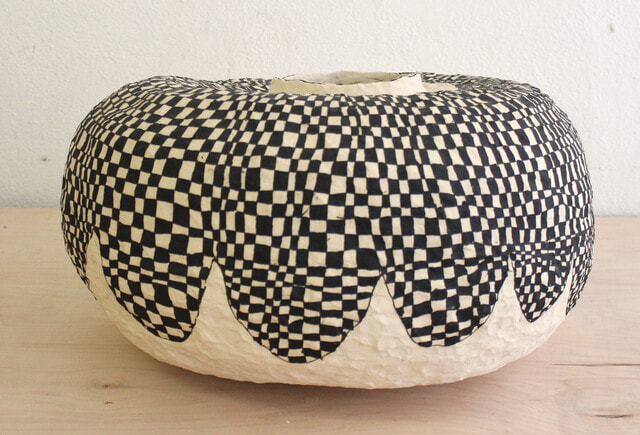
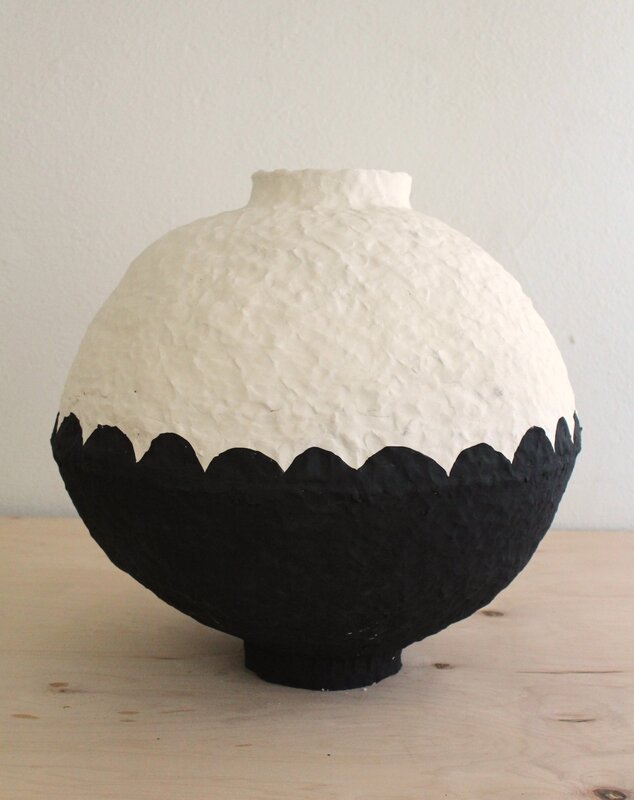
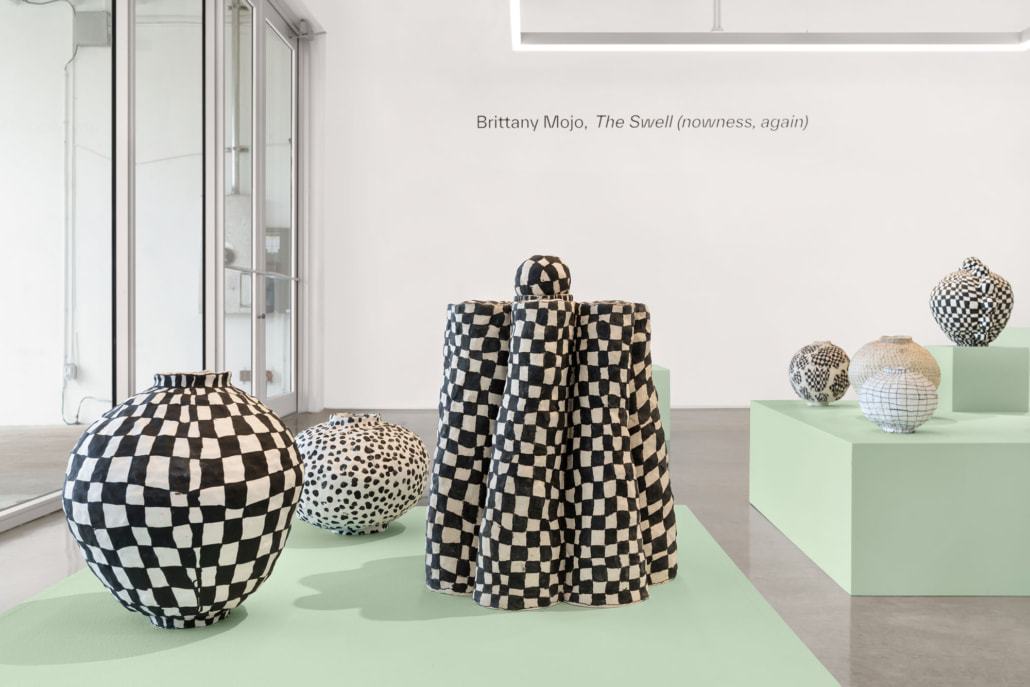
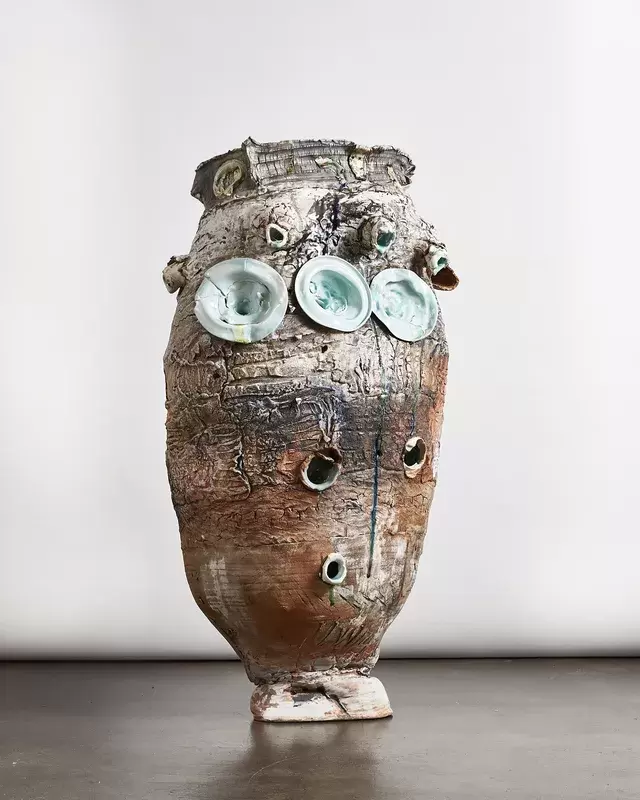
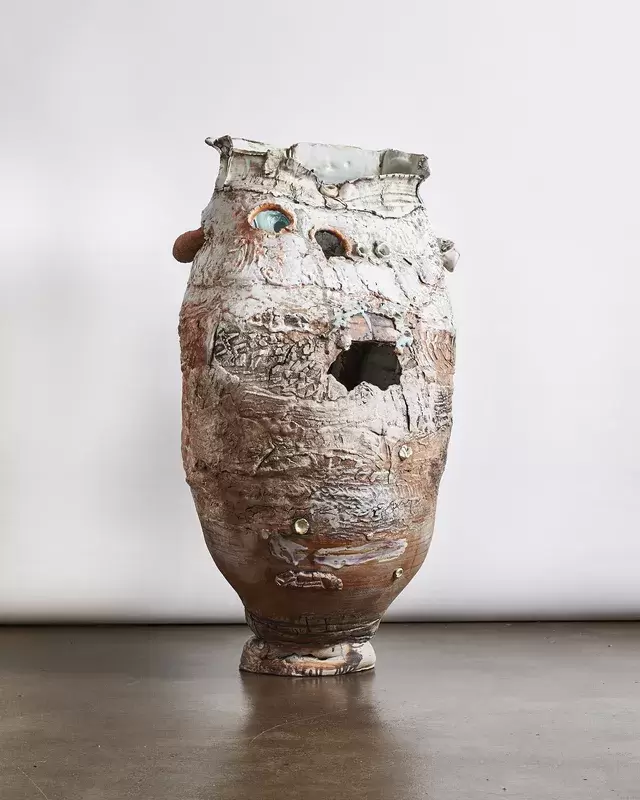
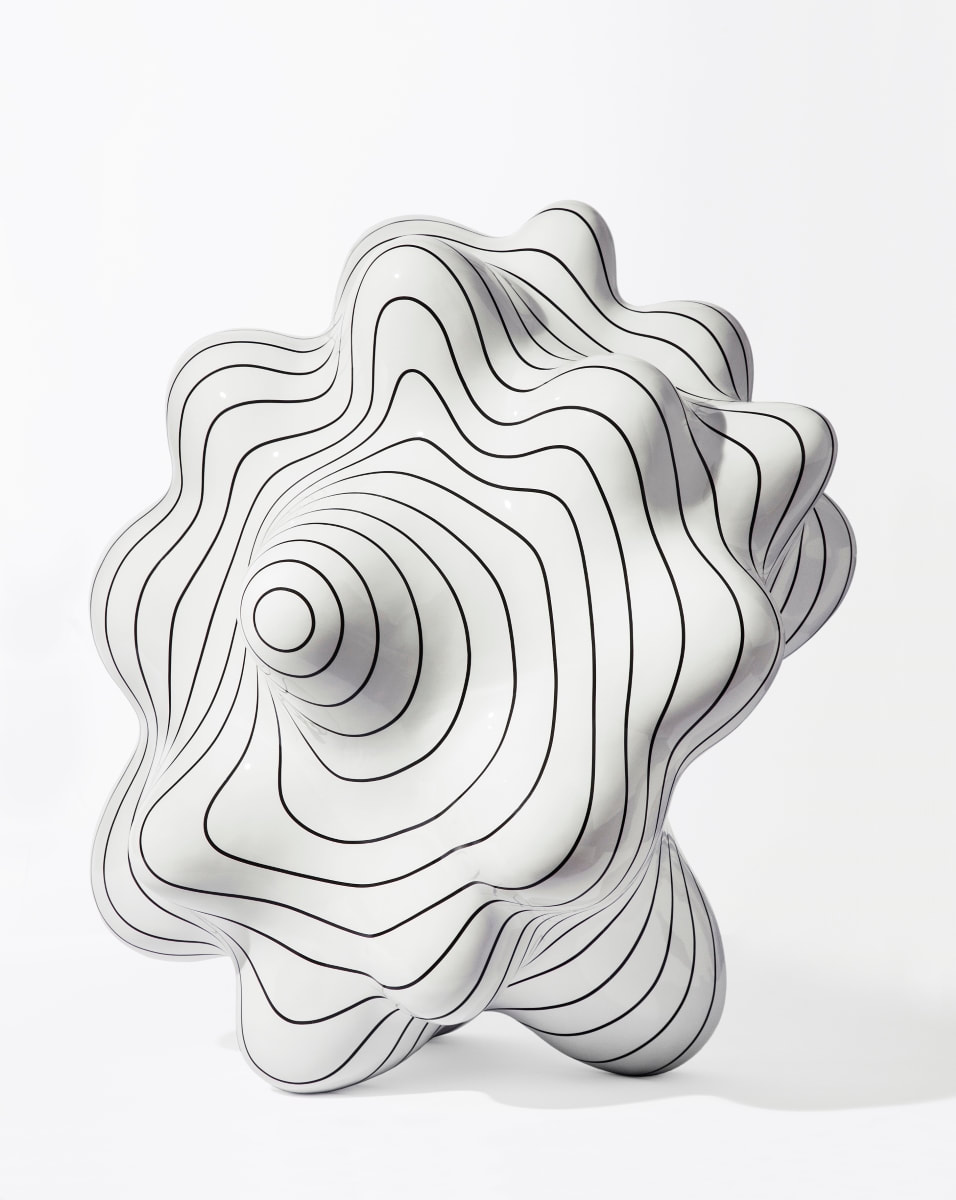
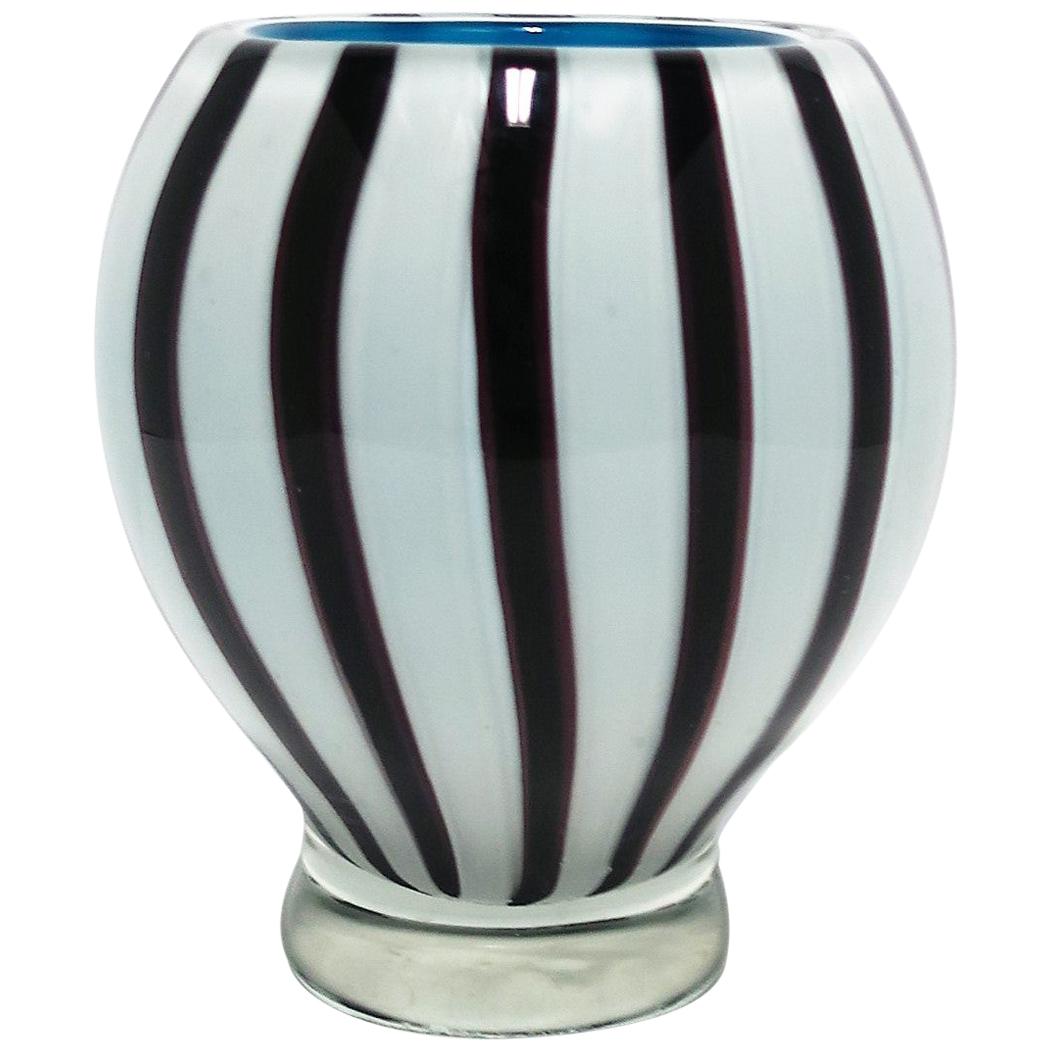
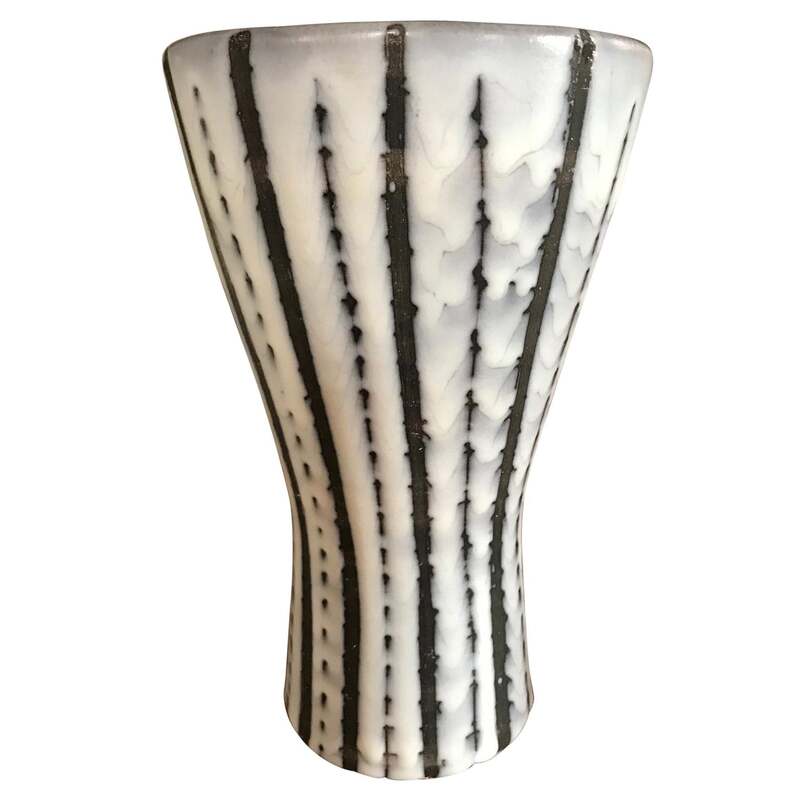
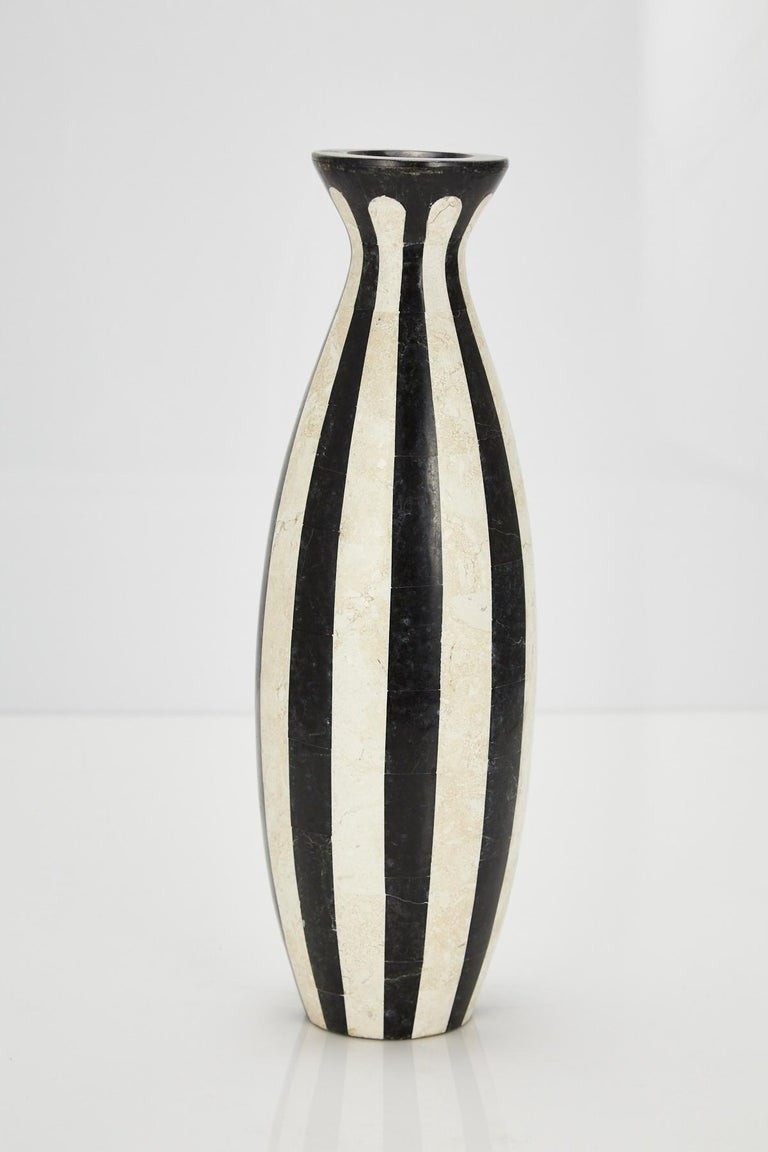
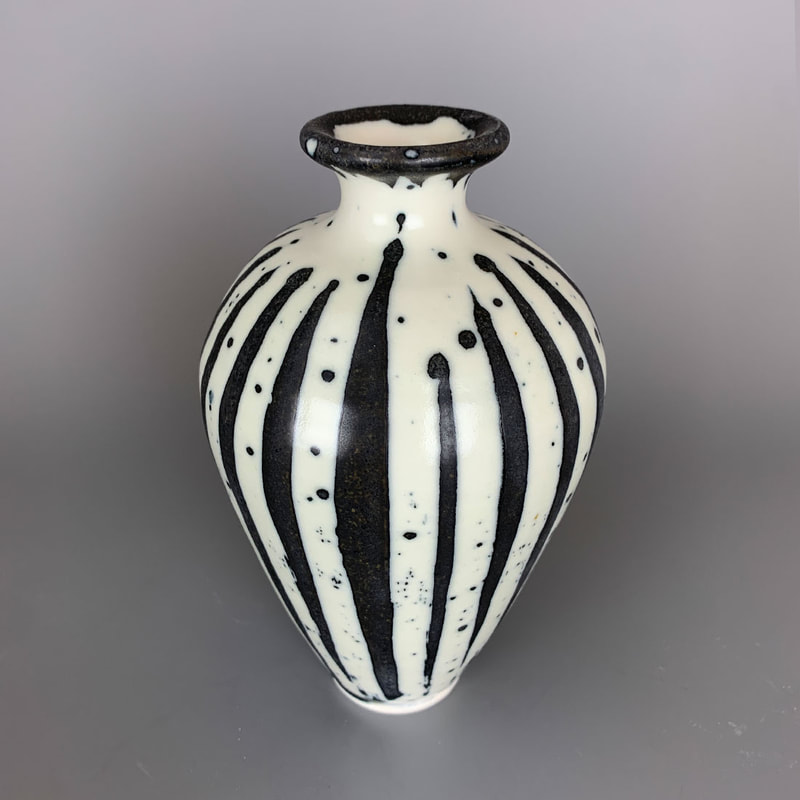
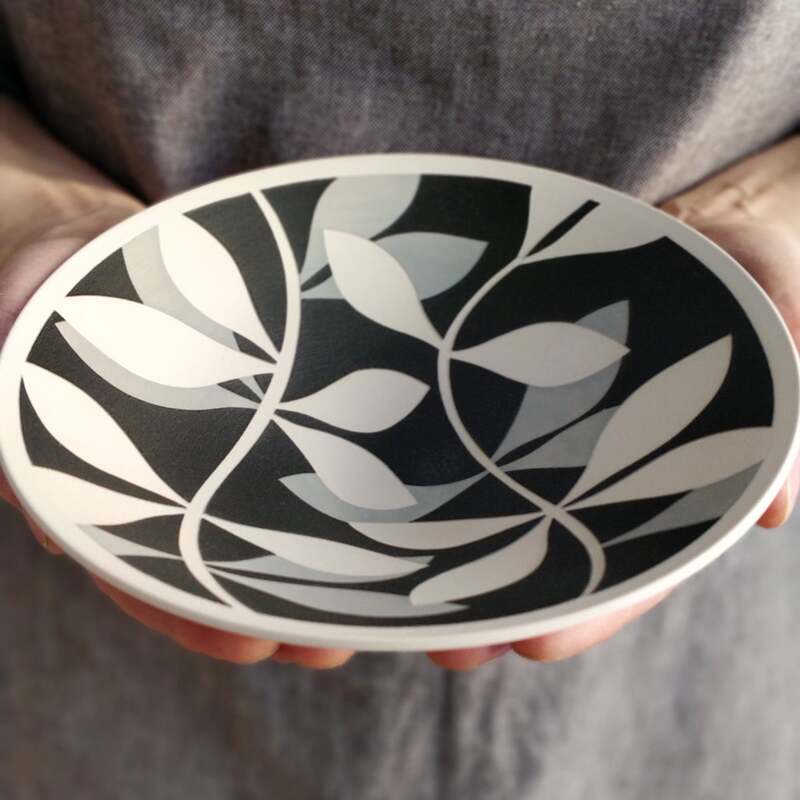
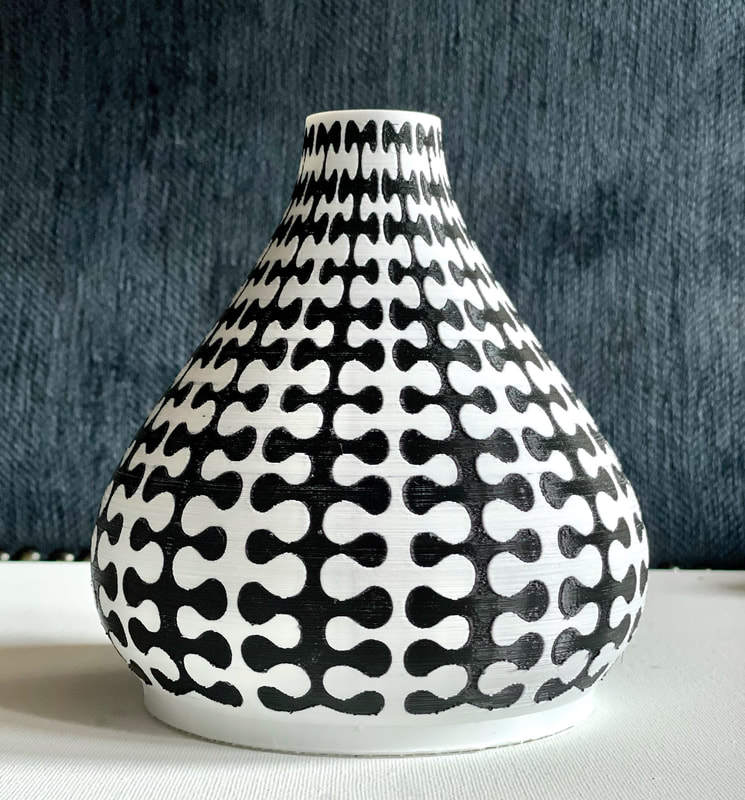
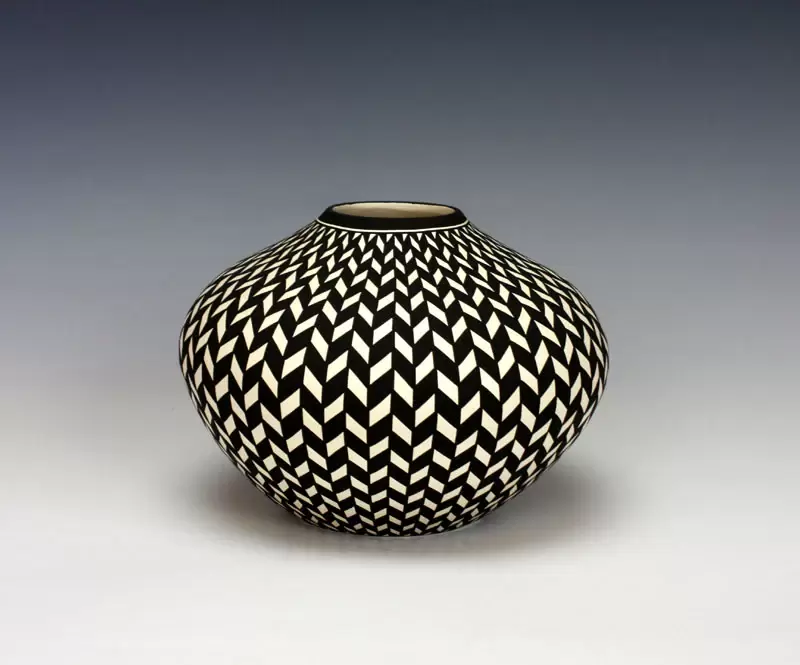
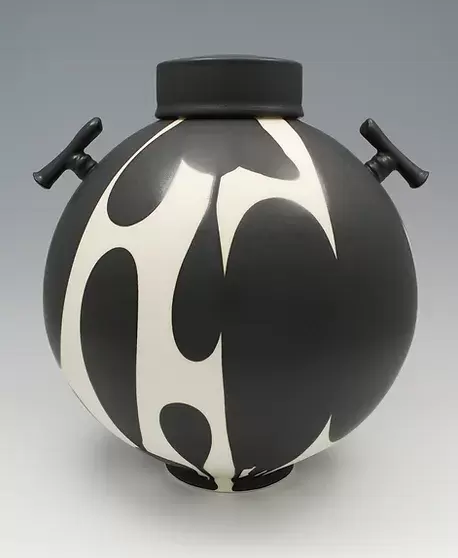
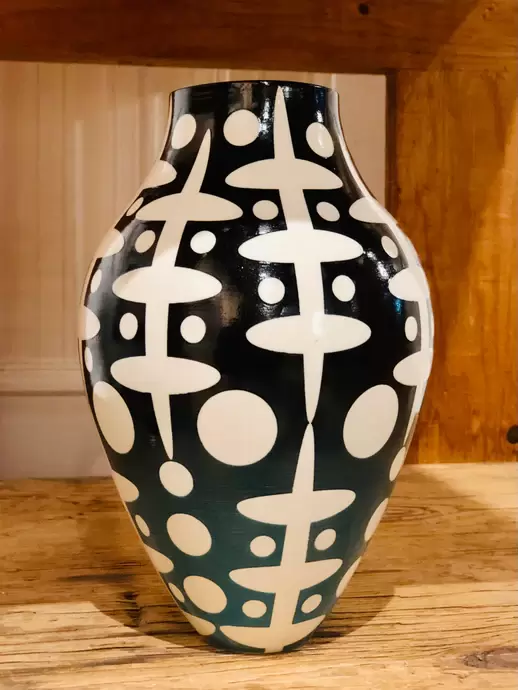
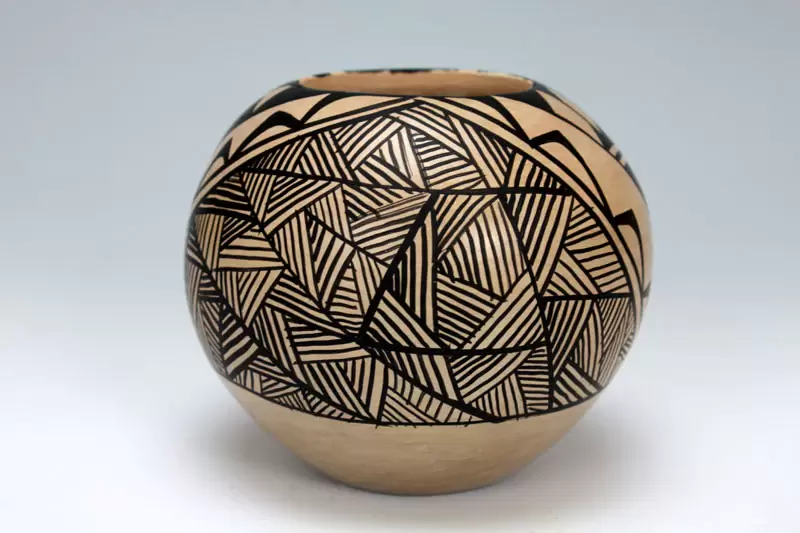
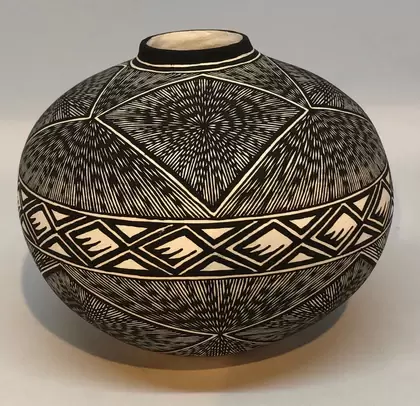
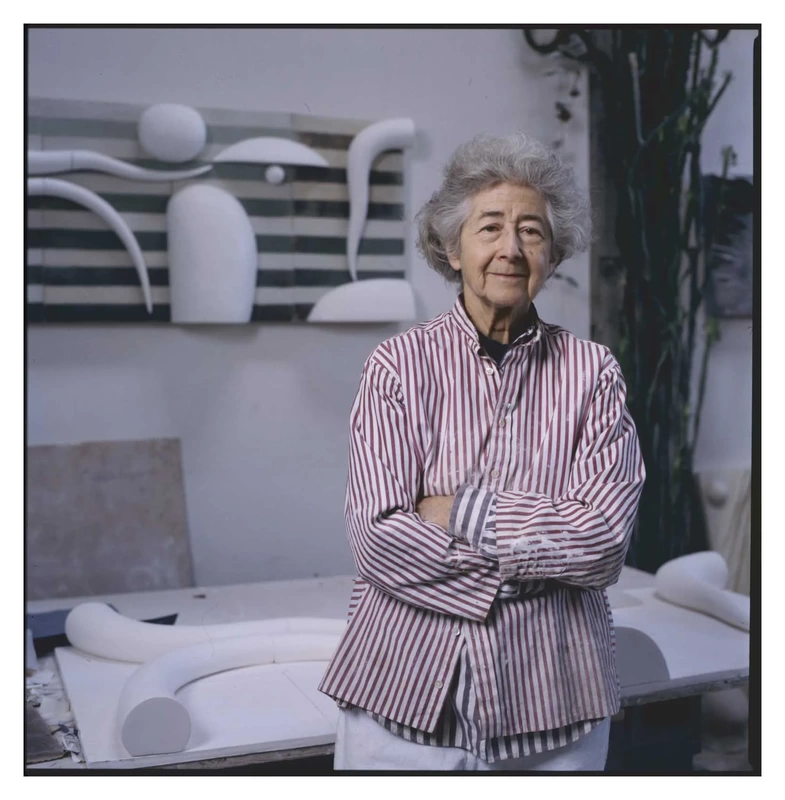
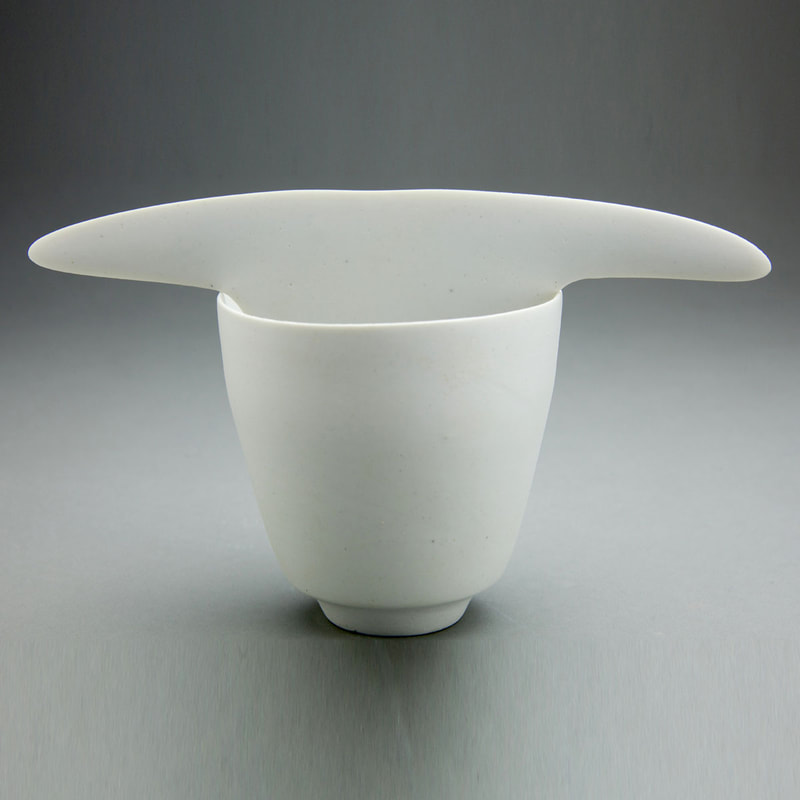
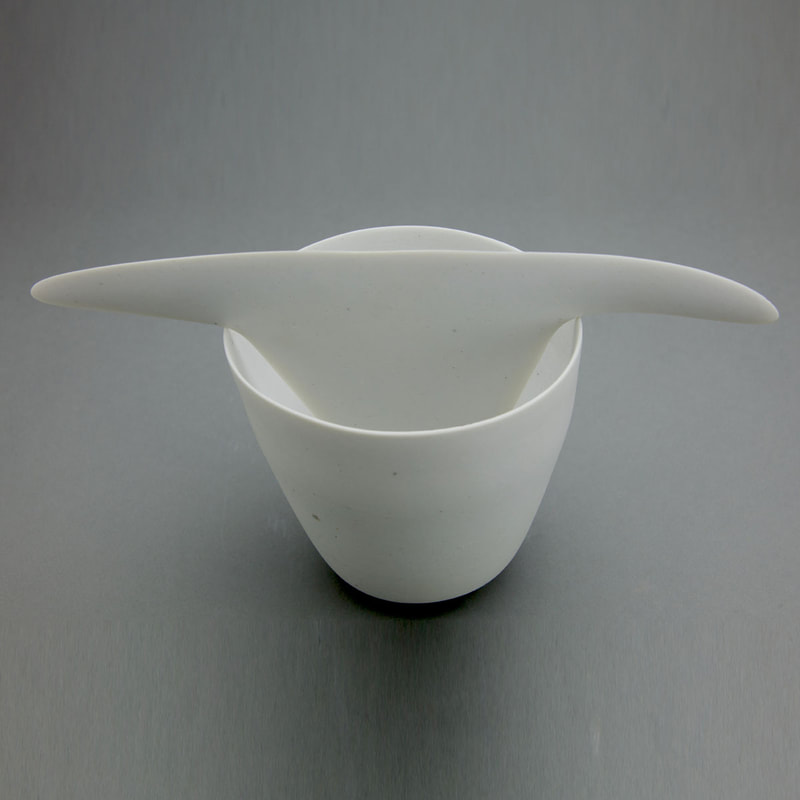
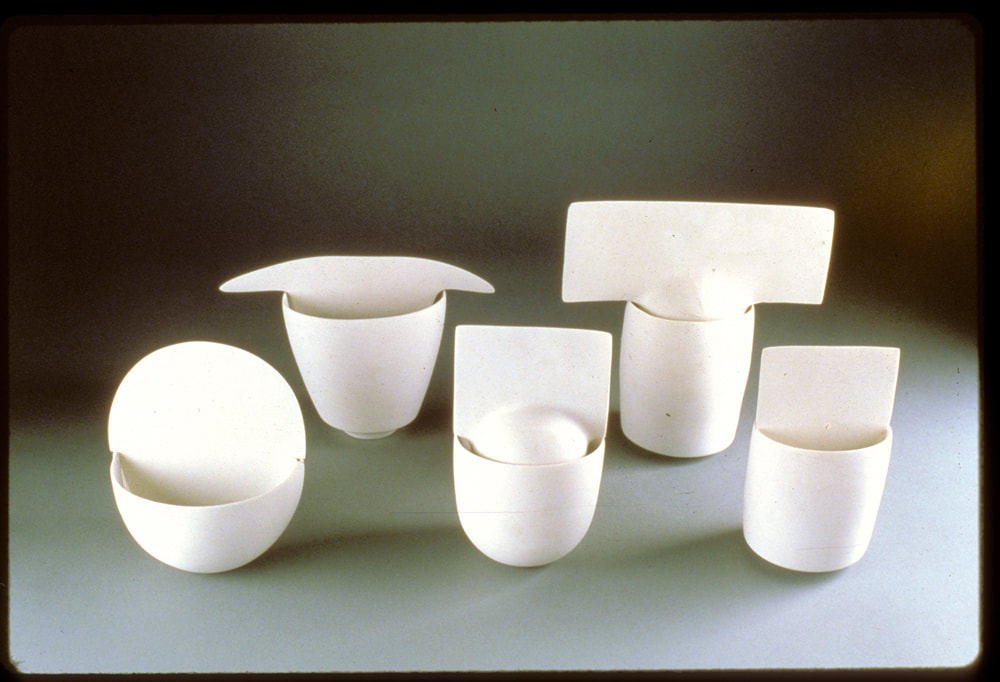
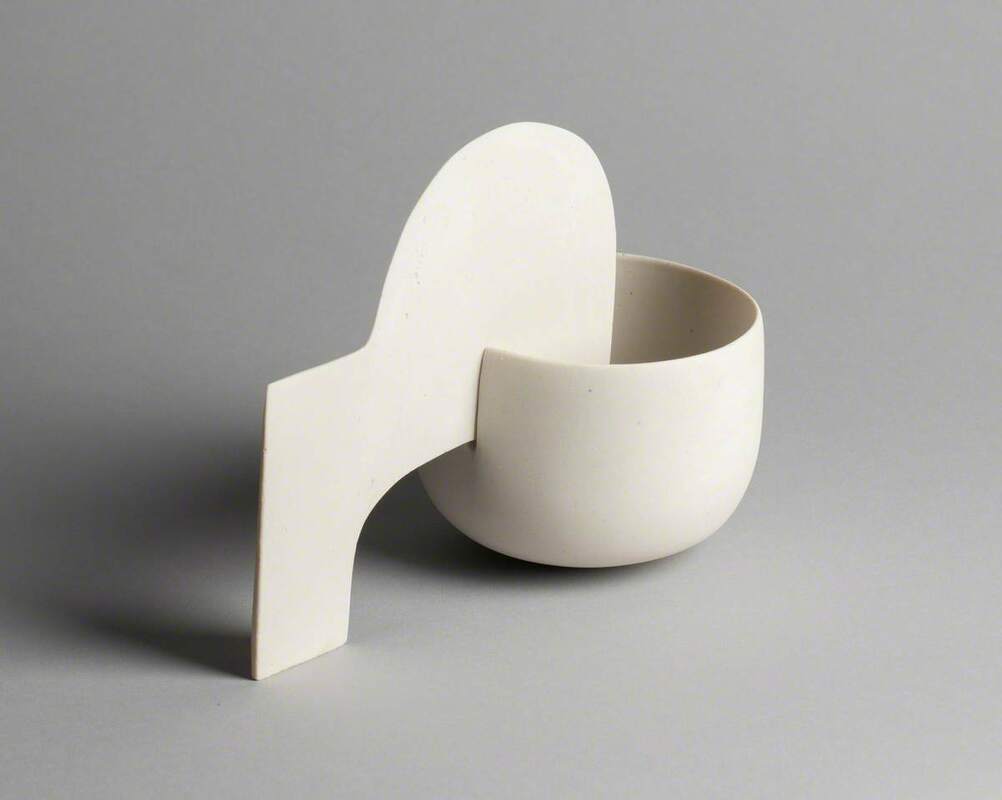
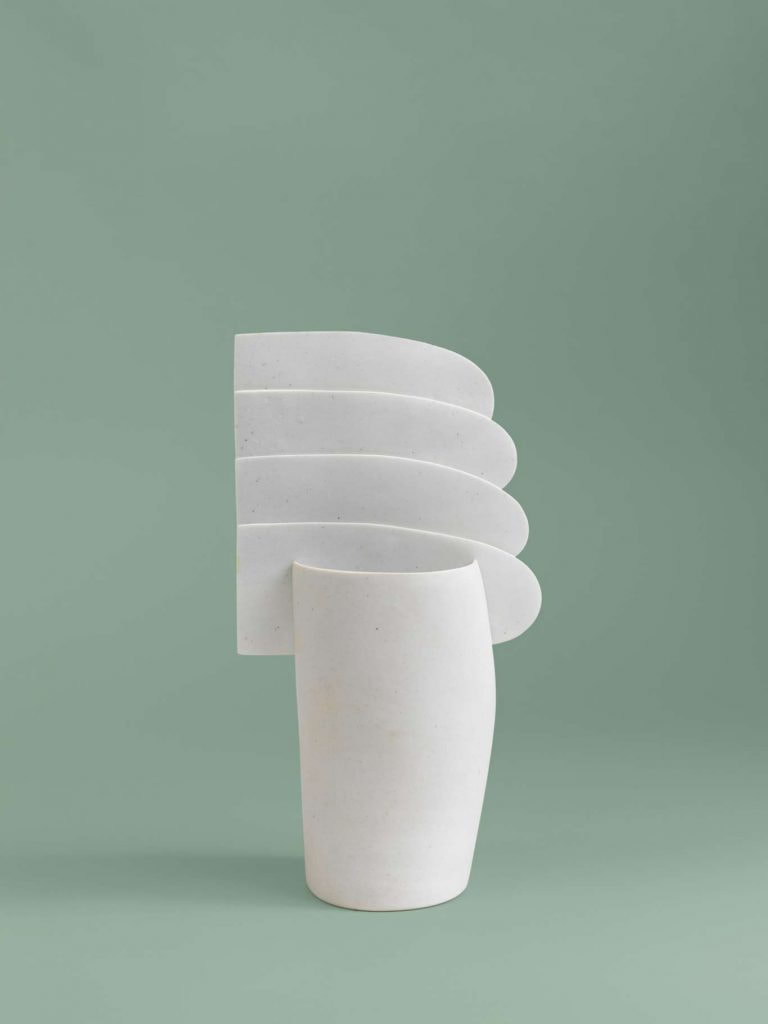
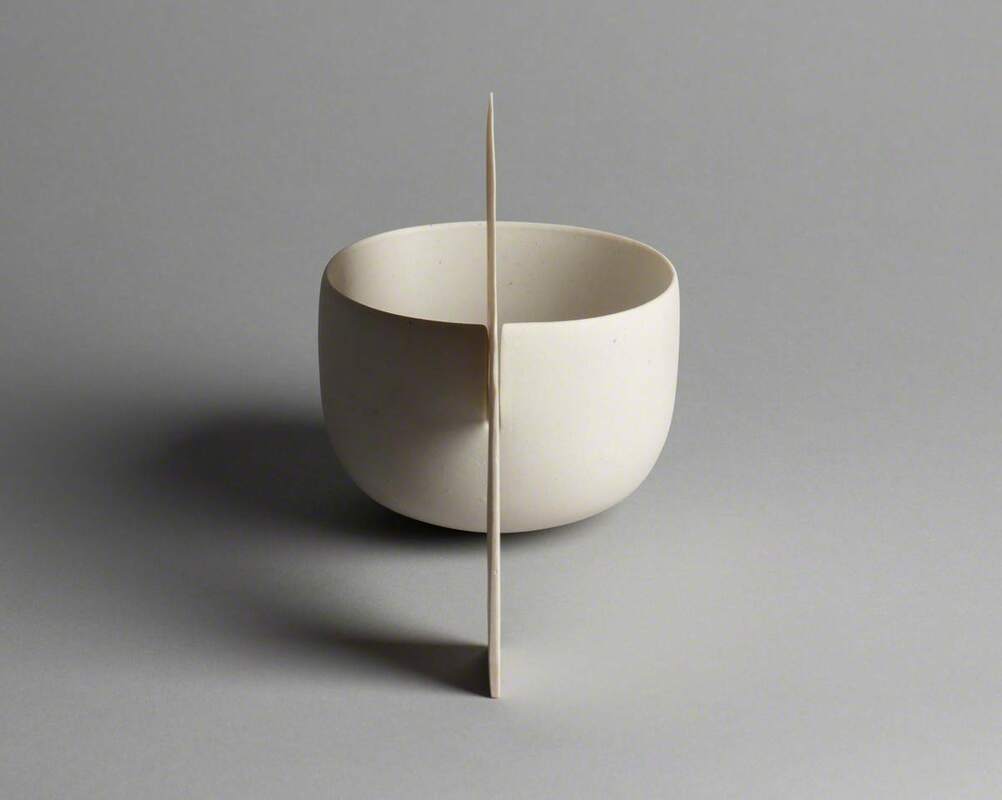
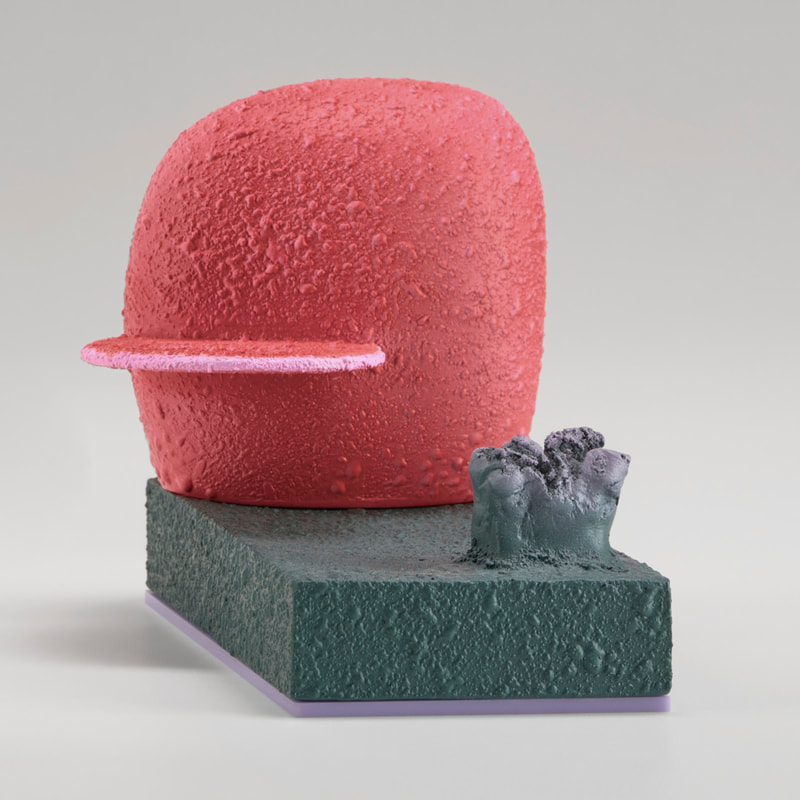
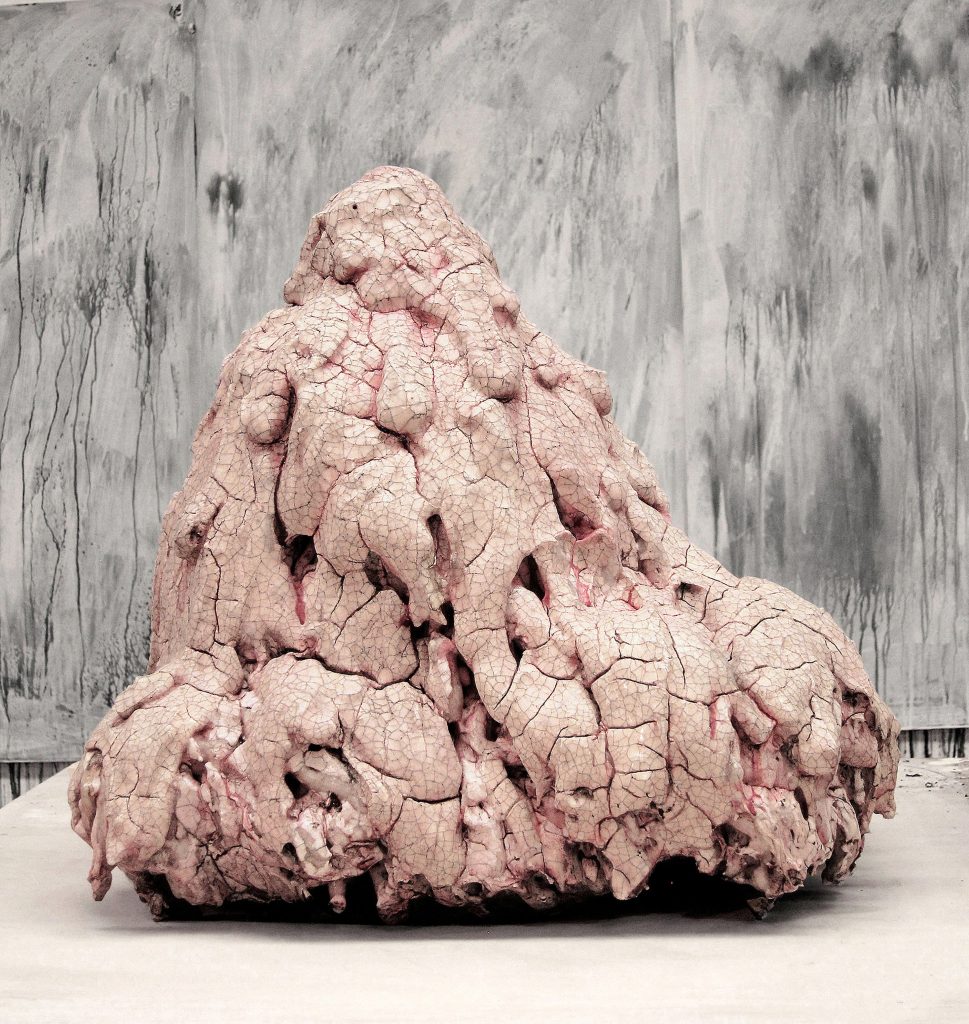
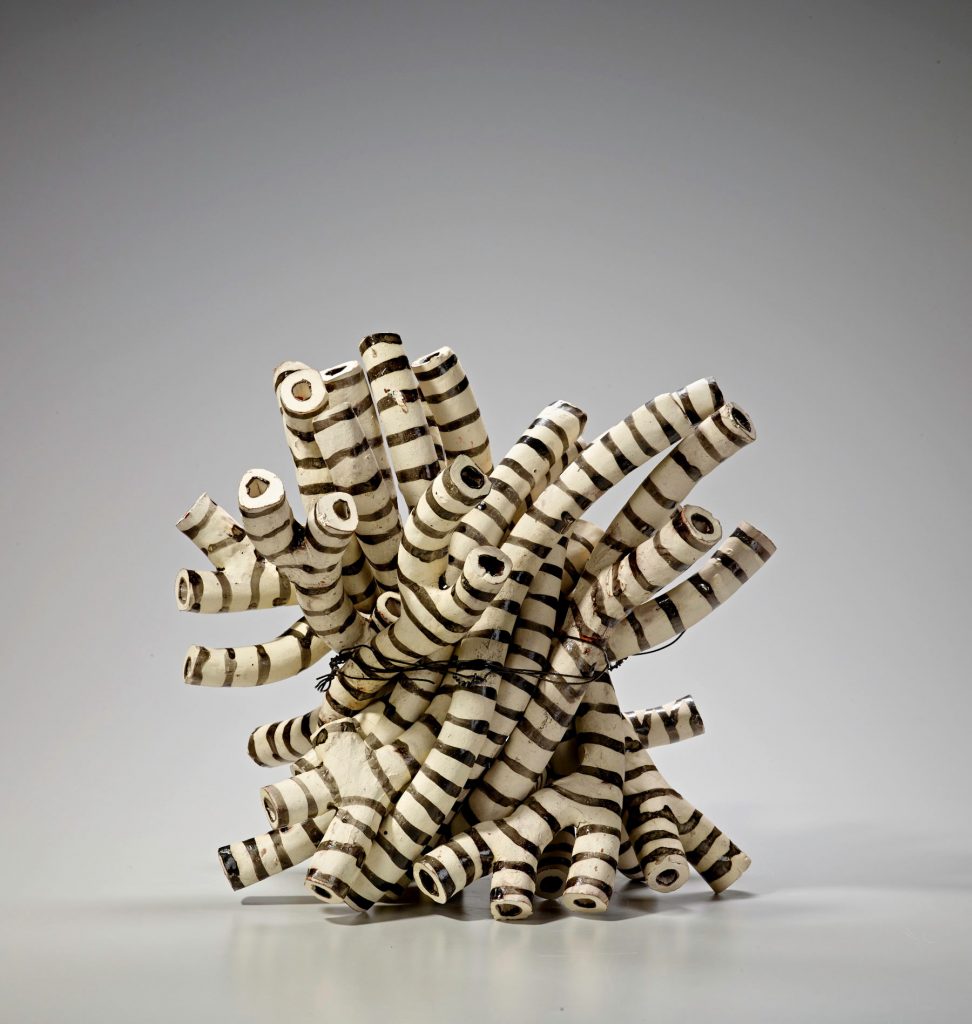
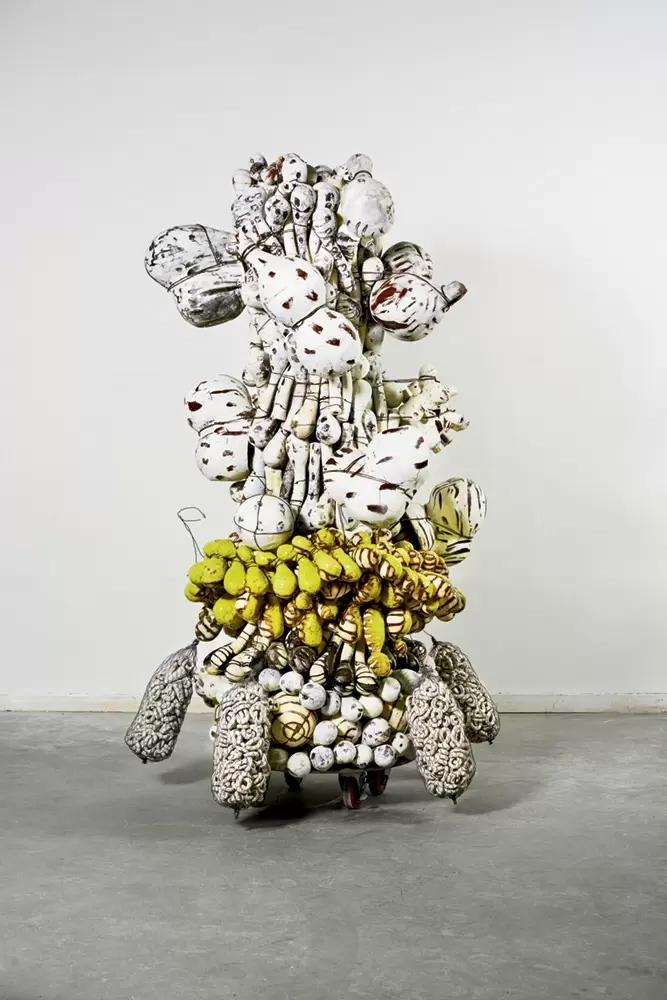
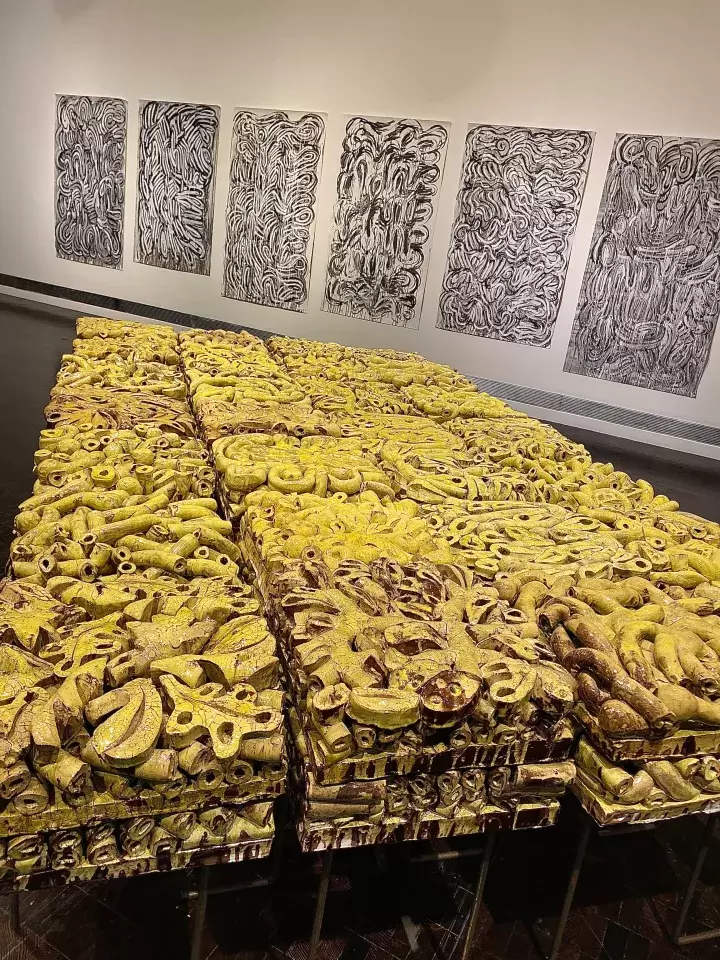
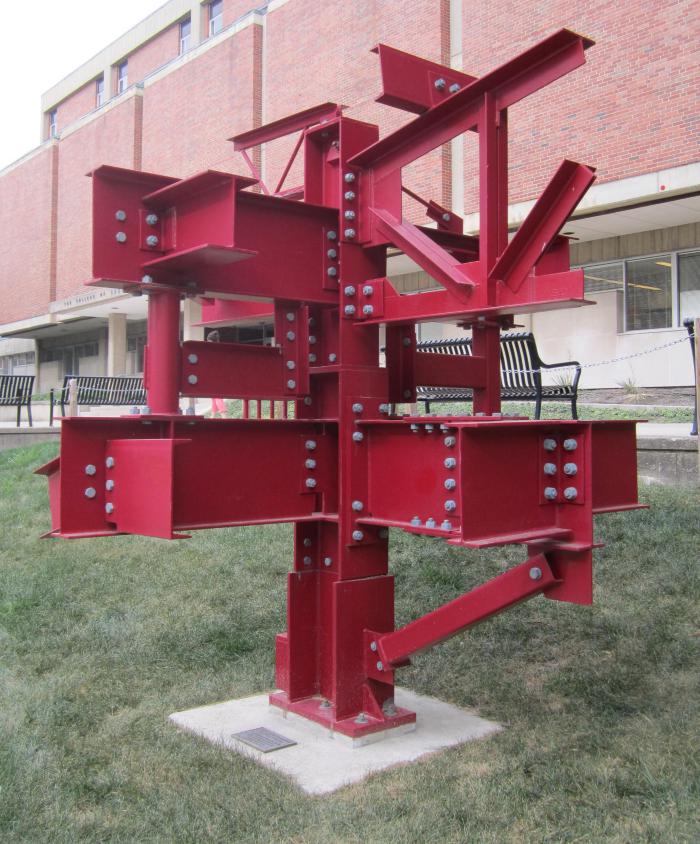
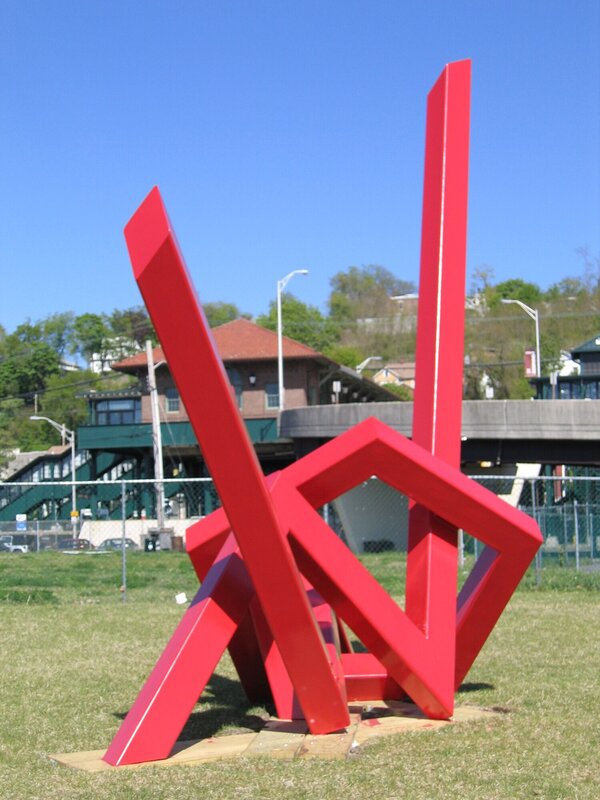
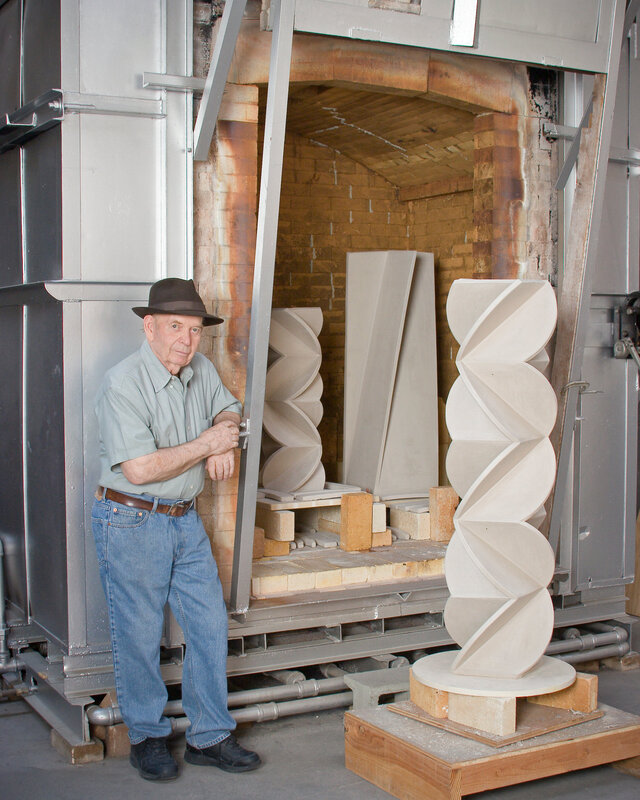
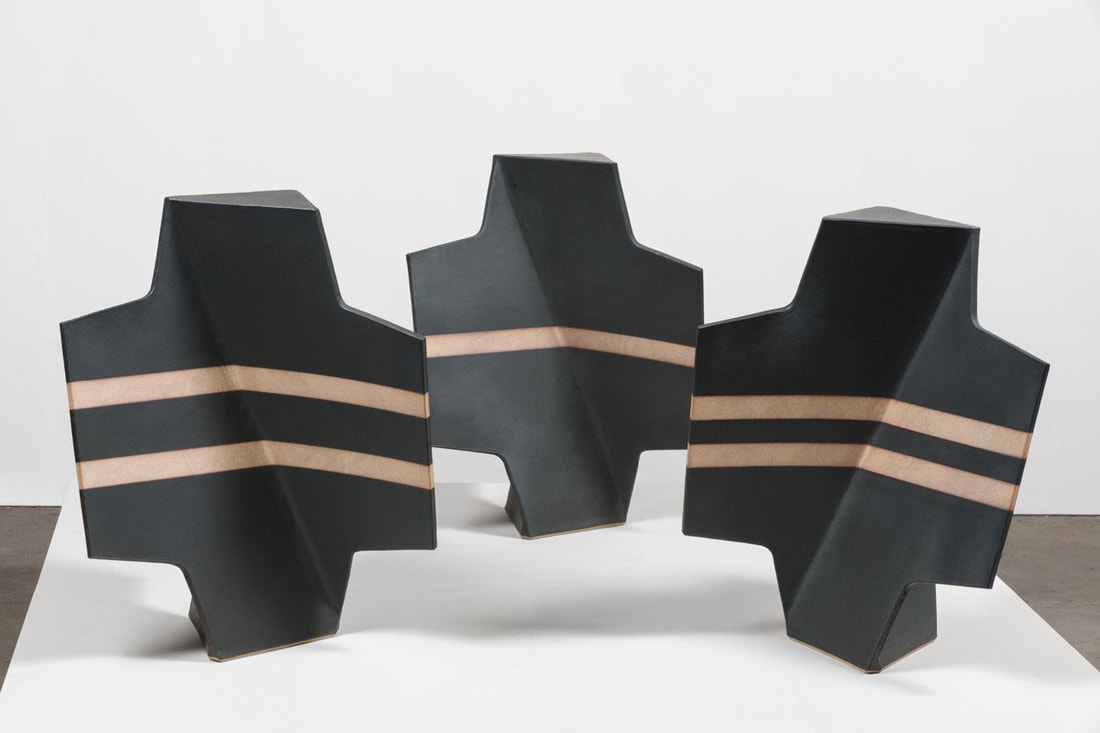
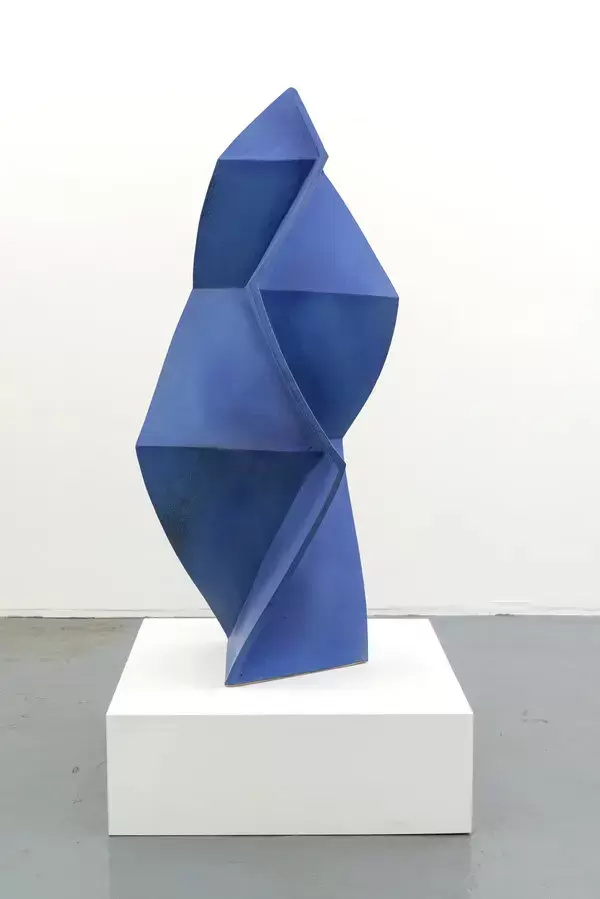
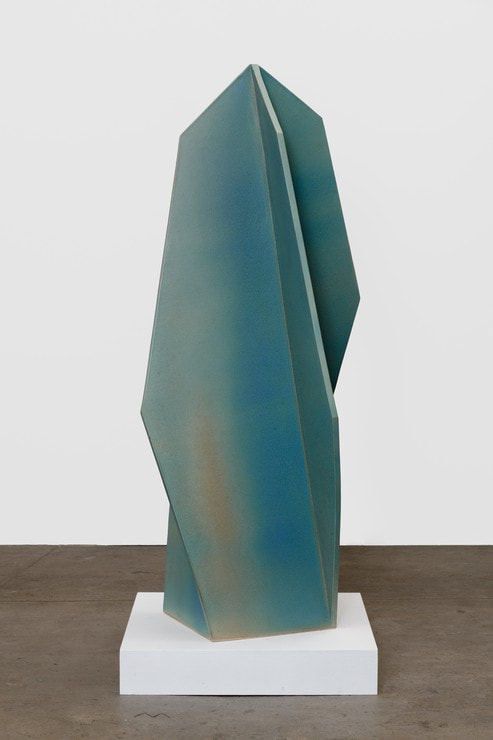
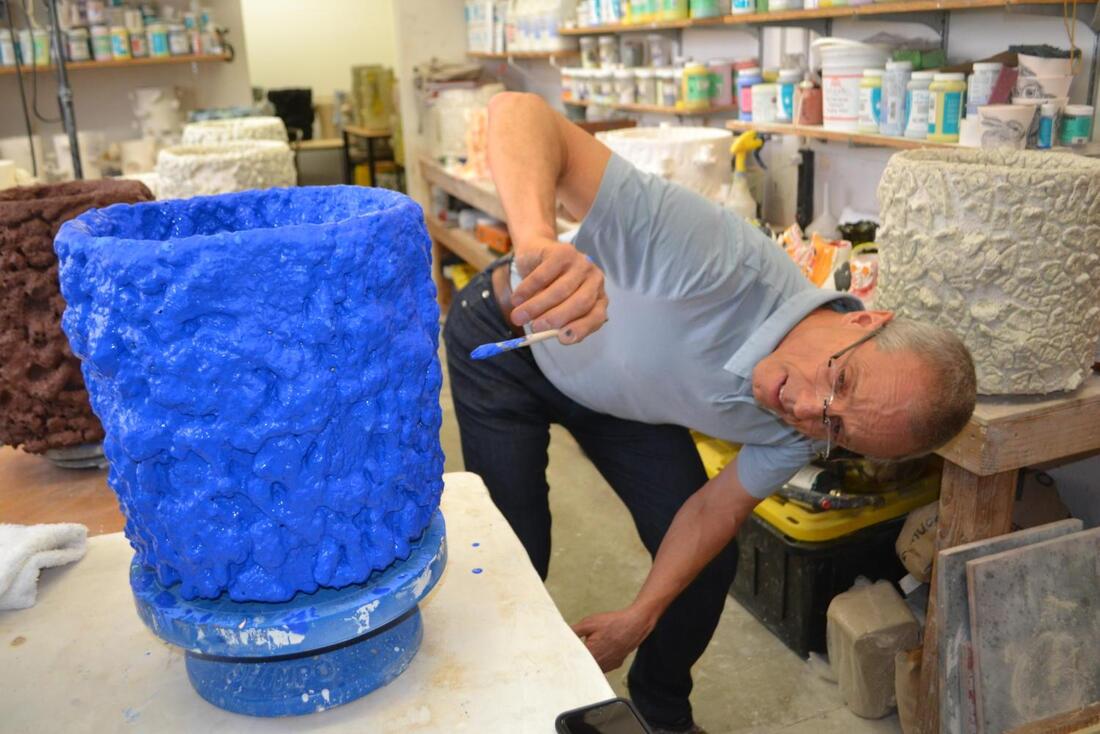
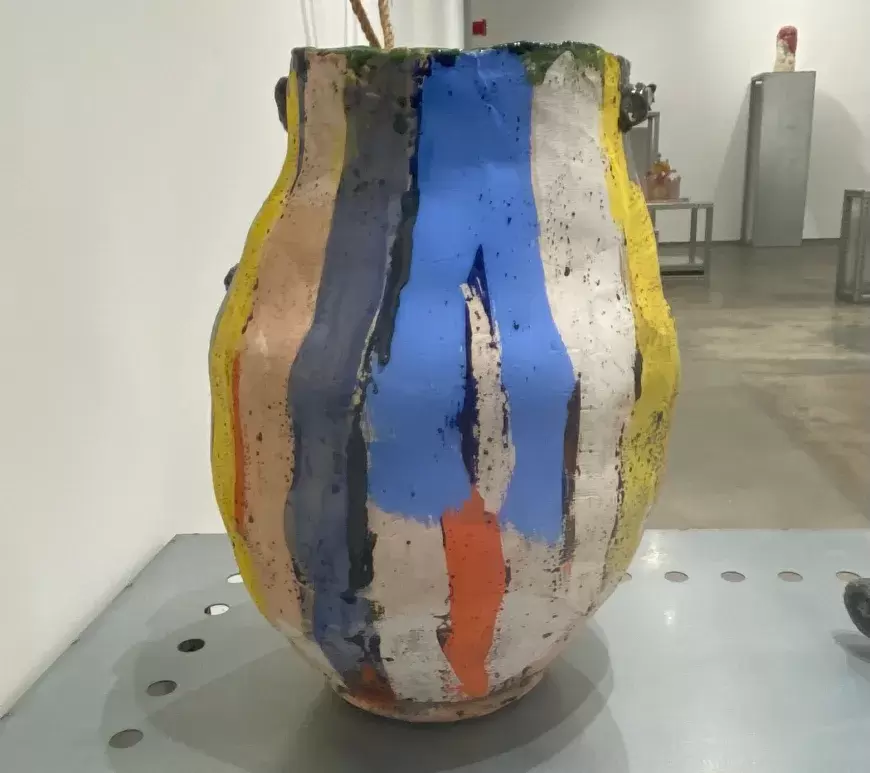
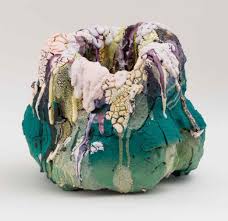
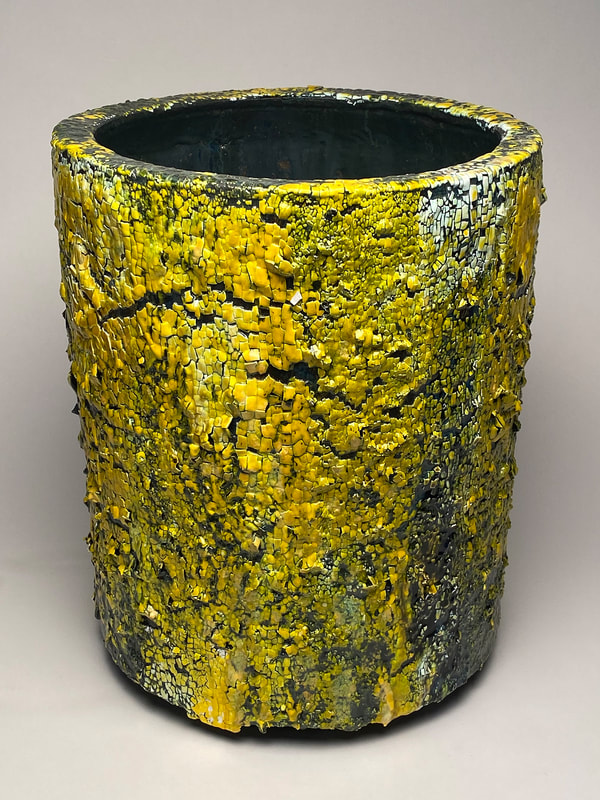
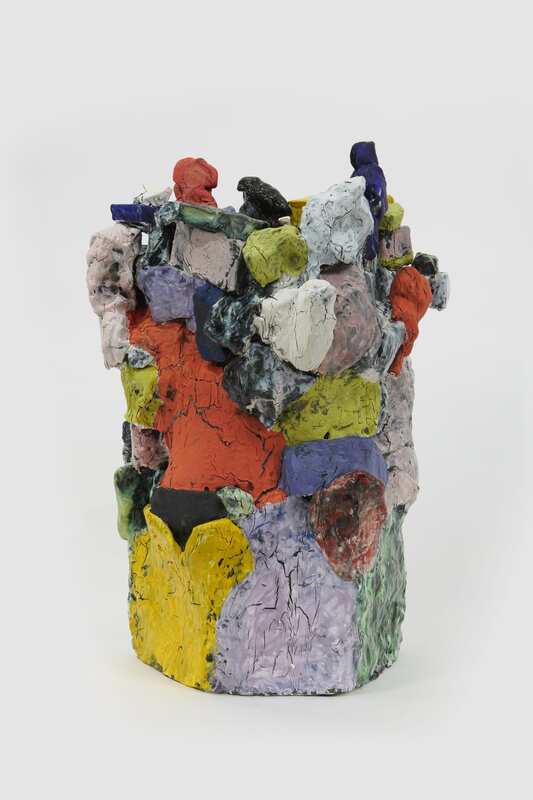
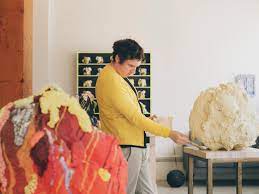
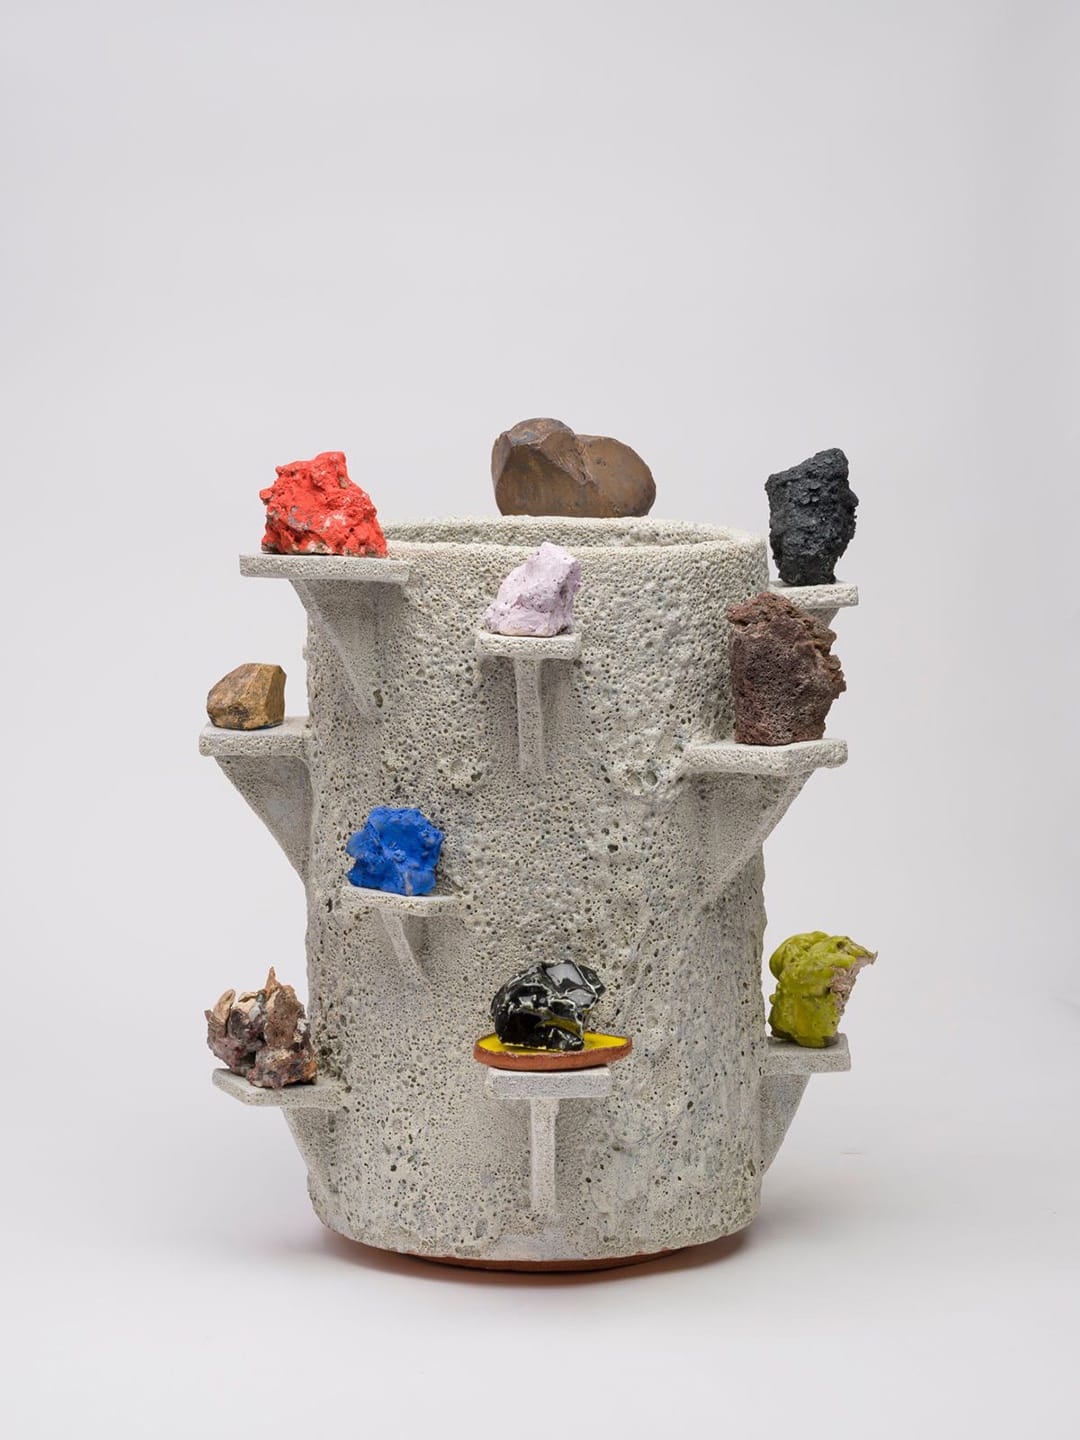
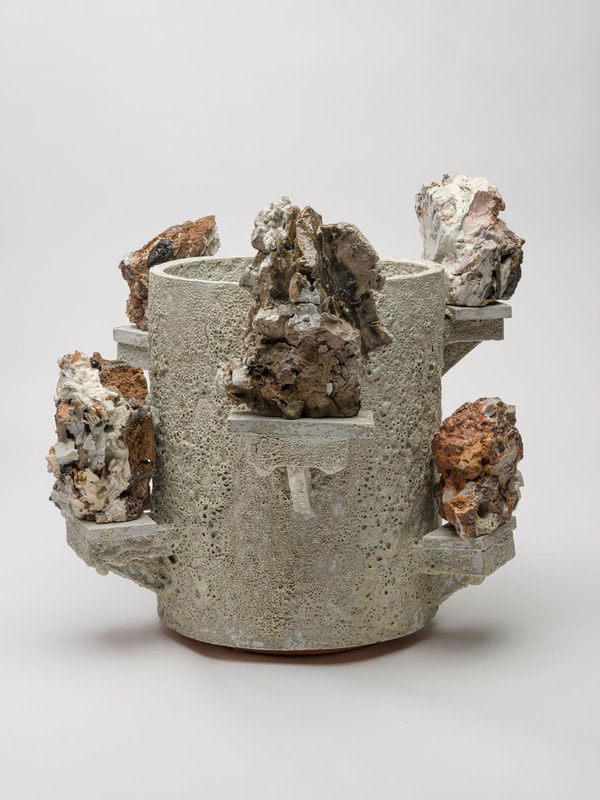
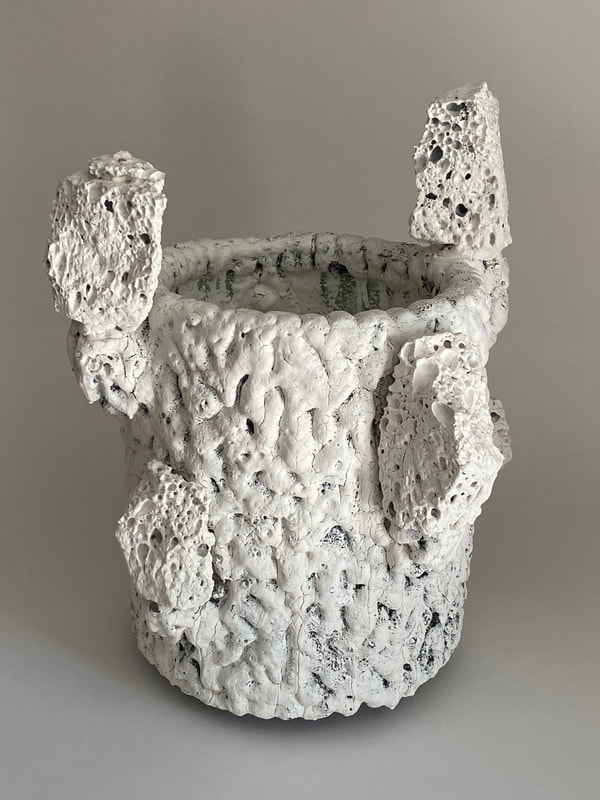
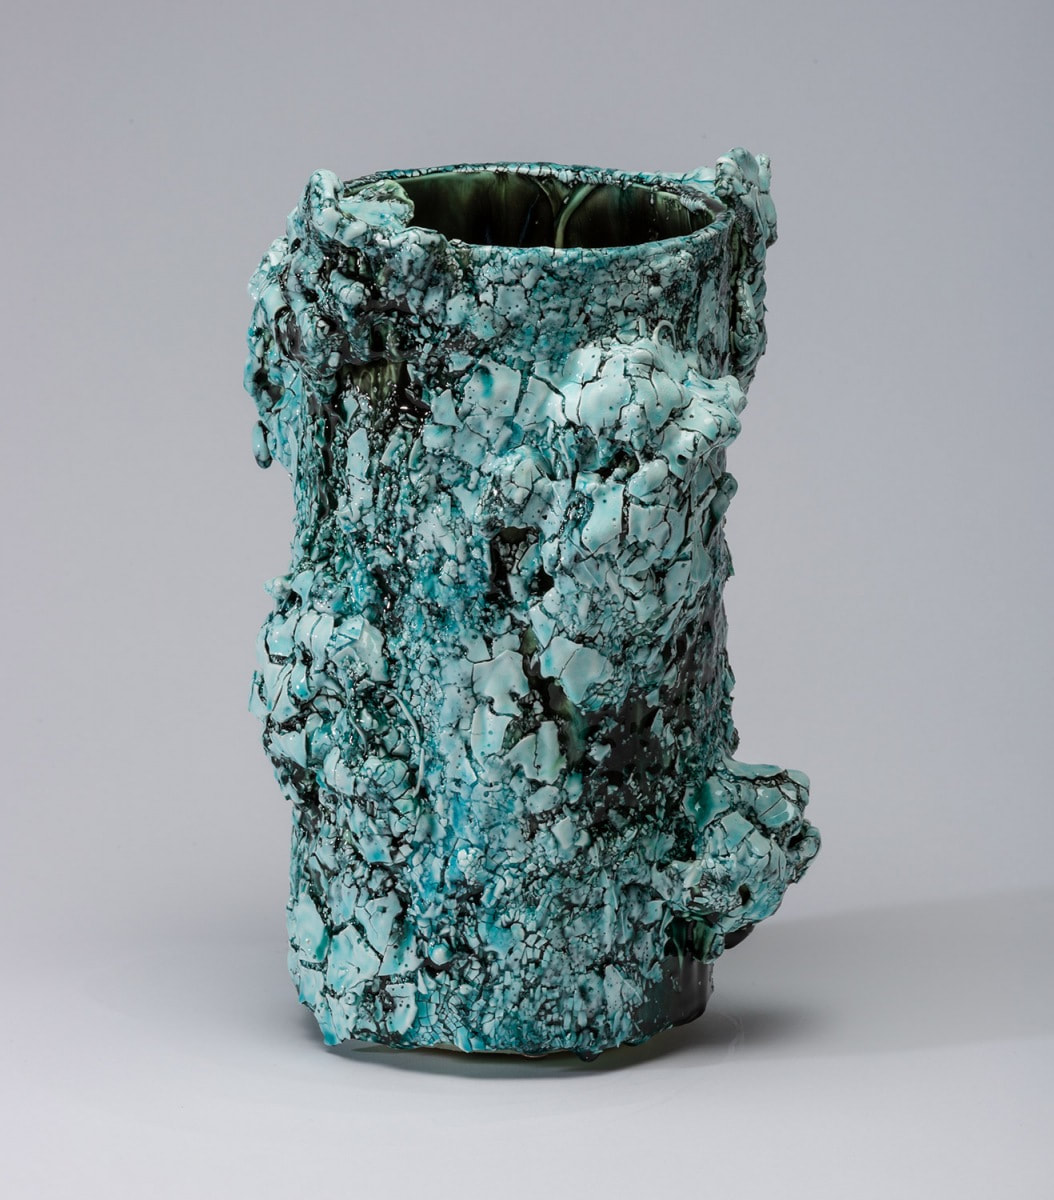
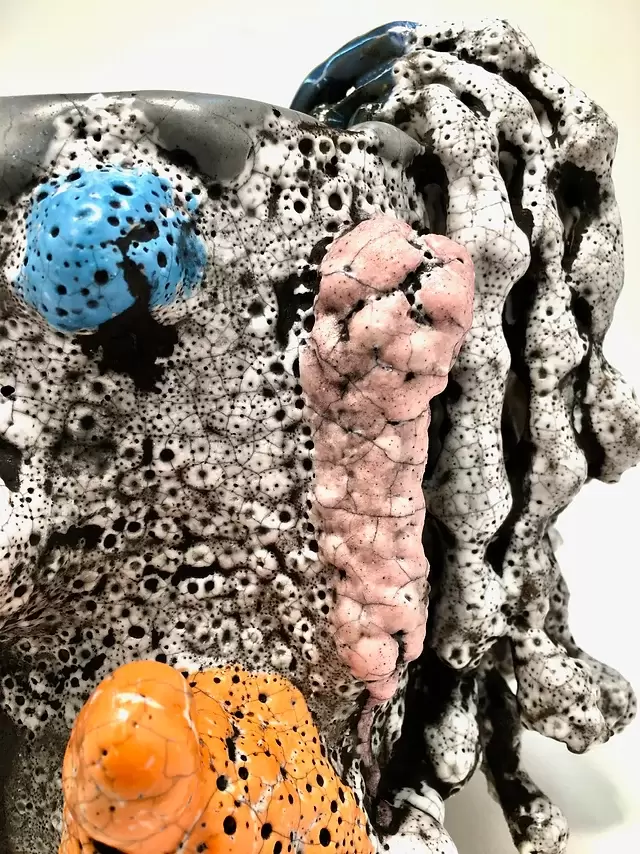
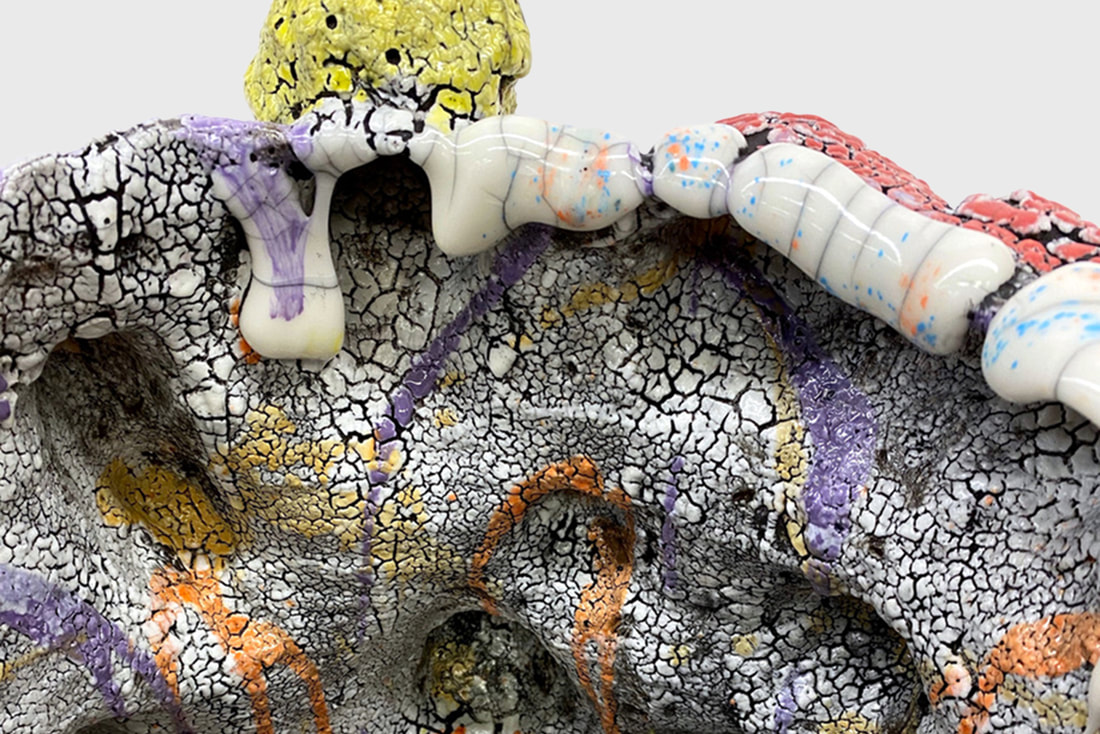
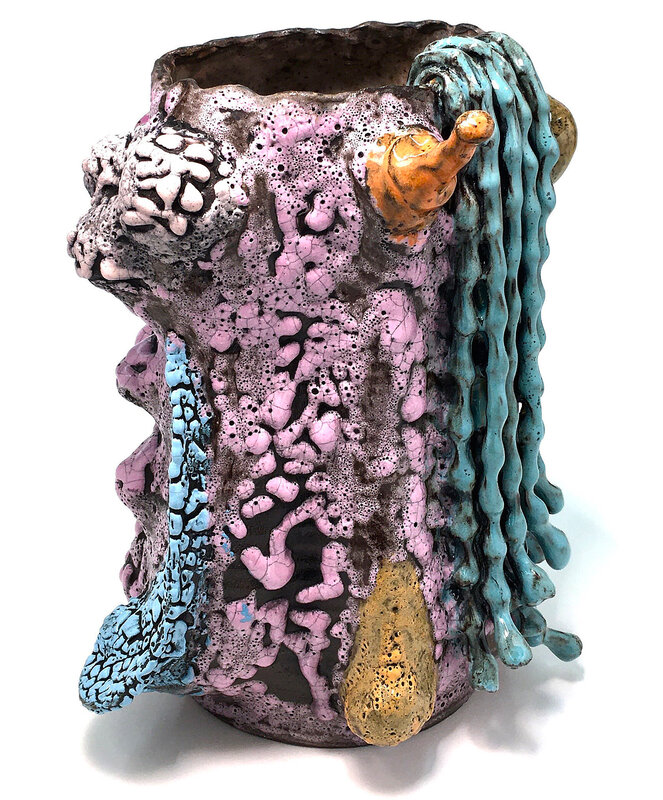
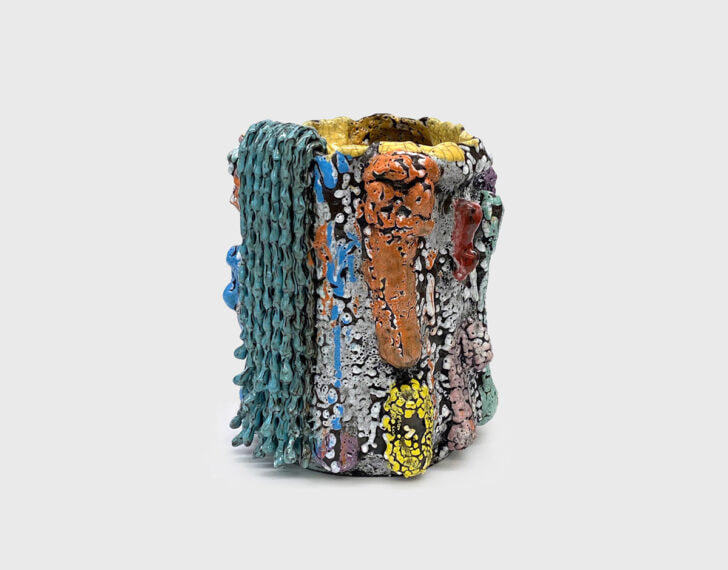
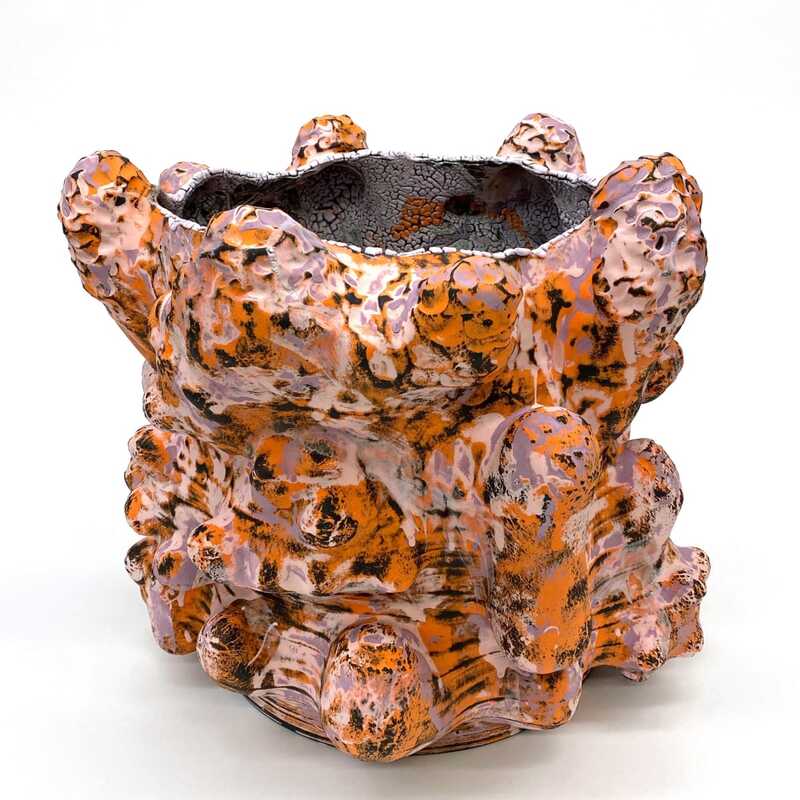
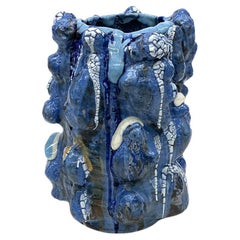
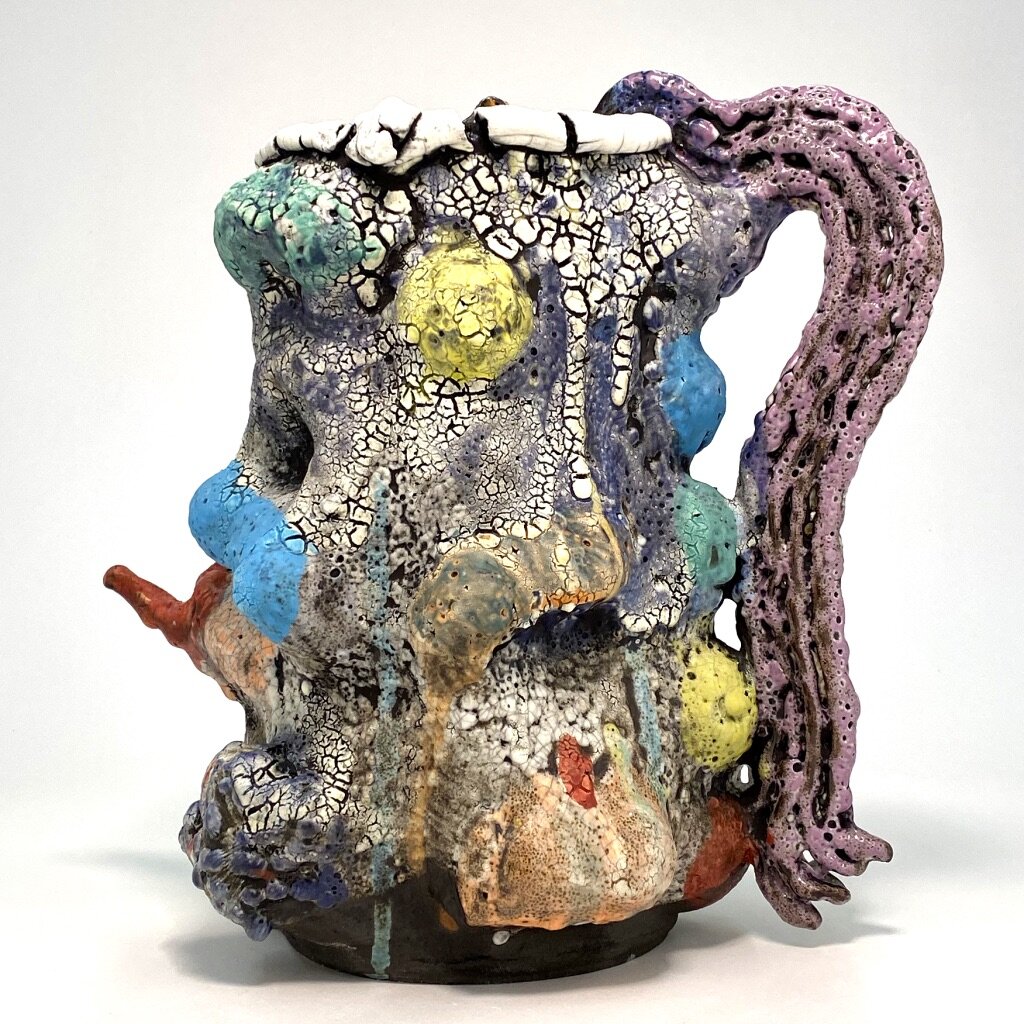
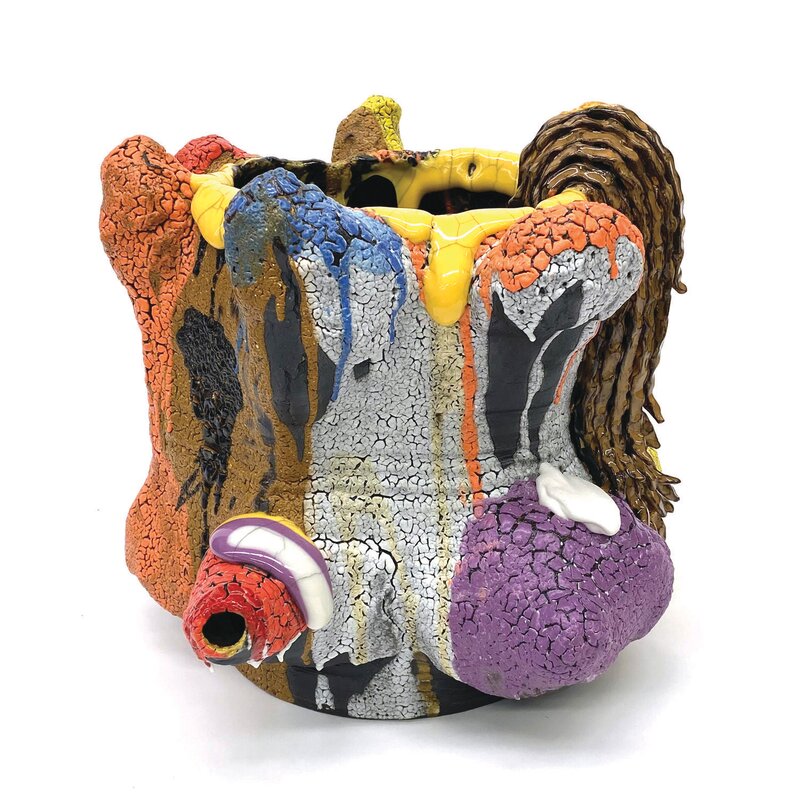
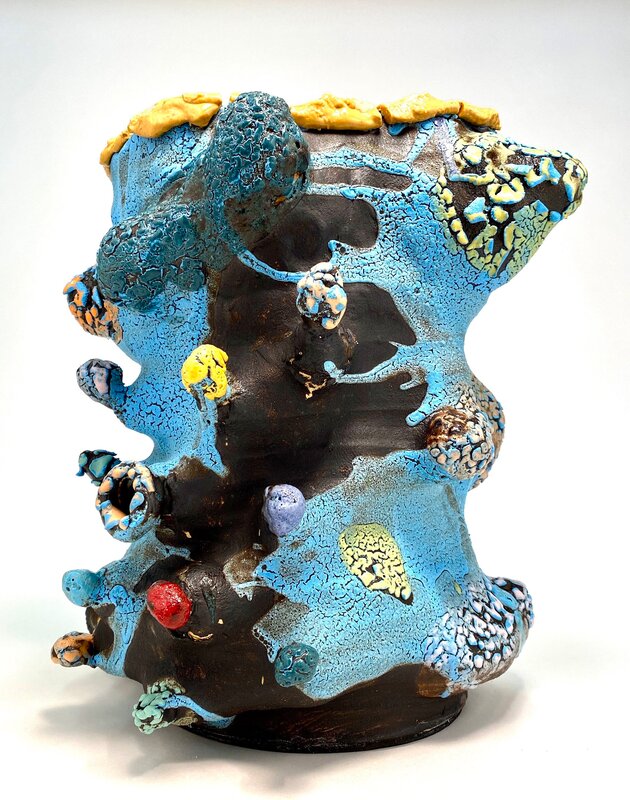
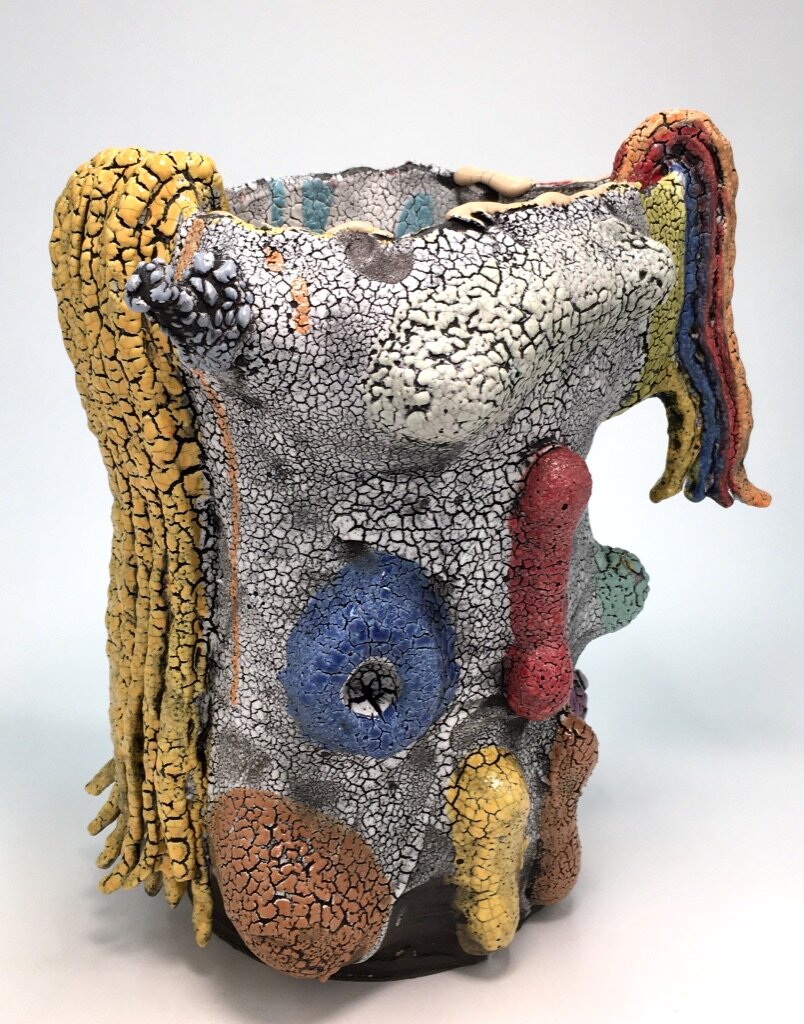
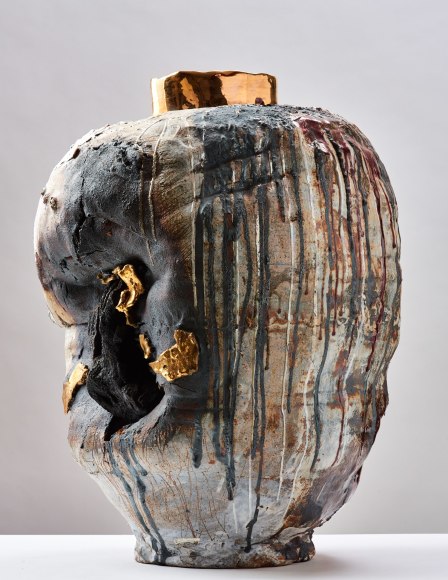
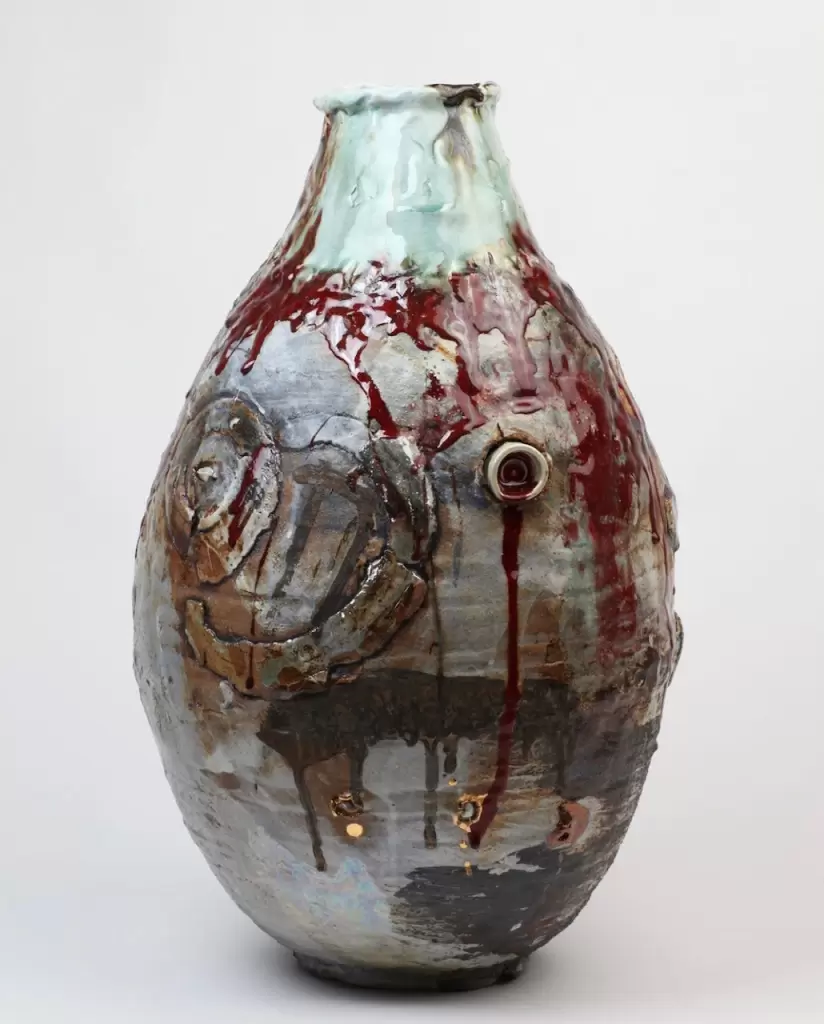
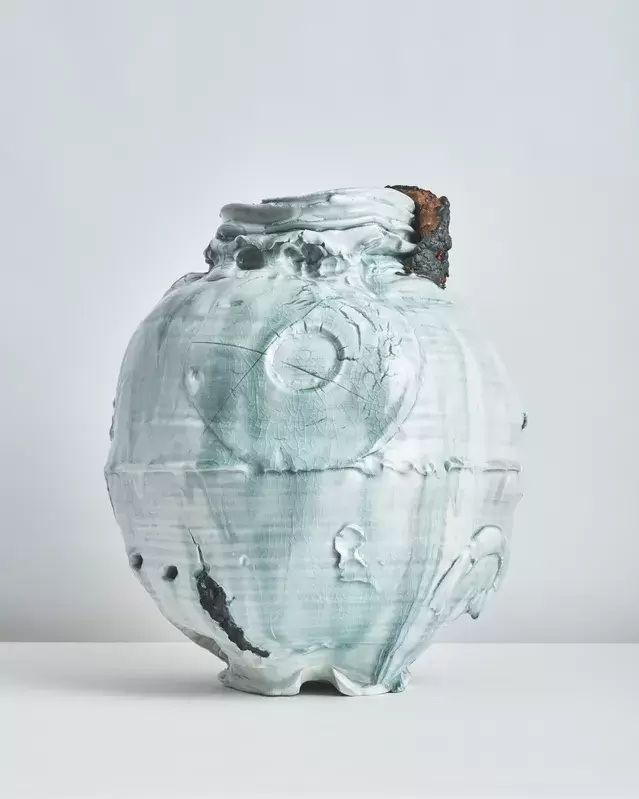
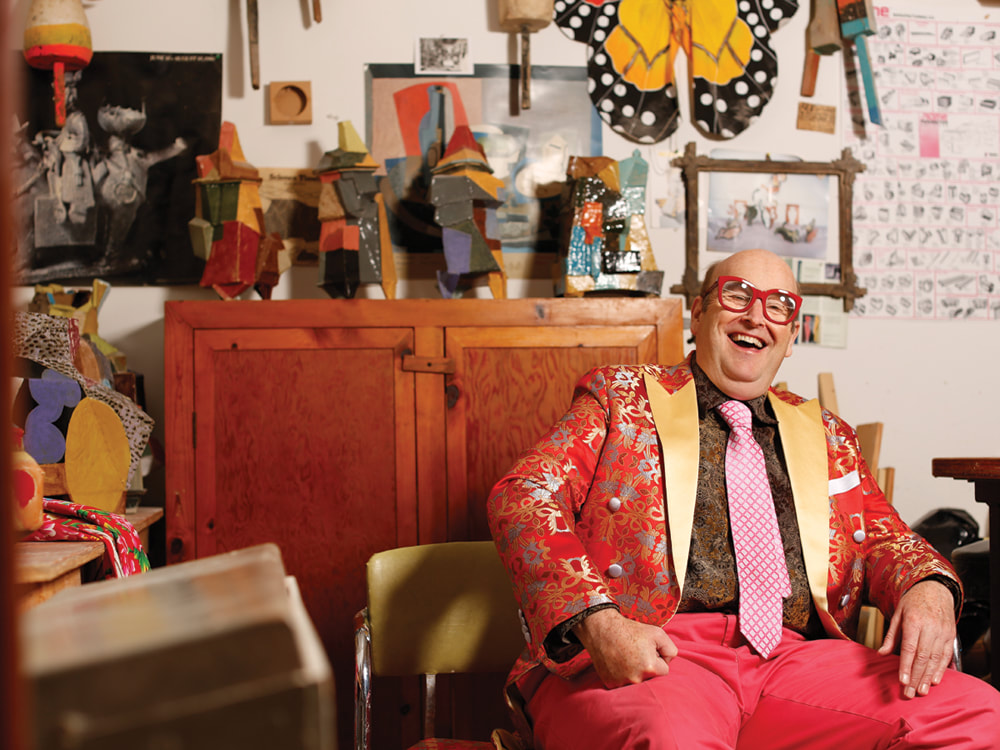
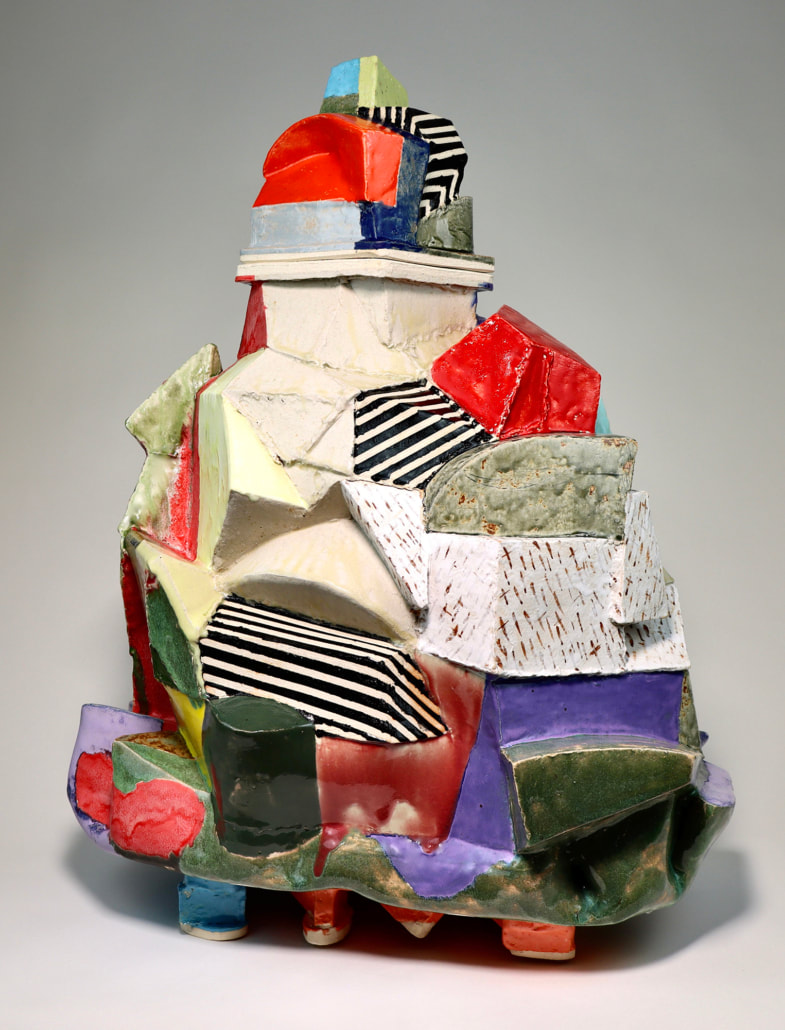
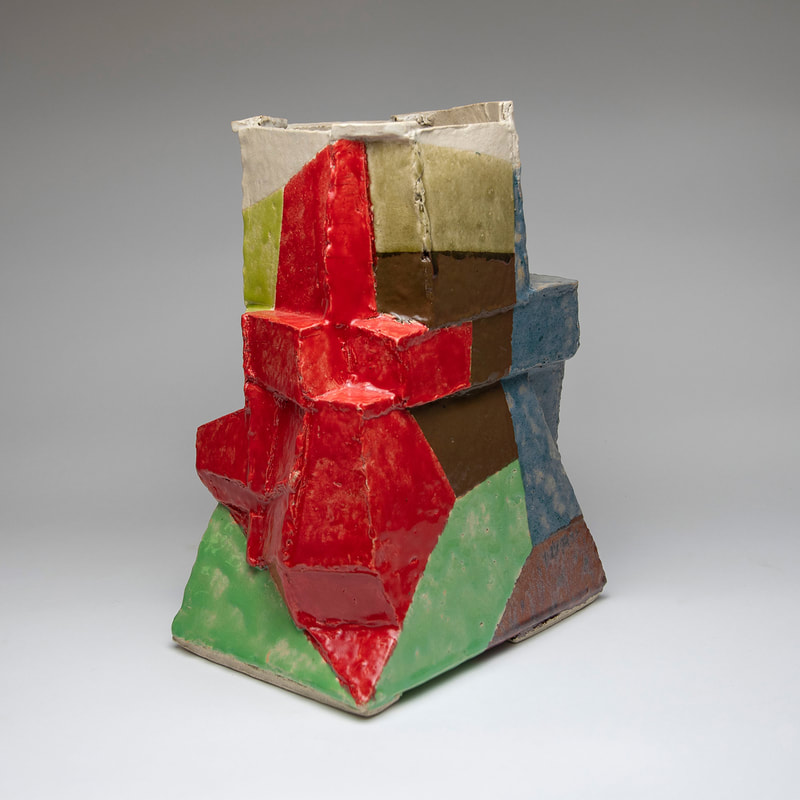
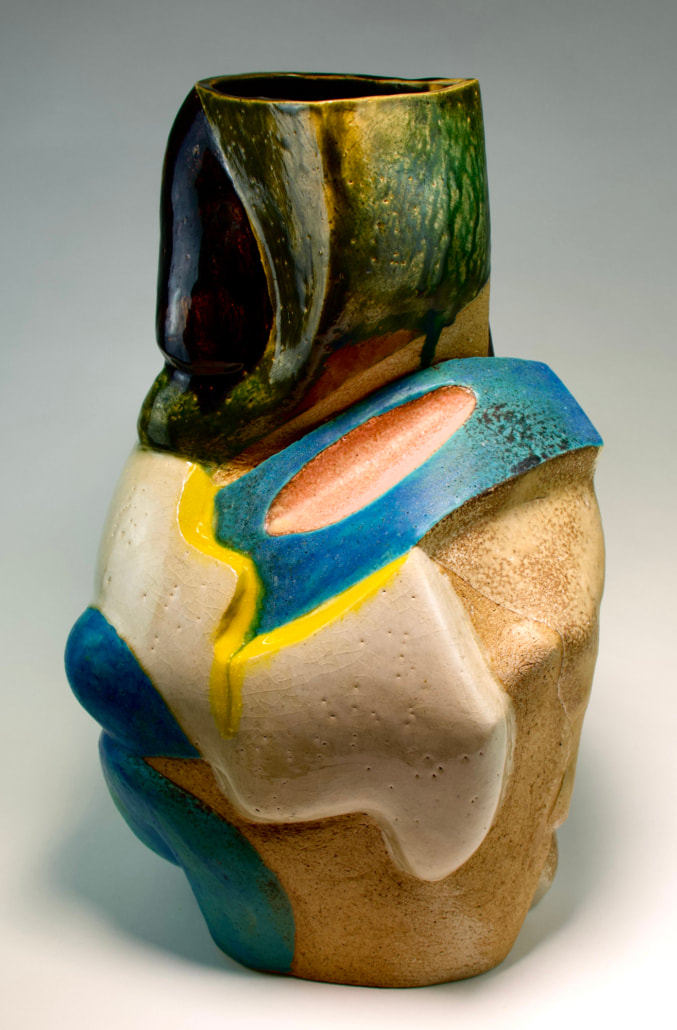
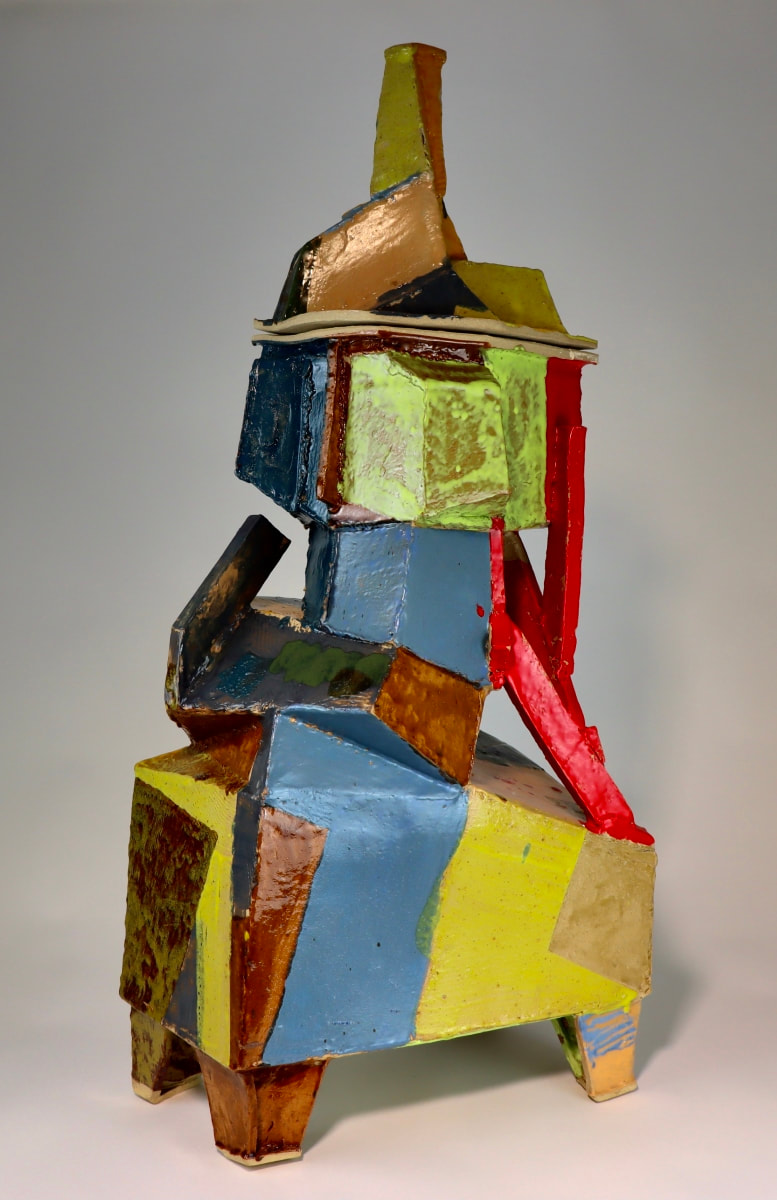
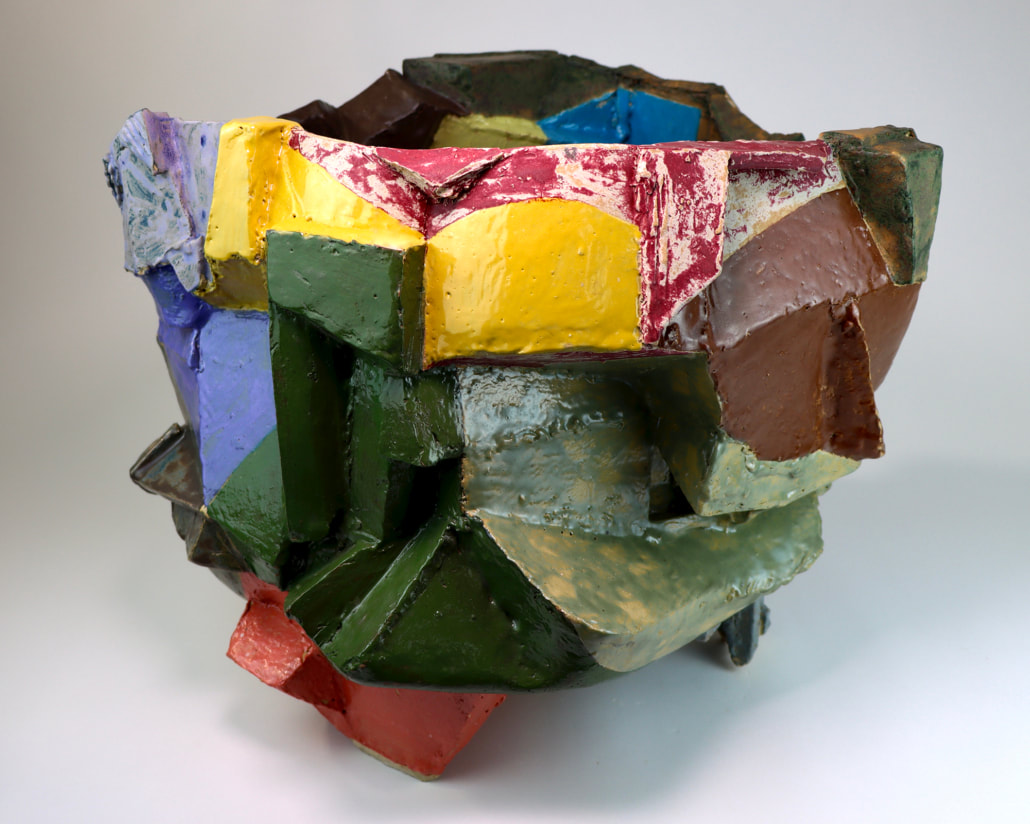
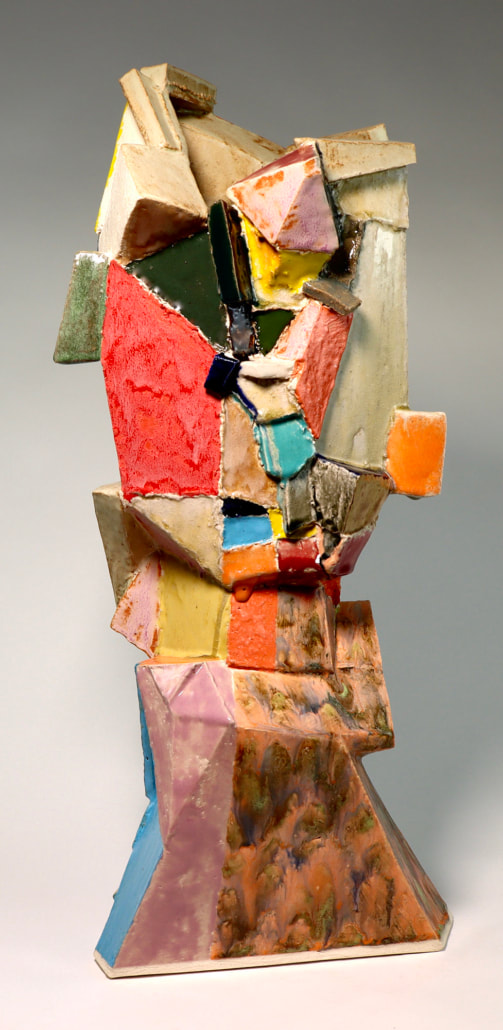
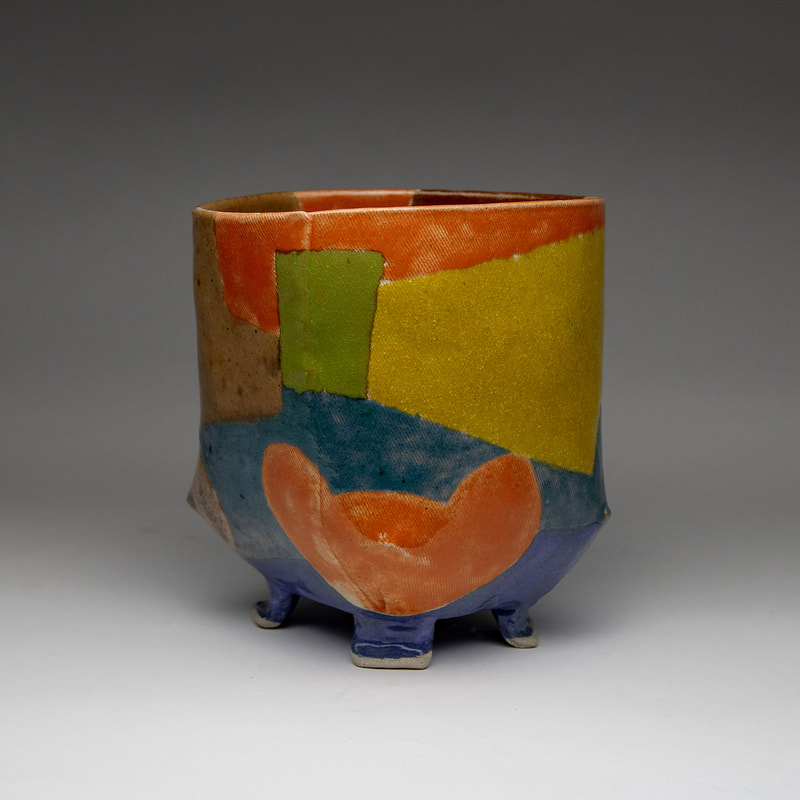
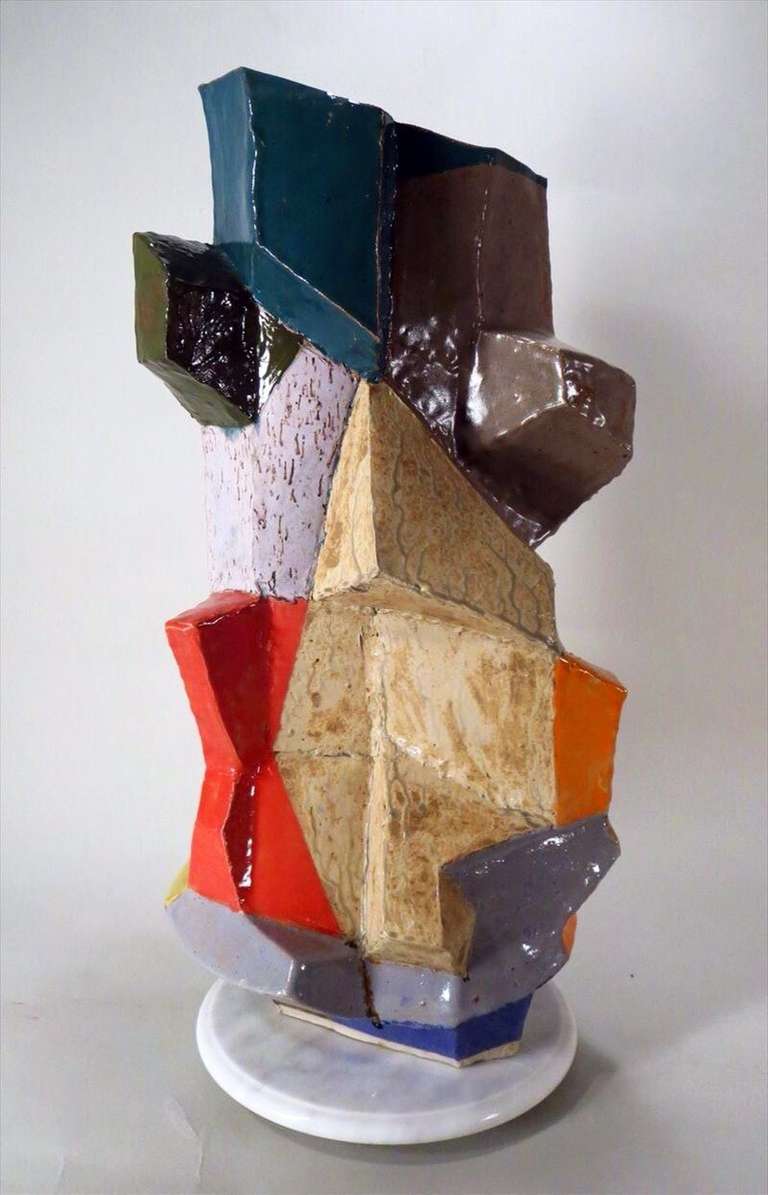
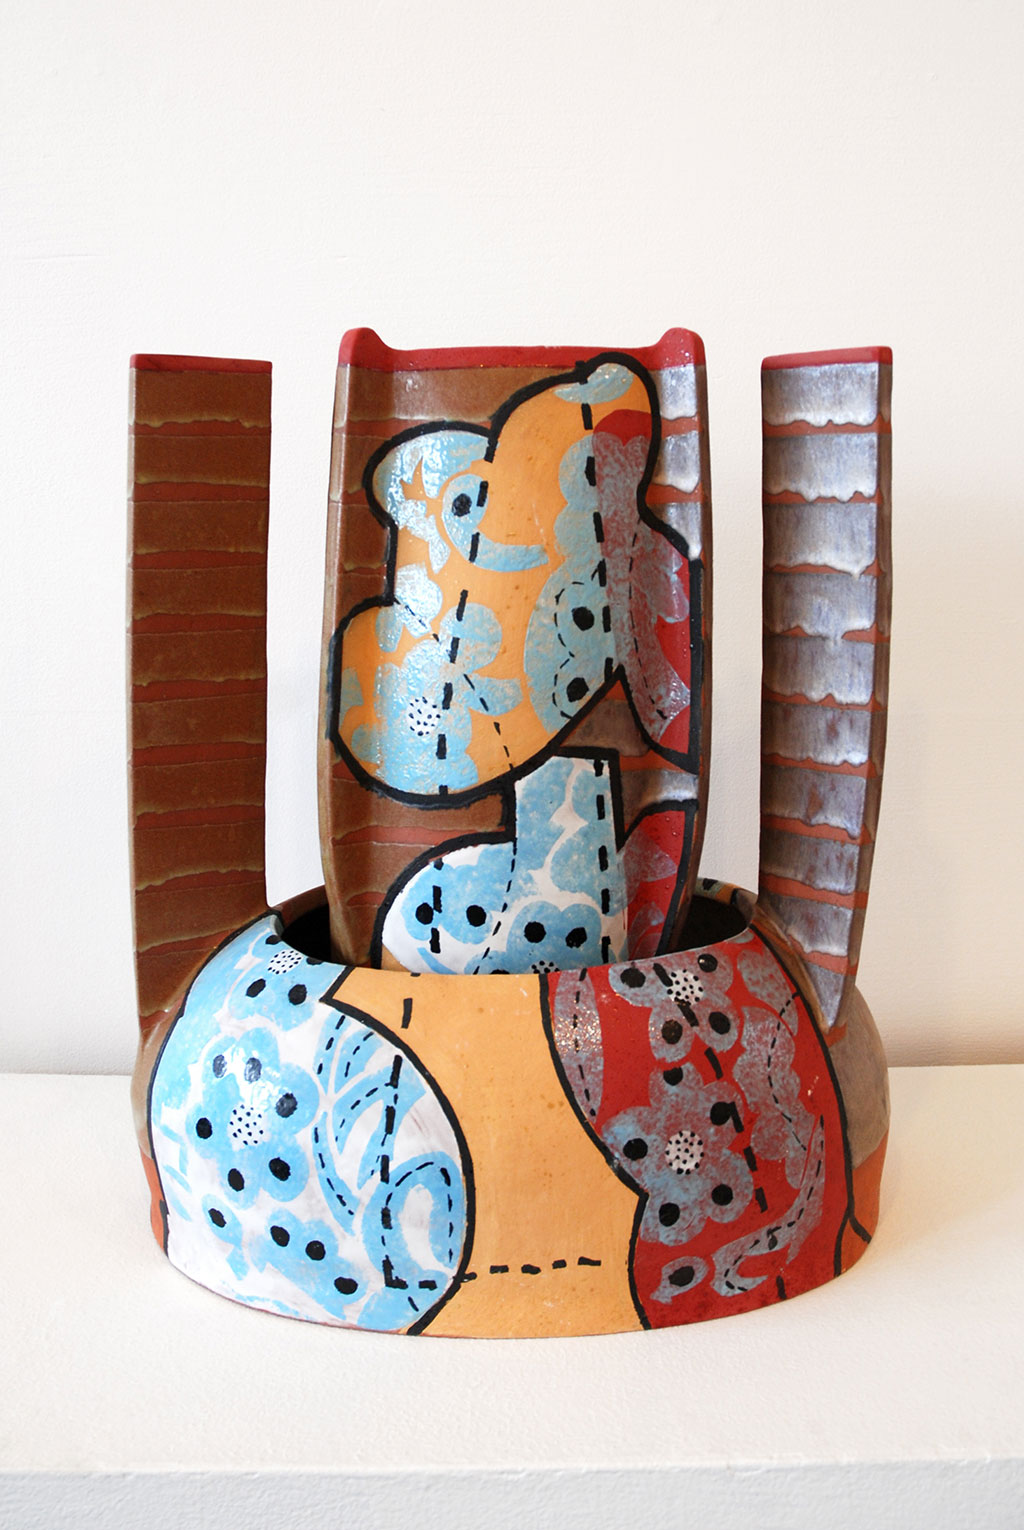
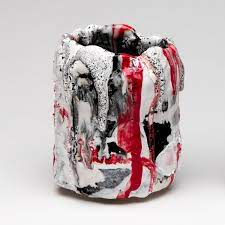
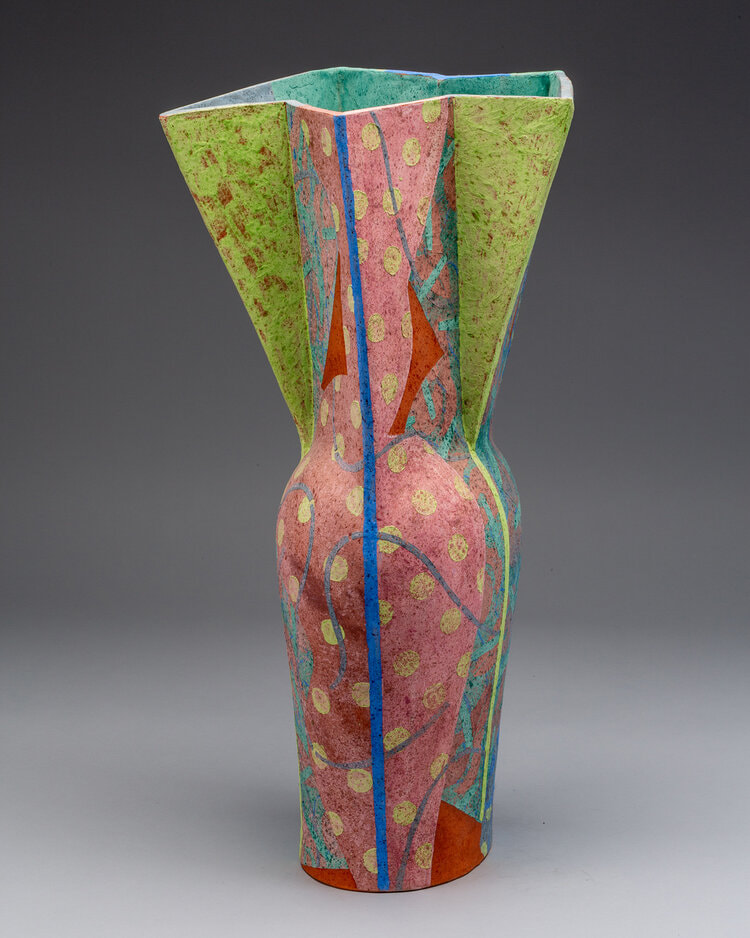
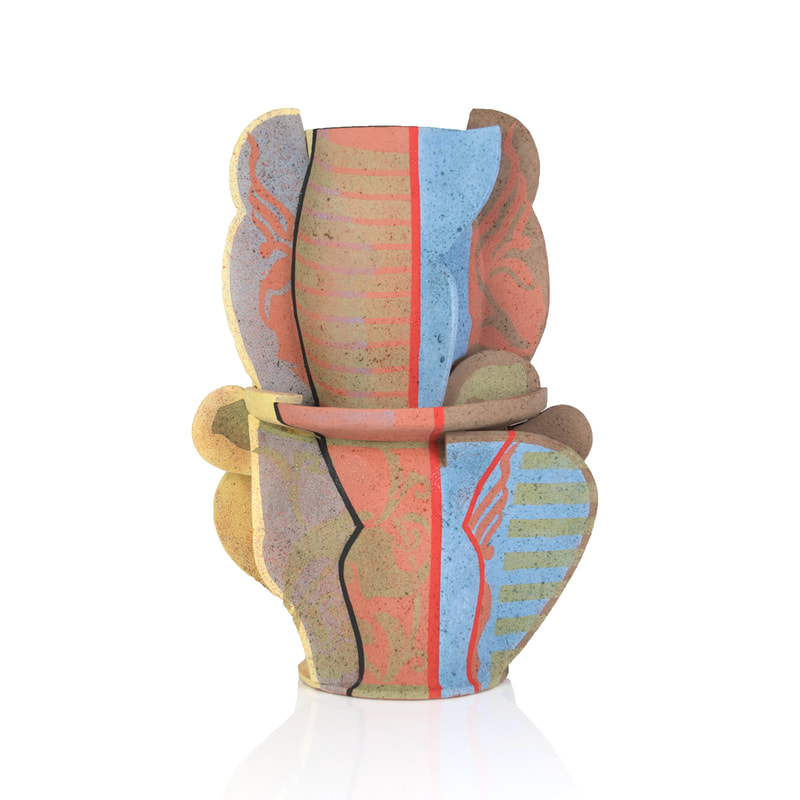
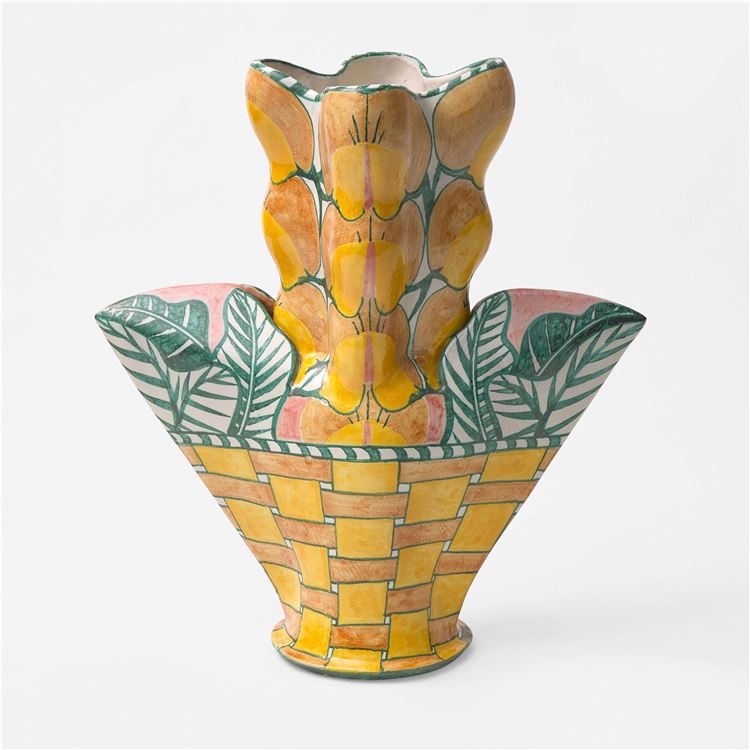
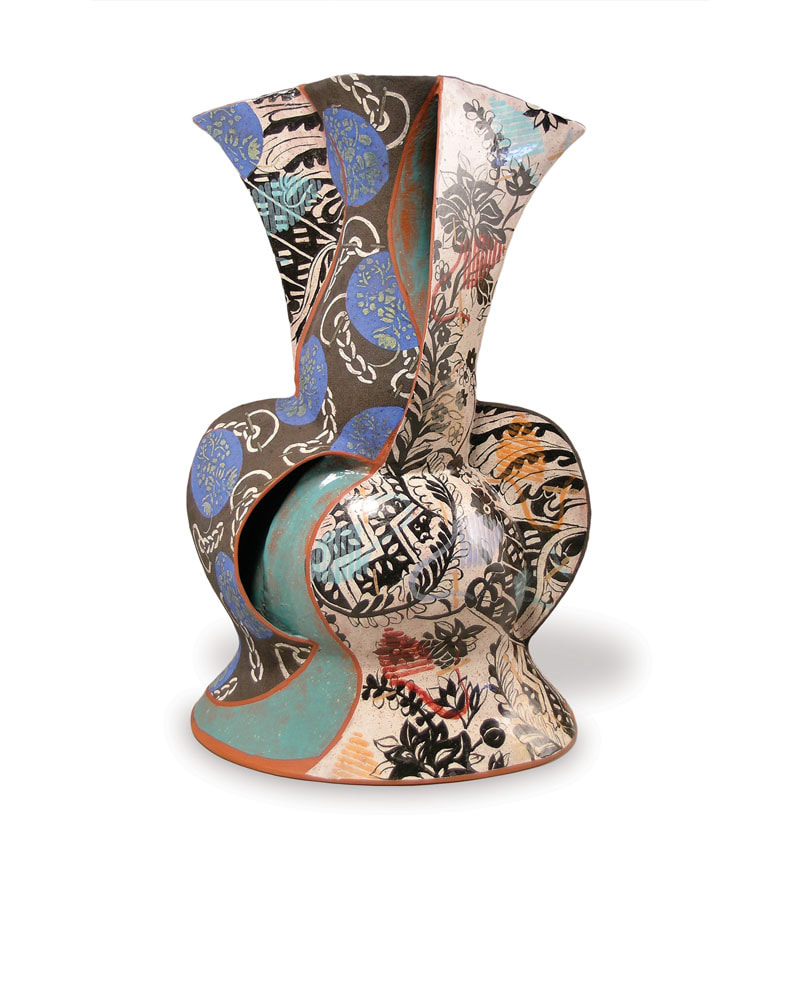
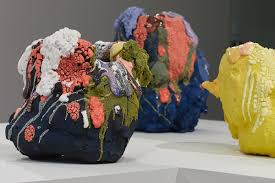
Artist references:
Tony Marsh
Vince Palacios
Elka Sada
John Gill
Andrea Gill
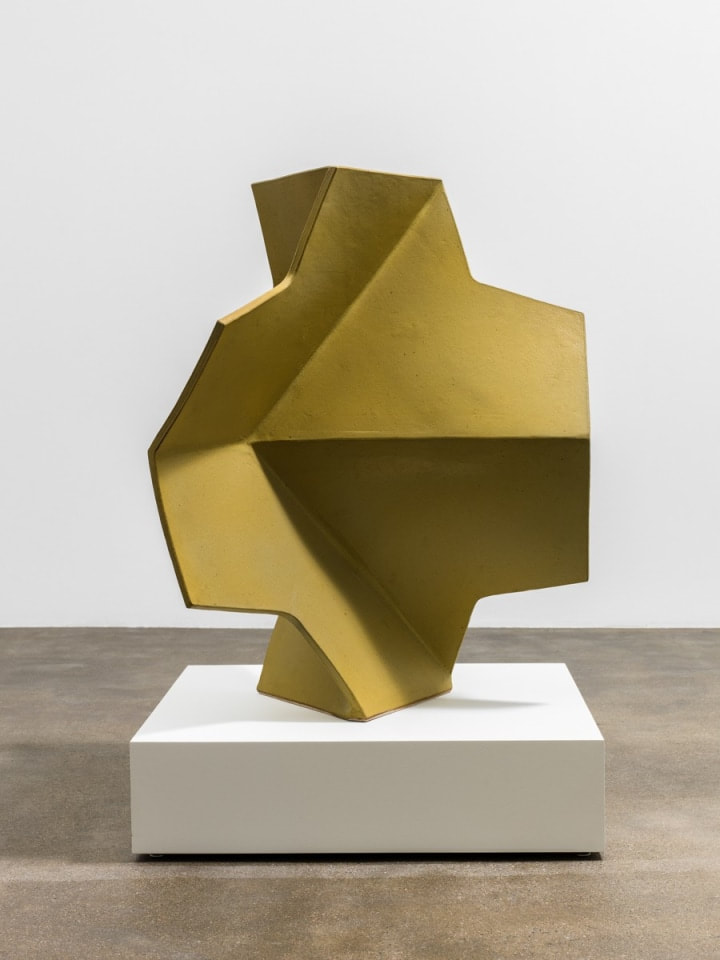
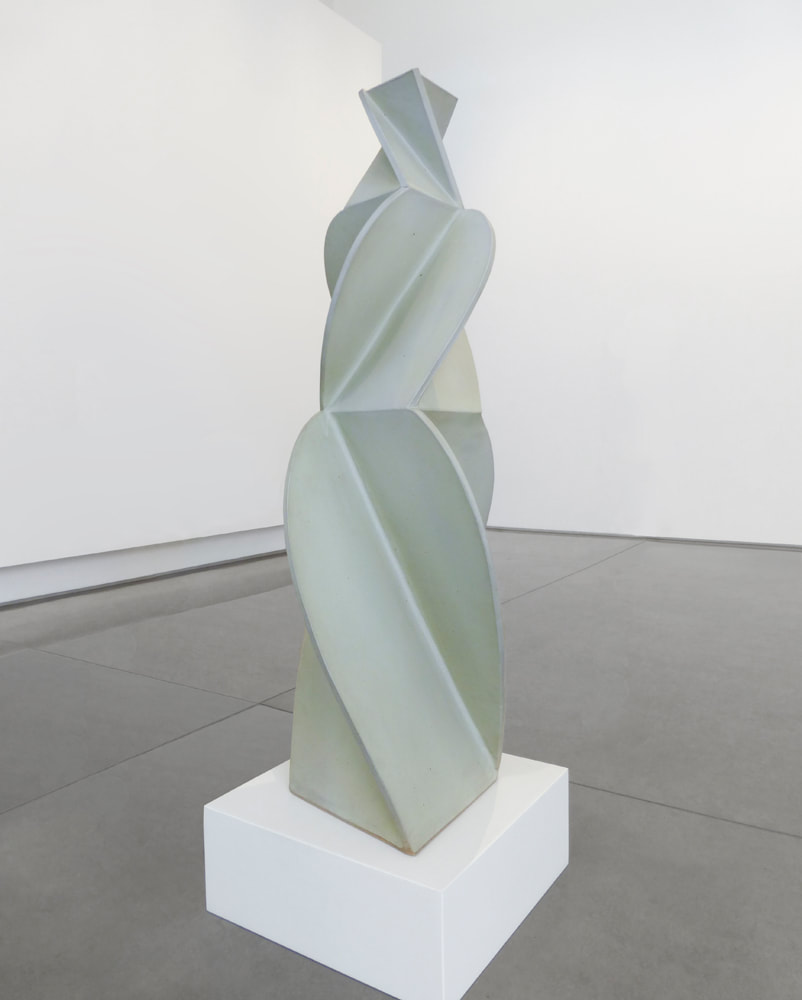
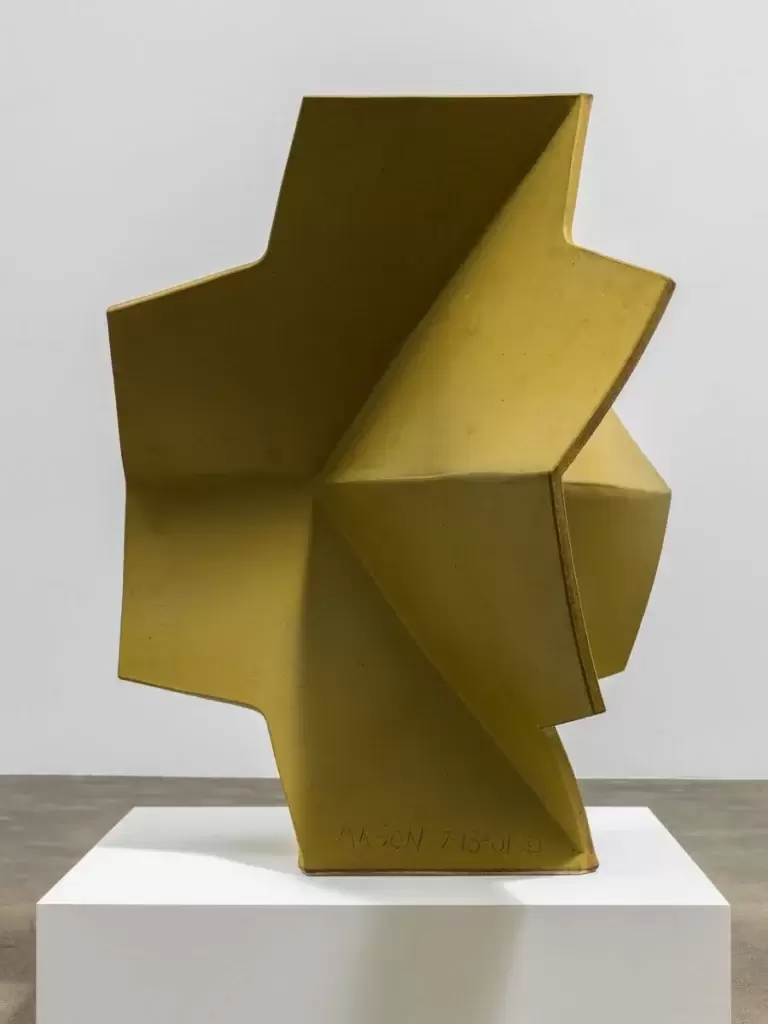
Gareth Mason
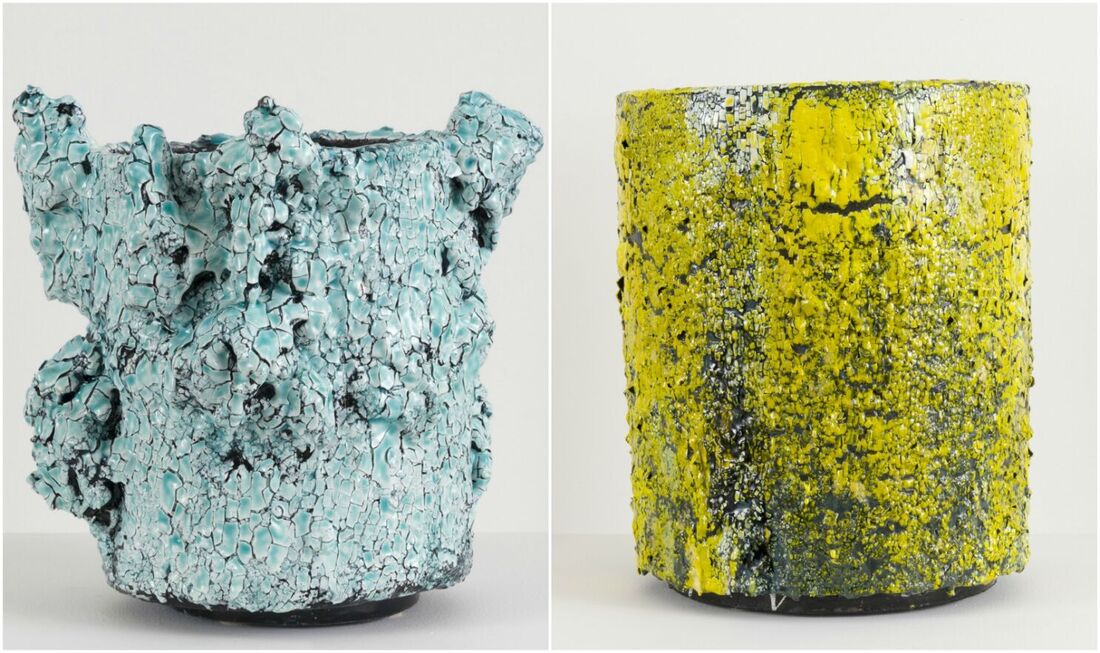
Brian Rochefort
In this assignment you will be workin with one of the basic and fundamental ways to work with clay, slabs. Slabs are a basic method of taking clay and shaping it into flat sheets of clay and then using those sheets of clay to build with. As you may know clay can be used in various stages of hardness, or wetness depending on the effects you're looking to achieve. In this project you will use slabs in varied levels of moisture (soft and hard slabs) to execute the sculptural project. It's important to keep in mind that slabs are going to be the mode of operation in this assignment. All work must be made for slabs, no coiled or pinched forms. You may refine your slabs, but all of your work must be made of slabs entirely.
In addition to the vessel form as the element of focus, we will use the vessel form as a vehicle for glaze and color play. We will be playing with excessive amounts of glaze and color. You might think of this as an oportunity to let the glaze be wild and free. We will explore the possibilities glaze lends to the ceramic sculptural process. What happens when we over apply glaze? How does molten glaze move over a surface? How do we deal with the realities of fluid materials in the firing process? Problems..... Challenges...... Discovery!
The Project:
Each student will be tasked with creating 1large scale vessel. This vessel should be an opportunity to explore composition and slab methodology. Vessels could be representational a person, place or thing, but I highly encourage you to work with a purely vessel grounded approach rather than going too far down the conceptual pathway. In this project we will discuss basic elements of design such as background, foreground, rhythm, negative and positive space. These basic elements of design will be the foundations for the sculptures produced. Students are encouraged to explore possibilities, take risks in composition and seek out inspirations. Art is not created in a vacuum but rather a response to something. Seek out elements in the world you can respond to. Look at the artists references and understand this is an opportunity to both learn slab construction and to play.
Upon completion of the project students will be engaging the glazing process. Vessels will be glazed with multiple glaze basses and the focus of the glazing will center on the characteristics of glaze ( how it moves, how it melts, how it is colored and how it can be modified to achieve various outcomes.Glaze will be a major element of this project and students are encouraged; instructed, to thing of how the glaze will play out in the firing process.
Project Value:
100 Points (major project)
Timeline:
2 Weeks for wet construction.
1 Week for glaze.
Requirements:
1 ceramic vessel
1 Vessel pedestal designed to catch glaze spill.
Vessels should be between24-36" in height
Slabs are to be the only means of production
Students should incorporate into vessel composition elements of both hard and soft slabs
Students must design sculptures that are in a vertical format (tall rather than wide) do not exceed 12" in width!!!!
Each vessel must be glazed ( glaze will comprise 50 percent of this project )
Areas of Focus:
Students should focus on the discussed methodology of construction (slabs, both hard and soft).
Students should focus on compositional design considering how glaze will interact with the vessels structure.
Students should pay attention to the way clay behaves when wet and soft as well as how it behaves when dry and stiff.
Goals:
Gain a beginning level understanding of how to produce slabs using studio equipment as well as by hand.
Learn to manage ceramic slabs in various states of moisture (hard and soft slab construction).
Learn how to manage the drying and storage of ceramic works while in production.
Gain a foundational understanding of glaze and glaze application.
Gain a beginning level understanding of how glaze interacts with surface and how glazes can be used to create dynamic surfaces though contract, shift and movements of melt.
Resources:
I strongly suggest you look for inspiration and see whats our there that you can respond to, take over, repurpose, borrow from, and plain old fashioned simply take and make your own. Research and searching for inspiration is essential in developing your abilities to both think of ideas and create them in reality. Do yourself a huge favor and see whats our these for you to respond to.
Artist references:
Tony Marsh
Vince Palacios
Elka Sada
John Gill
Andrea Gill
Gareth Mason
Brian Rochefort


Float.......