#17
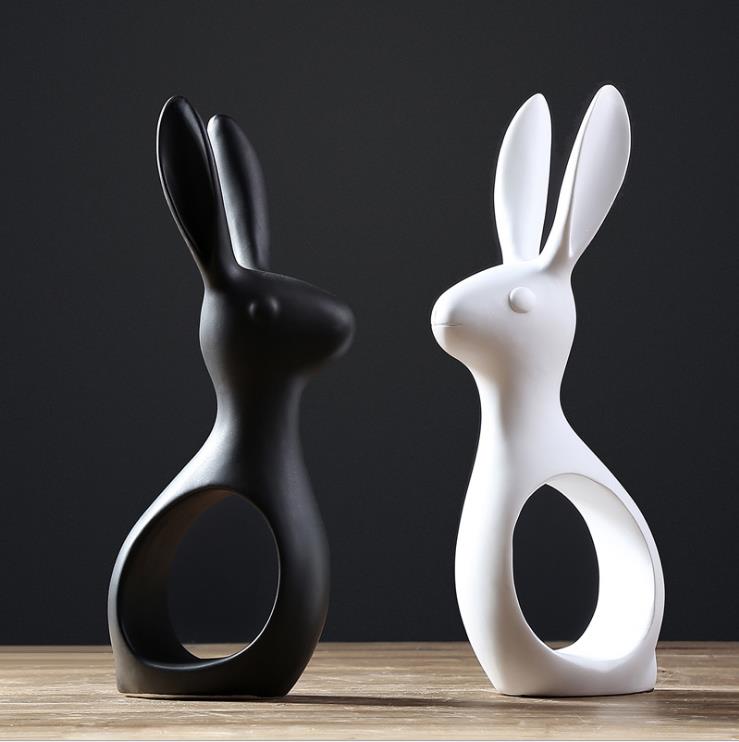
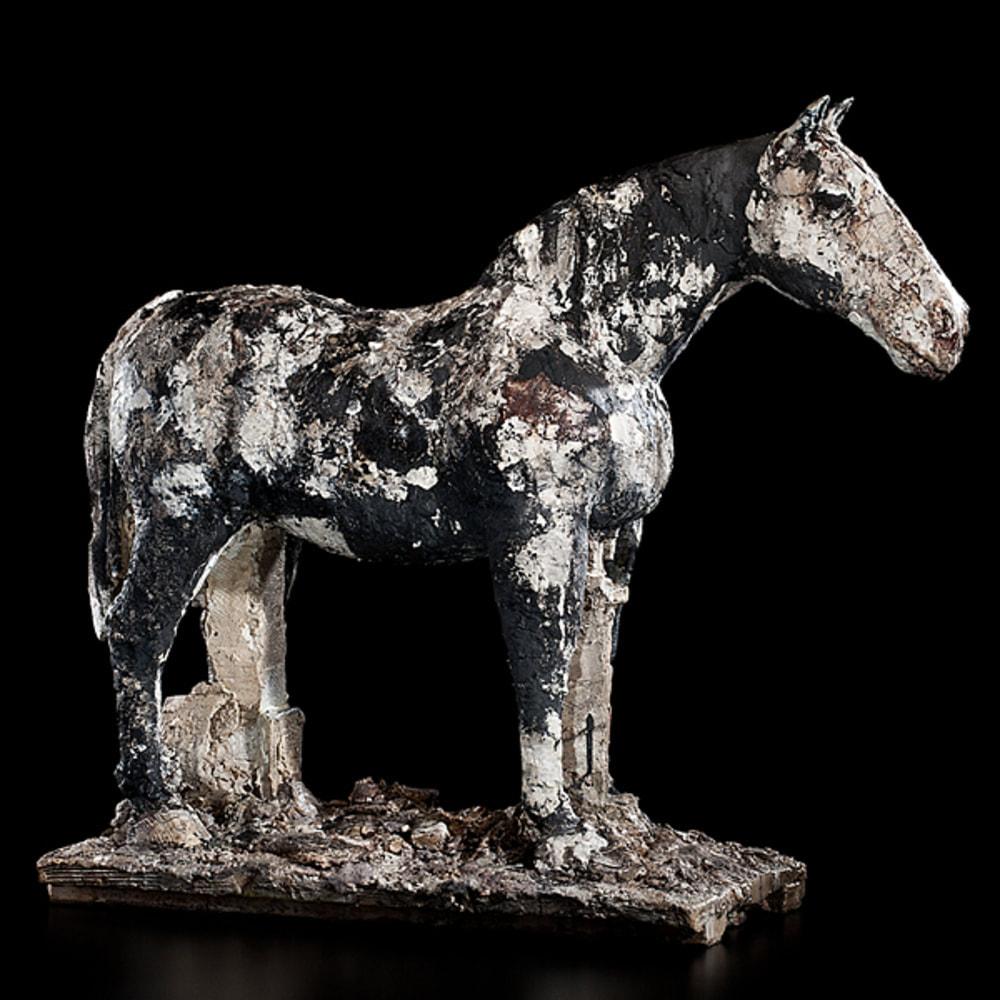
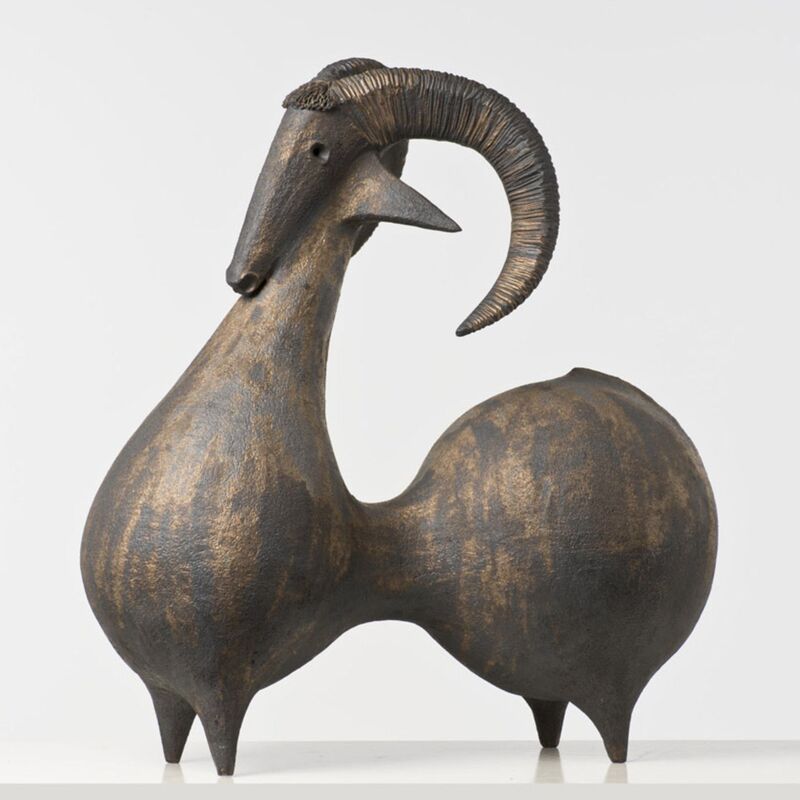
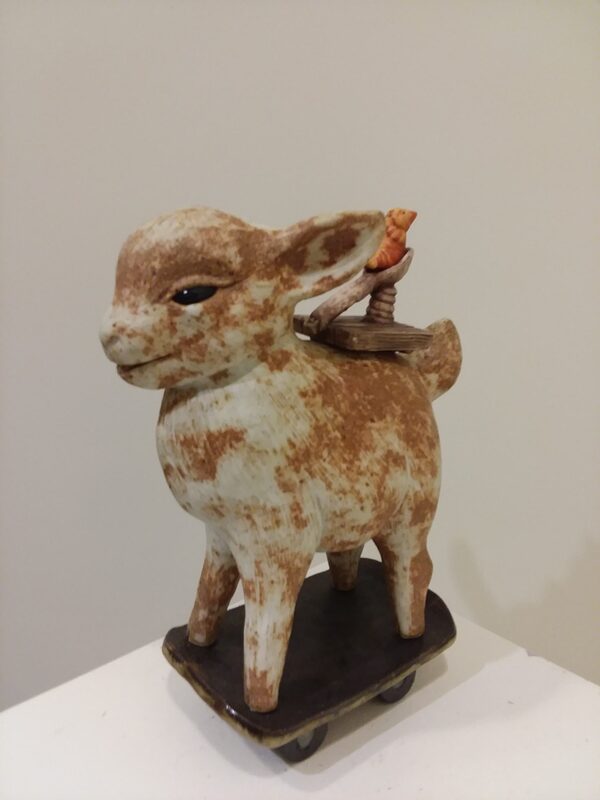
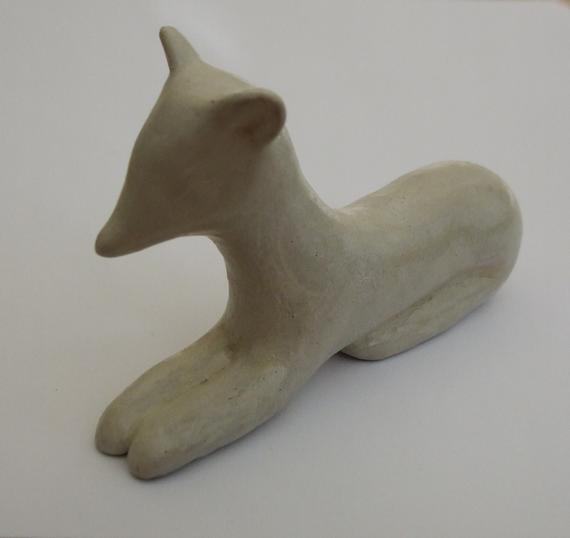
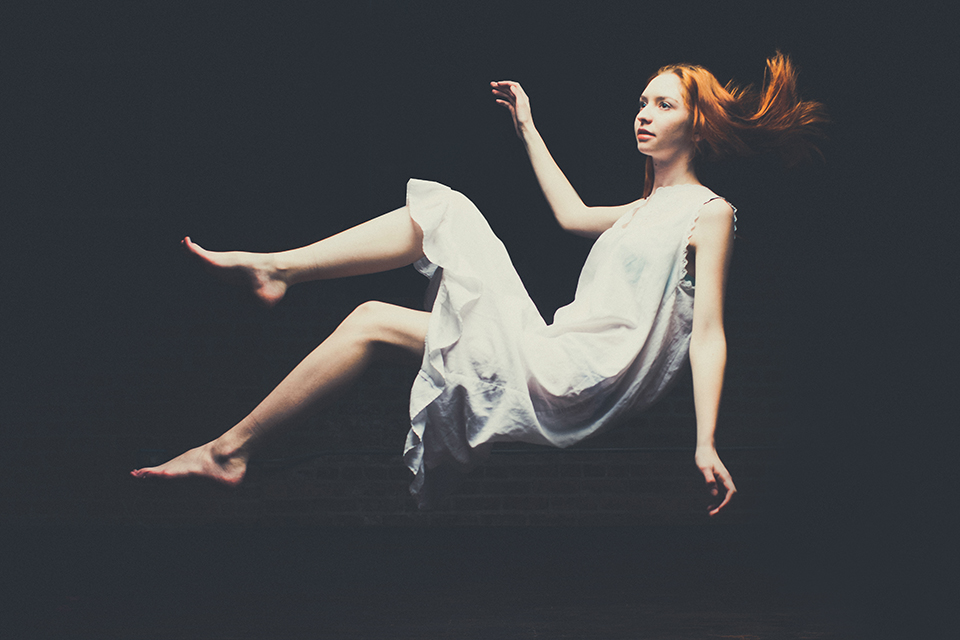
If for some reason I had a Spirit Animal.

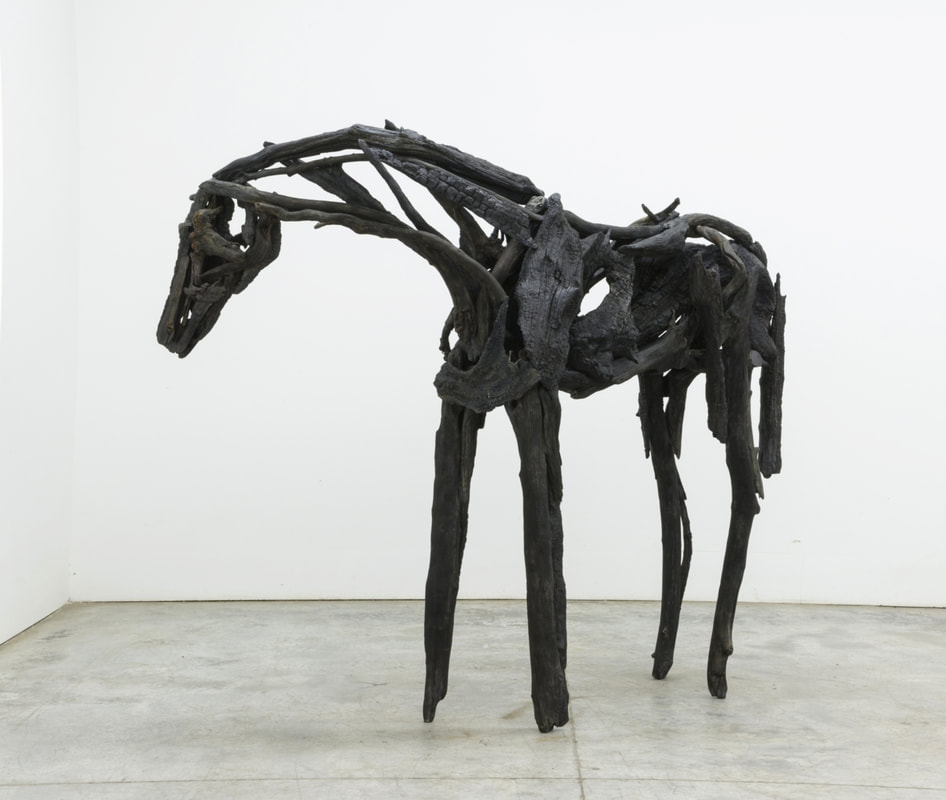
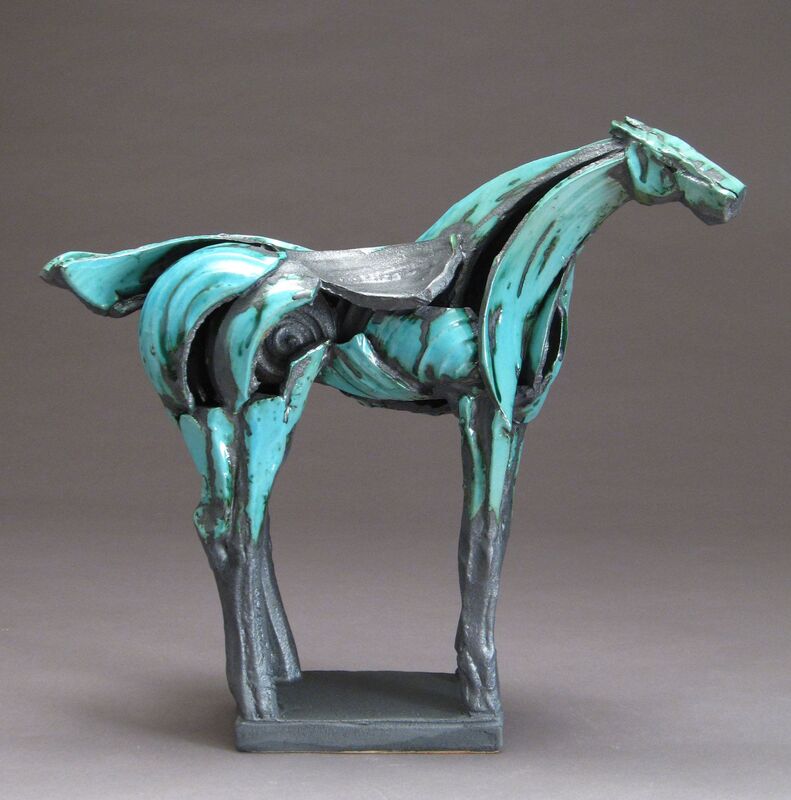
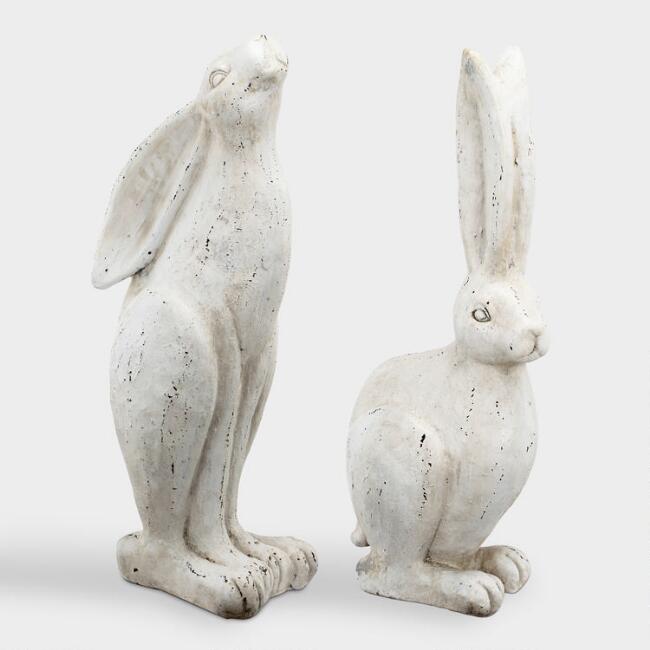
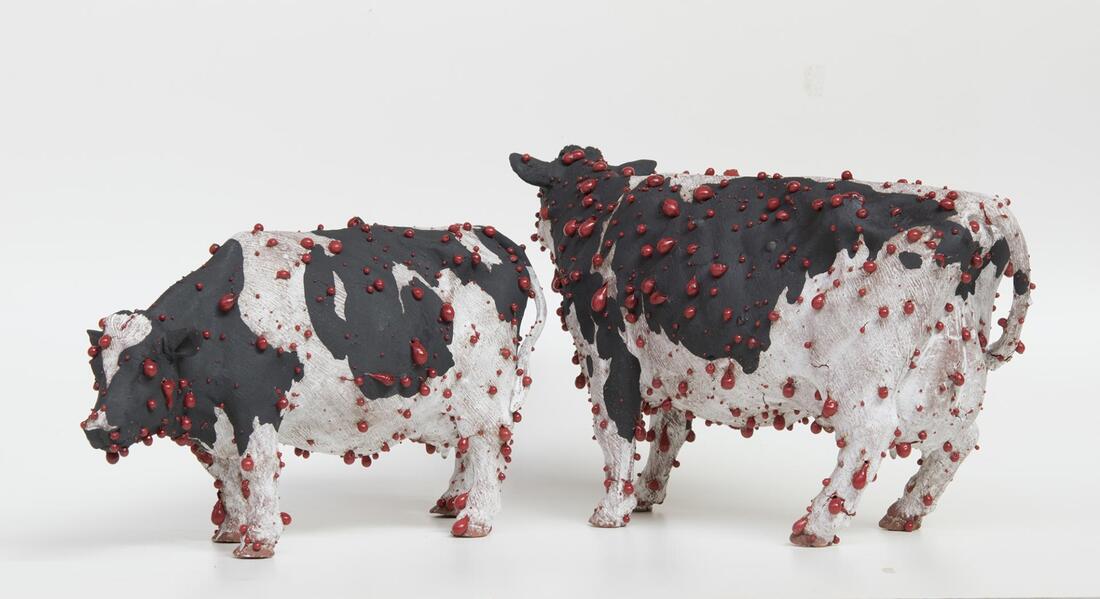
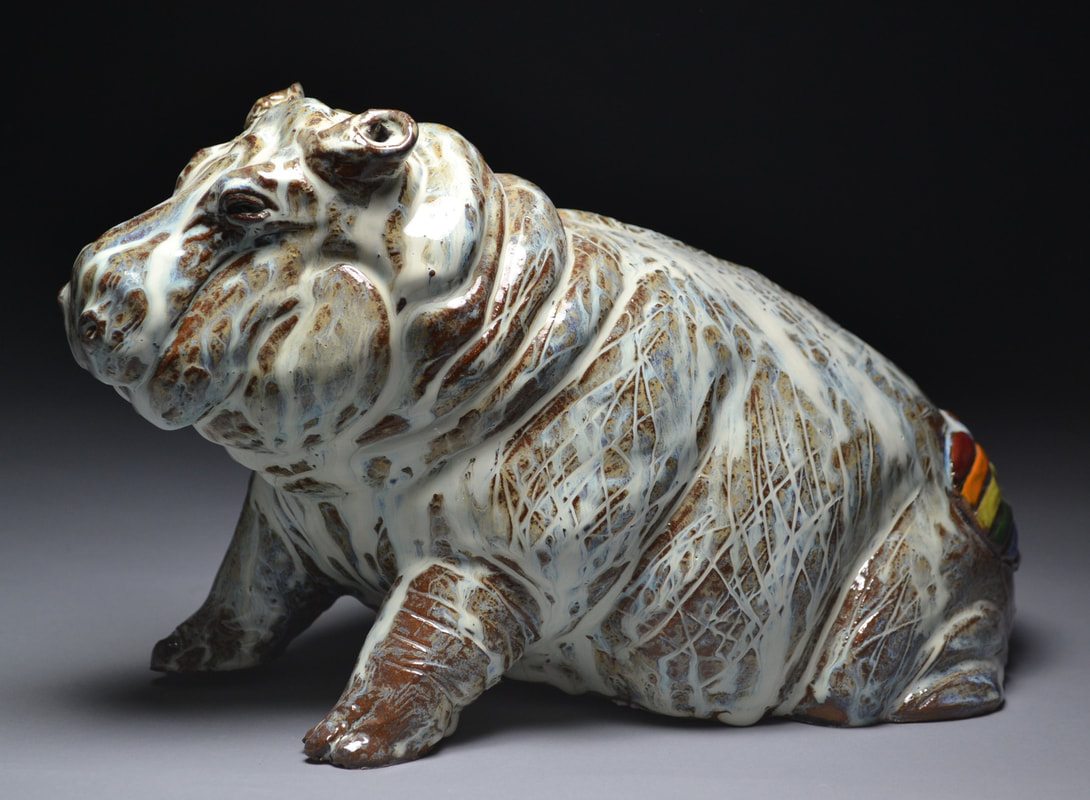
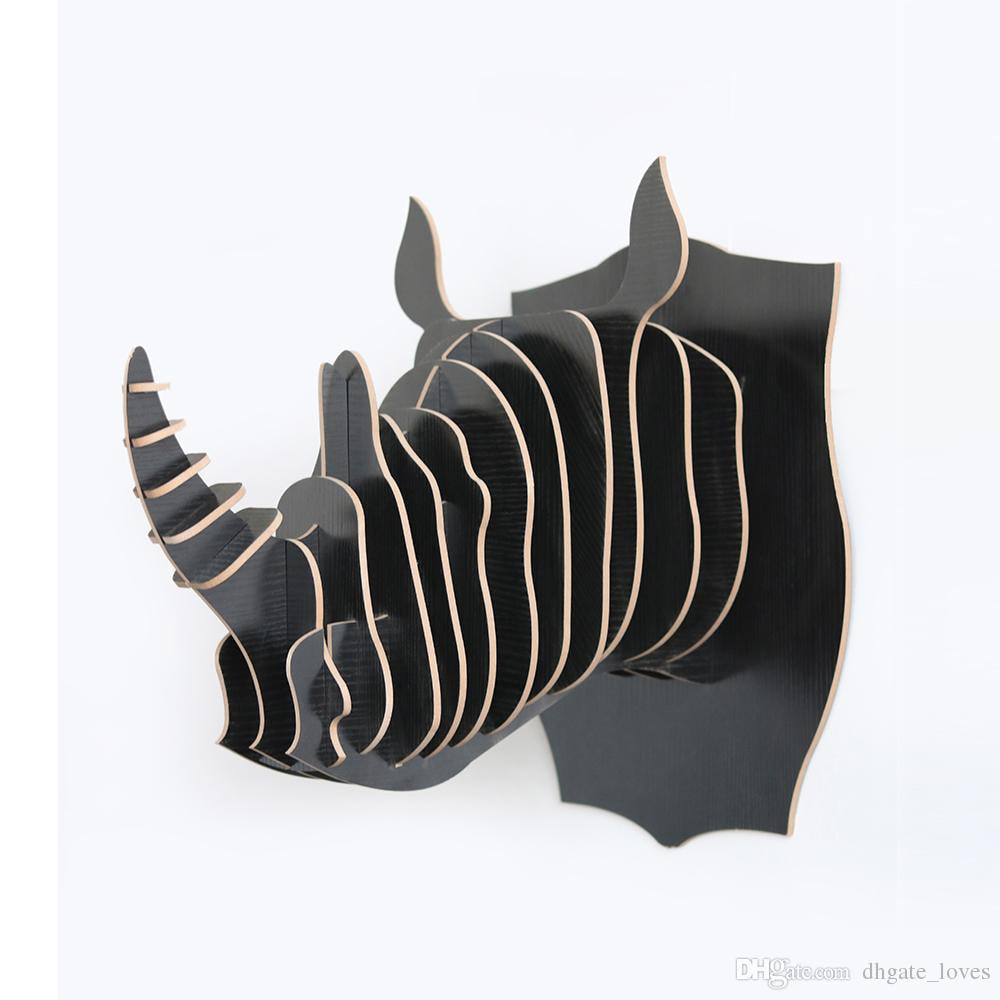
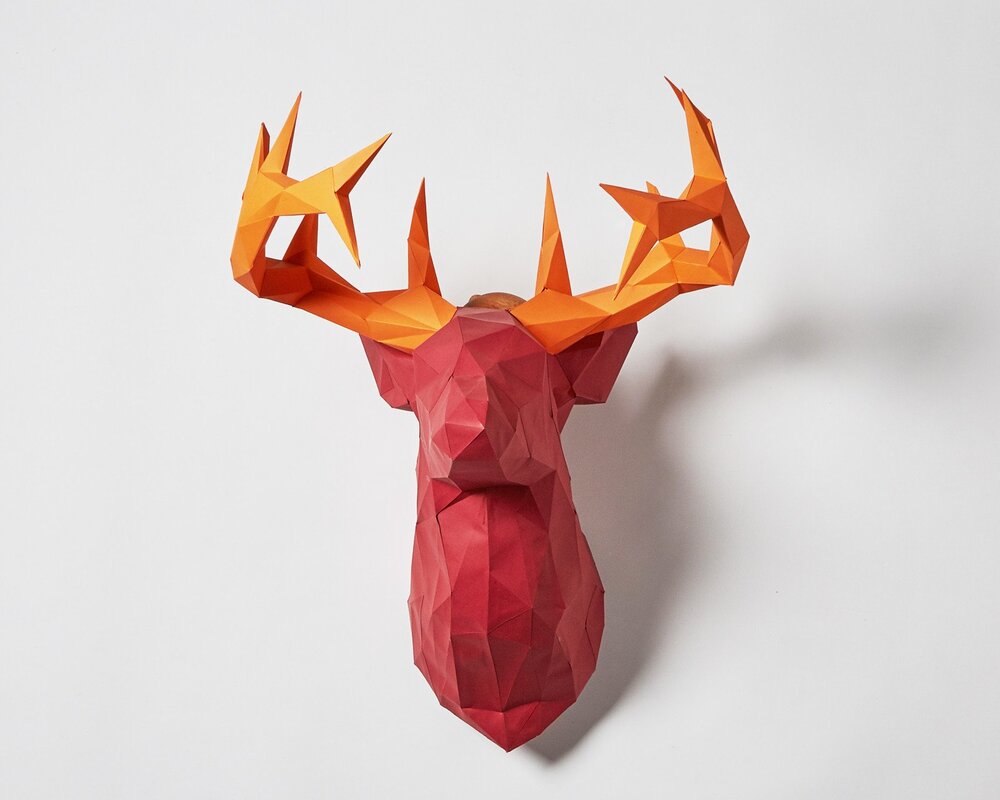
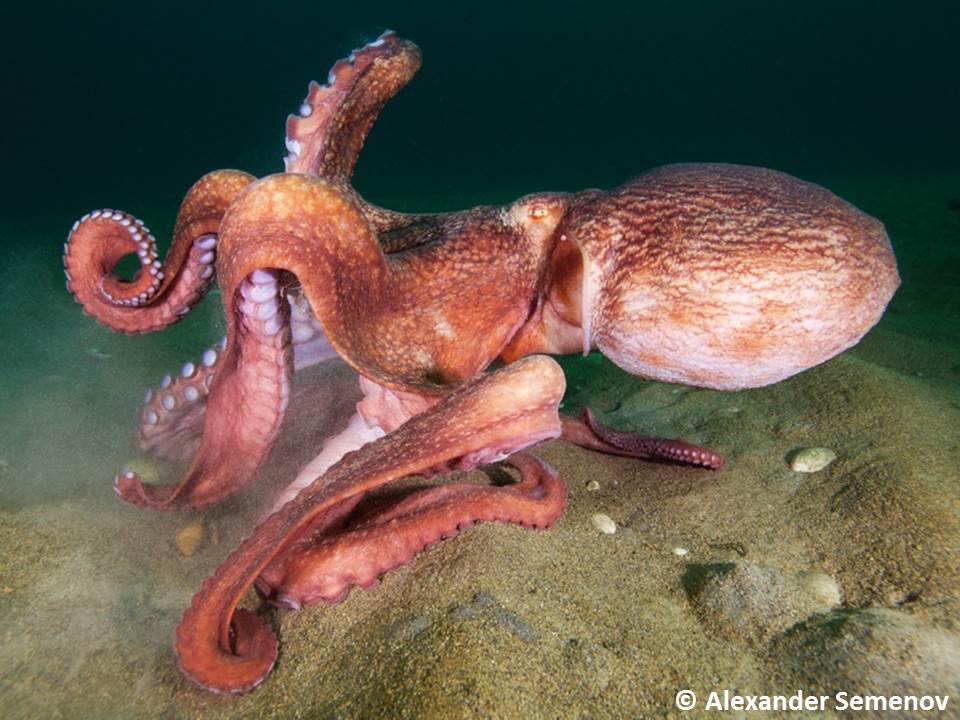
For this project students will be investigating the sculptural forms of the animal world. Through the basic building techniques of coil, slab and pinch, students will construct sculptures of an animal. Why an animal you might ask, well firstly it has a reference point you can study and work from, secondly....everyone loves animals right? From a subject of art perspective, animals are timeless and have many textures, shapes and forms to work from.
The Project:
Students will be asked to consider their animal and find a way to bring it into a sculptural form. These sculptures should be dynamic. They are not limited to complete physical sculptures but can be busts, parts, sections or what ever else you can think of. I must add that they must be respectful of the animal.After all they are you spirit animal. ; )
Requirements:
Each student will be asked to create 1 sculpture of their animal.
The animal must be your SPIRIT Animal.
Sculpture must be made of Clay and utilize glaze.
Sculptures must be no larger that 18" in height and no smaller that 12" in height.
Goals:
Learn firsthand how to use the fundamentals hand-building methods to create sculptural forms. (3 Dimensional)
Gain experience in the timing needed to maintain moisture and control drying of clay sculptures in construction progress.
Learn how to develop and execute complex forms in clay.
Learn how to develop concepts and forms that are generated from a single subject source.
Learn how to apply glaze to create finished surfaces on sculptural forms.
Gain experience in working through the medium of ceramic and understand its limitations and strengths. (color / engineering)
Experience the challenges of creating a interest in randomly assigned tasks and subjects.
Time Line:
Students will have 3 Weeks to complete the wet work phase of this project before we load a bisque firing.
Source:
Spirit Animal Finder
https://whatismyspiritanimal.com/spirit-animal-quiz/


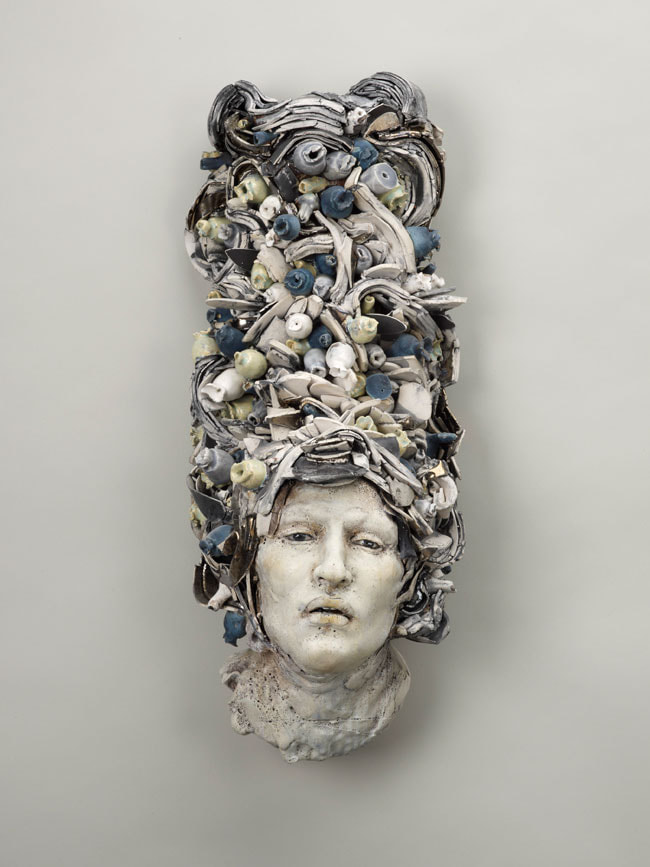
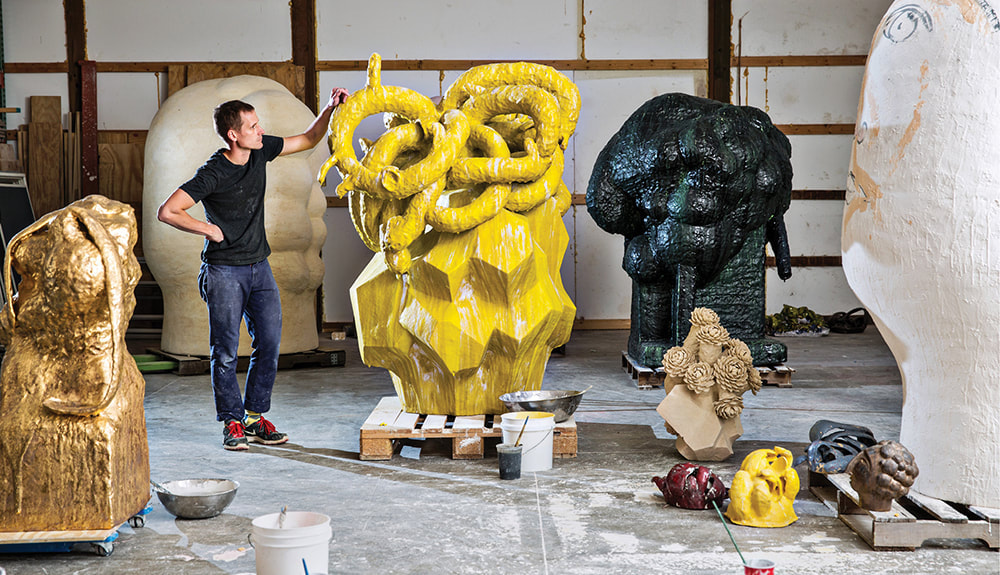
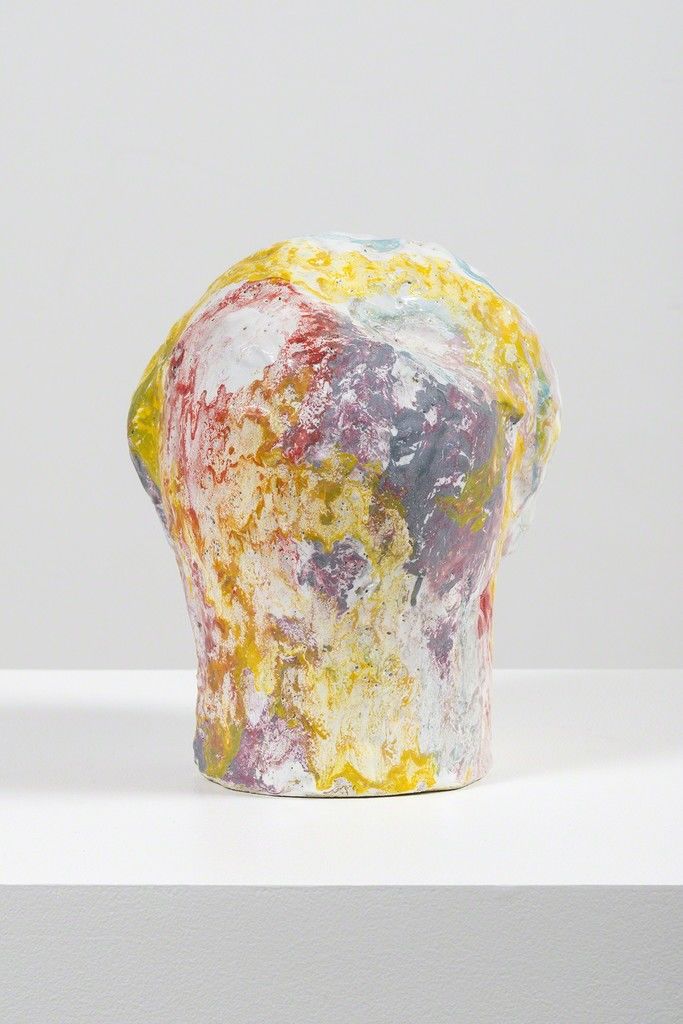
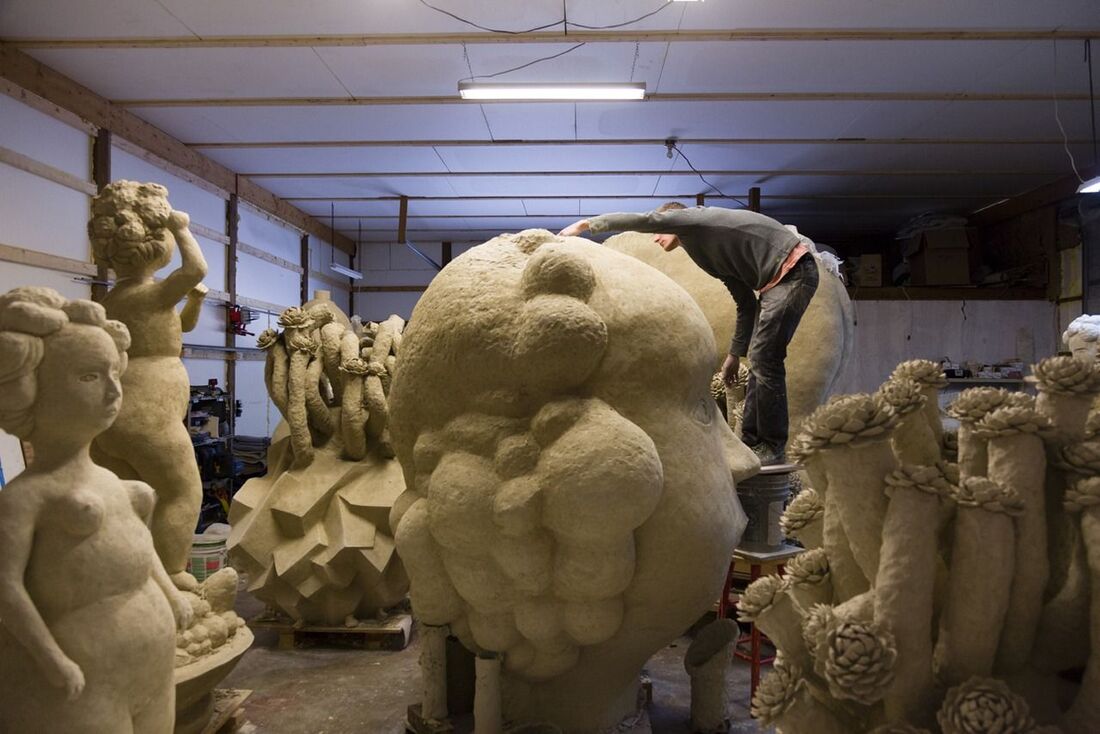
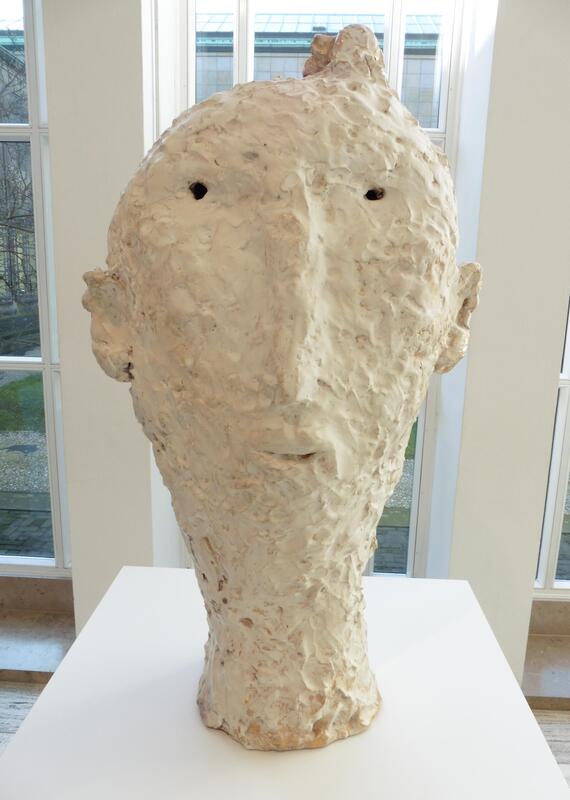
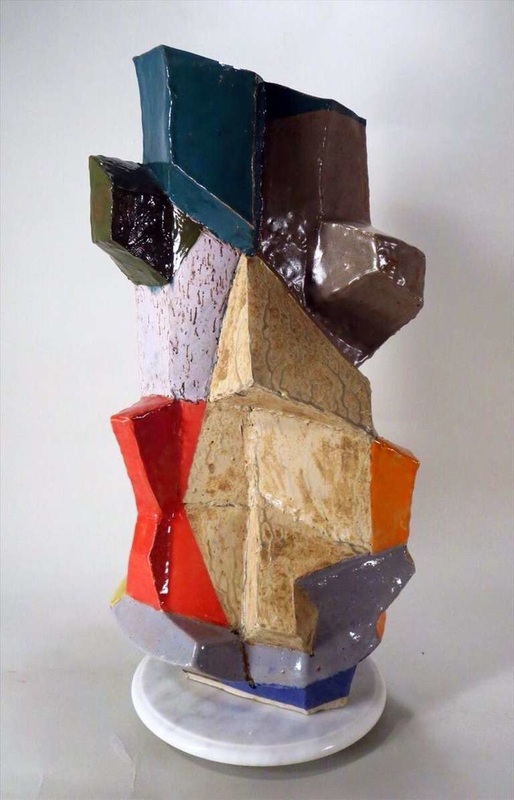
#16
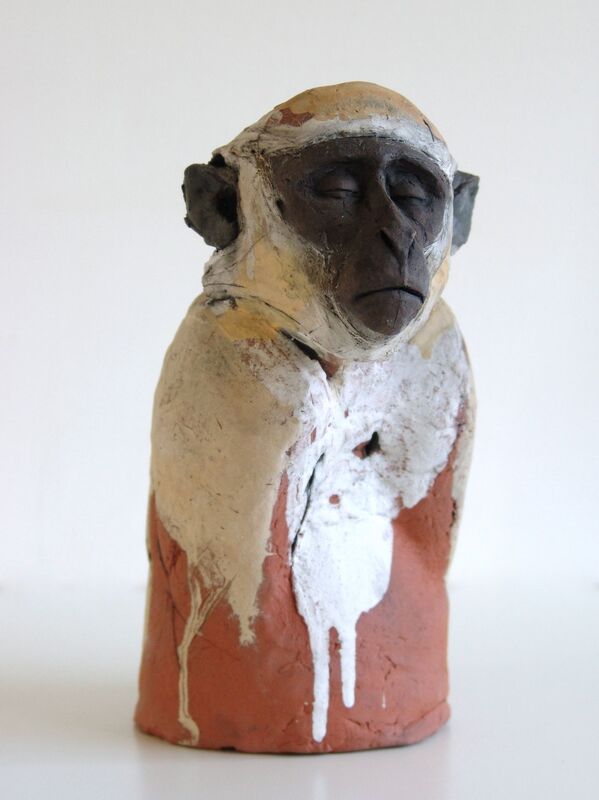
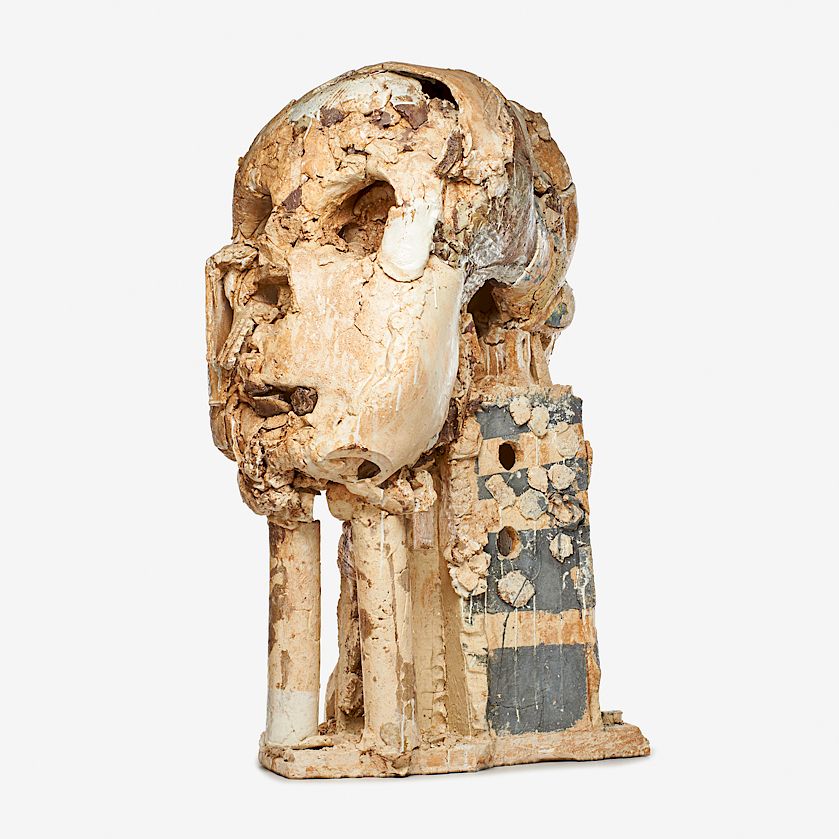
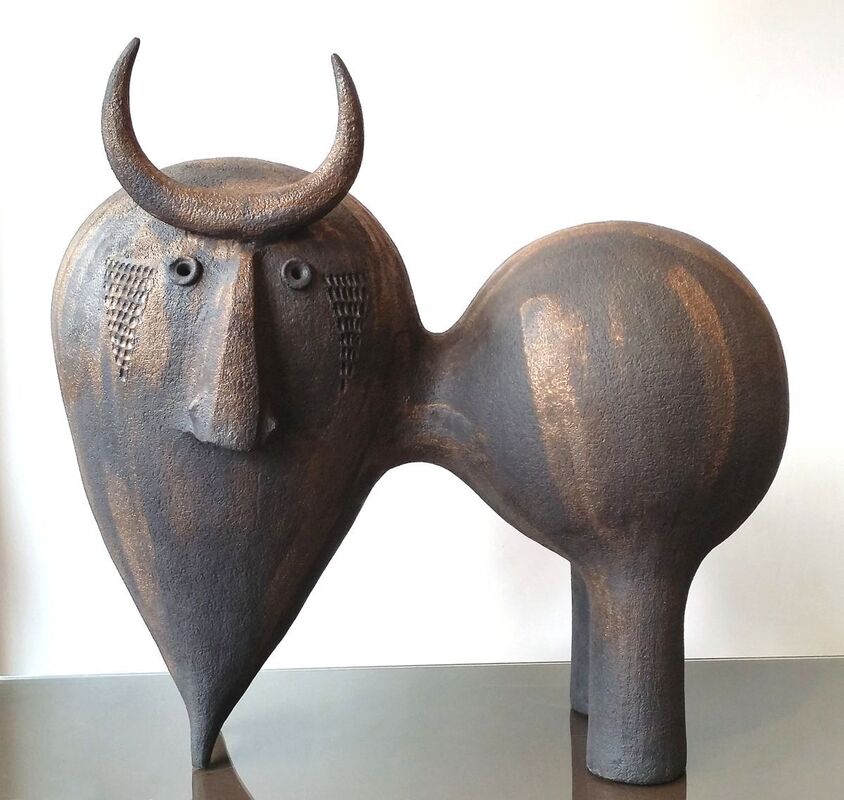
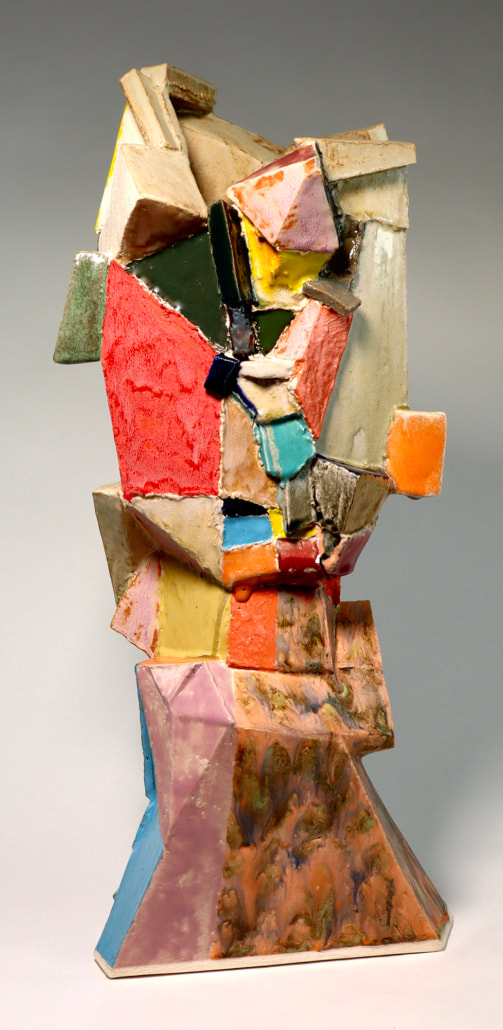
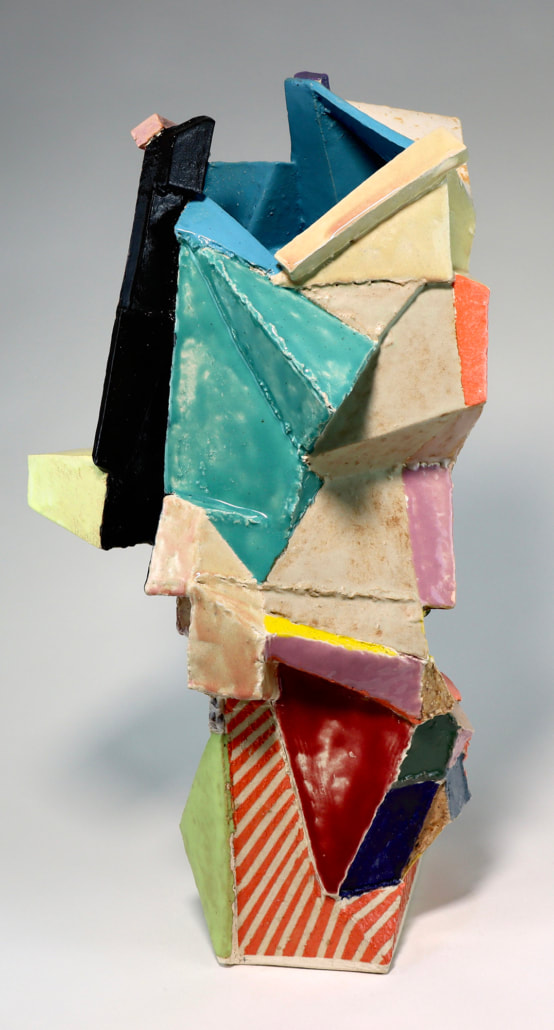
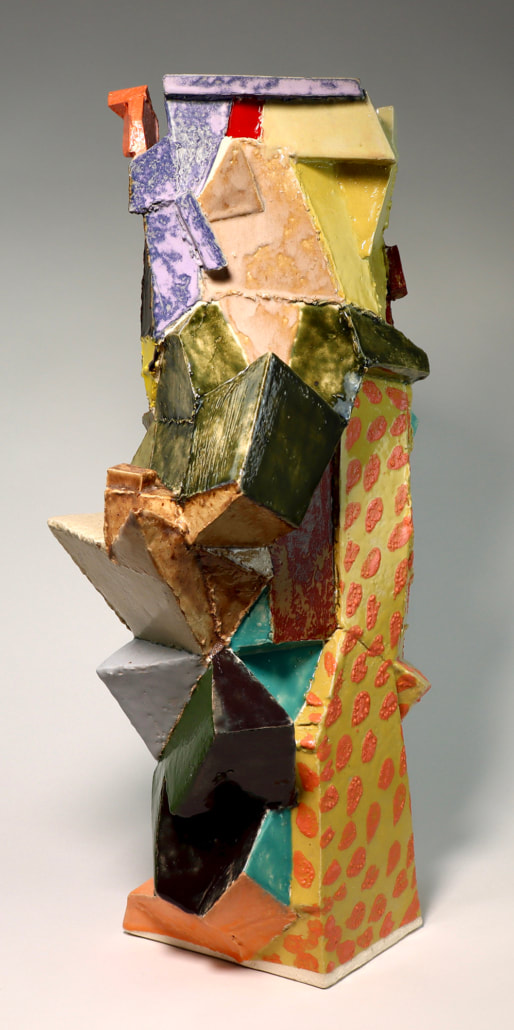
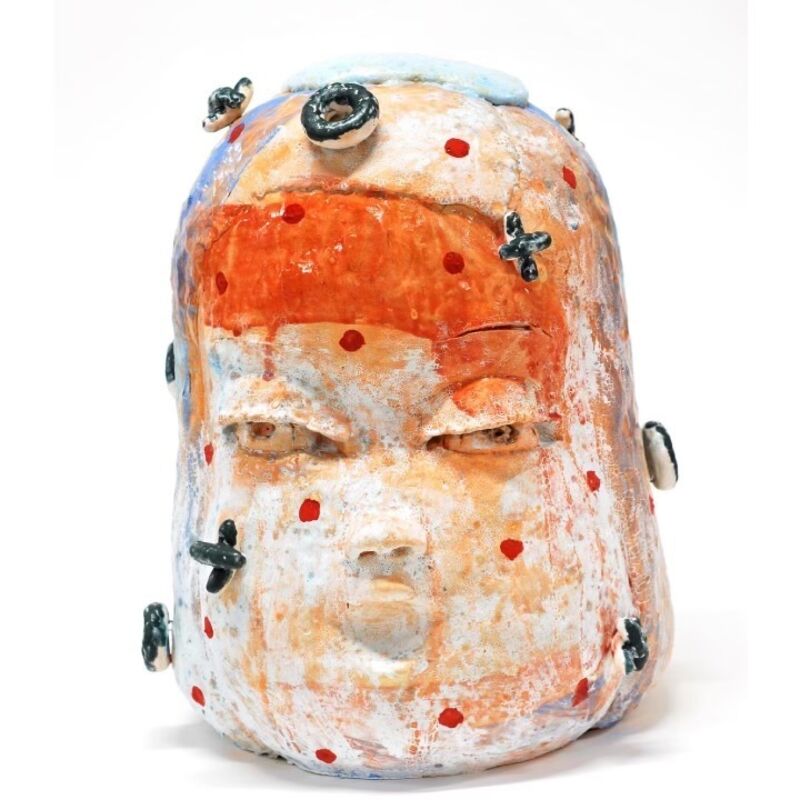
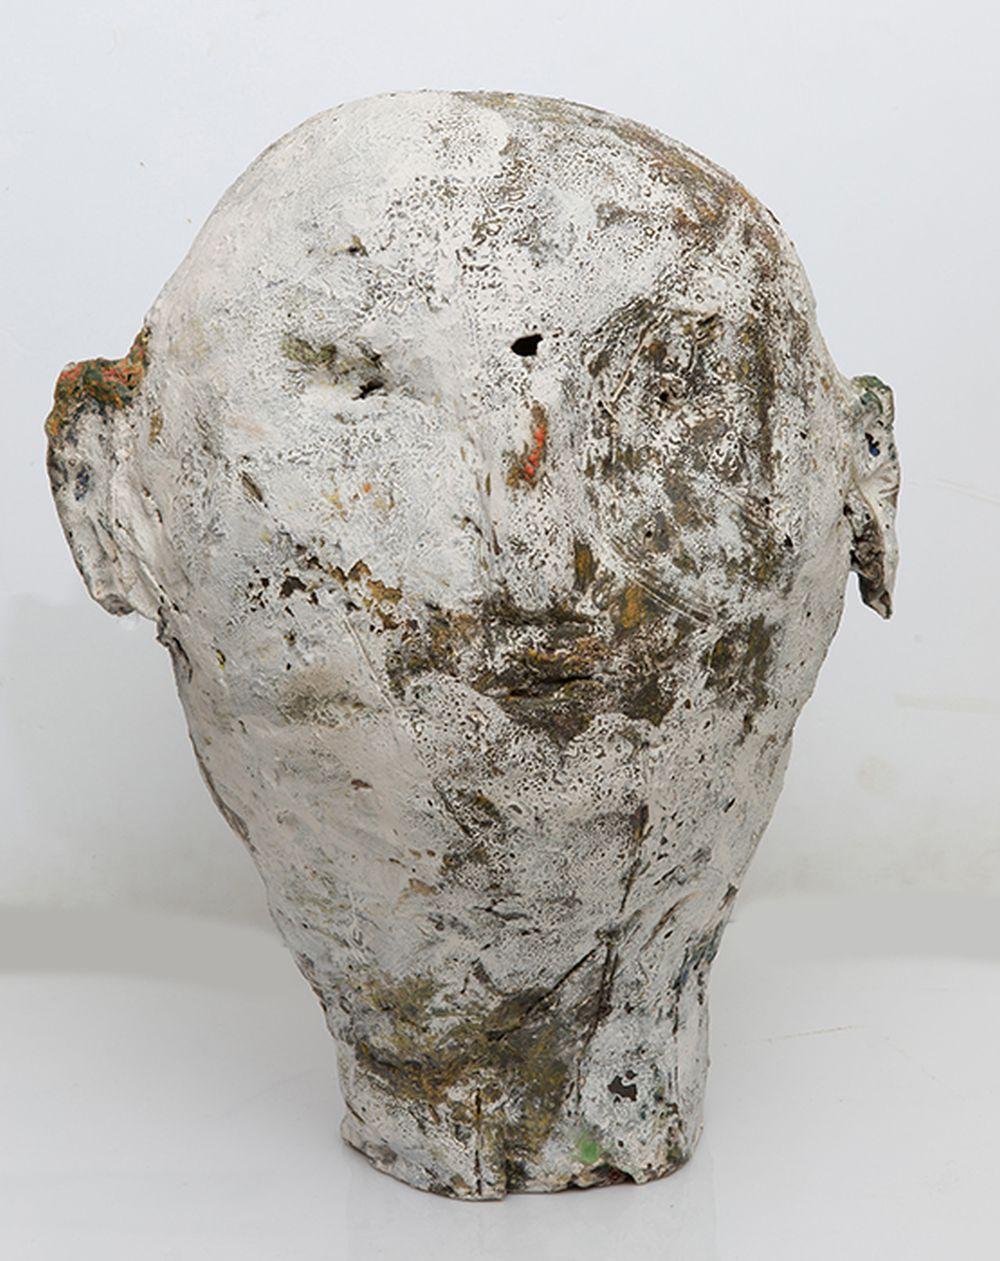
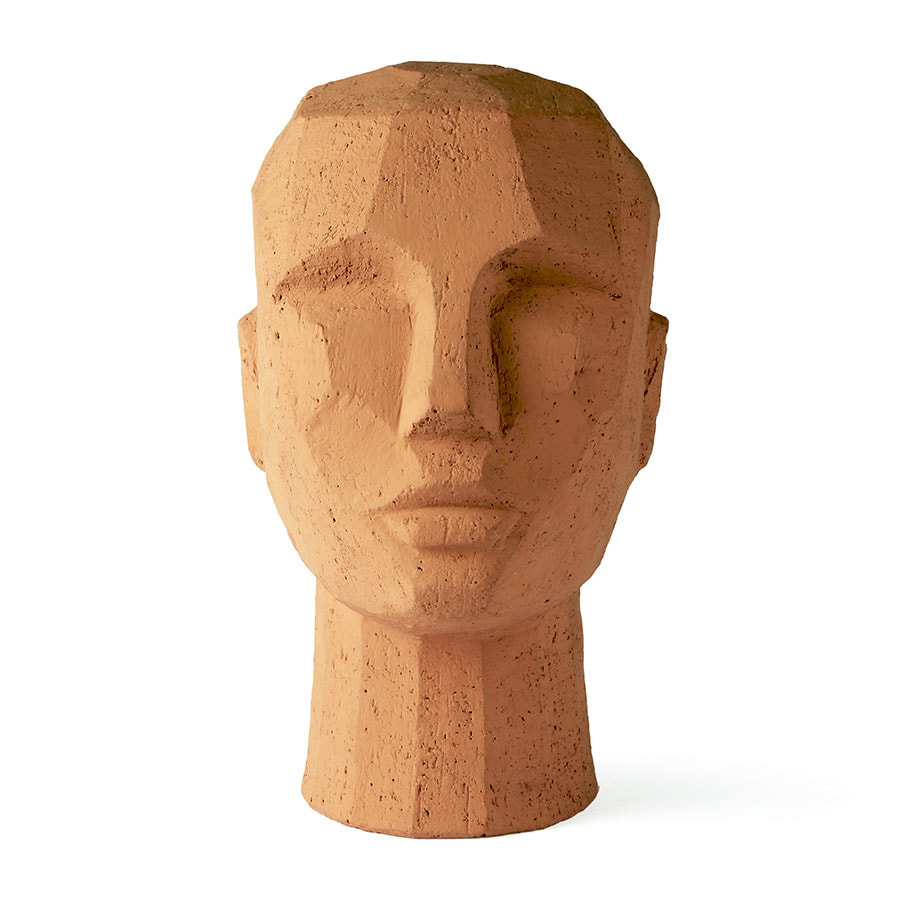
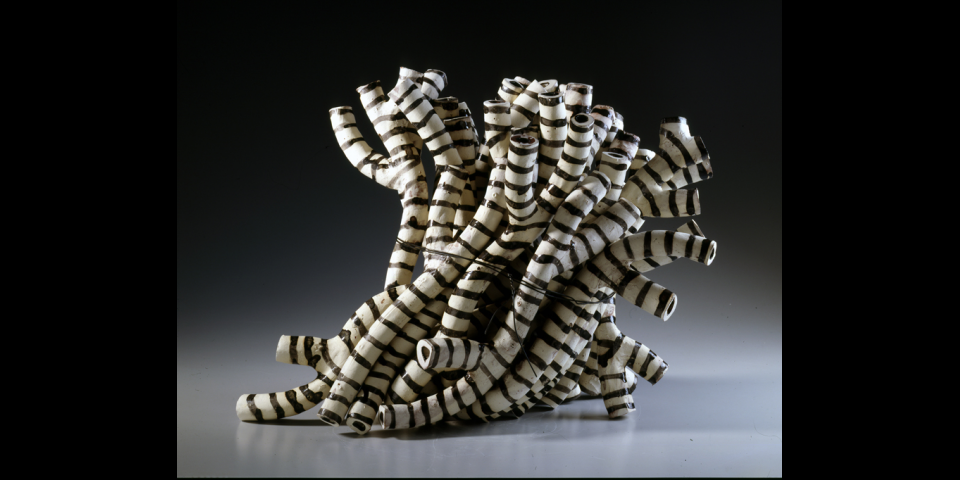
Coil / Cabesa
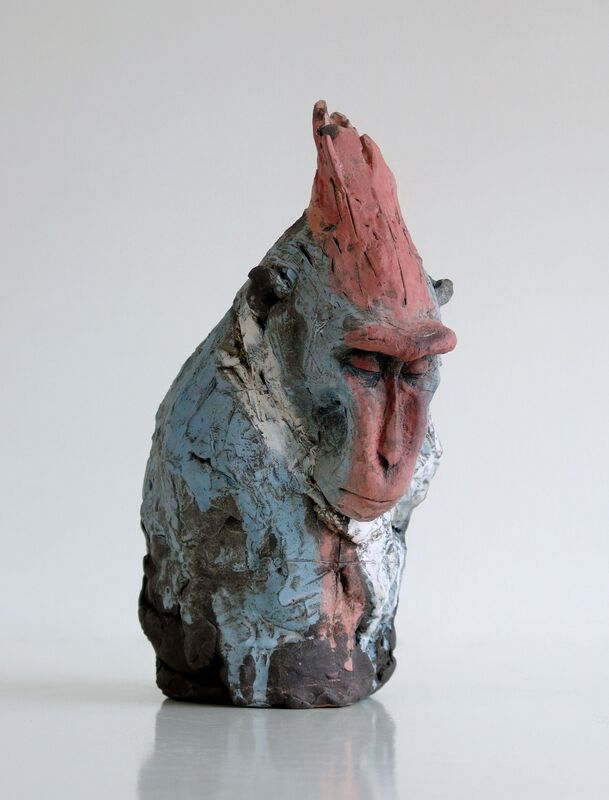
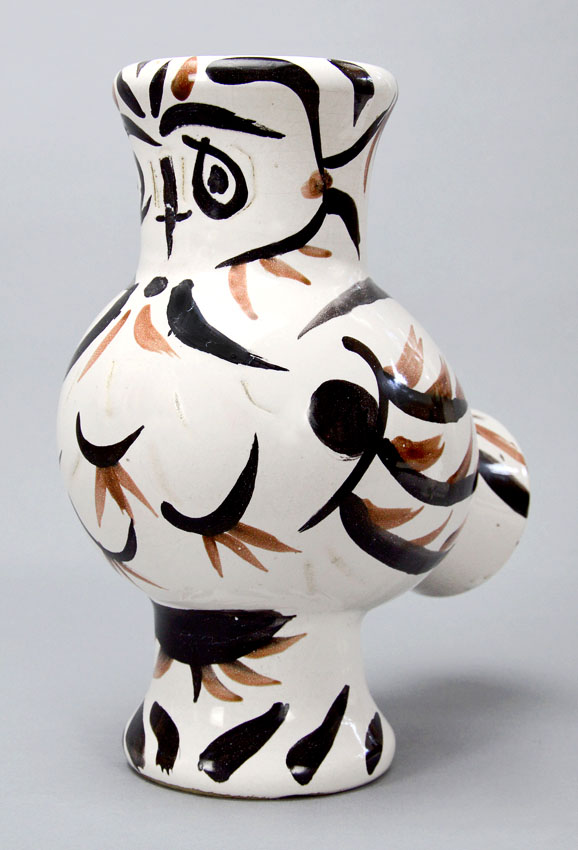
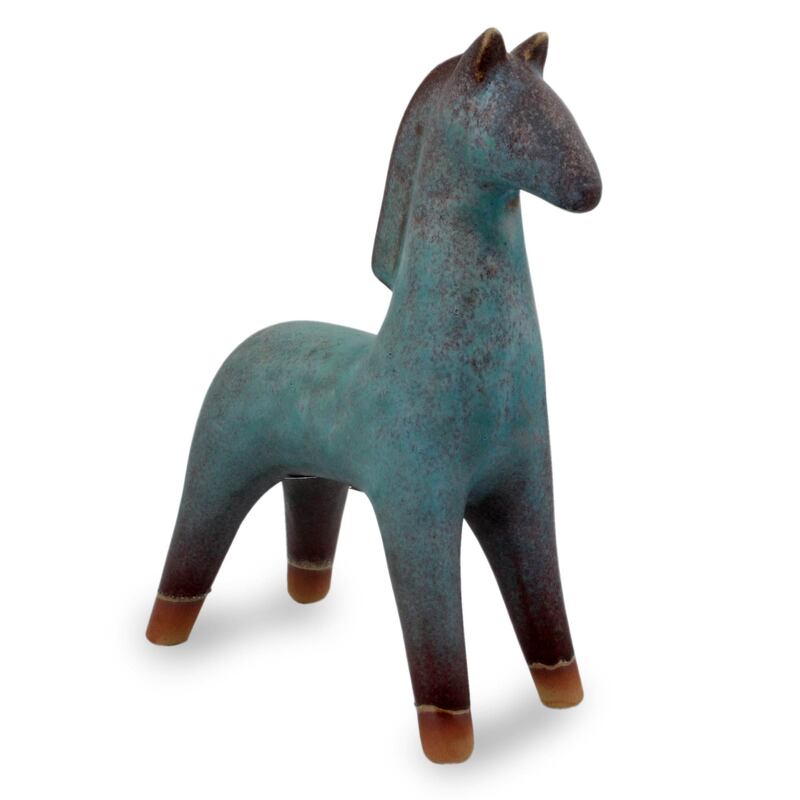
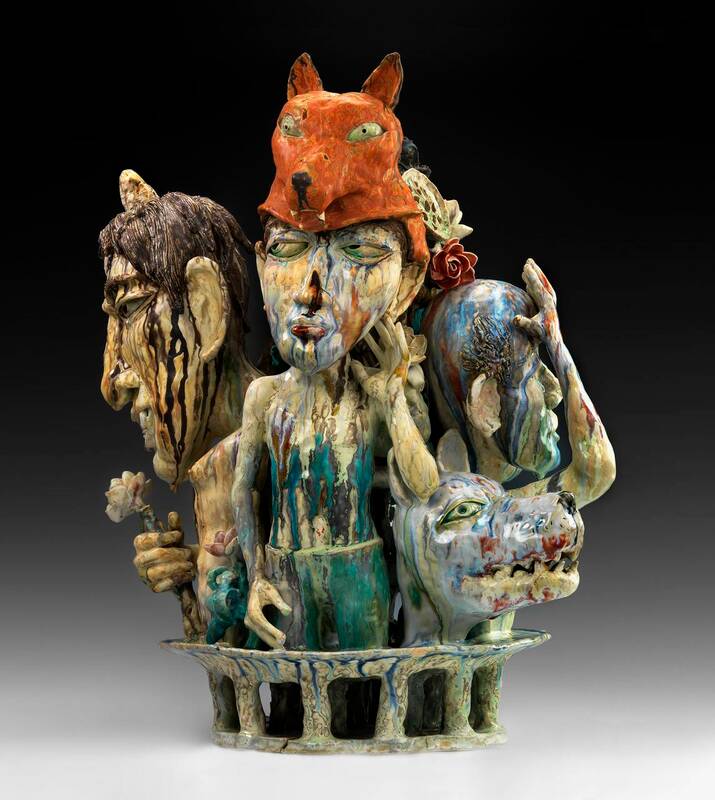
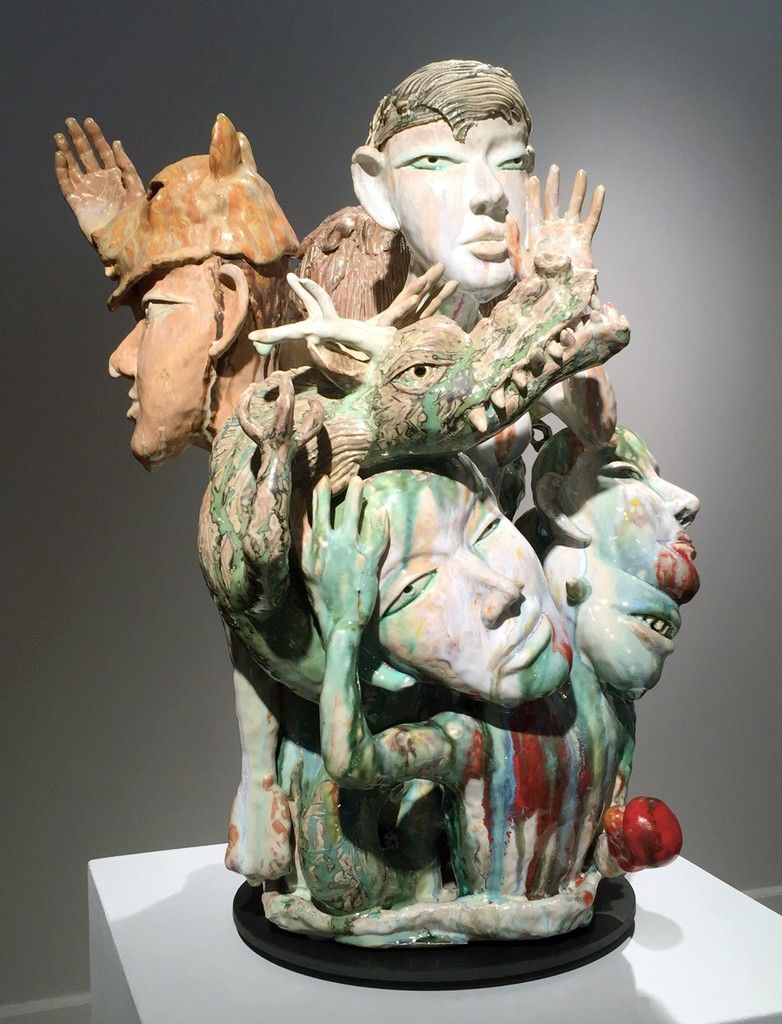
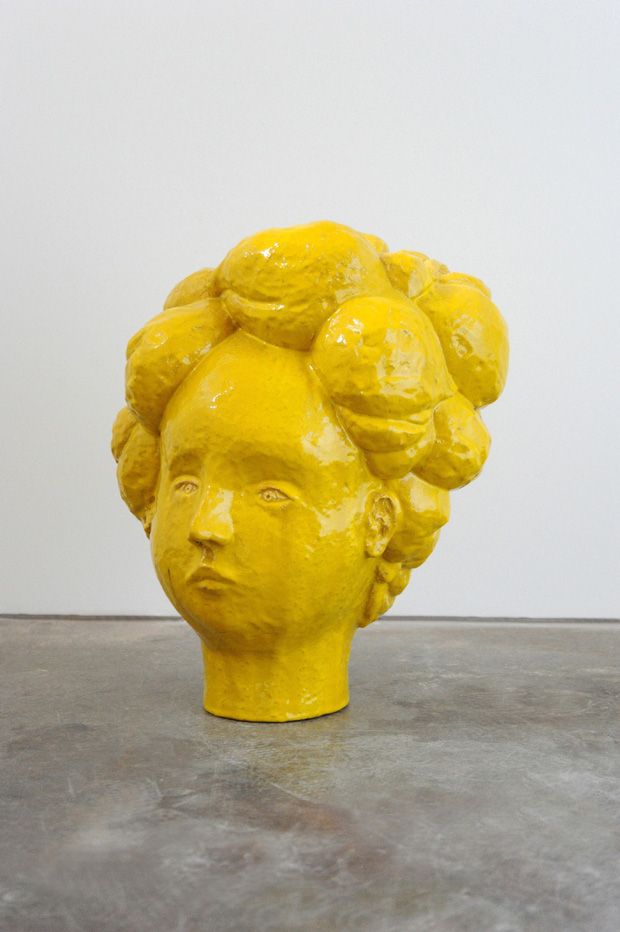
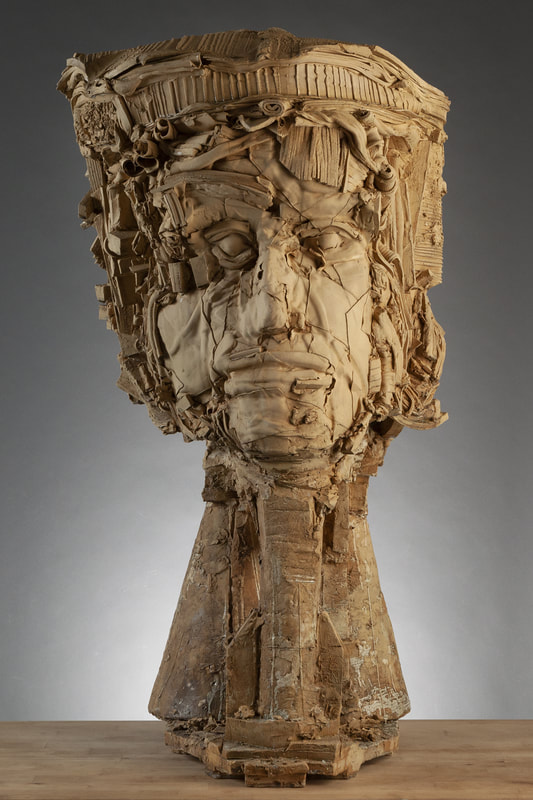
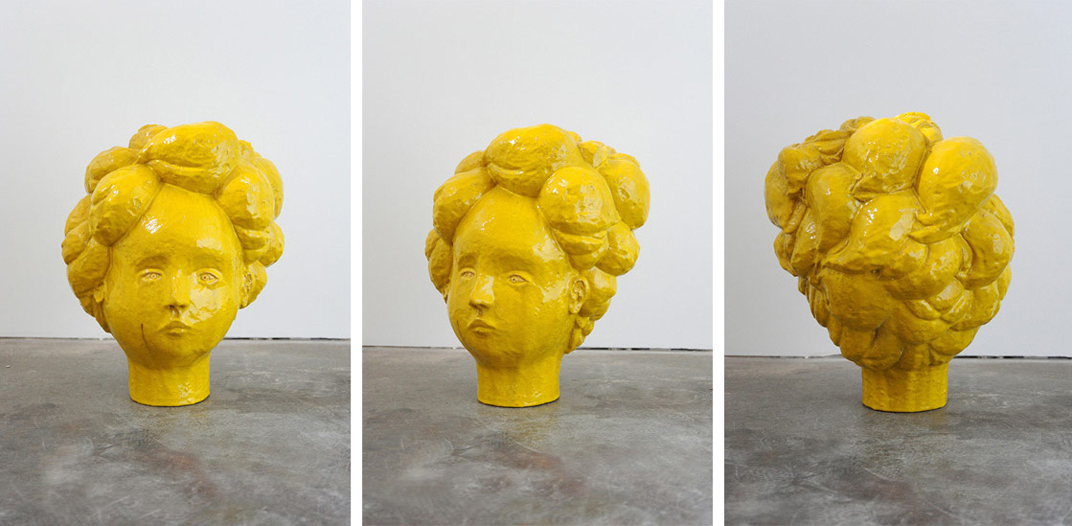
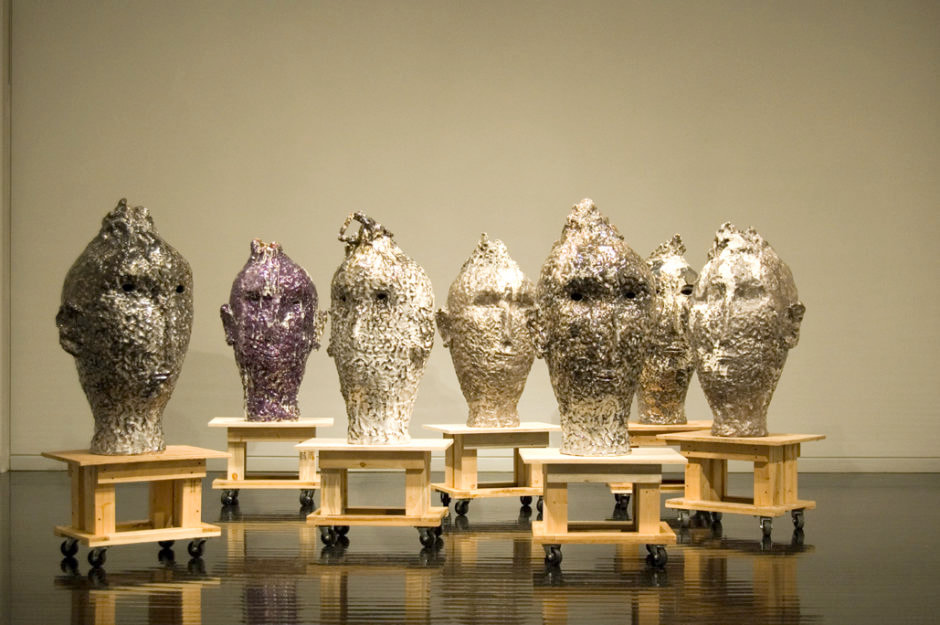
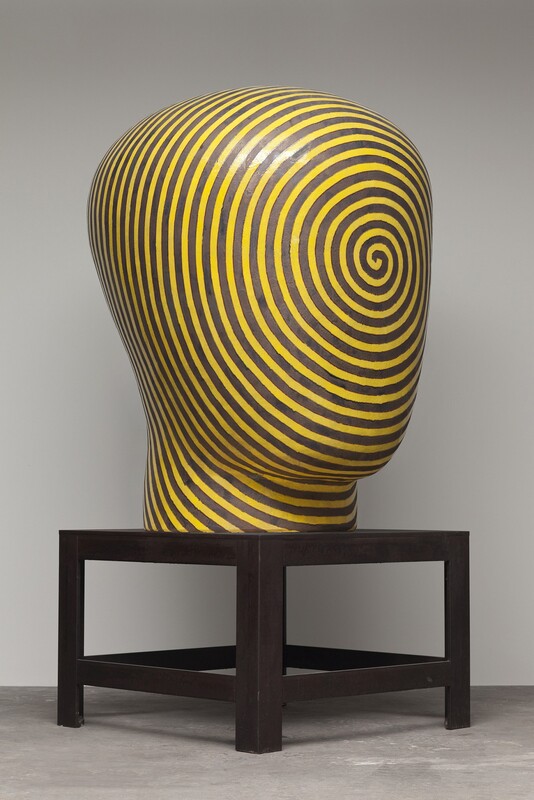
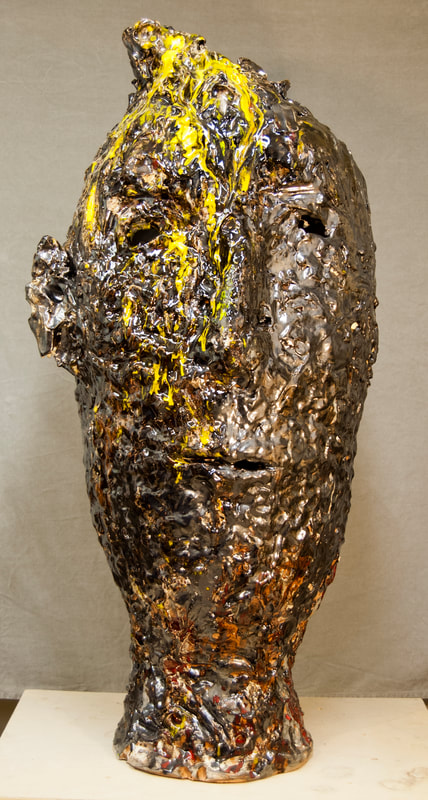
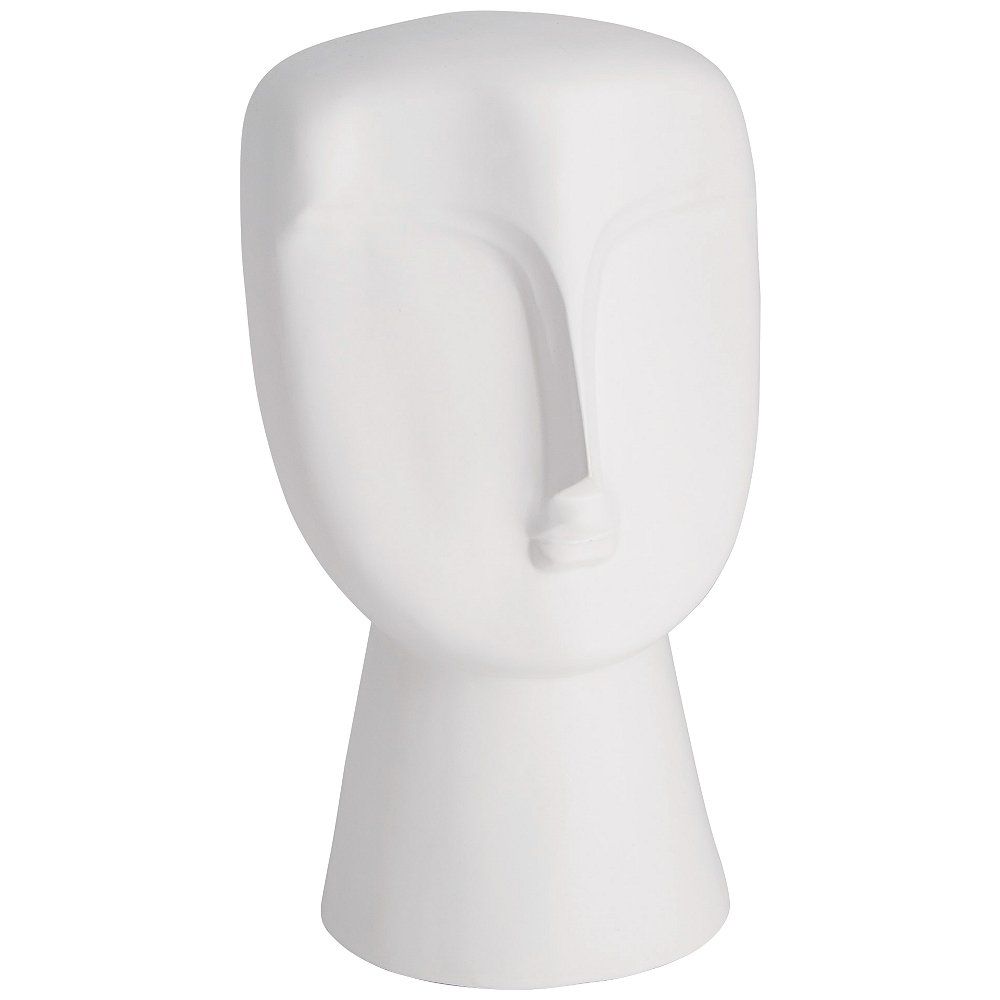
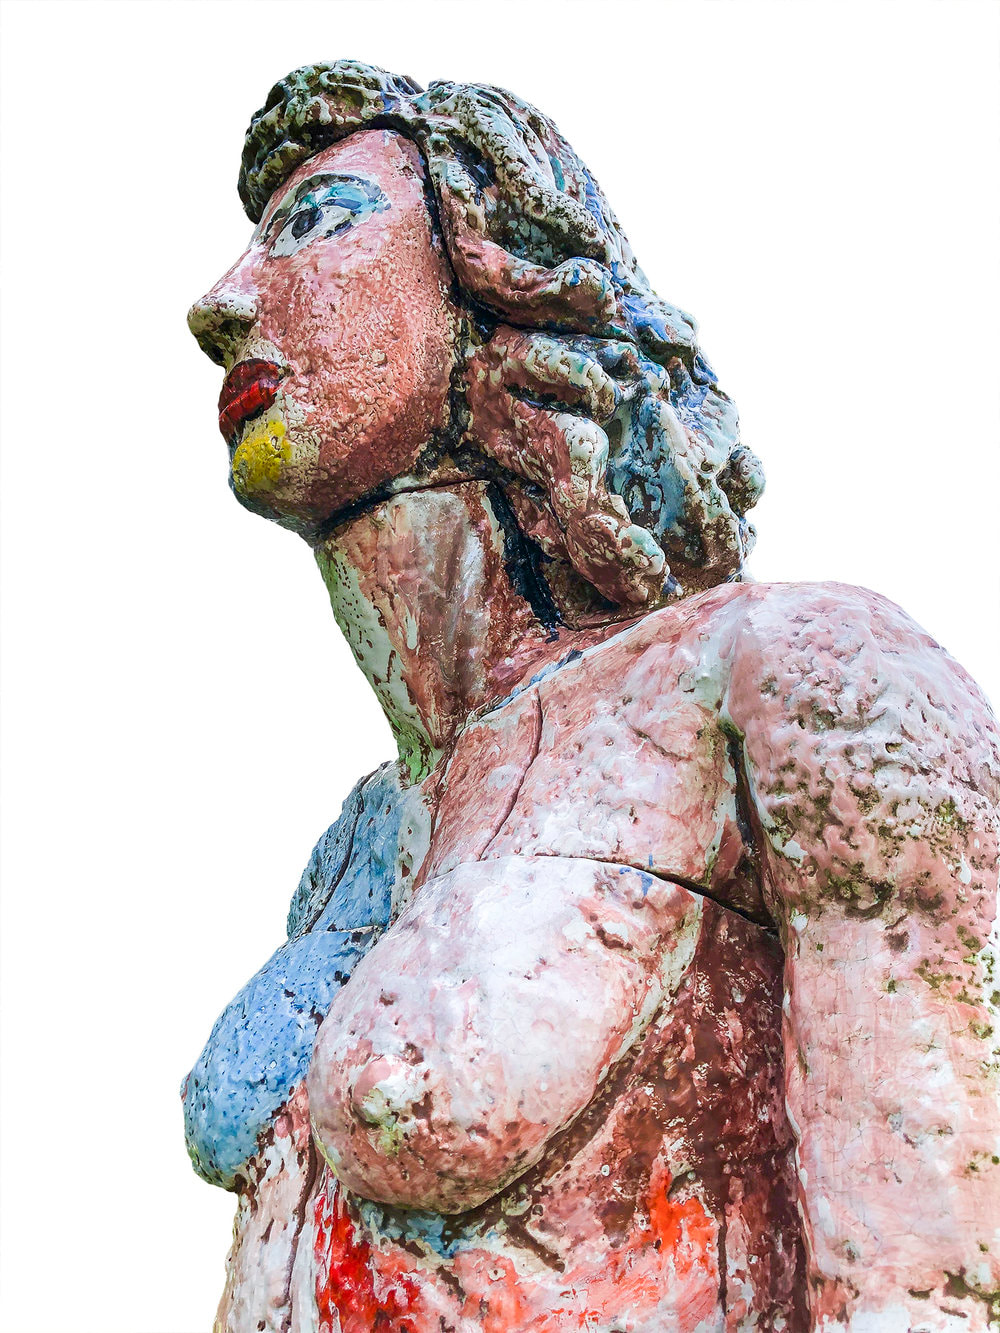
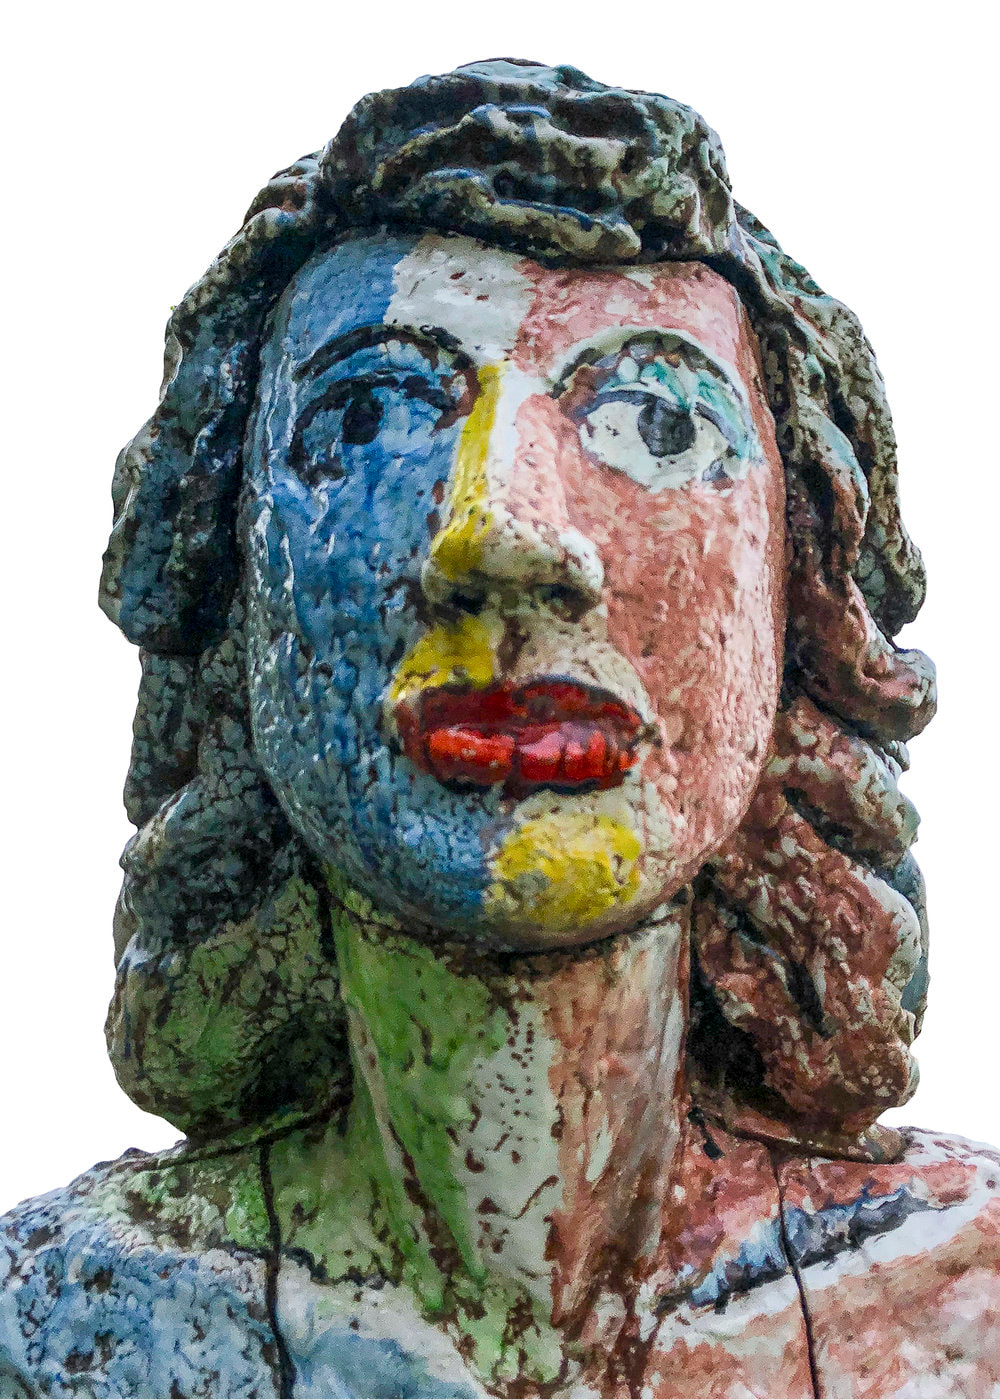
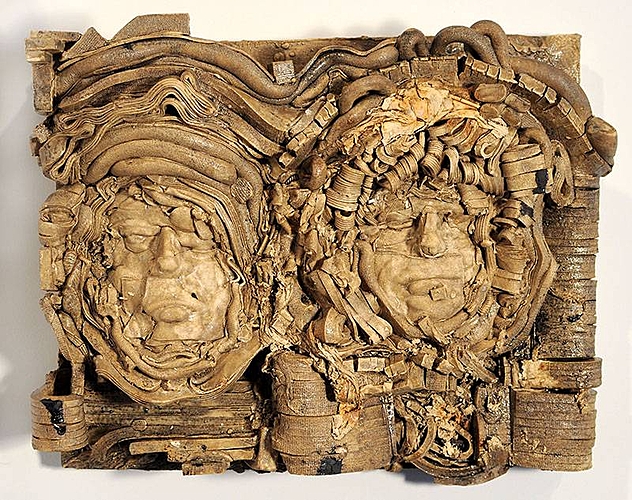
In this project assignment you will be playing with fundamental building techniques associated with child building. Simple straight forward methods of construction will be the focus of this assignment. While the technique focus is coil, the conceptual direction will be the head.... or Cabesa. Please remember to be loose, have fun and let the work develop as you go. Don't be too rigid in your ideas and allow yourself the freedom to evolve and change as you work, after all this is a fun, introduction to coils.
The Project:
Each student is required to use coils as the main building method of their sculptures. Coils will be rolled by hand and will be joined with a slip and wiggle, followed by luting and smoothing. The techniques will be demonstrated in class and can be reviewed at any time needed, just please ask for further assistance. Sculptural focus will be on the head, or portraiture. In this particular case I would like you to focus on building from you imagination rather than from real life reference. This is to allow for playful abstraction and freedom to add, remove or modify in any artistic mode or direction as you see fit.
Requirements:
Each student must follow the these guidelines to successfully complete this assignment:
Produce TWO (2) sculptural head/portraiture.
Use coils as their main building methodology.
Produce sculptures that are between 12-16" in height.
Glaze their heads with a poly-chomatic surface.
Goals:
Learn the basic construction technique of coil.
Learn time management with construction of sculptural forms made from clay.
Learn to manage moisture content of clay to dry and stiffen clay to produce structural sound sculpture.
Gain a beginning level understanding of glaze application.
Begin to understand the firing process and the transformation process clay goes through when fired.
Time line:
Each student will have two weeks to build and construct their sculptures and have them ready for the first firing. (bisque)
Resources:
Central Cal Clay.com
Matt Wedel
Akio Takamori
Cristina Cardova
Sunk Yuh
Viola Frey
Xavier Toubes
Jean Pierre Laracque


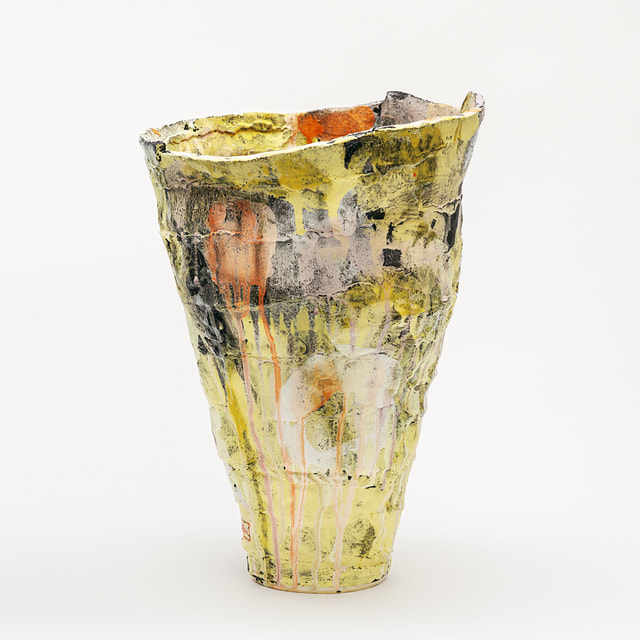
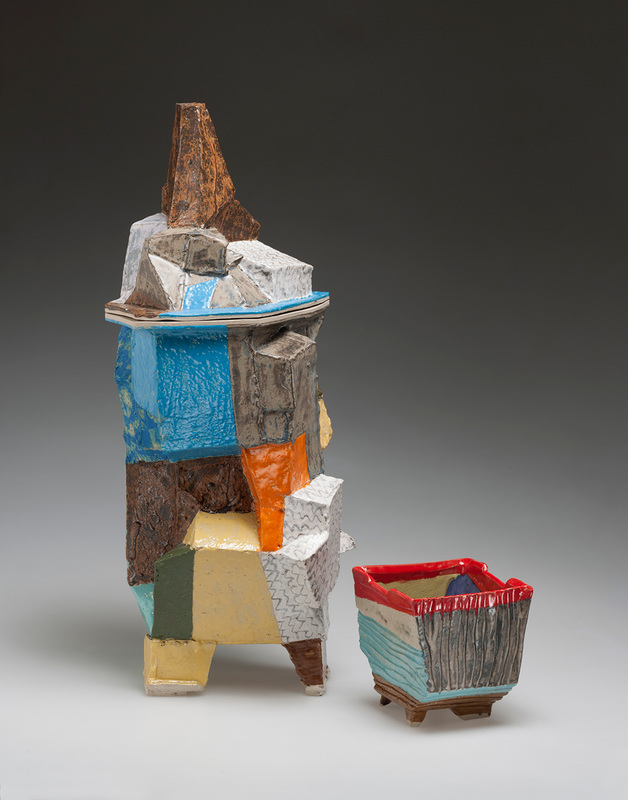
#15
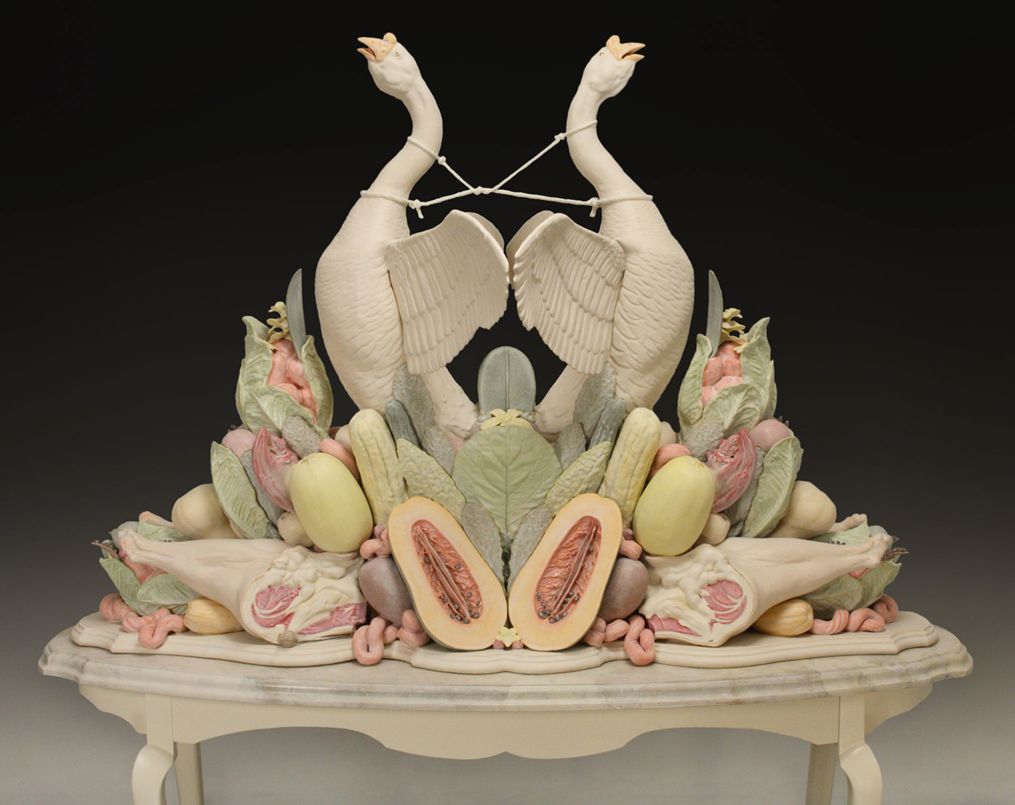
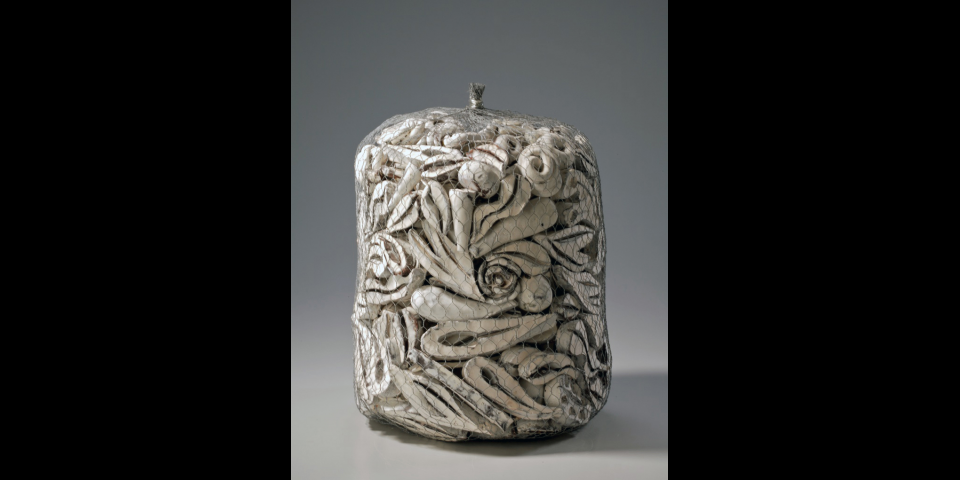
Full-Filled
Fulfilling Ones Destiny
Overview.
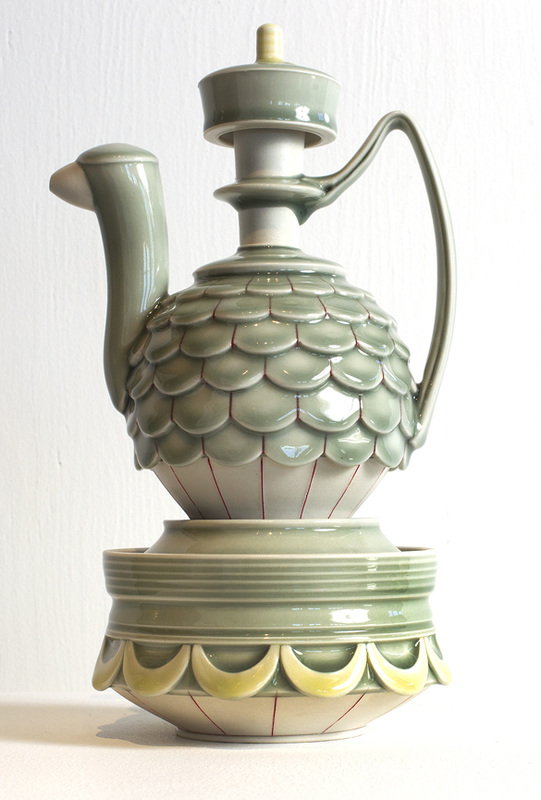
In this project you will be playing with concepts that surround the vessel.
What is a vessel?
What does a vessel do?
How does a vessel work?
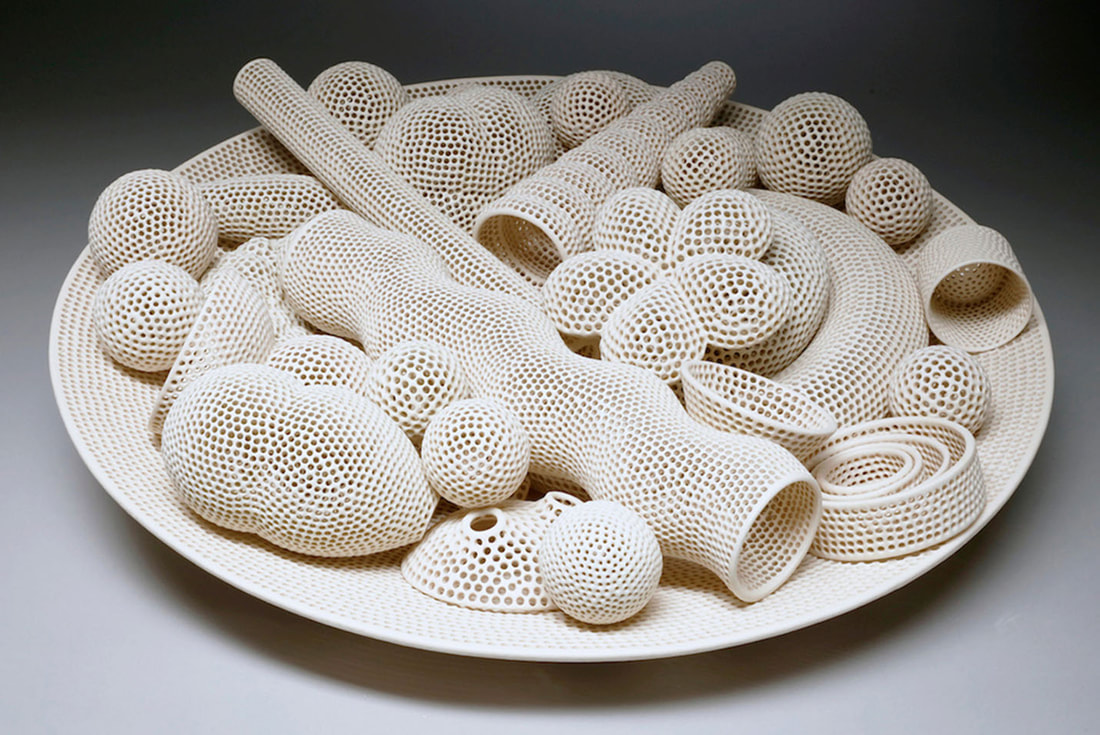
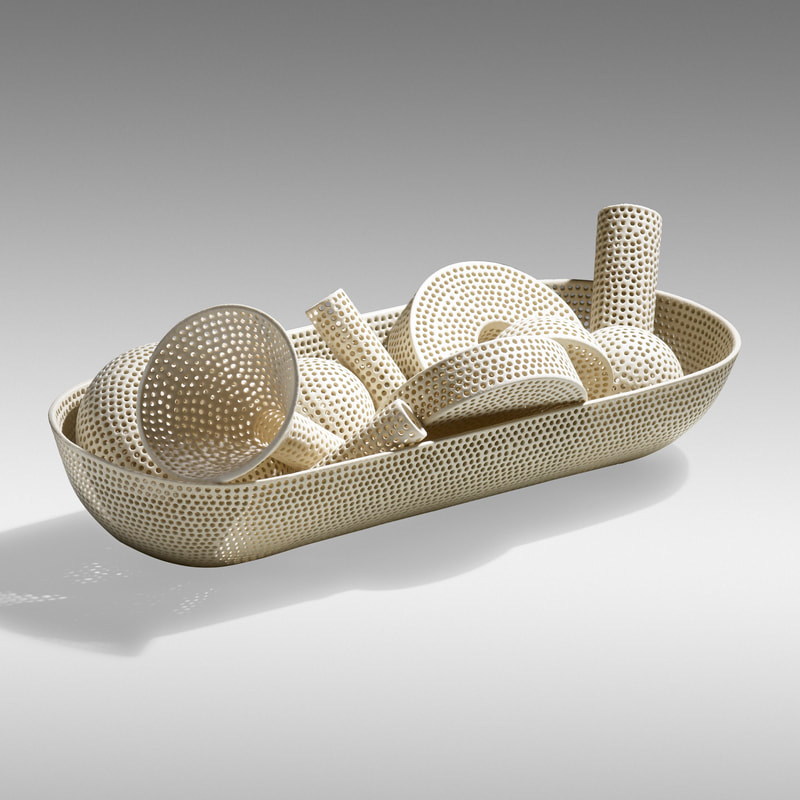
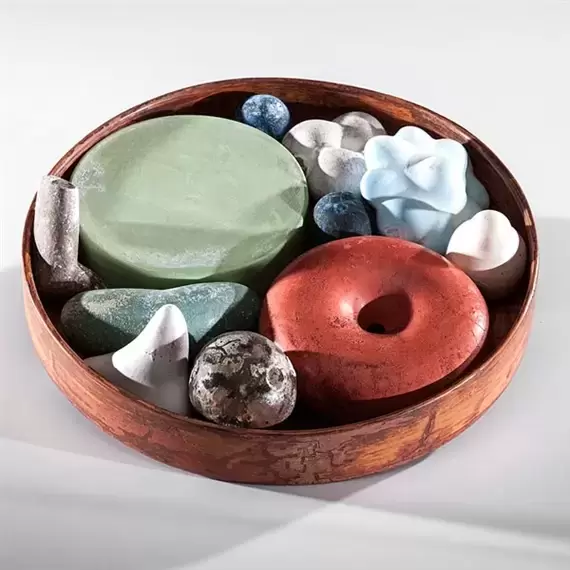
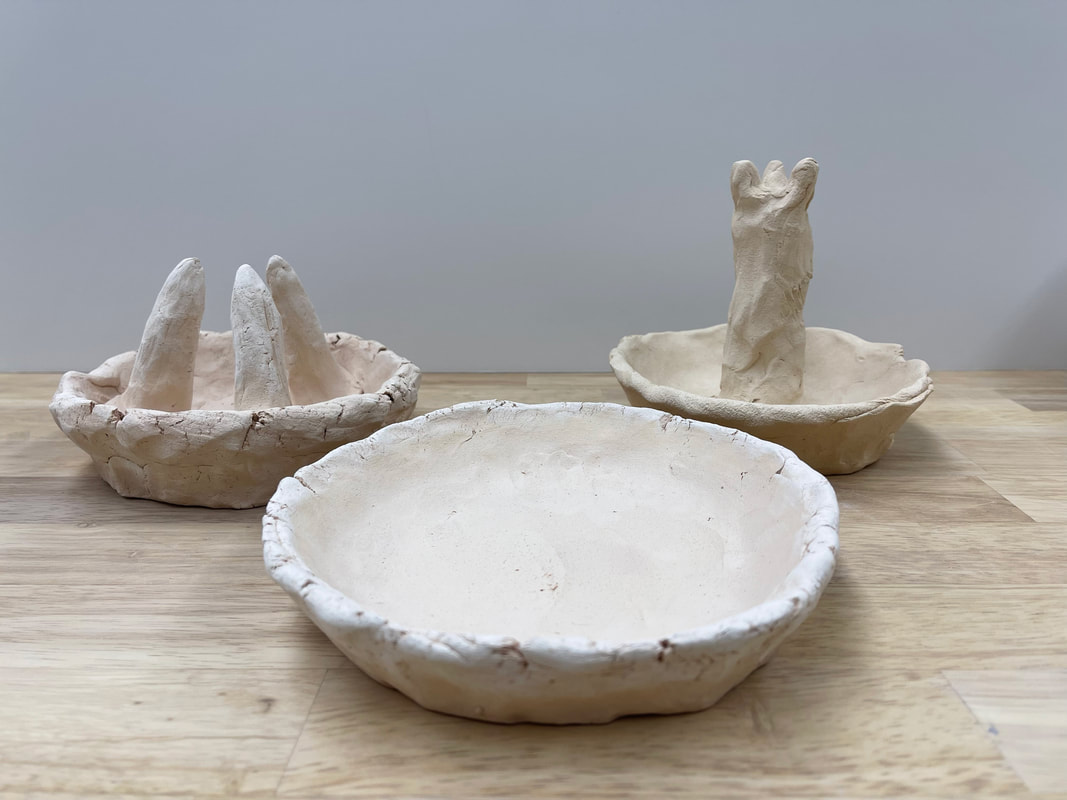
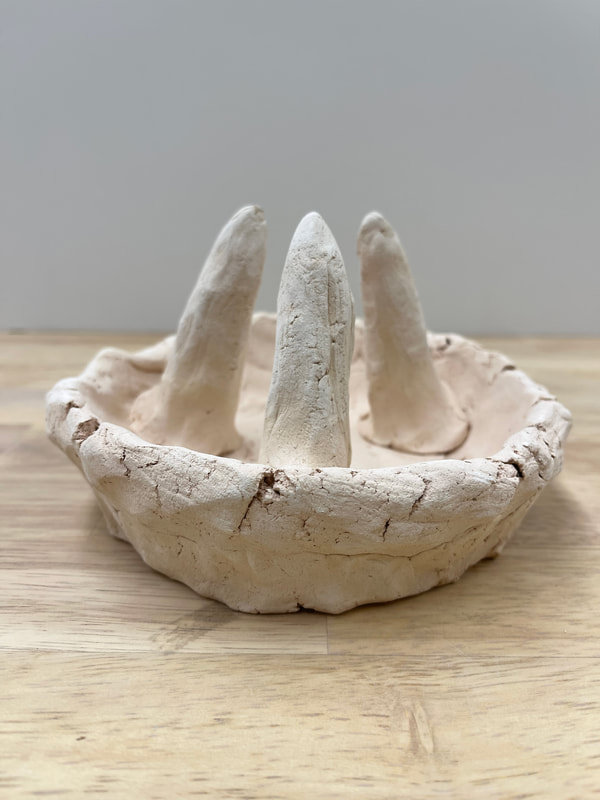
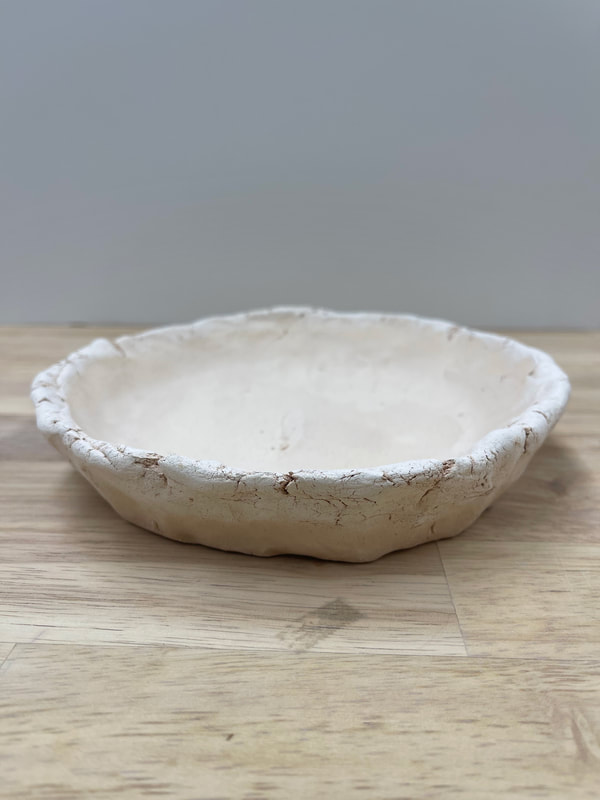
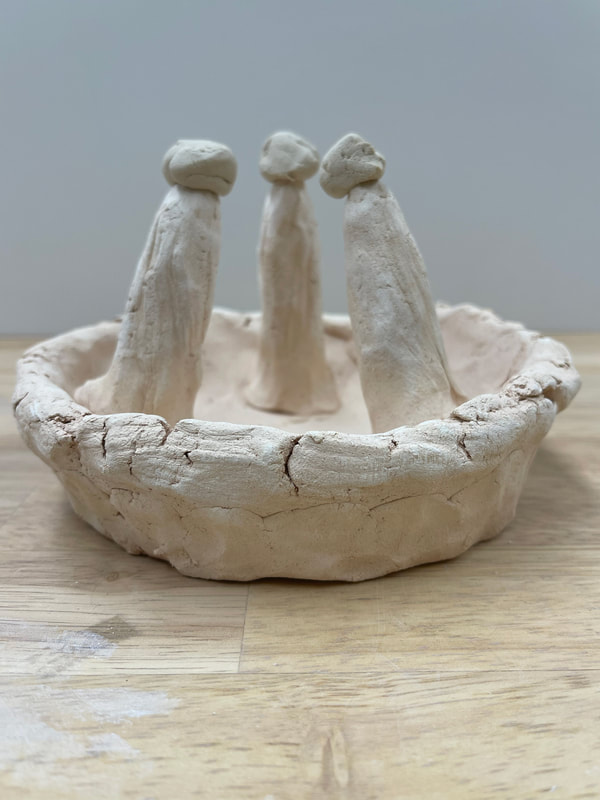
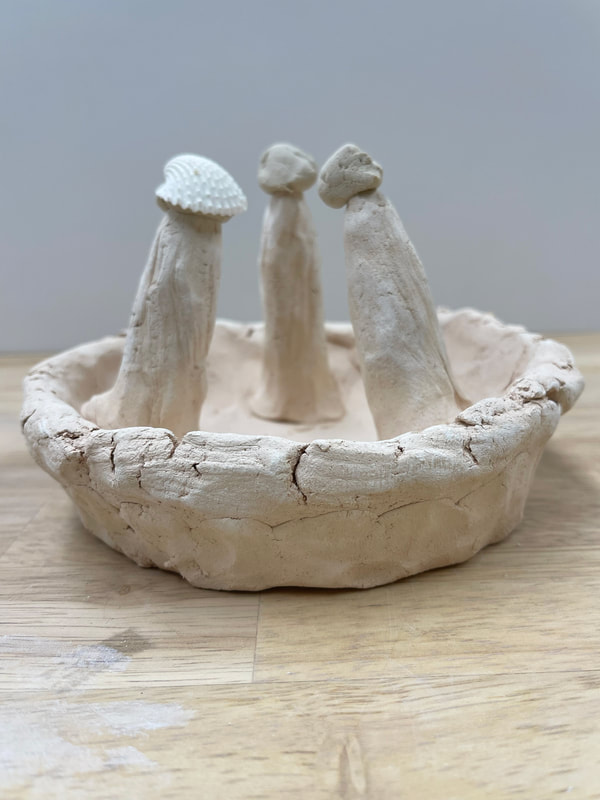
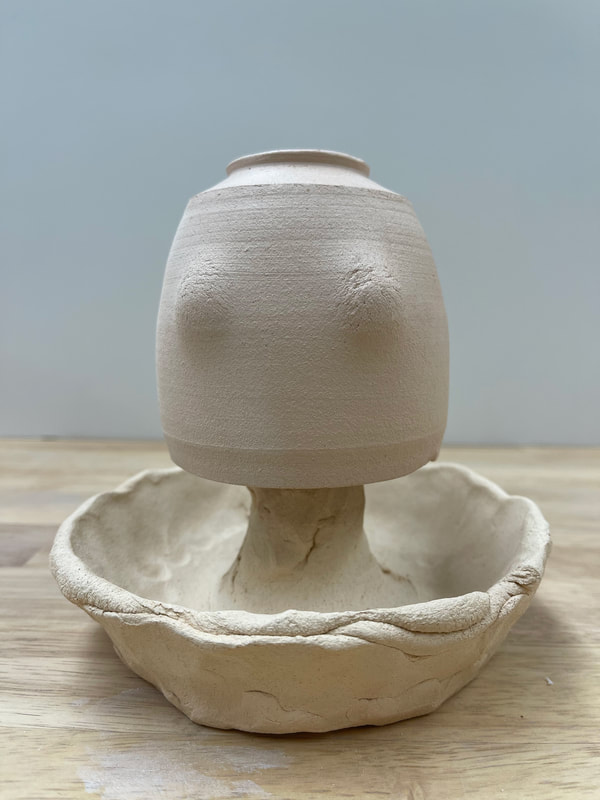
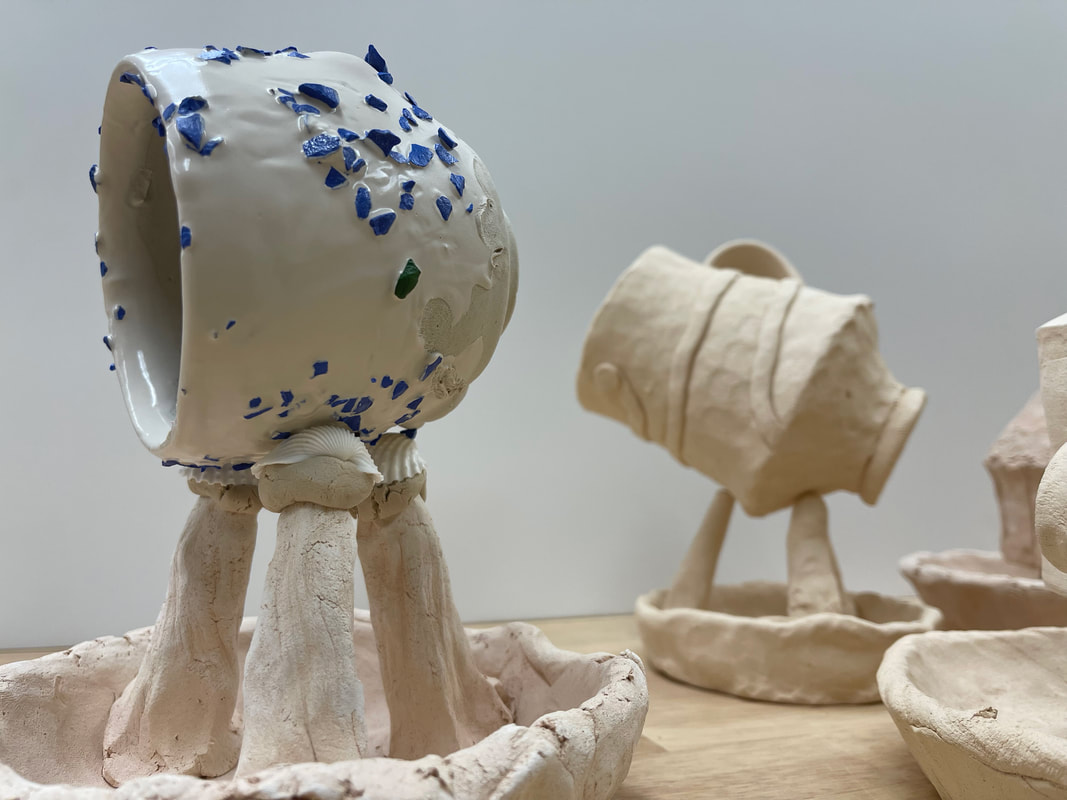
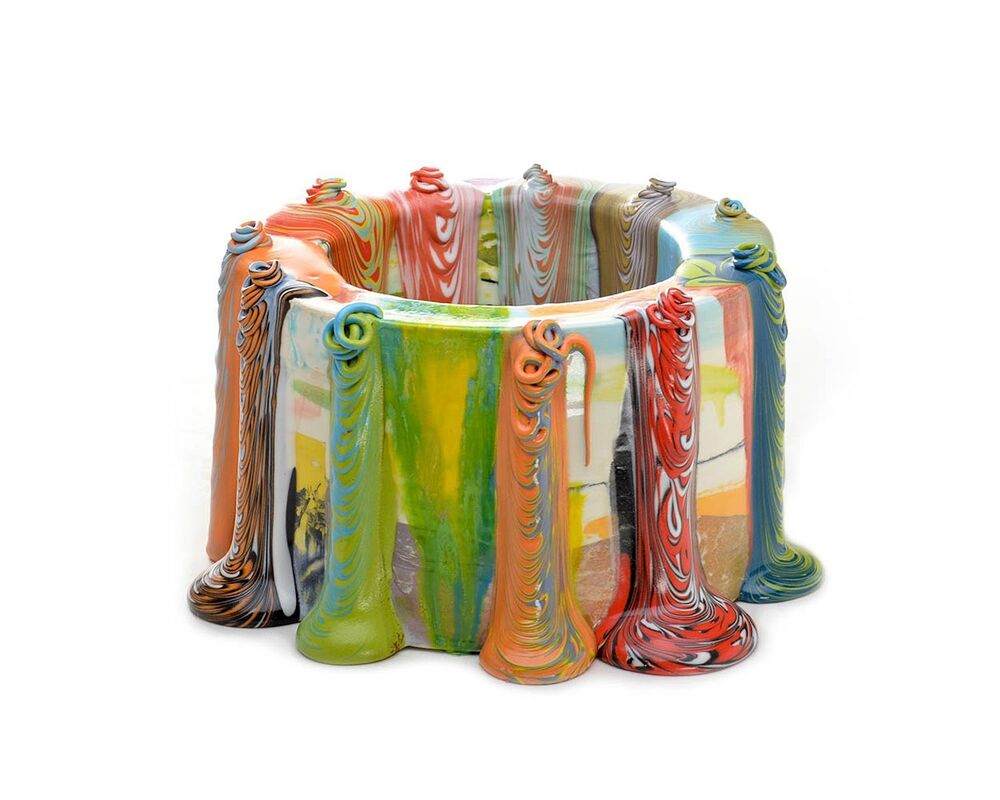
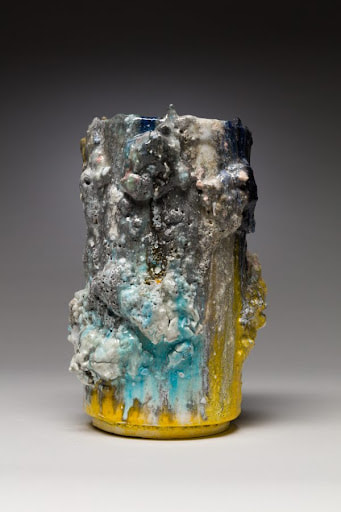
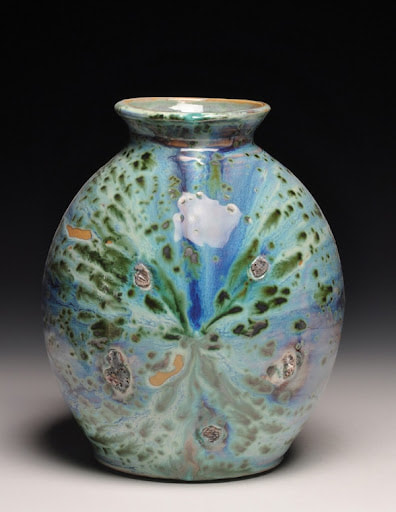
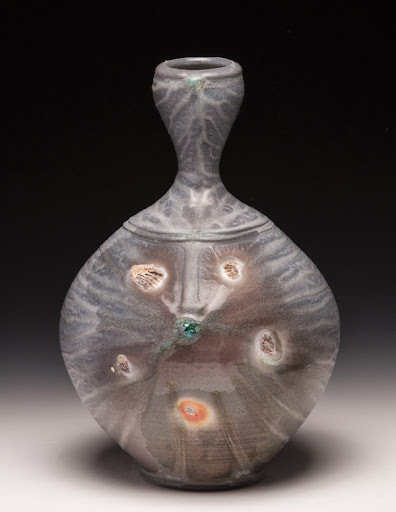
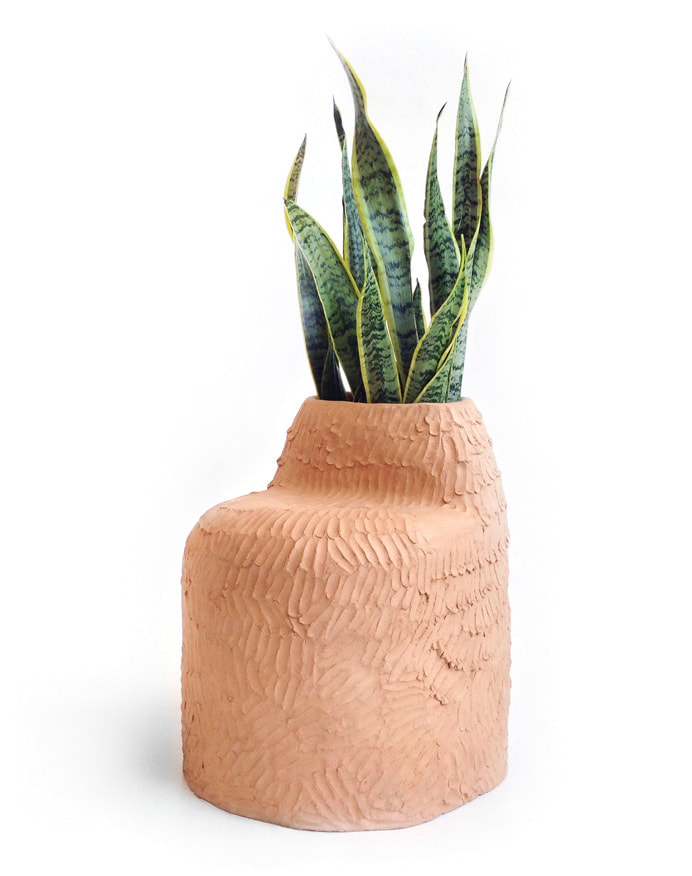
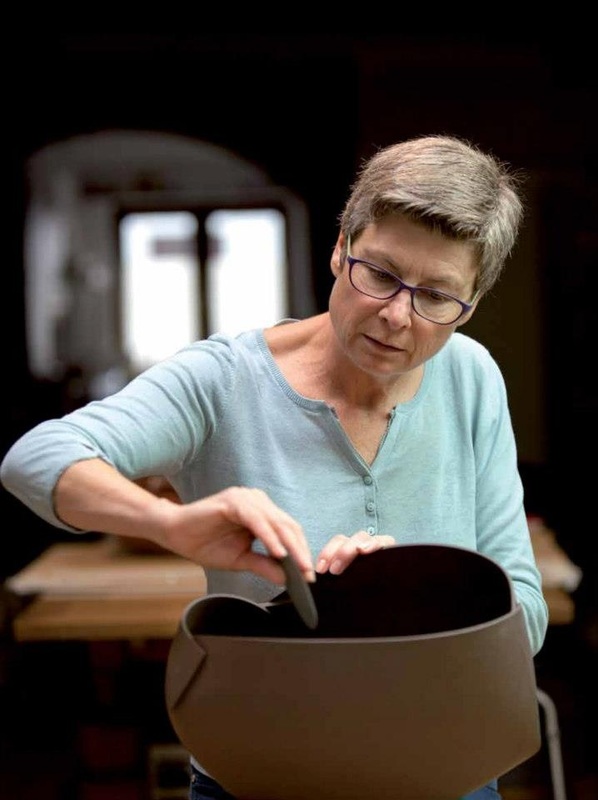
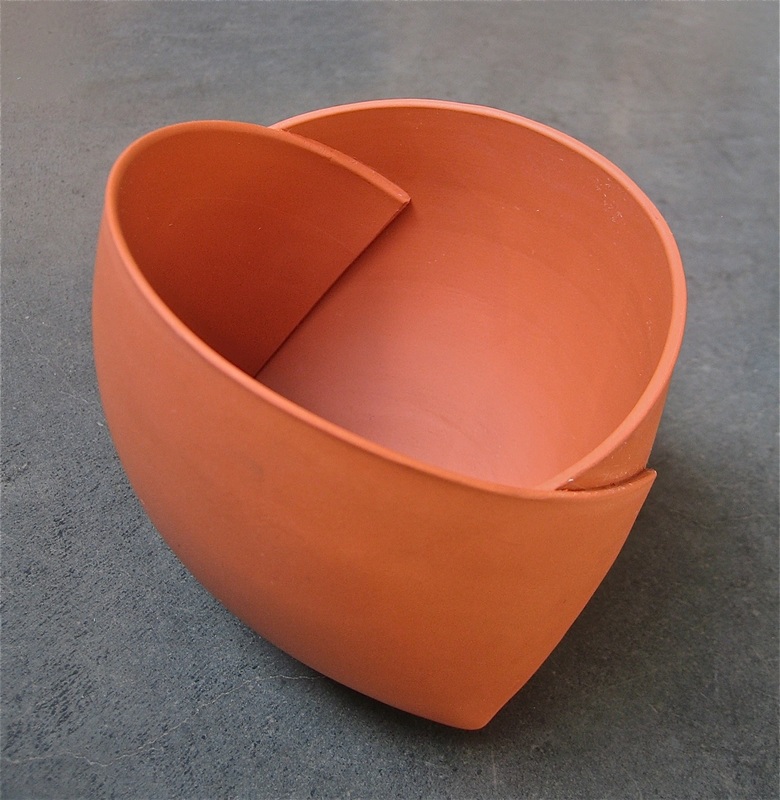
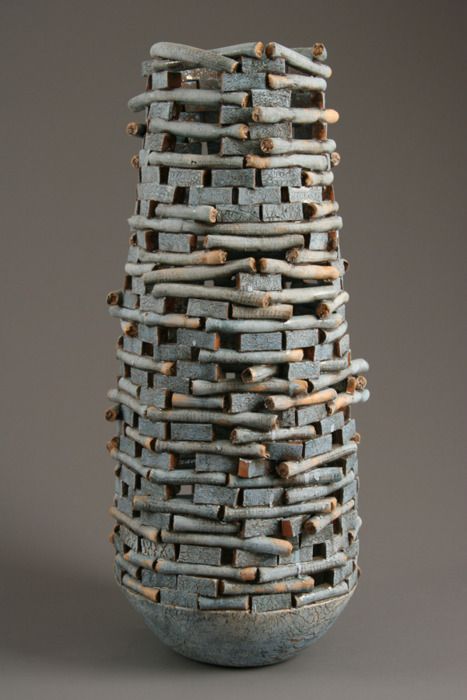
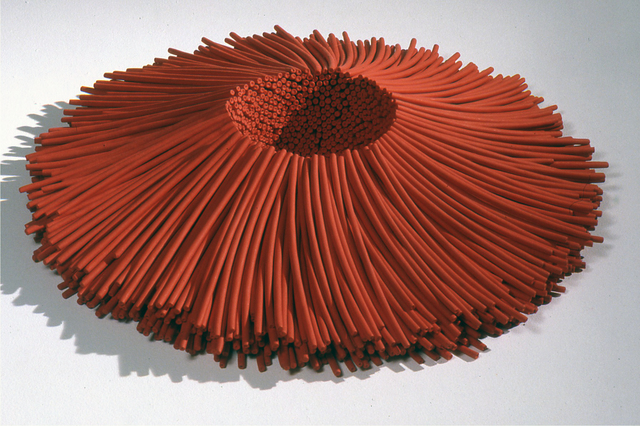
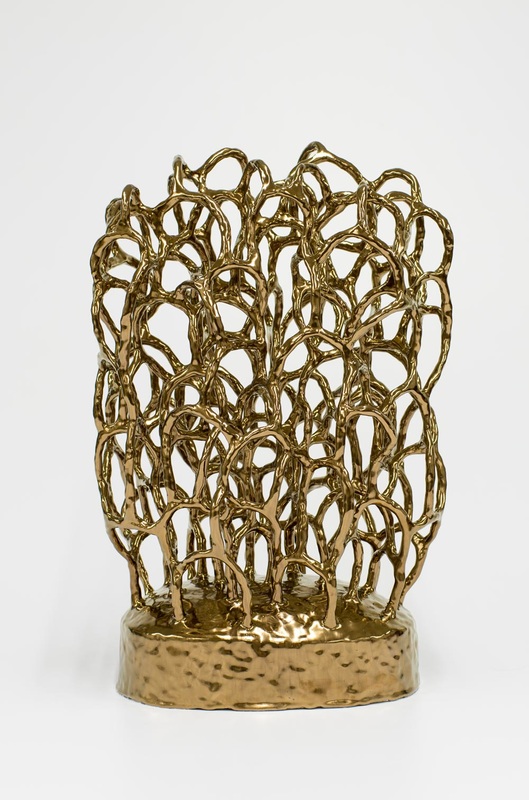
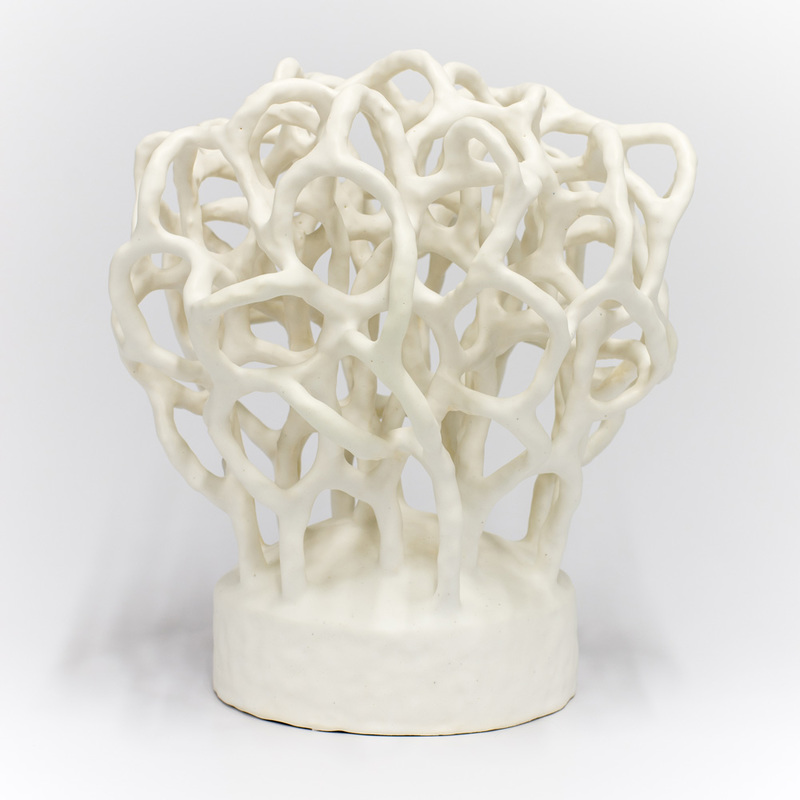
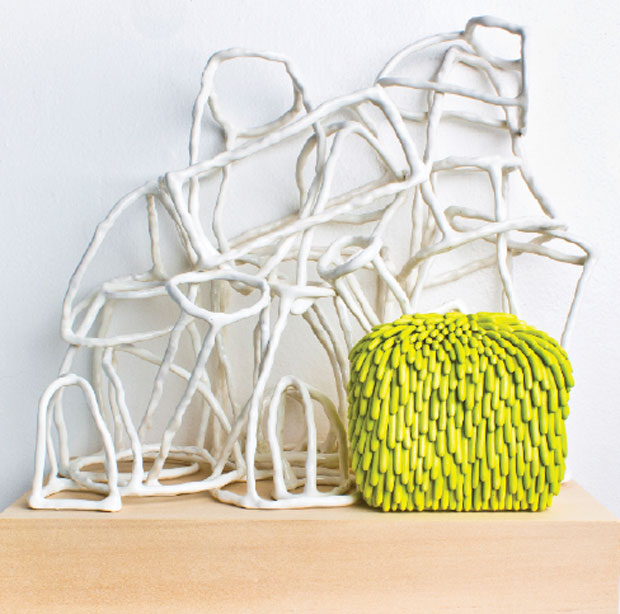
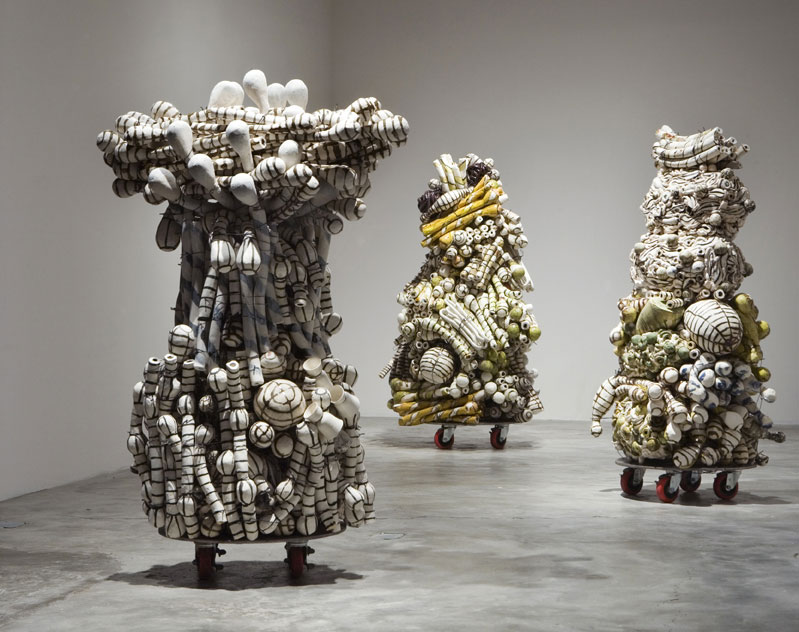
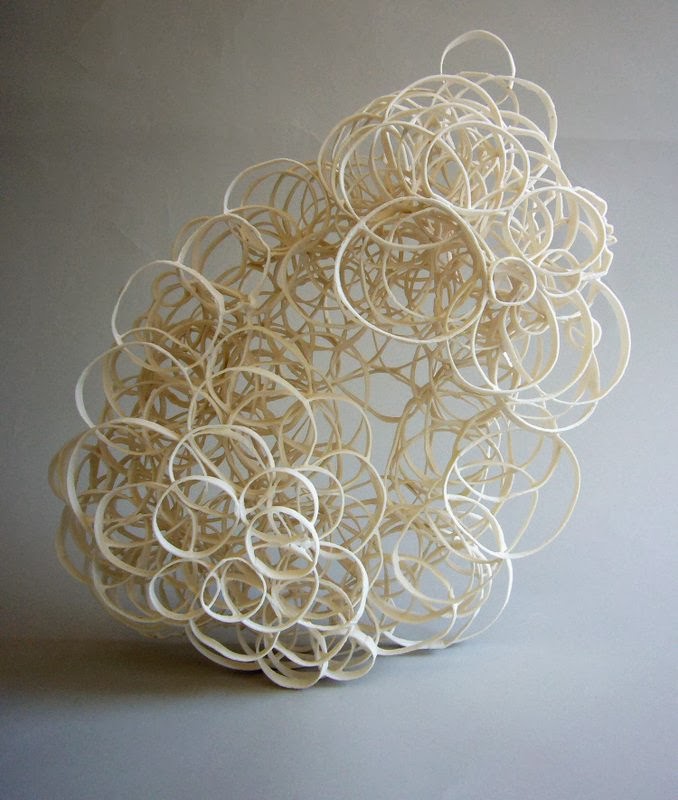
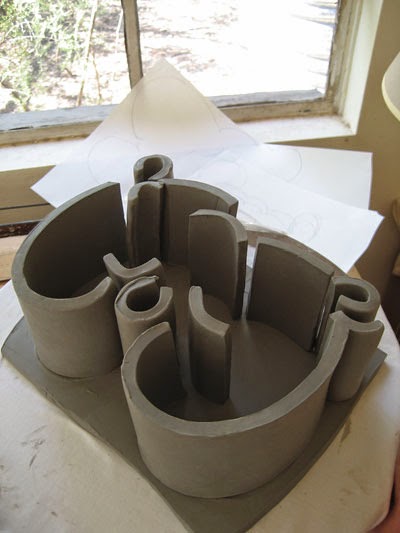
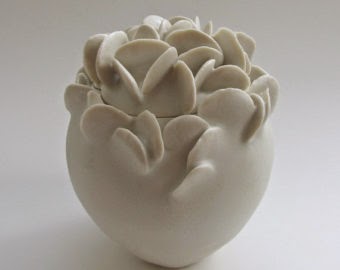
These are the question we will use as the central expansion point for this concept. As artists we will explore these concepts in a class discussion and start to formulate as individual what our vessel is and does. What a vessel does is going to be a key aspect of the assignment. What does a vessel do? In this case Im posing to you that the vessel holds some thing, contains something. This is the vessels purpose and we are going to explore this essential concept of the vessel. The ability to hold and or contain.
Project.
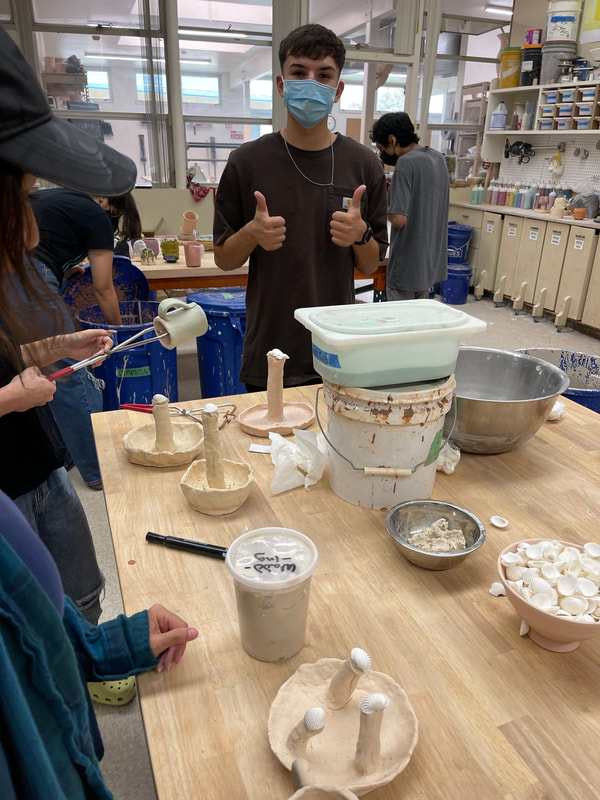
Each student will be tasked with conceptualizing a vessel that contains or holds something / (some things).As a class we will be working with the basic technique of pinch forming objects and forms. Pinch should be used as the primary methodology to create both you vessel and you objects.
Requirements.
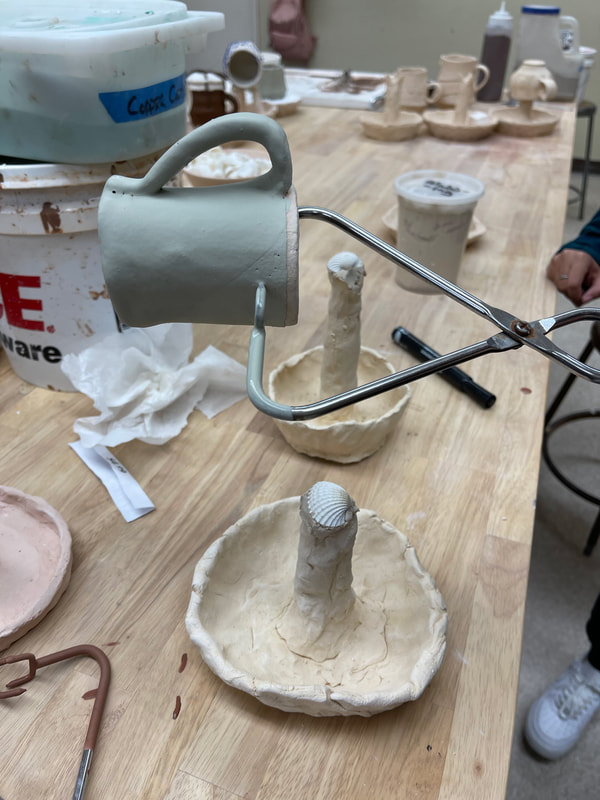
Construct a vessel that is 12" or so wide (there is room for adjustment and change to this).
Construct elements that fulfill your vessels purpose of containment or holding. (5-10 elements)
Use the techniques associated with PINCH to form and create your vessel and its elements.
Glaze all aspects of your work with studio glazes.
Provide a written Artist report on your work that explains you concept and created work.
Areas of Focus.
Students will learn to decider and break down elements of their concepts into tangible formal objects.
Students will work on building a narrative in their work through the use of objects and iconography.
Utilize the pinch method to create simple forms that insinuate deliberate objects from the artists concept.
Goals.
Gain basic understanding of the techniques associated to pinch forming clay.
Gain a basic understanding on how to translate ideas and concepts into formal objects.
Learn how to manage moisture and workability of solid clay forms.
Gain basic understanding of glazing and glaze application of studio glazes.
Explore ways to write and explain ones artistic works as part of a presentation of formal works.
Artist Resources.
Tony Marsh
Cornucopias
David Reagan
Dirk Stachke
uarkceramics.org/university-of-arkansas-ceramics-blog/2018/5/15/tony-marsh-interviewed-by-nick-dison
Overview.
In this project you will be playing with concepts that surround the vessel.
What is a vessel?
What does a vessel do?
How does a vessel work?
These are the question we will use as the central expansion point for this concept. As artists we will explore these concepts in a class discussion and start to formulate as individual what our vessel is and does. What a vessel does is going to be a key aspect of the assignment. What does a vessel do? In this case Im posing to you that the vessel holds some thing, contains something. This is the vessels purpose and we are going to explore this essential concept of the vessel. The ability to hold and or contain.
Project.
Each student will be tasked with conceptualizing a vessel that contains or holds something / (some things).As a class we will be working with the basic technique of pinch forming objects and forms. Pinch should be used as the primary methodology to create both you vessel and you objects.
Requirements.
Construct a vessel that is 12" or so wide (there is room for adjustment and change to this).
Construct elements that fulfill your vessels purpose of containment or holding. (5-10 elements)
Use the techniques associated with PINCH to form and create your vessel and its elements.
Glaze all aspects of your work with studio glazes.
Provide a written Artist report on your work that explains you concept and created work.
Areas of Focus.
Students will learn to decider and break down elements of their concepts into tangible formal objects.
Students will work on building a narrative in their work through the use of objects and iconography.
Utilize the pinch method to create simple forms that insinuate deliberate objects from the artists concept.
Goals.
Gain basic understanding of the techniques associated to pinch forming clay.
Gain a basic understanding on how to translate ideas and concepts into formal objects.
Learn how to manage moisture and workability of solid clay forms.
Gain basic understanding of glazing and glaze application of studio glazes.
Explore ways to write and explain ones artistic works as part of a presentation of formal works.
Artist Resources.
Tony Marsh
Cornucopias
David Reagan
Dirk Stachke
uarkceramics.org/university-of-arkansas-ceramics-blog/2018/5/15/tony-marsh-interviewed-by-nick-dison


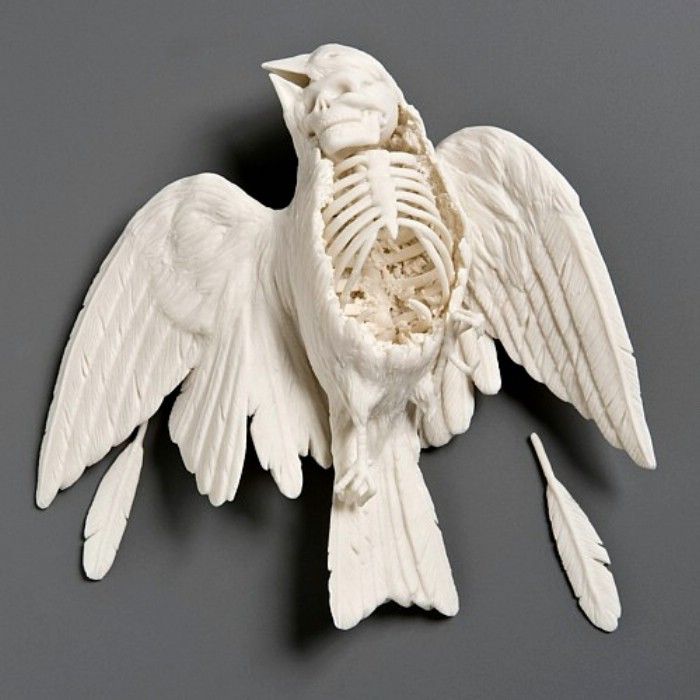
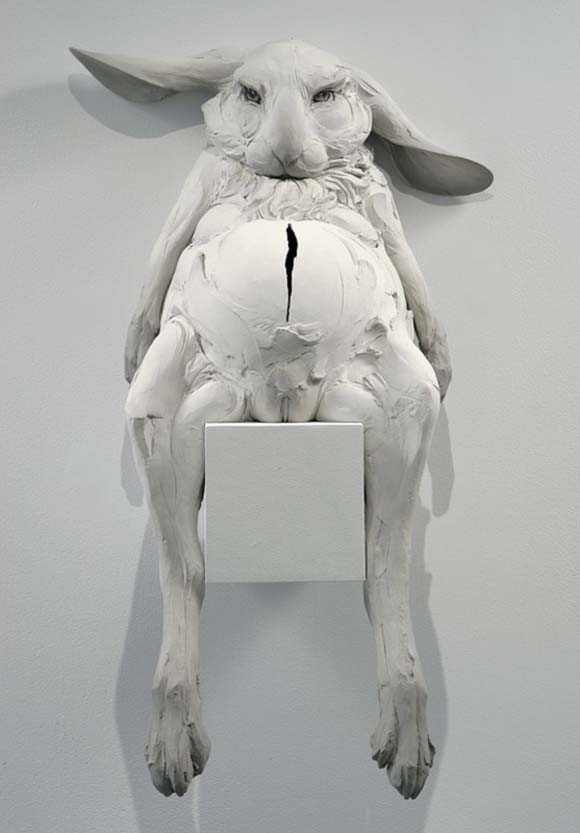
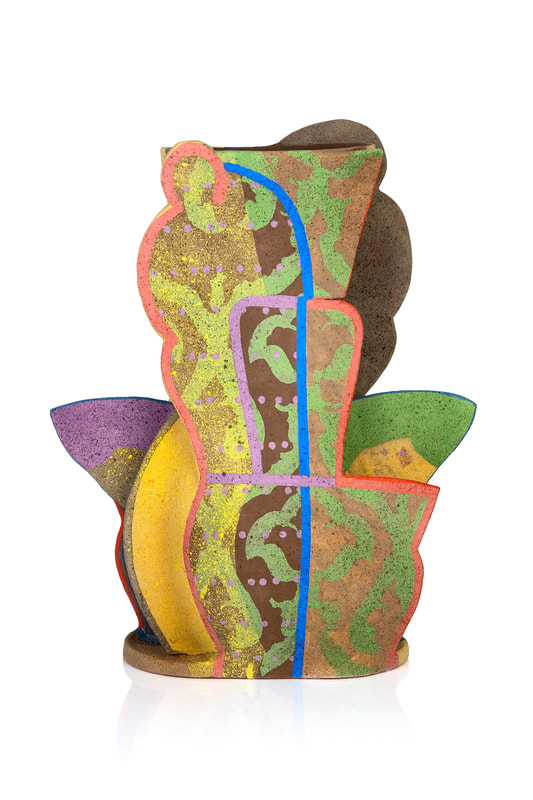
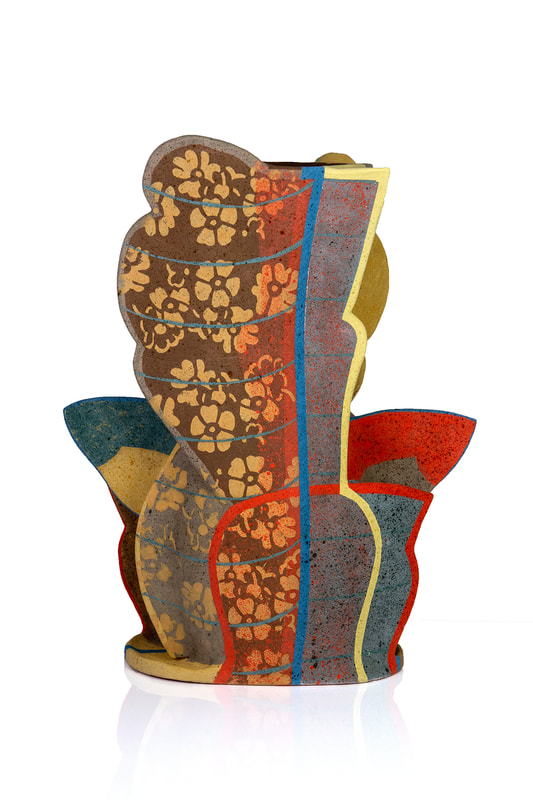
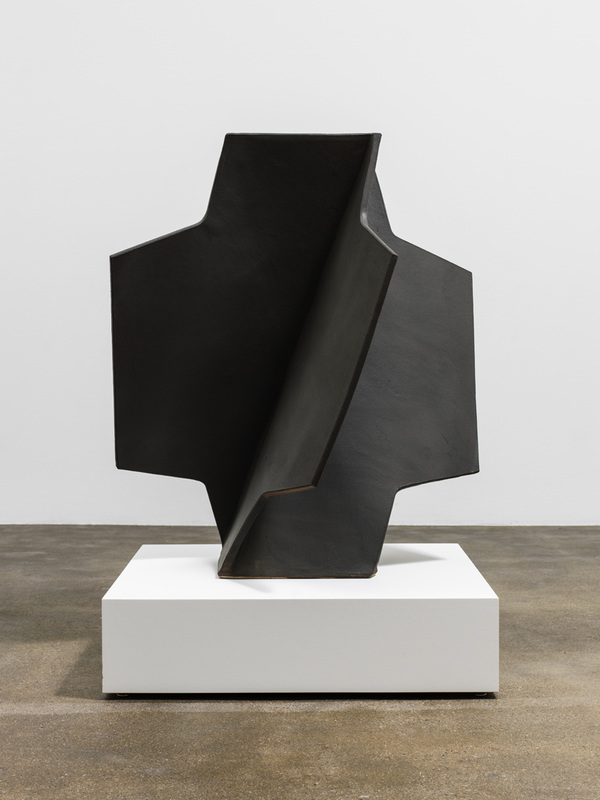
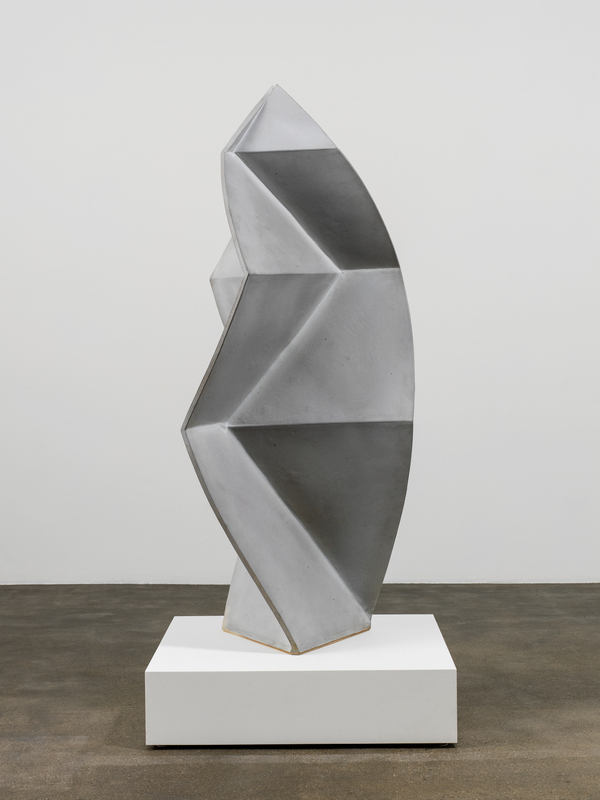
#14
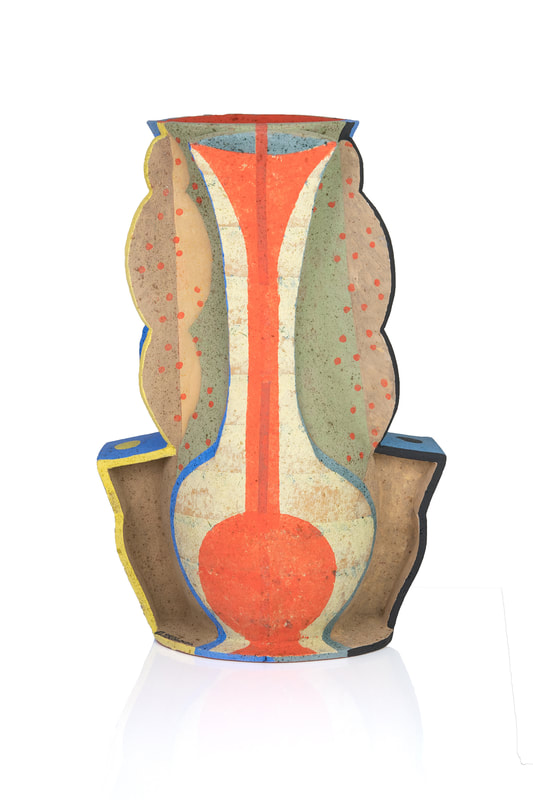
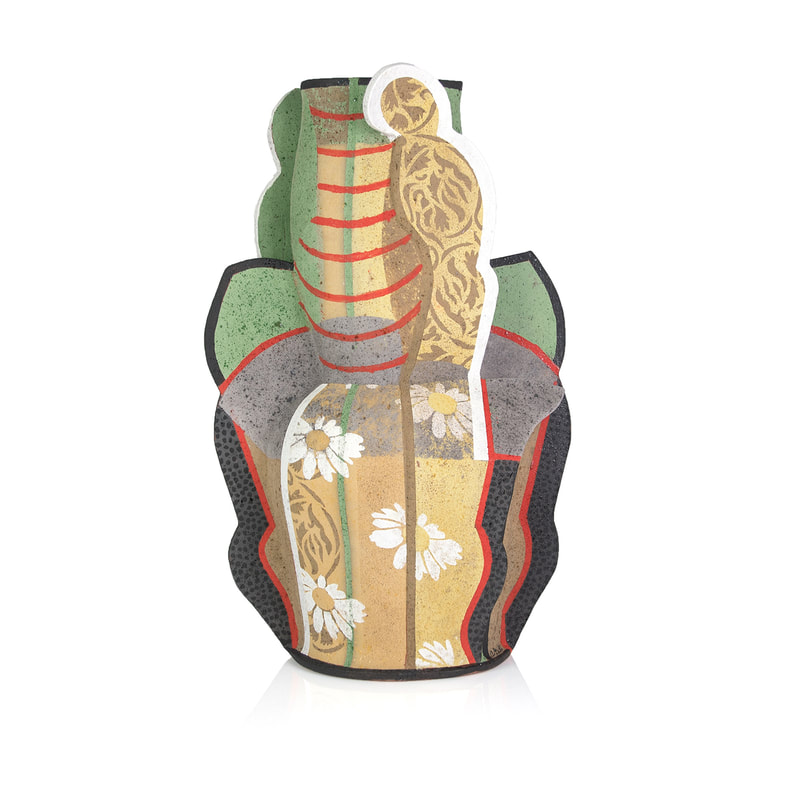
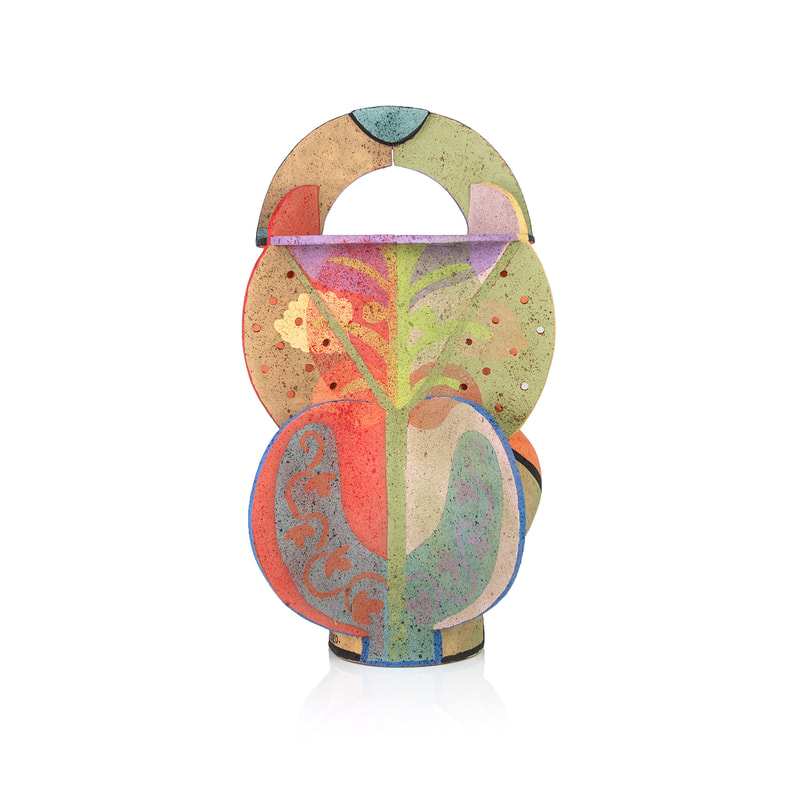
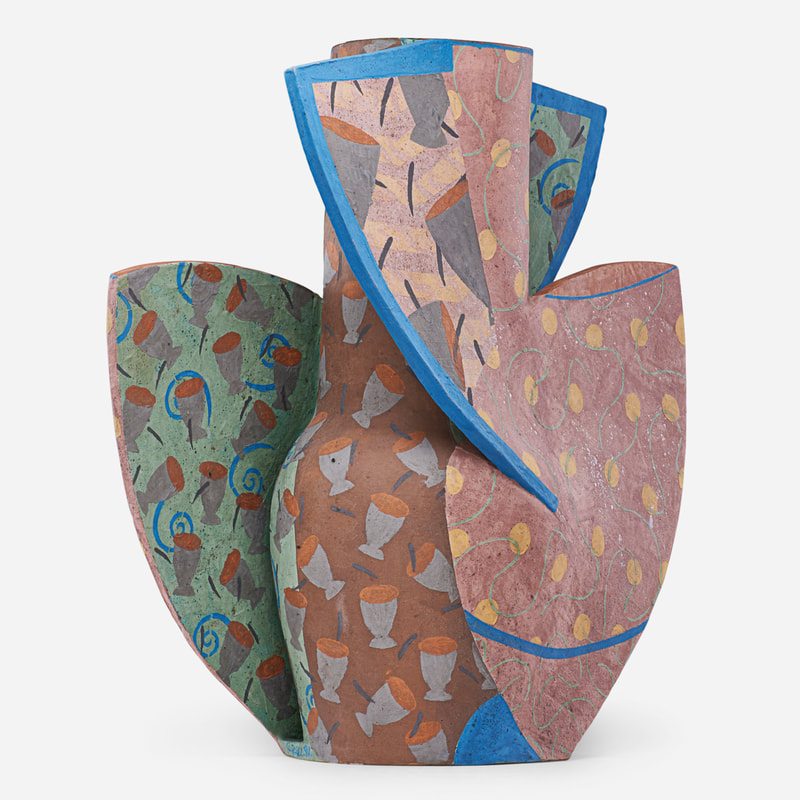
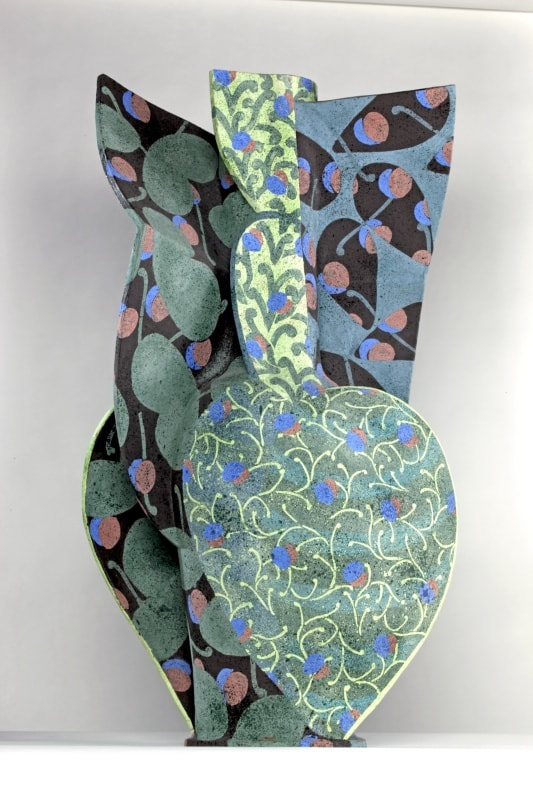
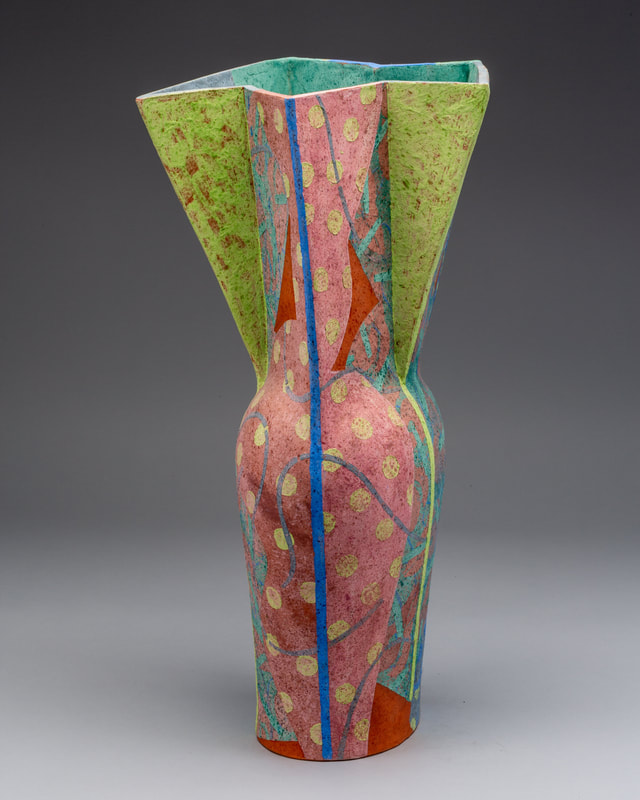
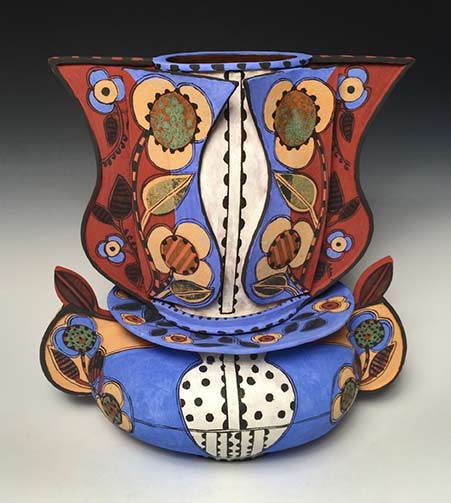
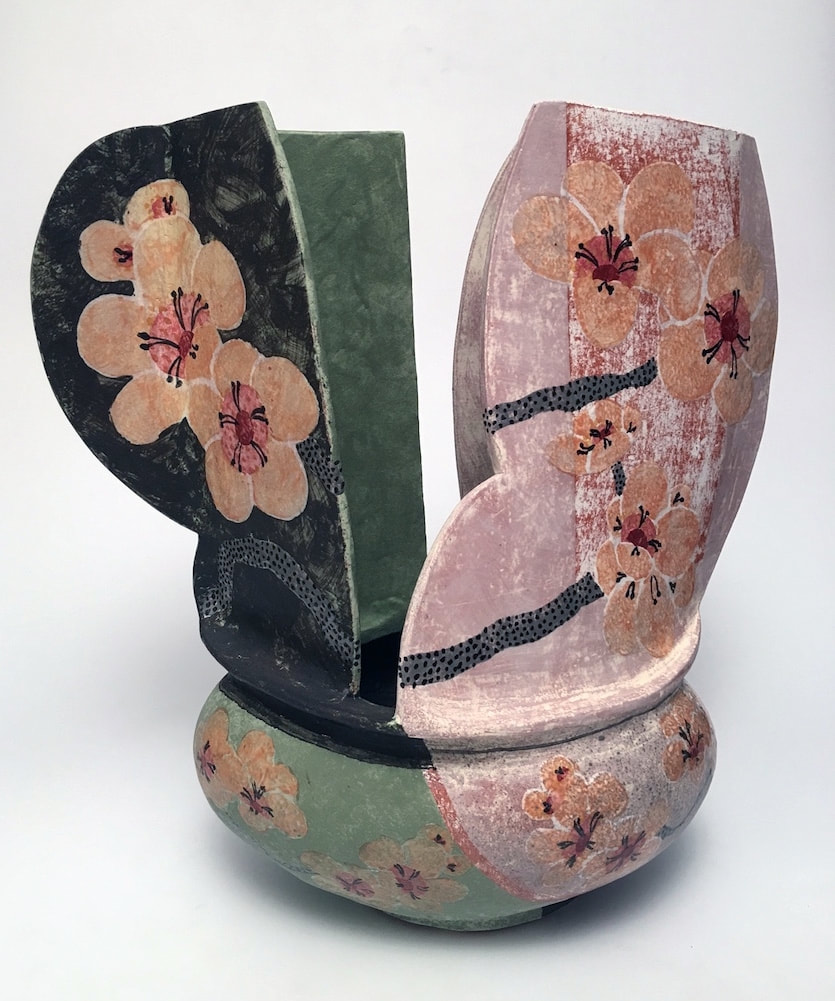
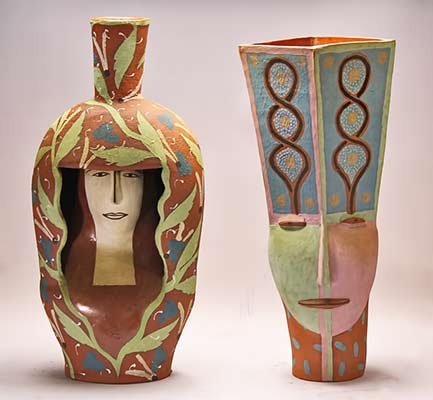
Slabs: Hard and Not So Hard (soft)
Meet the Gills

Overview:
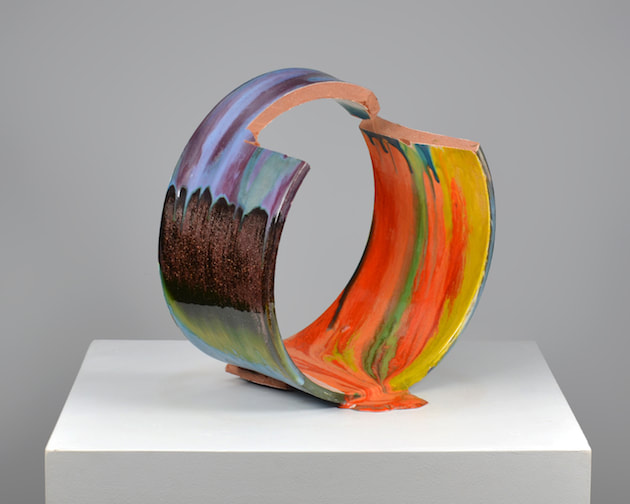
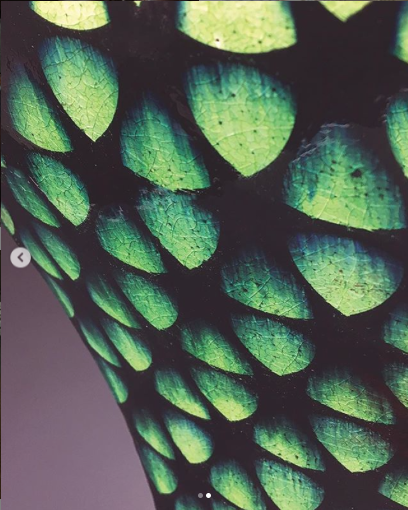
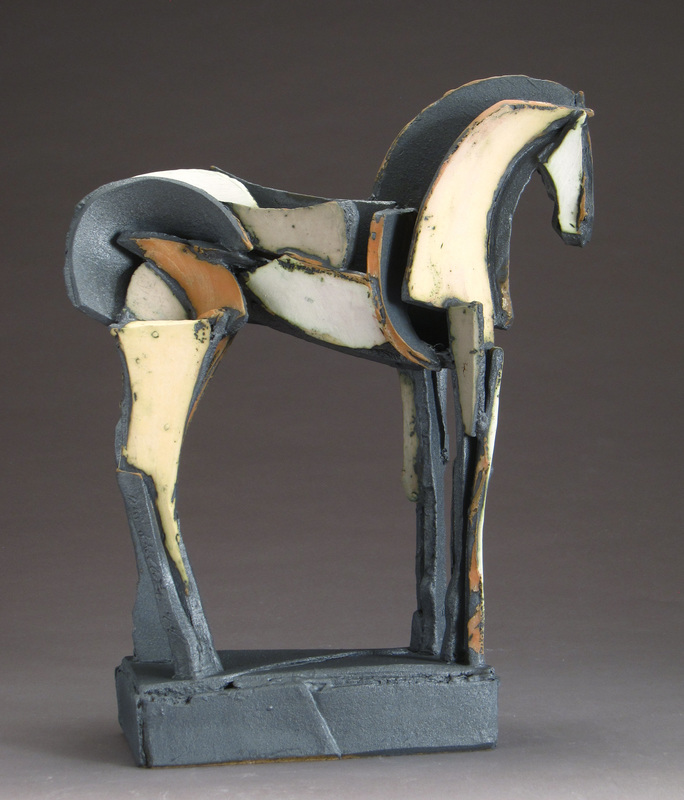
In this projects students will be learning the basics of slab construction. Slabs as you probably already know are sheets of clay. They can be made though all sorts of techniques (hand, foot, slab roller, rolling pin and throwing them out on a table....and you can cut them out as well!). For this project we will be focusing on two basic methods of building, Hard Slab and Soft Slab. Students will be rolling the dice for their assigned method! Yes a little gambling makes the art work more exciting. And to add to the discussion we will be working based on the woks of master Artist Couple John and Andrea Gill. They will be both the focus of work and the subject of a written critique submitted.
The Project:
In this projects students will be asked to build a slab built sculptural form that is inspired by either Andrea or John Gill. As artists we will utilize the works of this iconic ceramic duo as a launch pad for you own artworks. Please do not consider this a copy, but rather a starting point to a destination of your own. We will use their history and discoveries as a tool box for ideas, structural starting point and surface possibilities. Using Artists as reference point allows student to gain skills through emulation and also discovery of techniques needed to make iconic works of ceramic art. Students will be assigned a master artist by lottery system and are not allowed to change artists after the lottery has concluded. Each student is limited to production of one ceramic sculpture for this project.
The Requirements:
Students must:
Construct a sculpture that is 18" in height.
Use slabs as their primary construction method.
Use either hard or soft slab techniques or a combination of both.
Use Slips to change the color of their clay bodies and or for surface development (no un-slipped clay bodies)
Use low fire glazes fired at low fire temperature Cone 04.
Produce a sculpture that is 18" in height.
Write a 500 word research paper on the artist you have been assigned to (John or Andrea Gill).
The Objective:
Students will learn the benefits of artist research and study through hands on work as well as investigative research Though this process students should begin to realize the vast amount of information available to them as artists as it relates to their art production and intellectual development of art theory.
Develop introductory skills associated with slab construction (hard and soft).
Develop and understanding of timing related to slab production and drying.
Gain exposure to low fire glazes and glazing techniques.
Develop skills associated to slip decoration and stencils.
References:
John Gill
Andrea Gill


#13
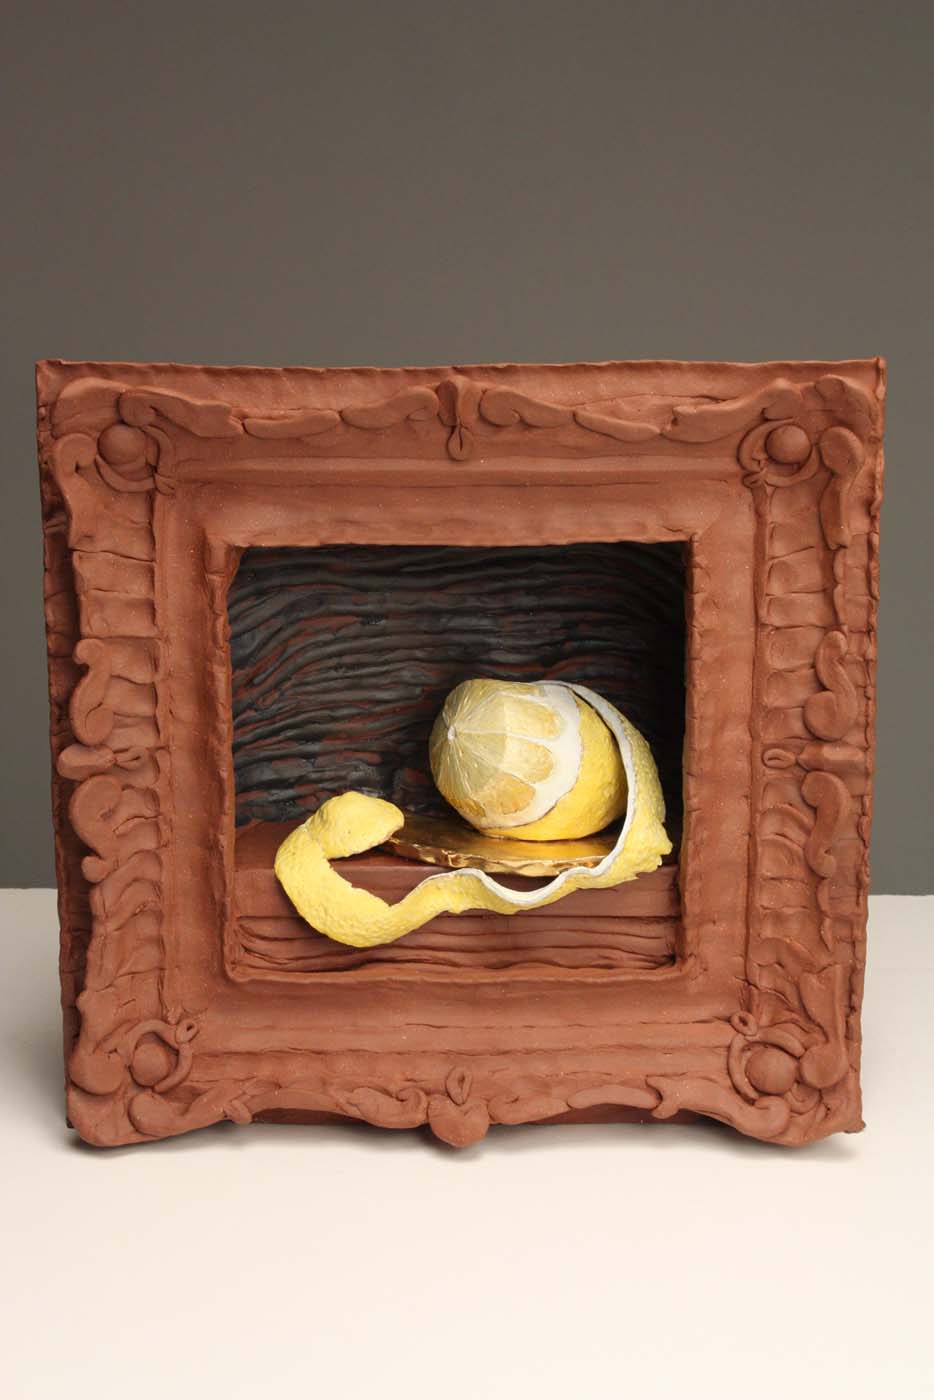
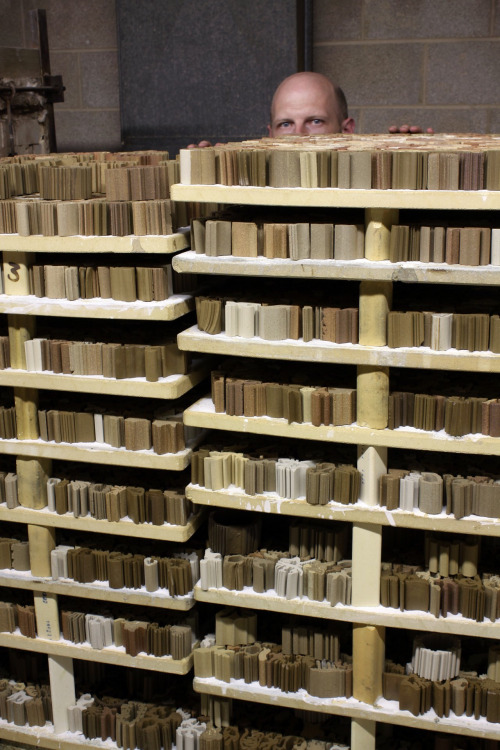
Ready, Set, Ready-made (tiles)
Overview:
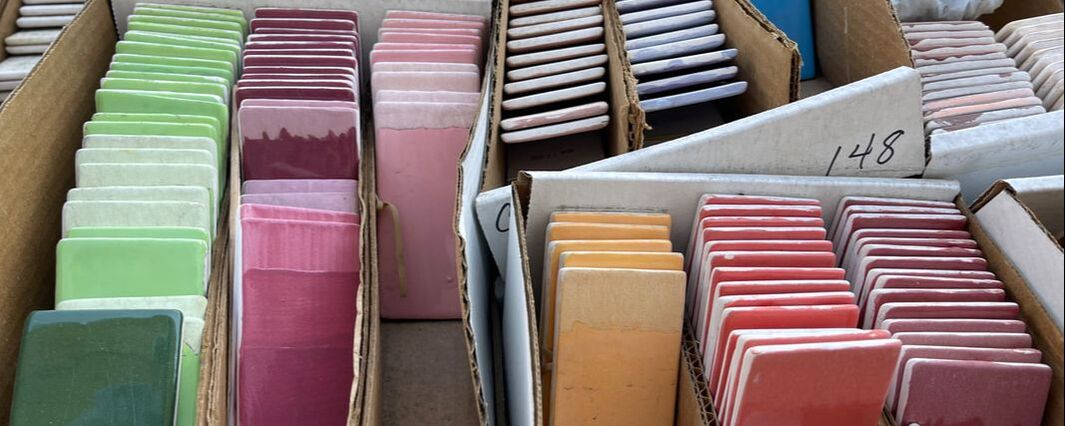
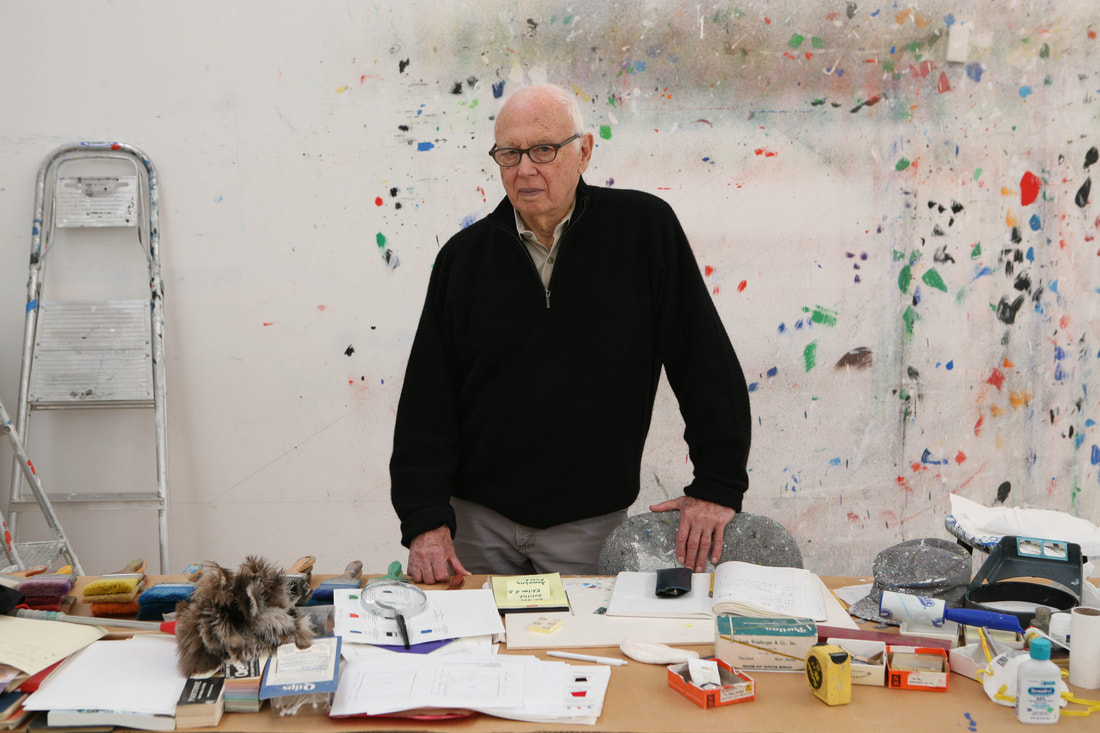
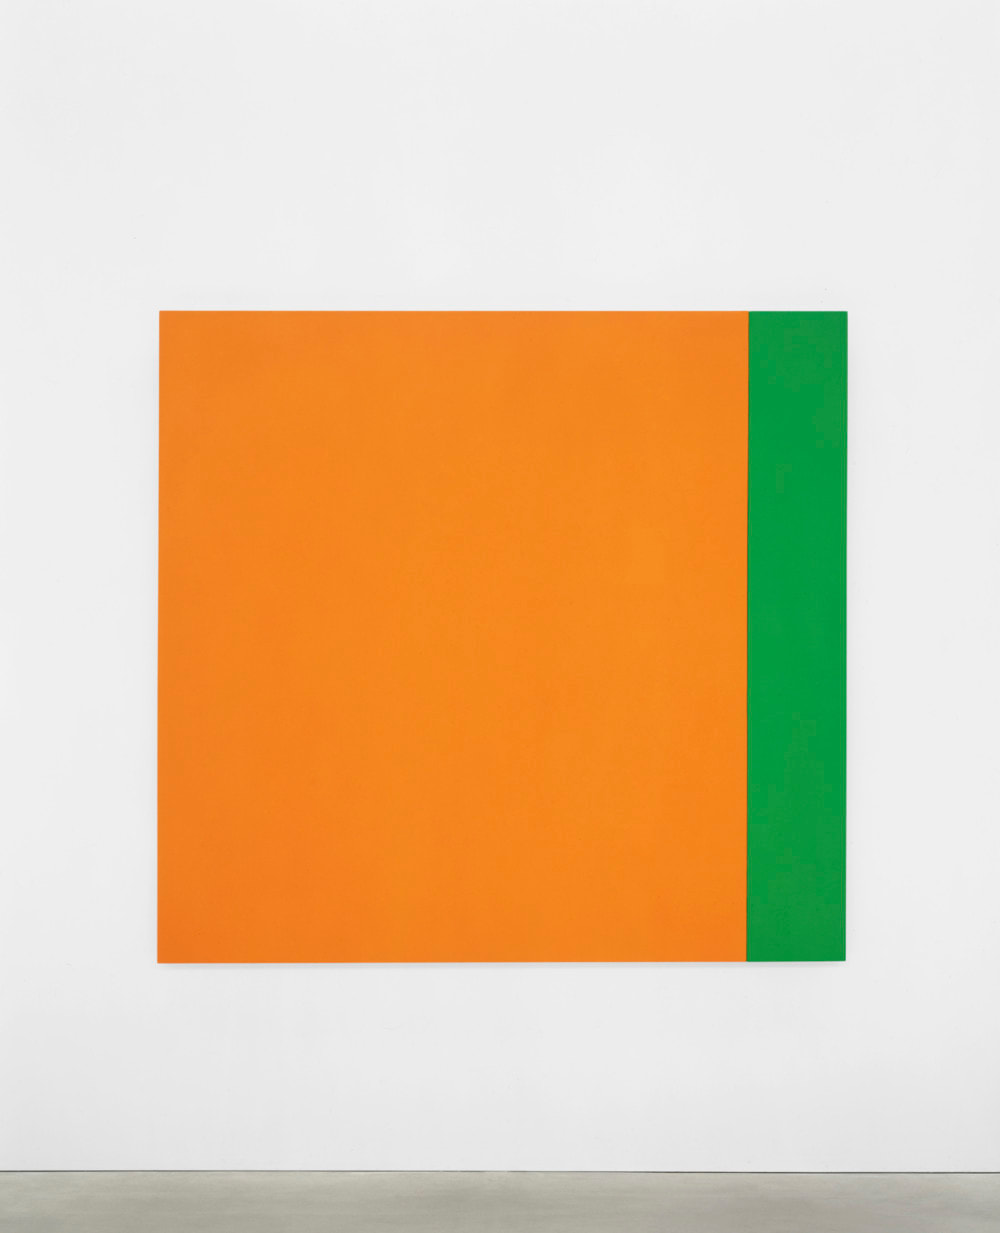
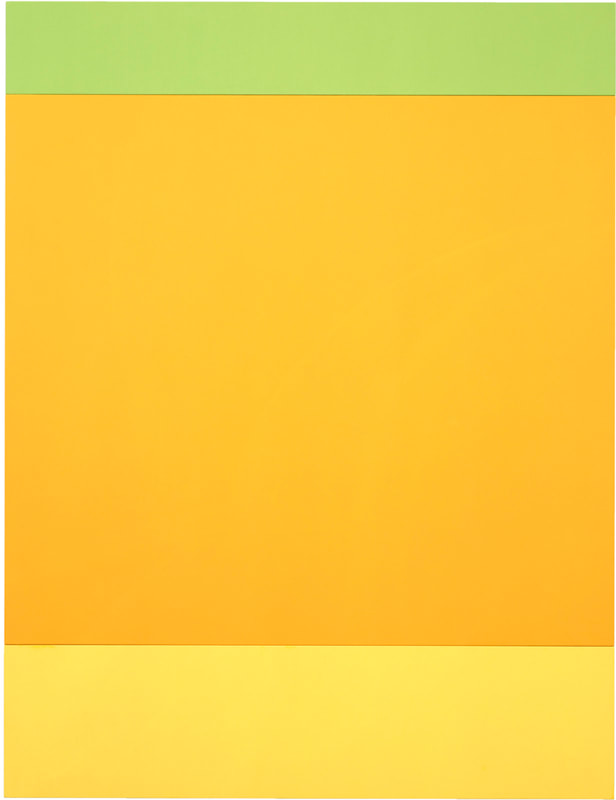
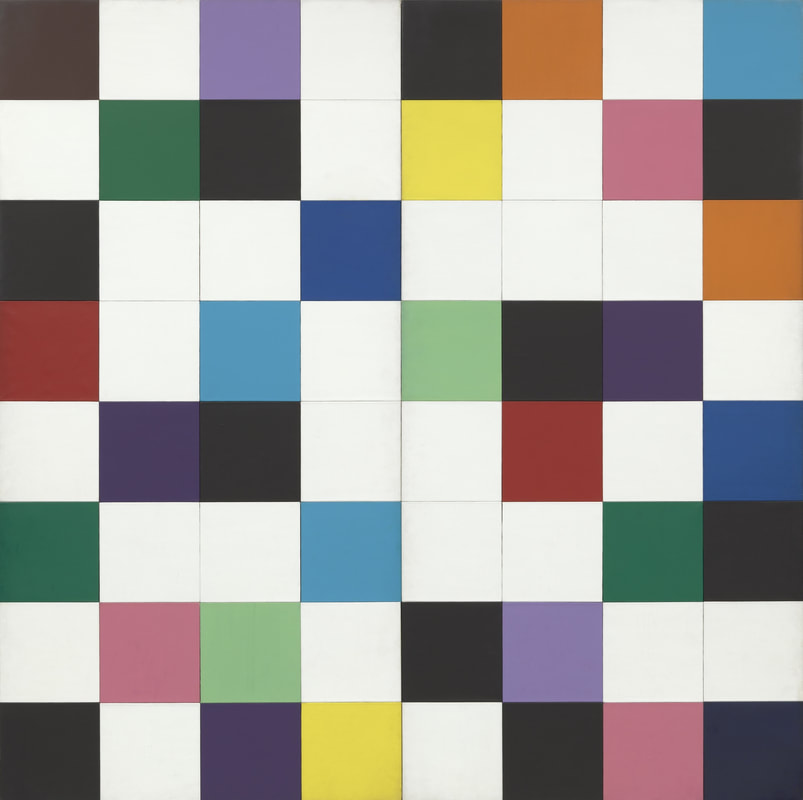
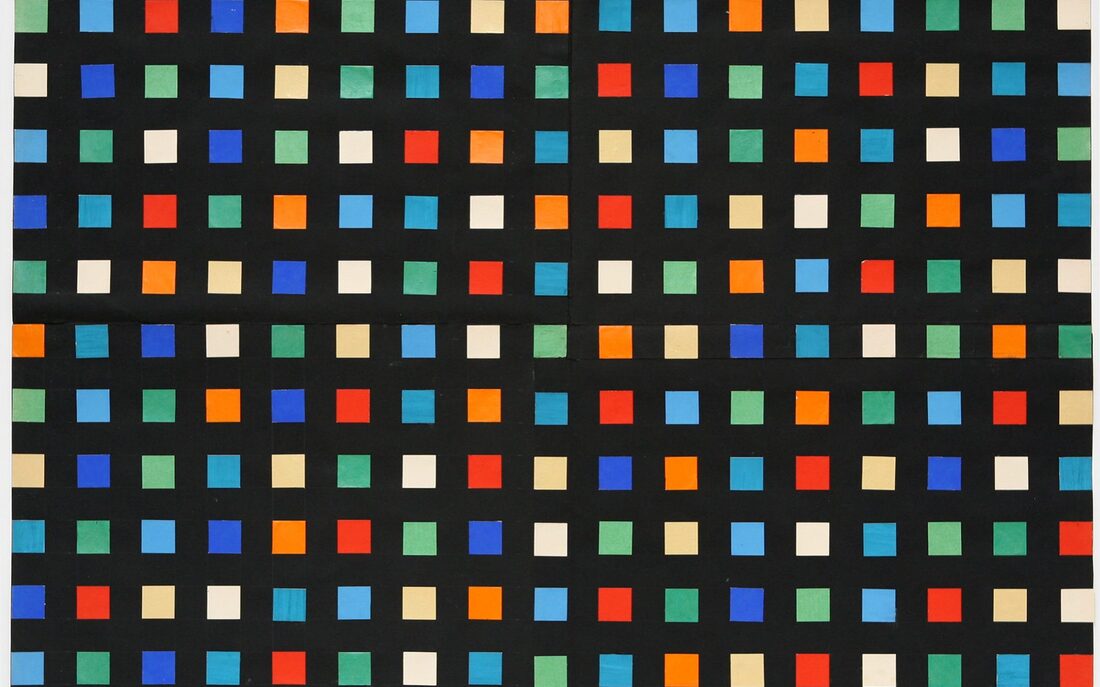
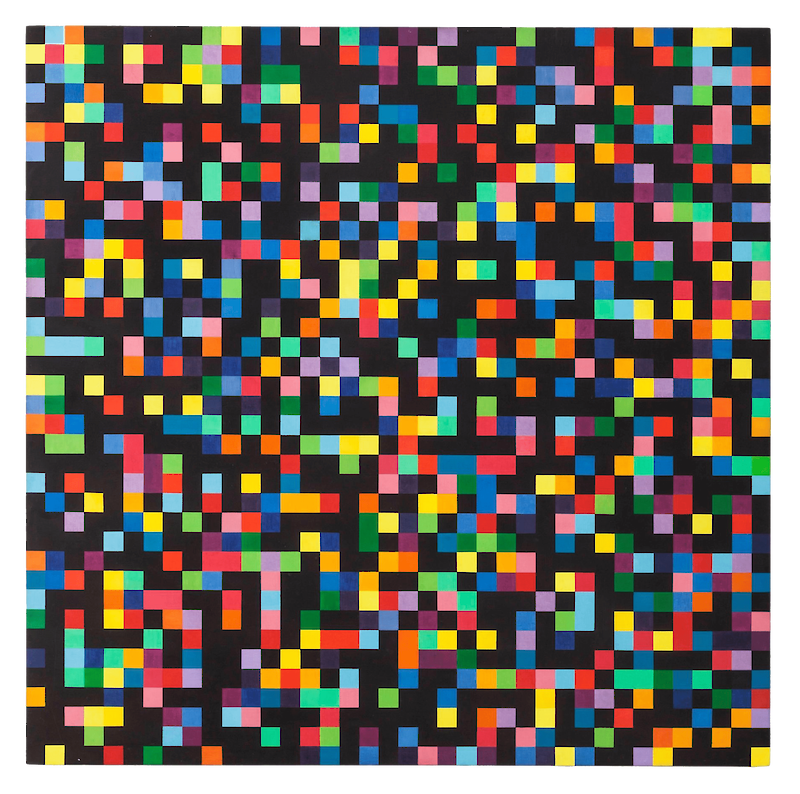
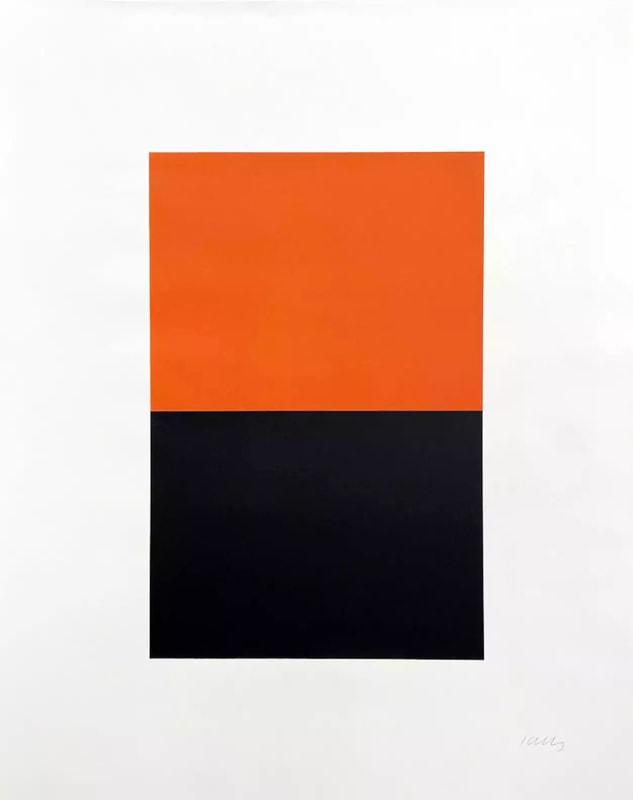
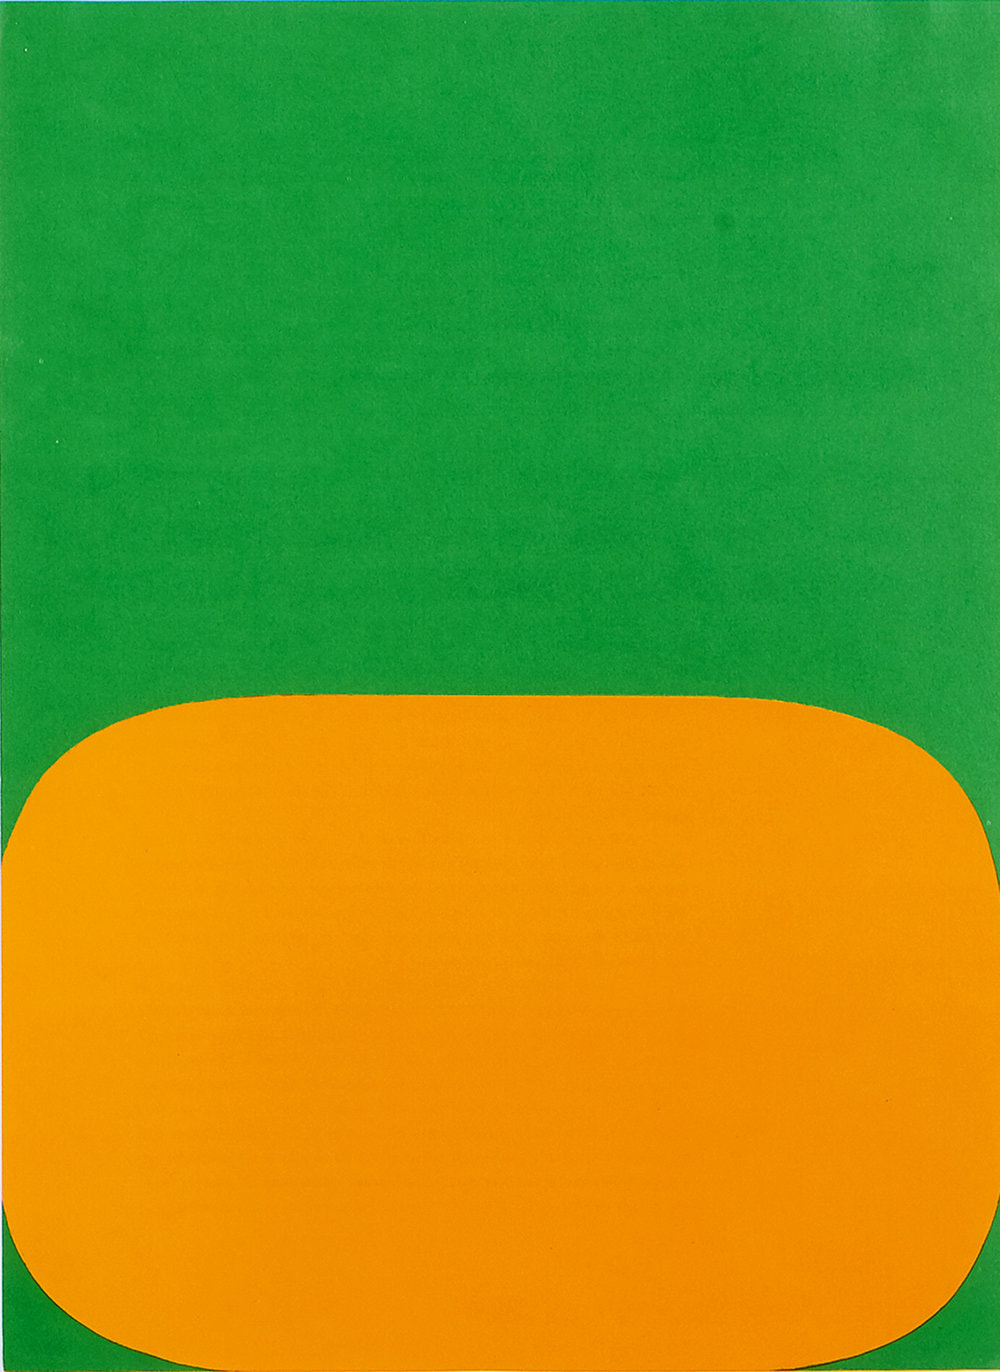
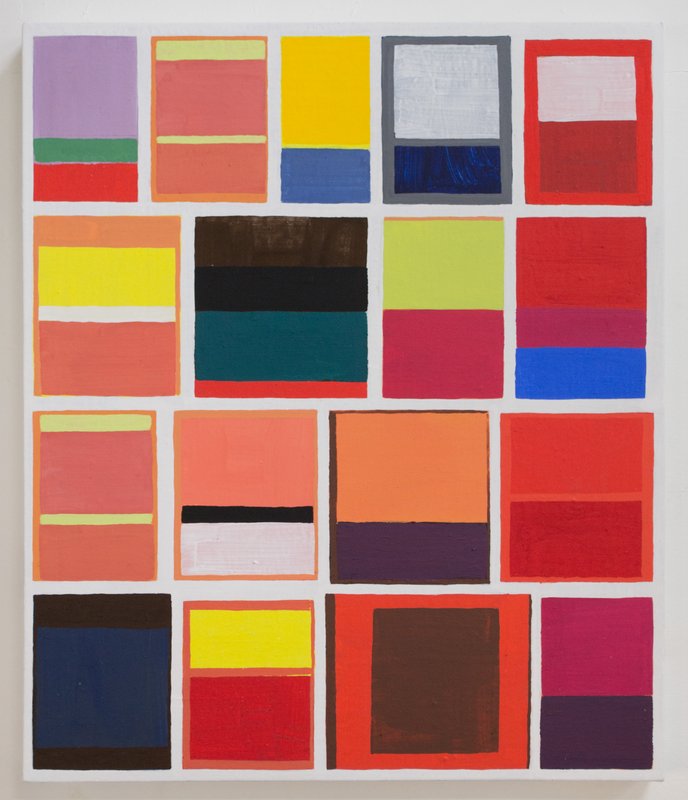
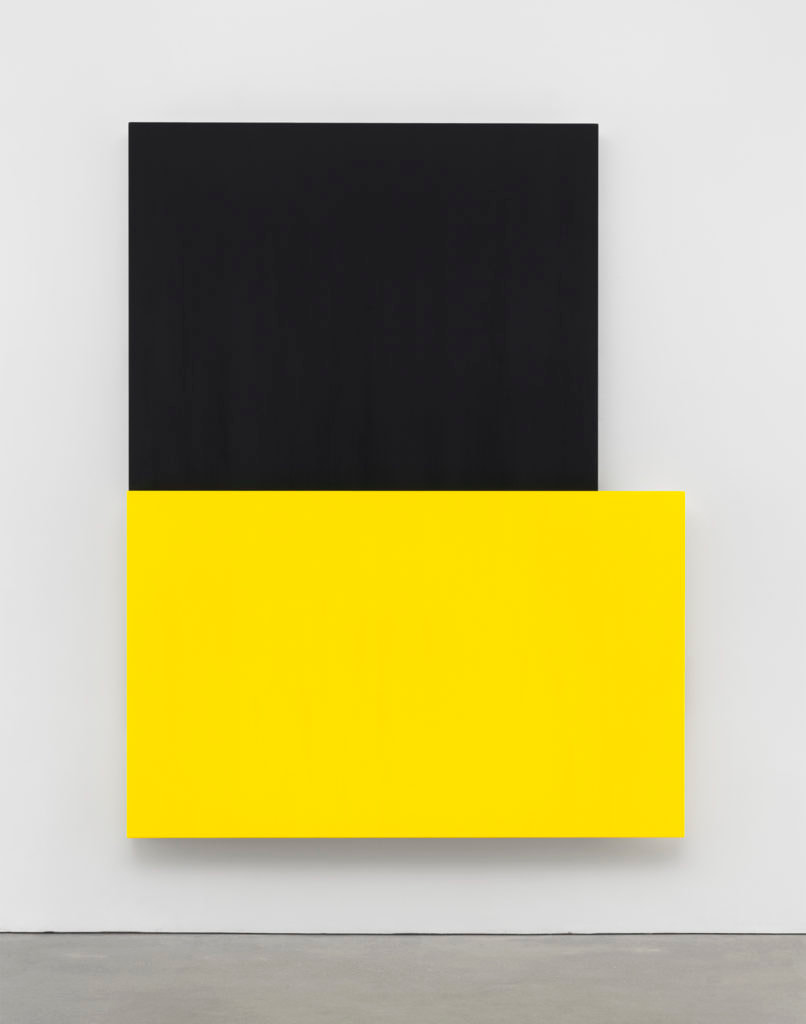
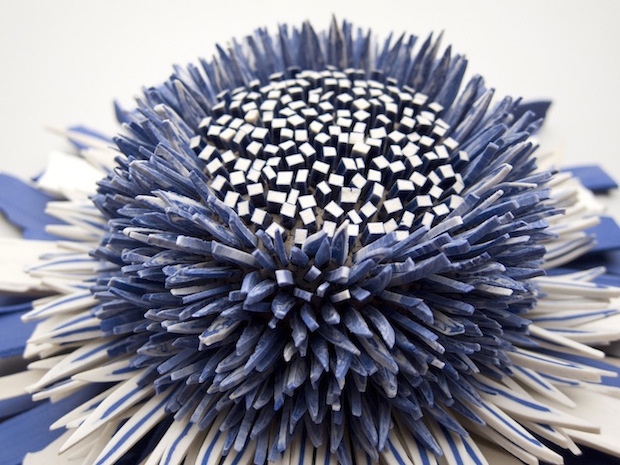
In this project we will be paying with the concept of the ready made. Or for those of you less familiar with that term, let's simply describe it as found and assembled. In this specific case we will be working with a large supply of tiles that were used as industrial Quality Control samples in a ceramic glaze company. These tiles are perfect examples of found ceramic elements that were destined to be discard, and whose intended purpose differ from out end use. We will be using these tiles as as both color source. physical material and conceptual pixel for visual image making.
The Project:
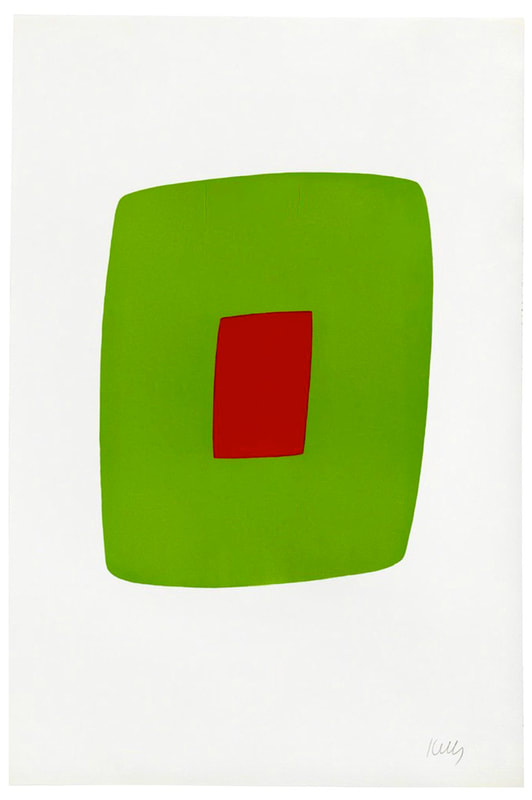
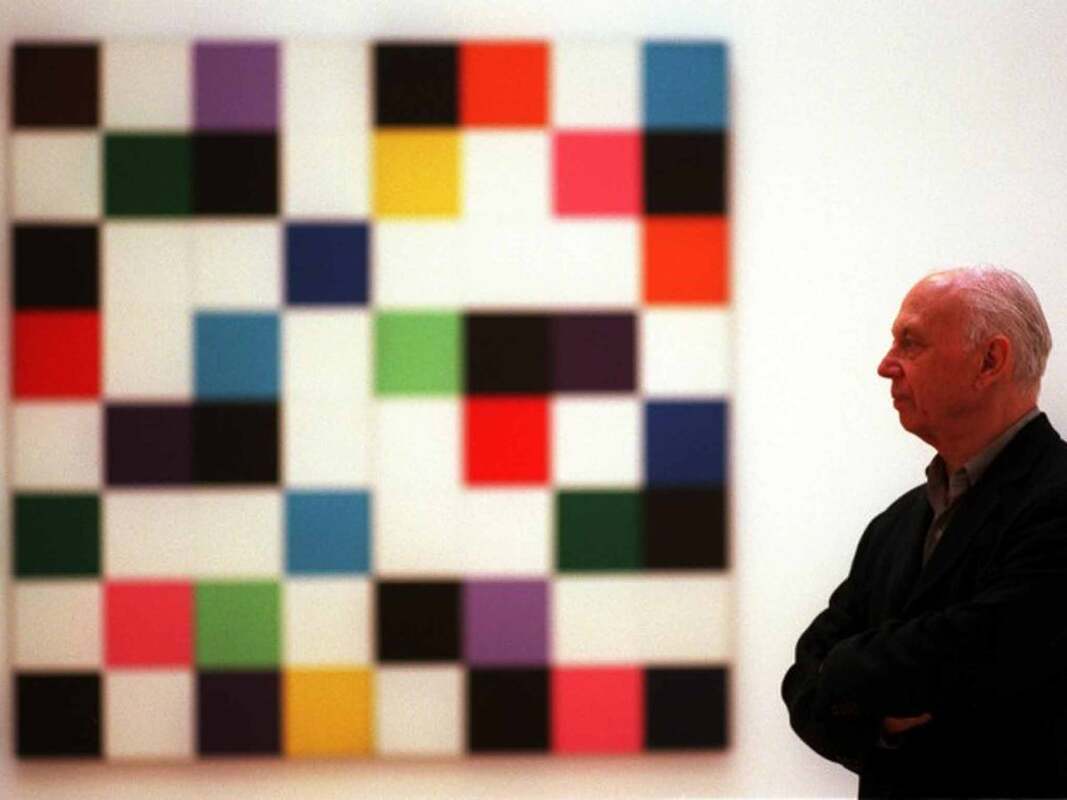
Students will be working from a master source in this assignment. This master source will be the place we derive out visual concepts and layouts for the project. Our Master source will be Ellsworth Kelly. Kelly was an American painter who specialized in minimalistic, design layout painting that were simple and graphic. His works are a perfect source of inspiration for the collection of ready made tiles we have stumbled upon. Students will be working in both groups of two or as individuals (student choice). Each group or individual will be assigned a panel board to layout your designs based upon one of Kellys' works. Each panel board will be approx. 48"x60" and will be hung from the wall on the south exterior of the art building. They will serve as a public art, signage for the art department, and decoration for all to enjoy.
The Requirements:
Each student (or group) must completely cover their designated space with tiles. No bare areas are allowed. All usable space must be used.
Each student (or group) must used an iconic Ellsworth Kelly art work as their artistic source.
Color schemes should try to be followed as best as possible. Adjustments will need to be made based upon availability and quantity. Use your discretion to move forward on you design.
You must layout you work before you begin to fix tiles to the panel boards. Plan before you glue.
All work will become the property of the art build, and all materials will provided for this project.
Objective:
The objective of this assignment is to give students a experience in ready made ceramic works. To pose questions on how involved an artist must be in all aspect of ones work to call such work theirs. What is that ratio? Does this ratio change from artist to artist? Does design equal art? Does emulation or inspiration retain ownership of the creative art source?
Students l play with these questions in class dialogue and experience the converation first hand as they work to create works based on other design using found materials.
In this project we will be paying with the concept of the ready made. Or for those of you less familiar with that term, let's simply describe it as found and assembled. In this specific case we will be working with a large supply of tiles that were used as industrial Quality Control samples in a ceramic glaze company. These tiles are perfect examples of found ceramic elements that were destined to be discard, and whose intended purpose differ from out end use. We will be using these tiles as as both color source. physical material and conceptual pixel for visual image making.
The Project:
Students will be working from a master source in this assignment. This master source will be the place we derive out visual concepts and layouts for the project. Our Master source will be Ellsworth Kelly. Kelly was an American painter who specialized in minimalistic, design layout painting that were simple and graphic. His works are a perfect source of inspiration for the collection of ready made tiles we have stumbled upon. Students will be working in both groups of two or as individuals (student choice). Each group or individual will be assigned a panel board to layout your designs based upon one of Kellys' works. Each panel board will be approx. 48"x60" and will be hung from the wall on the south exterior of the art building. They will serve as a public art, signage for the art department, and decoration for all to enjoy.
The Requirements:
Each student (or group) must completely cover their designated space with tiles. No bare areas are allowed. All usable space must be used.
Each student (or group) must used an iconic Ellsworth Kelly art work as their artistic source.
Color schemes should try to be followed as best as possible. Adjustments will need to be made based upon availability and quantity. Use your discretion to move forward on you design.
You must layout you work before you begin to fix tiles to the panel boards. Plan before you glue.
All work will become the property of the art build, and all materials will provided for this project.
Objective:
The objective of this assignment is to give students a experience in ready made ceramic works. To pose questions on how involved an artist must be in all aspect of ones work to call such work theirs. What is that ratio? Does this ratio change from artist to artist? Does design equal art? Does emulation or inspiration retain ownership of the creative art source?
Students l play with these questions in class dialogue and experience the converation first hand as they work to create works based on other design using found materials.


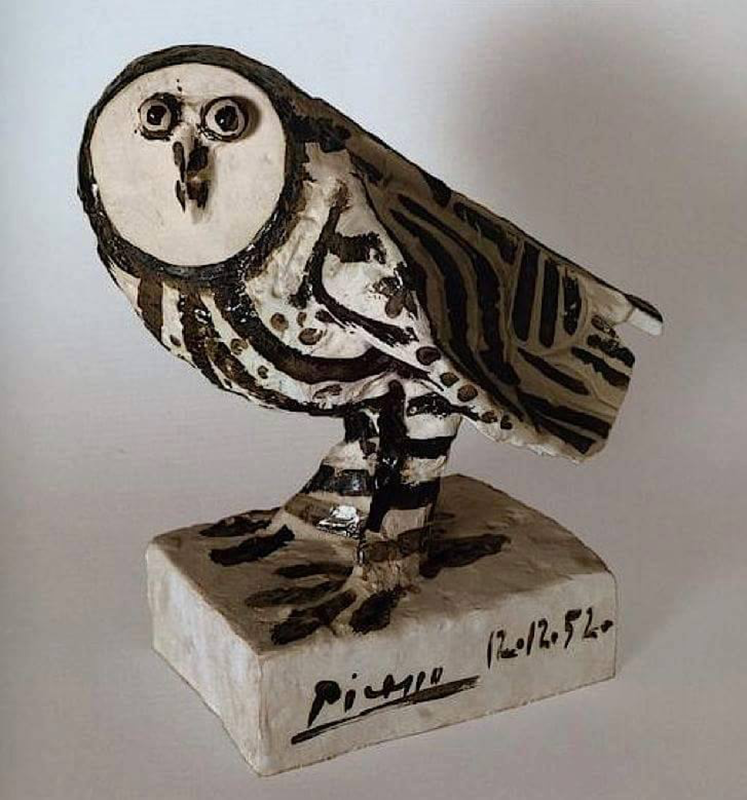
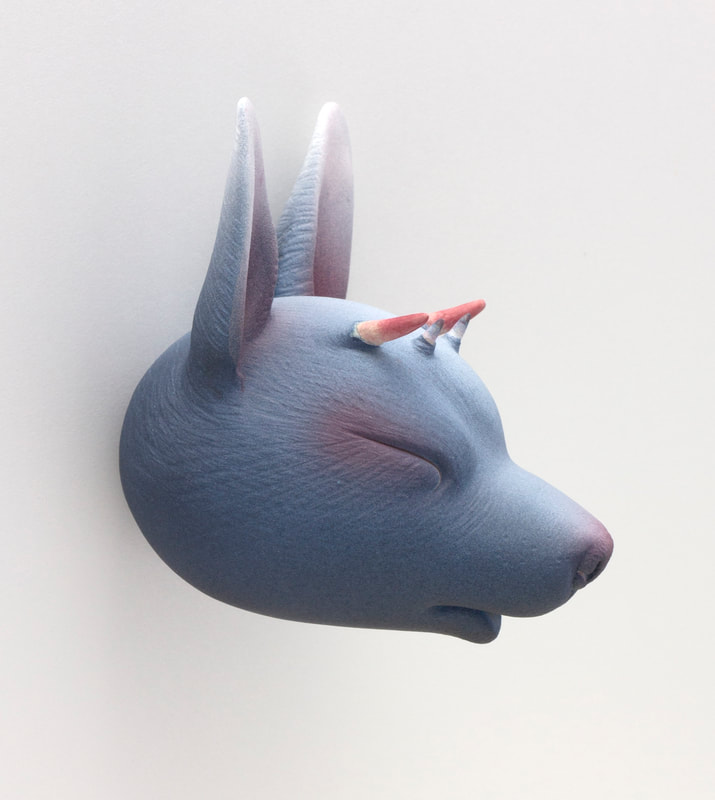
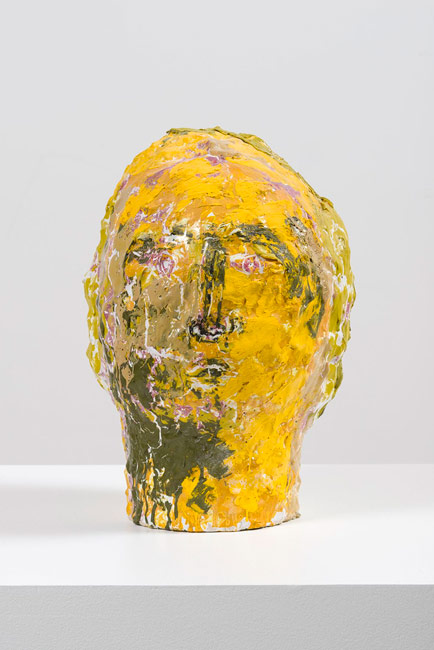
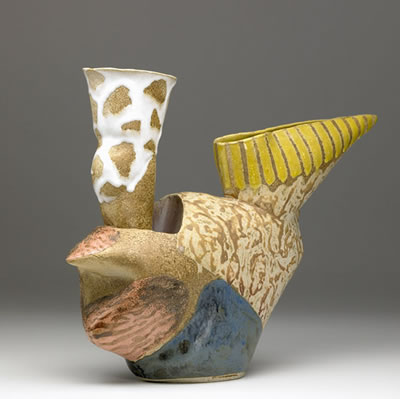
#12
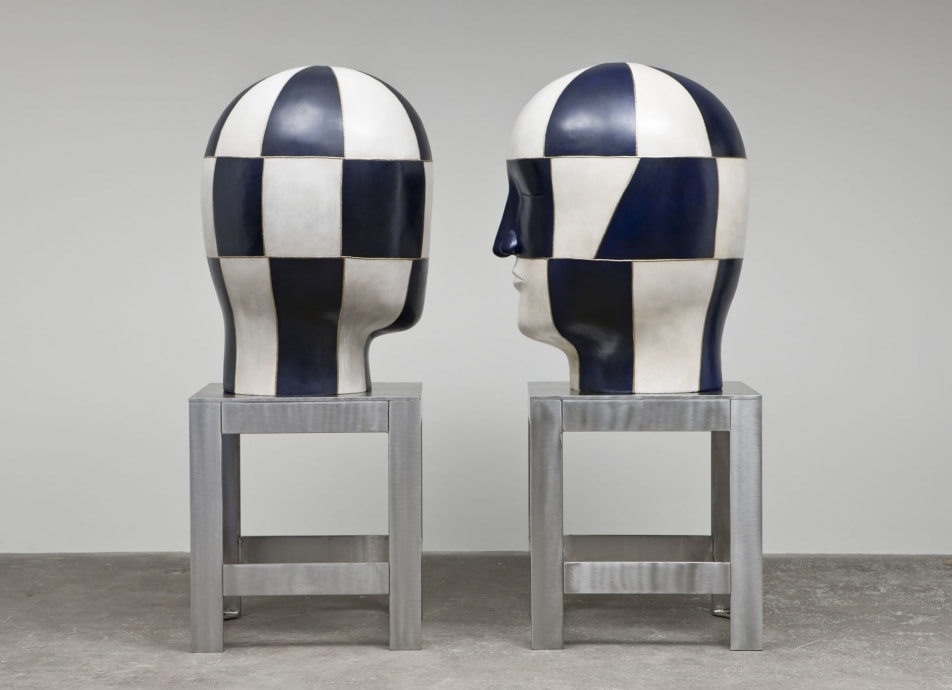
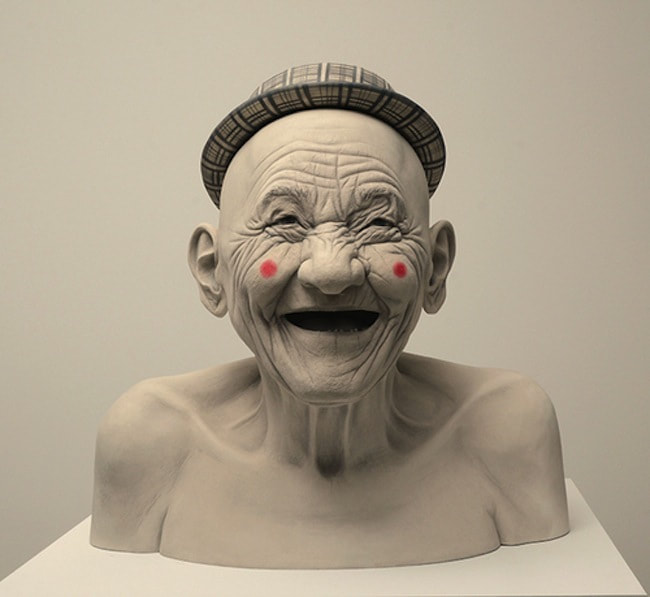
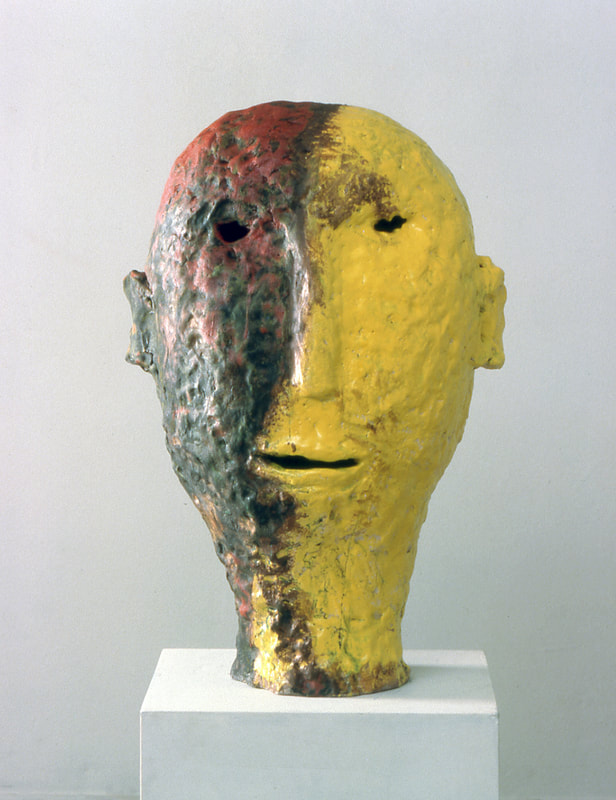
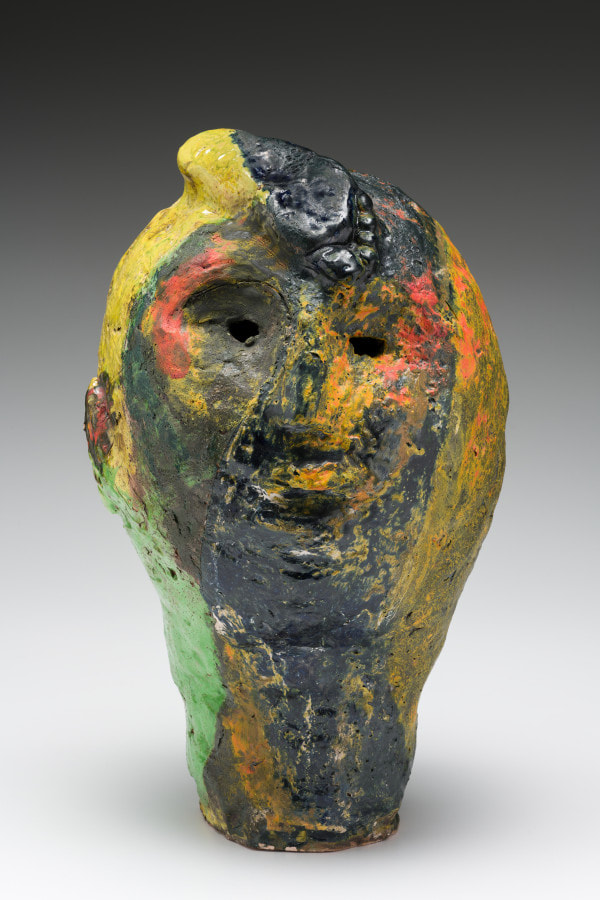
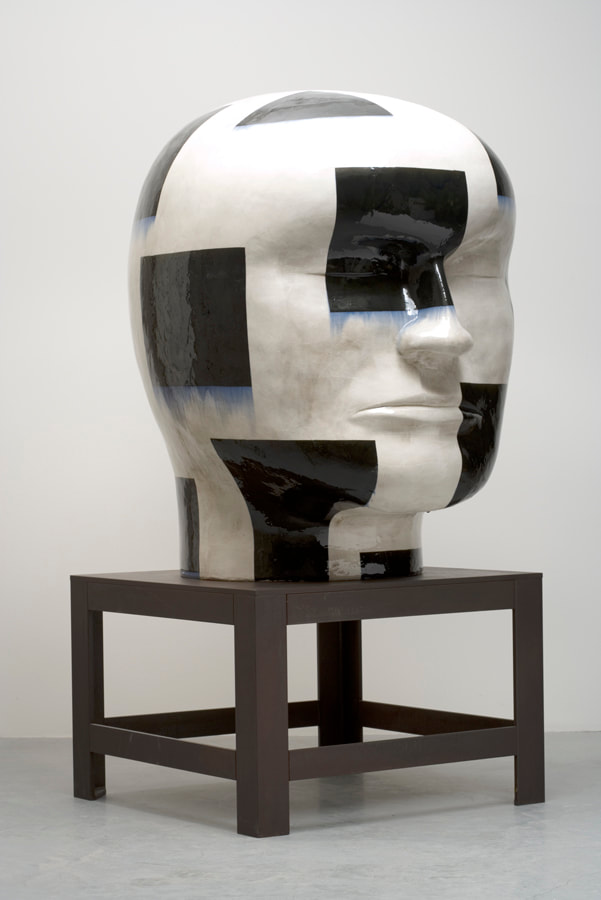
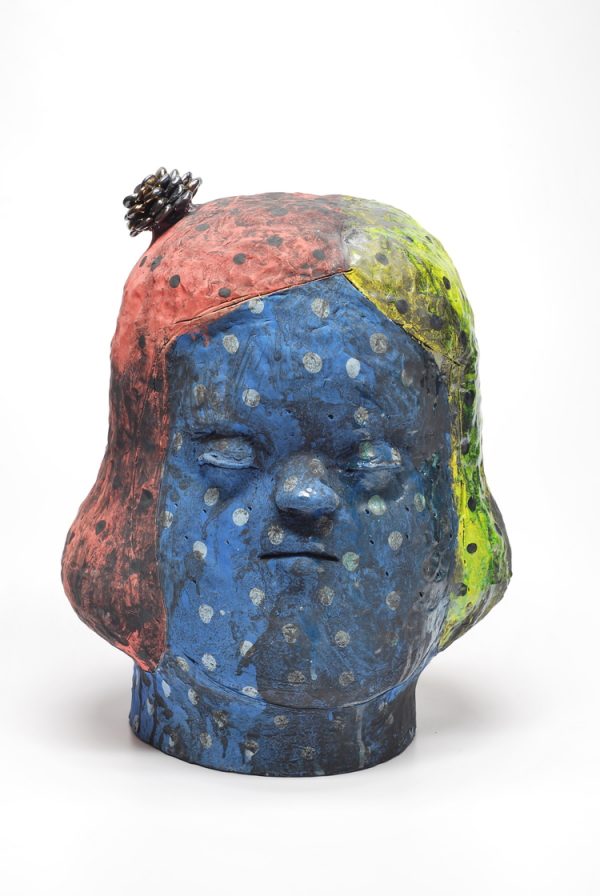
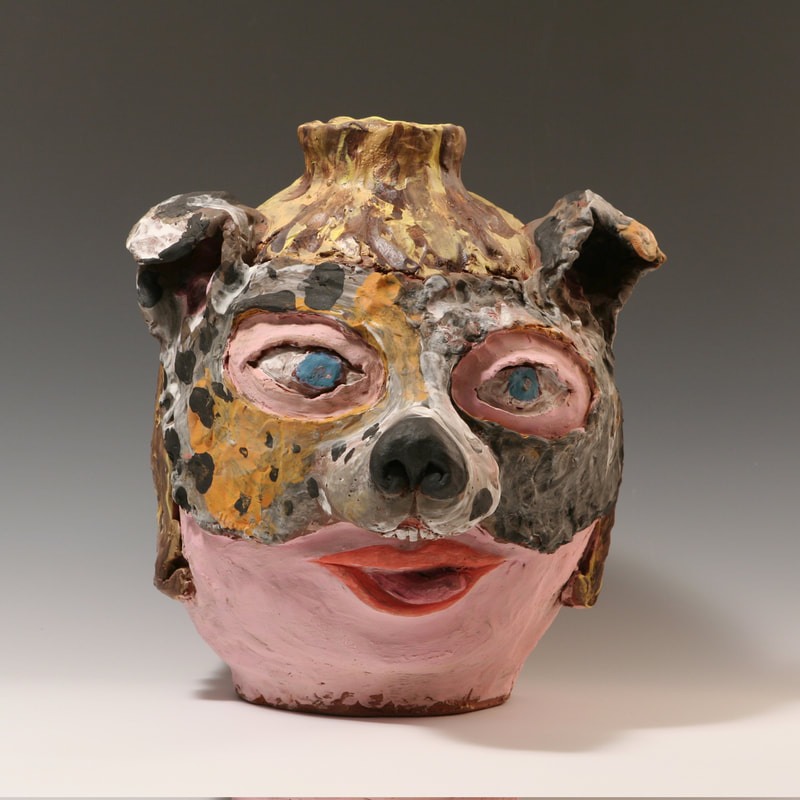
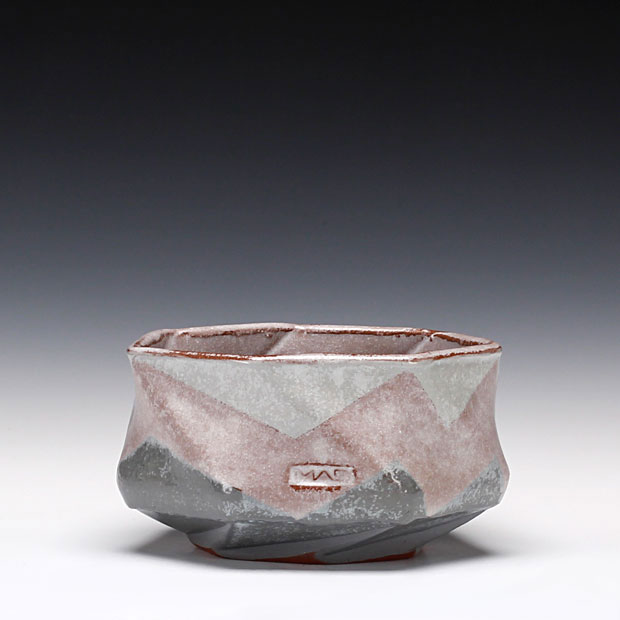
Melon, Cabeza, Knogen: playing with head space
Overview:
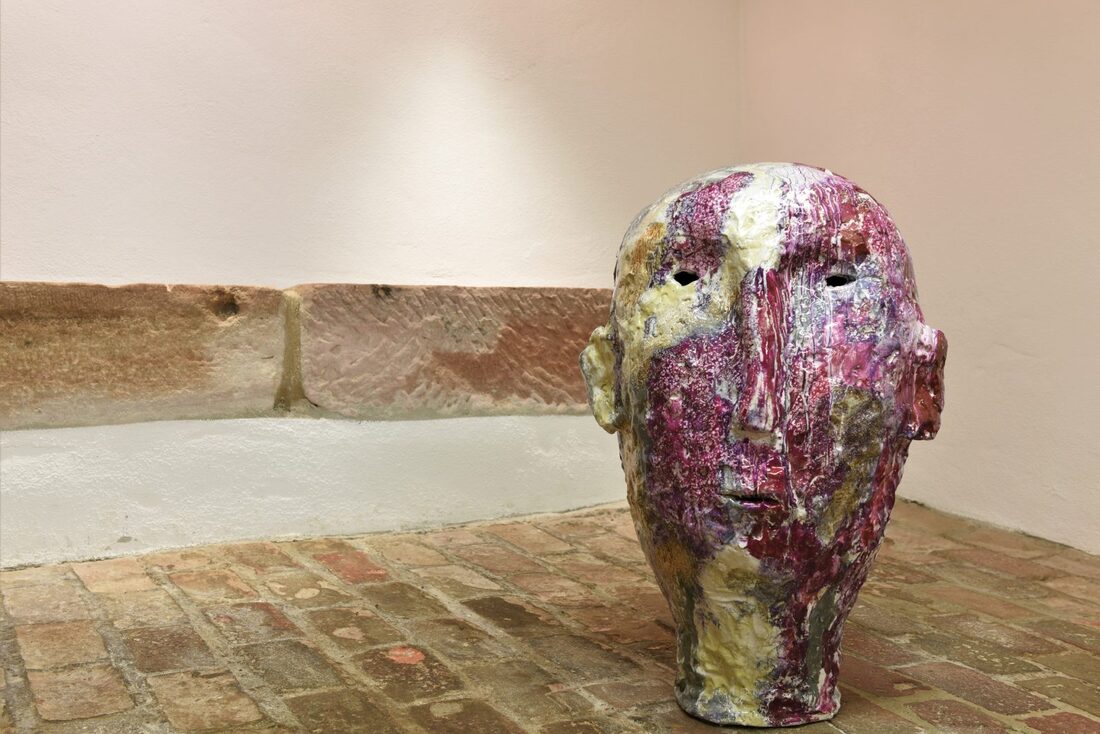
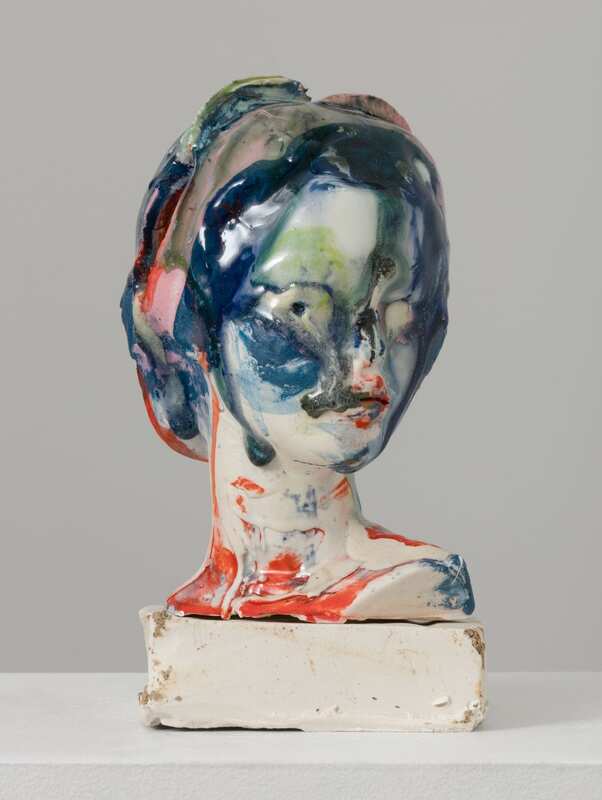
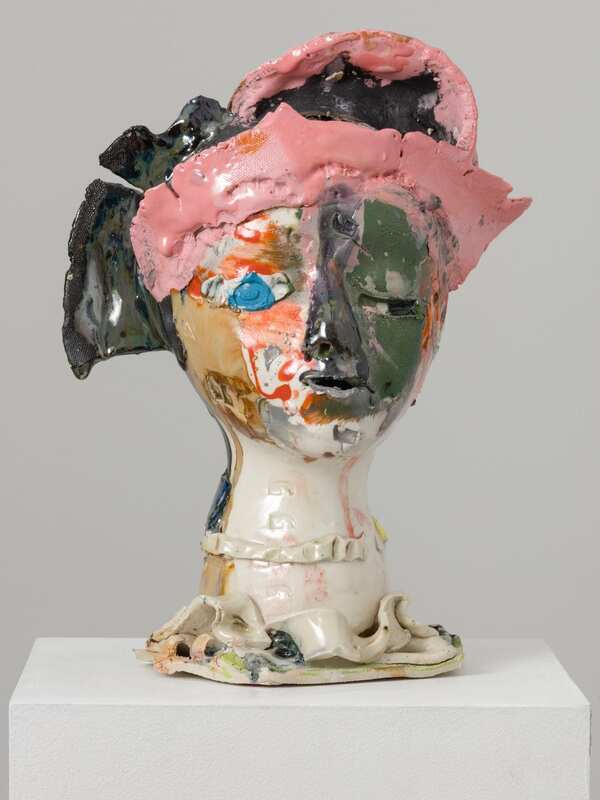
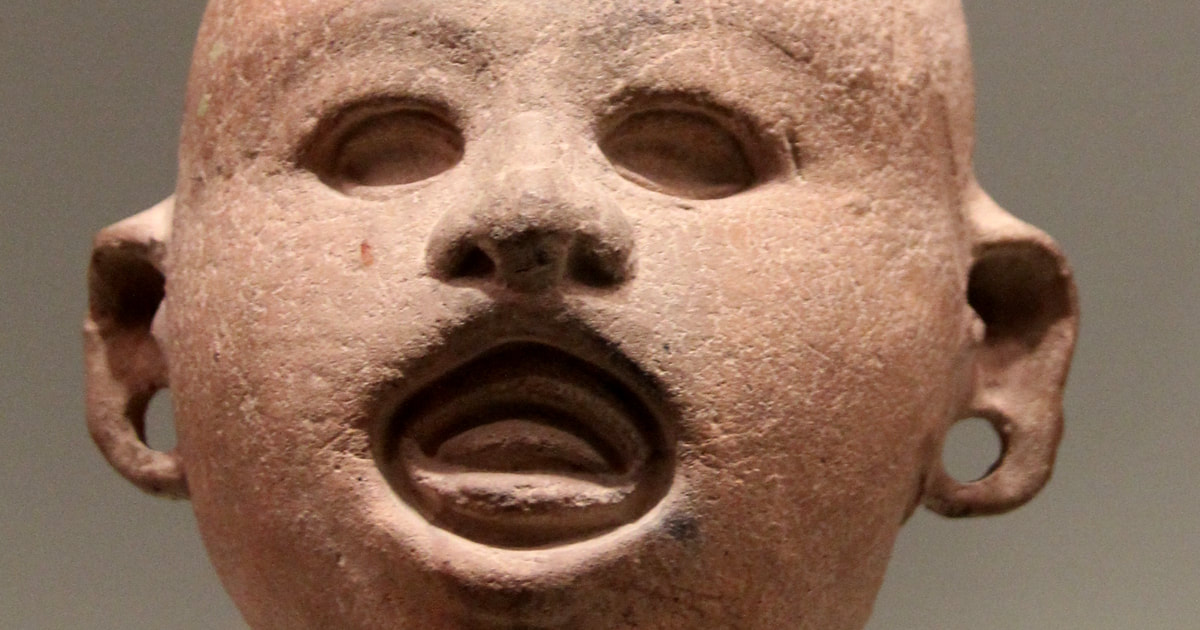
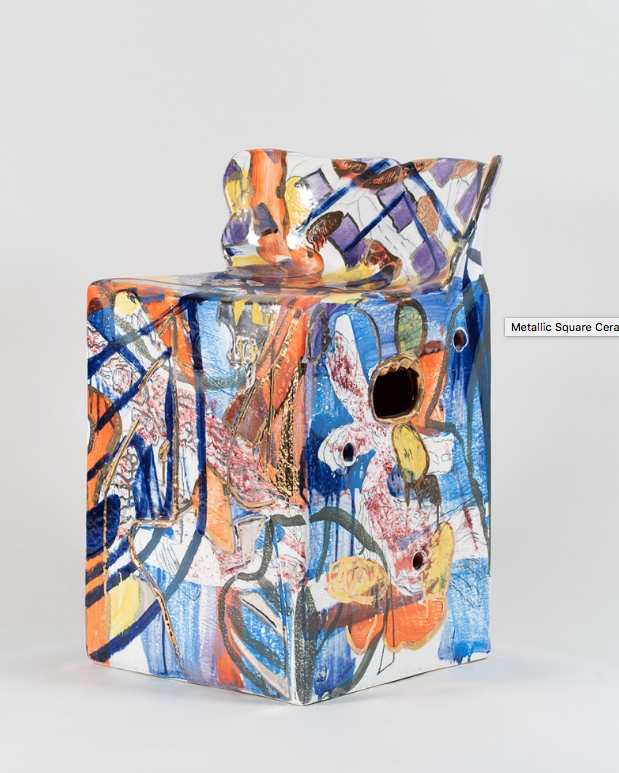
In this project we will be playing with some concepts on how to sculpturally engage the head. This intro project will function as both and opportunity to explore artistic concepts as well as explore the basic building fundamentals of clay and glaze application. Please take to heart to heart that this is going to be a fast and fun engagement. Keep it loose, fun and let's take some chances and set up some experiments.
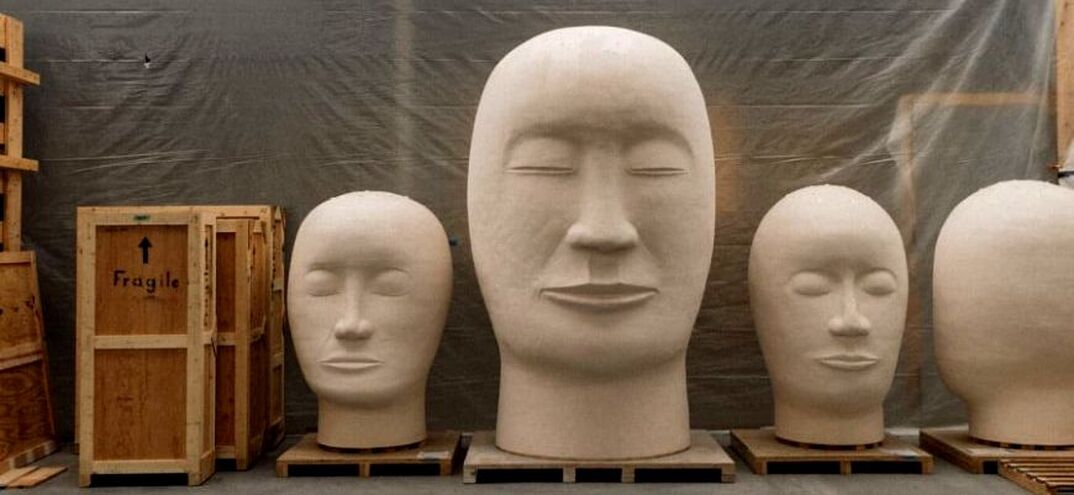
The Project:
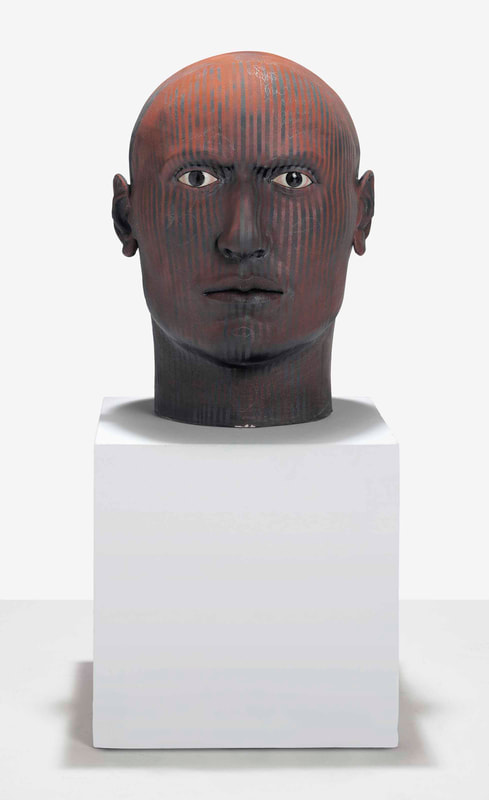
Each student is going to be asked to produce two (2) ceramic heads. Im requesting that one head will be engaged in a somewhat realistic fashion where you will look to key facial features to create a bust that will have a direct reference to the landscape of the head. The other head is going to be an abstraction of the head. This term could be used to address artistic choices used to create a bust that hints at or vaguely references the human head. In this abstract object students are encouraged to push their personal boundaries on how they define, see, envision and create their artwork.
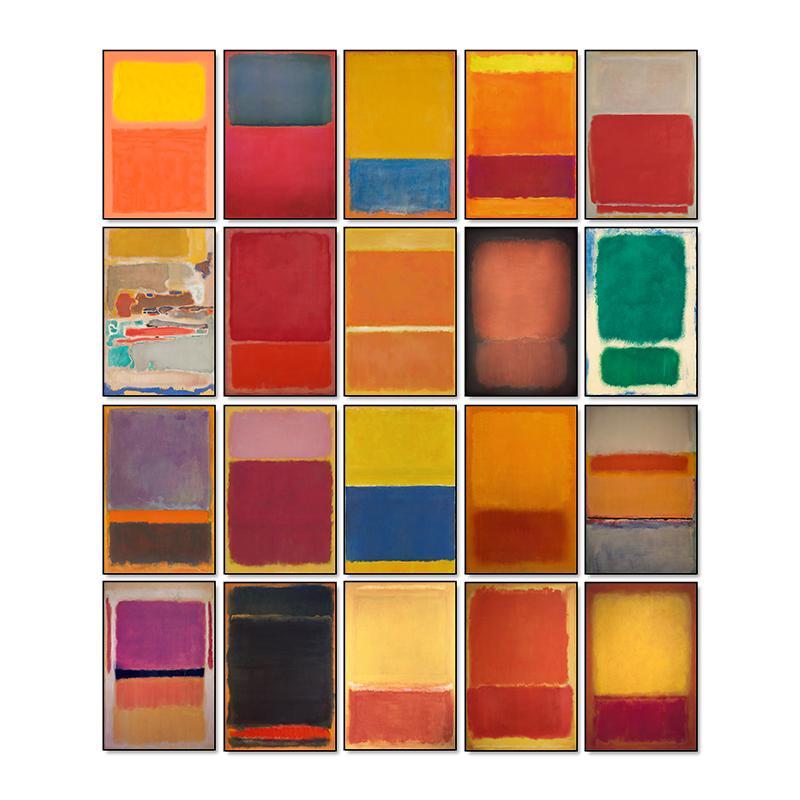
Works constructed will be fired to bisque and then treated with a Majolica Glaze method. This method is painterly and often associated with brilliant colors and crisp marks. The majolica glaze method will be covered in great length during class.
Requirements:
Each student will be required to do the following to successfully complete this project.
Create TWO (2) ceramic busts.
One will be addressing a more realistic approach.
One will be an abstract approach.
Each Bust must be no taller than 18"
Each bust must be able to stand upright on its own. (vertical orientation)
Each bust must be decorated using Majolica Glaze and the Majolica overglaze method.
All work will be installed as a group installation on the wall. (location to be determined)
Objective:
Through this project students will learn basic building techniques such as coil and pinch as well as how to join and combine ceramic elements to one another. Students will also gain beginning level knowledge of glaze and glaze application as well as the historical significance of majolica, its origins in the middle east and its continued usage in ceramic art for centuries. Principals of design such as scale, volume and proportion will also be discussed and employed as students create their art work.
Key Objective Targets:
Gain understanding of clays structural abilities and limitations.
Gain understanding on how moisture levels effect clay during construction.
Gain experience in monitoring and adjusting a ceramics sculptures moisture content.
Gain basic experience hand building with coil and pinch techniques.
Gain basic understanding of glaze, glaze application and surface decoration.
Become familiar with Majolica glaze and the basic history of the glaze technique.
Use fundamental elements of 3-D design to create ceramic sculptures.
Learn how to load an electric kiln and the processes of firing and the transformation that results.
Engage in dialogue and critique of ones art work through the class setting.
Artist References:
Xavier Tobes
Viola Frey
Matt Wedel
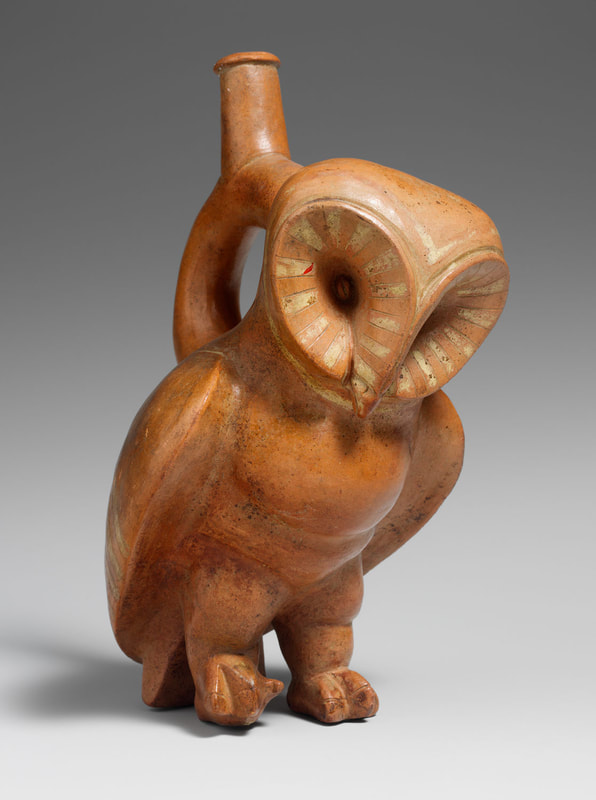
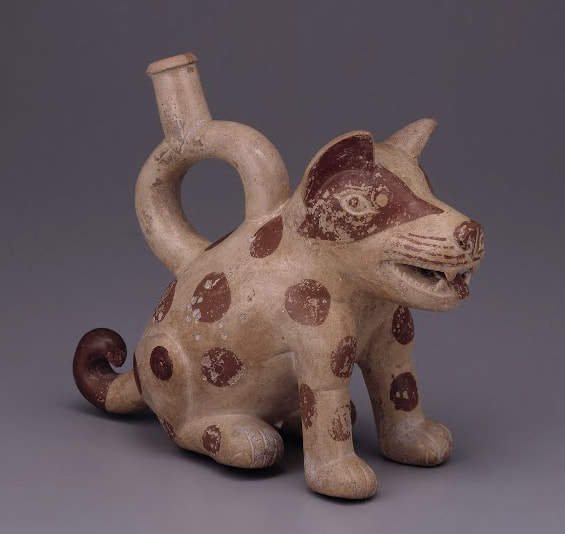
Moche Indian Ceramics
Sunkoo Yuh
Kristina Cardova
Jun Kaneko
Kensuki Yamada
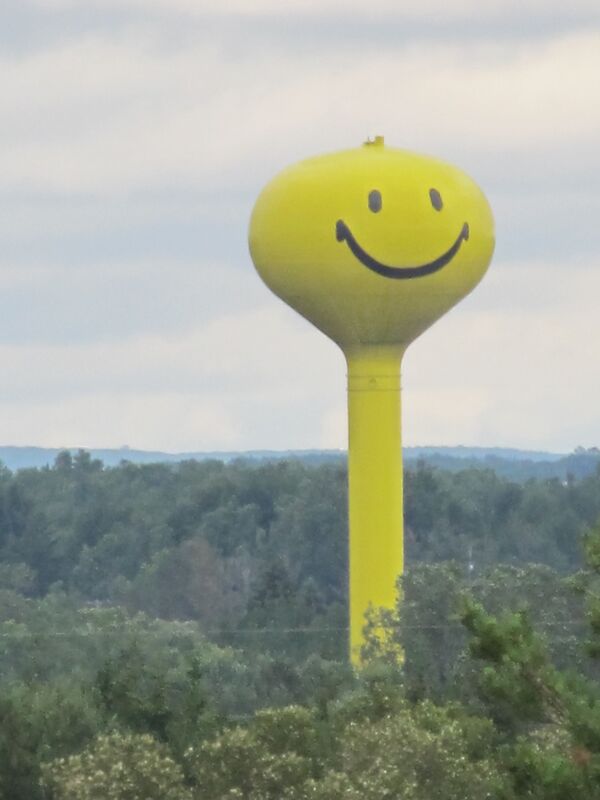
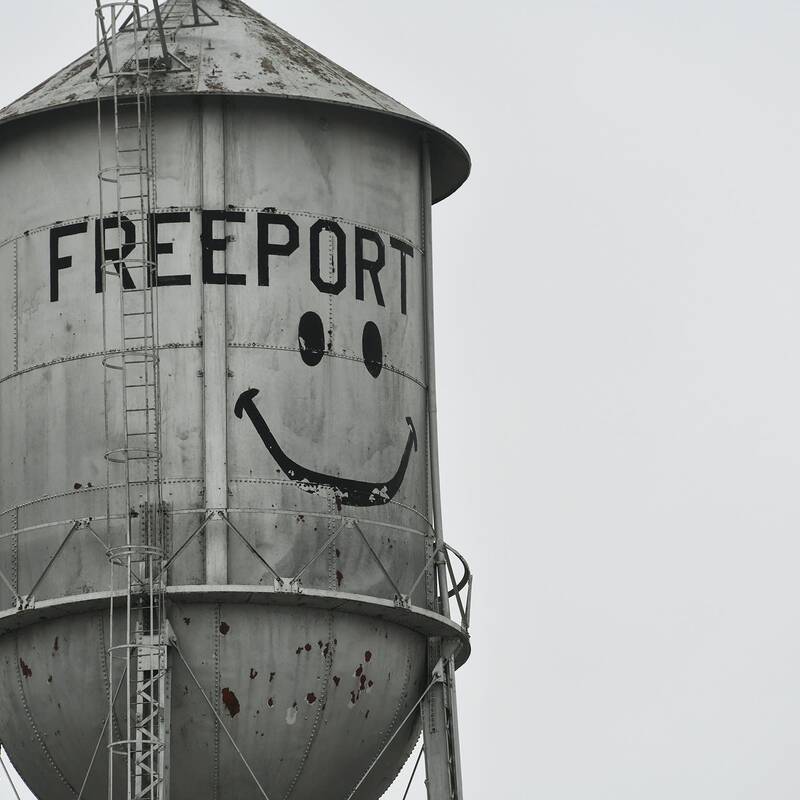
Mr. Water Tower
In this project we will be playing with some concepts on how to sculpturally engage the head. This intro project will function as both and opportunity to explore artistic concepts as well as explore the basic building fundamentals of clay and glaze application. Please take to heart to heart that this is going to be a fast and fun engagement. Keep it loose, fun and let's take some chances and set up some experiments.
The Project:
Each student is going to be asked to produce two (2) ceramic heads. Im requesting that one head will be engaged in a somewhat realistic fashion where you will look to key facial features to create a bust that will have a direct reference to the landscape of the head. The other head is going to be an abstraction of the head. This term could be used to address artistic choices used to create a bust that hints at or vaguely references the human head. In this abstract object students are encouraged to push their personal boundaries on how they define, see, envision and create their artwork.
Works constructed will be fired to bisque and then treated with a Majolica Glaze method. This method is painterly and often associated with brilliant colors and crisp marks. The majolica glaze method will be covered in great length during class.
Requirements:
Each student will be required to do the following to successfully complete this project.
Create TWO (2) ceramic busts.
One will be addressing a more realistic approach.
One will be an abstract approach.
Each Bust must be no taller than 18"
Each bust must be able to stand upright on its own. (vertical orientation)
Each bust must be decorated using Majolica Glaze and the Majolica overglaze method.
All work will be installed as a group installation on the wall. (location to be determined)
Objective:
Through this project students will learn basic building techniques such as coil and pinch as well as how to join and combine ceramic elements to one another. Students will also gain beginning level knowledge of glaze and glaze application as well as the historical significance of majolica, its origins in the middle east and its continued usage in ceramic art for centuries. Principals of design such as scale, volume and proportion will also be discussed and employed as students create their art work.
Key Objective Targets:
Gain understanding of clays structural abilities and limitations.
Gain understanding on how moisture levels effect clay during construction.
Gain experience in monitoring and adjusting a ceramics sculptures moisture content.
Gain basic experience hand building with coil and pinch techniques.
Gain basic understanding of glaze, glaze application and surface decoration.
Become familiar with Majolica glaze and the basic history of the glaze technique.
Use fundamental elements of 3-D design to create ceramic sculptures.
Learn how to load an electric kiln and the processes of firing and the transformation that results.
Engage in dialogue and critique of ones art work through the class setting.
Artist References:
Xavier Tobes
Viola Frey
Matt Wedel
Moche Indian Ceramics
Sunkoo Yuh
Kristina Cardova
Jun Kaneko
Kensuki Yamada
Mr. Water Tower


#11
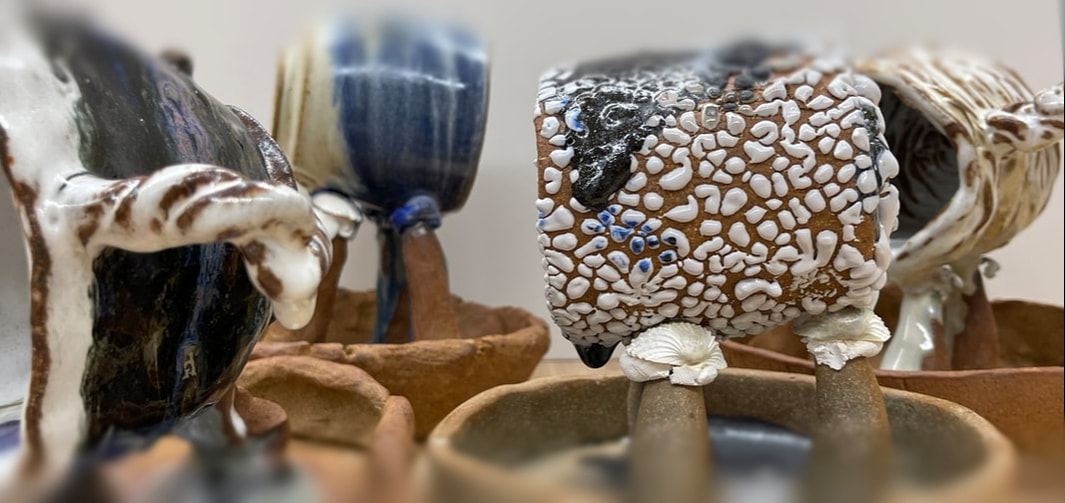
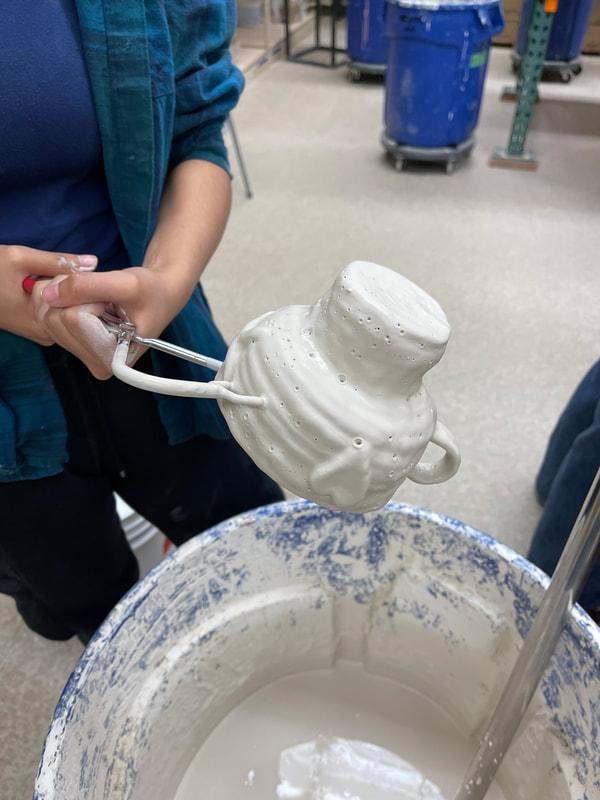
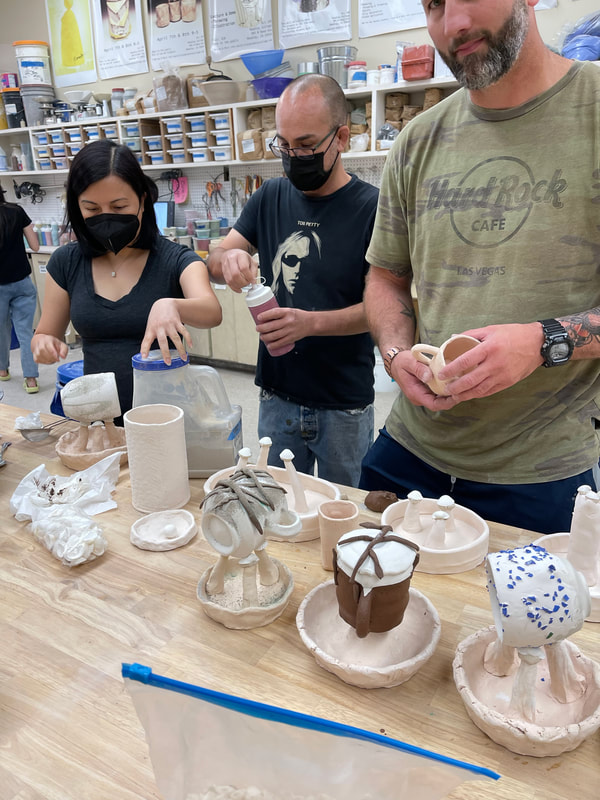
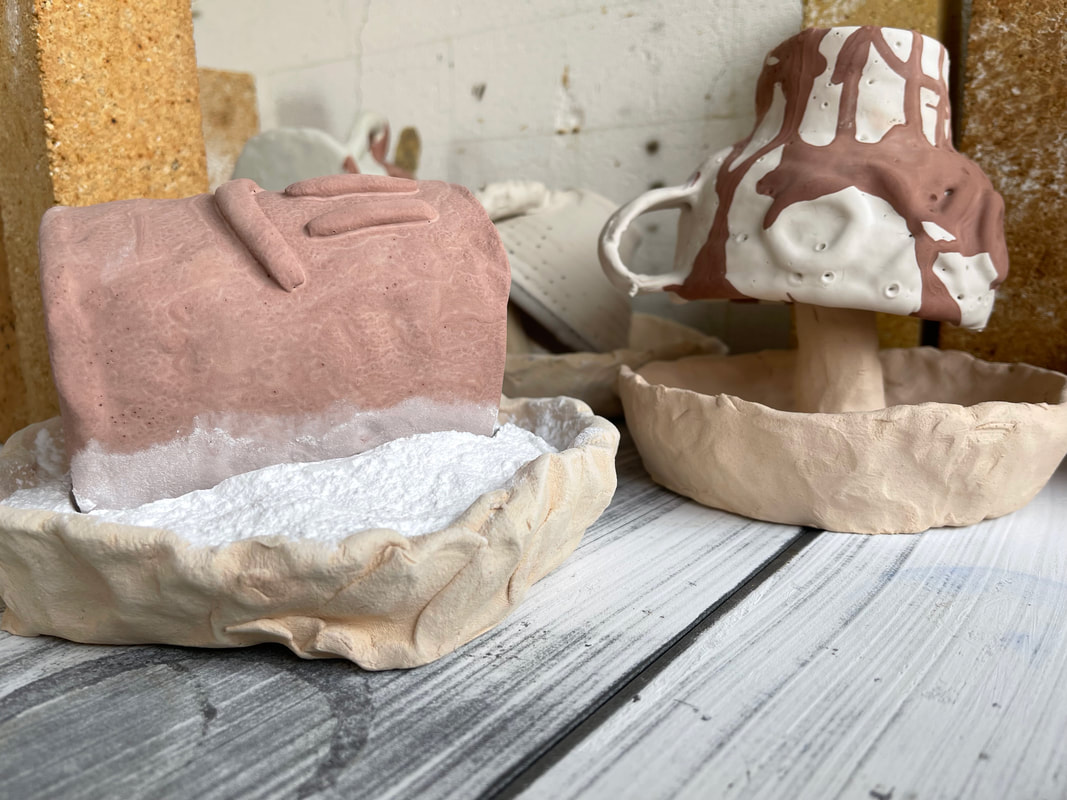
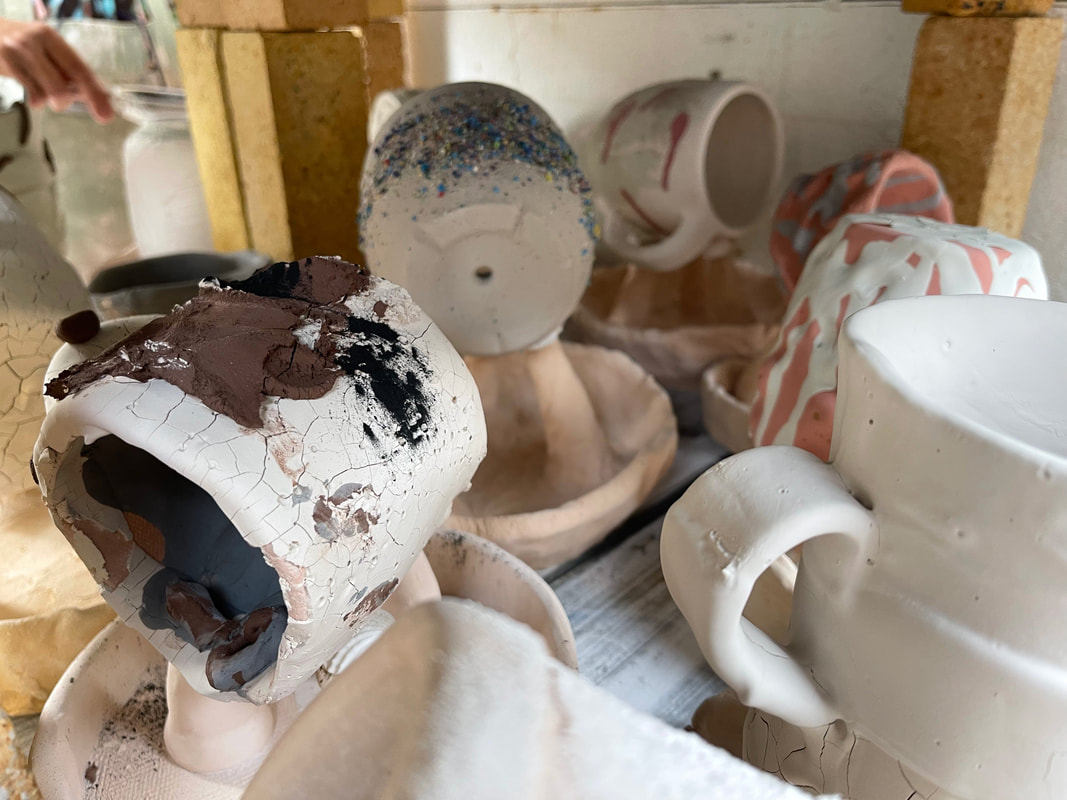
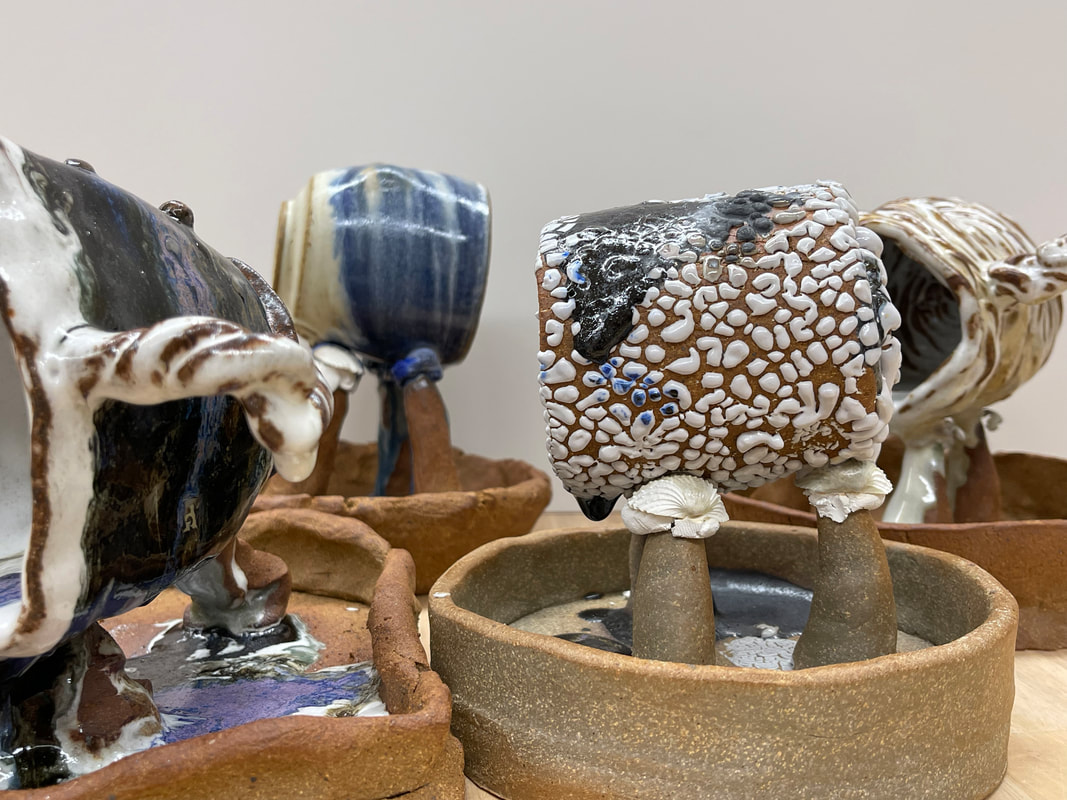
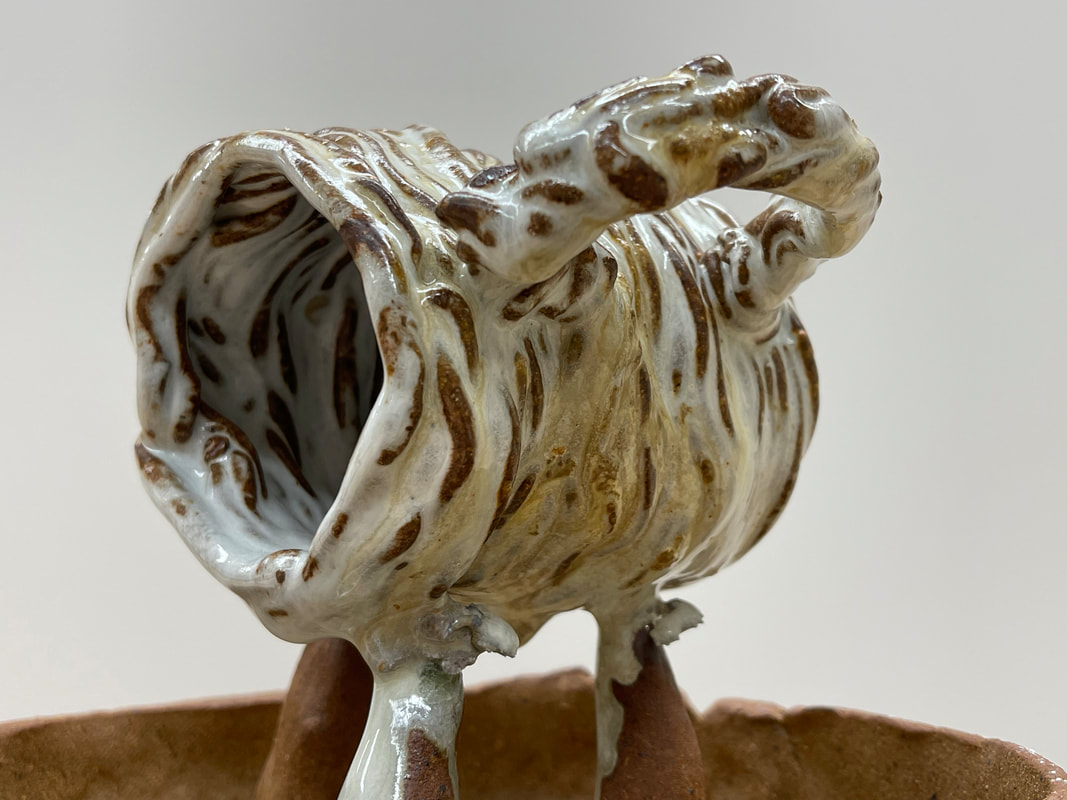
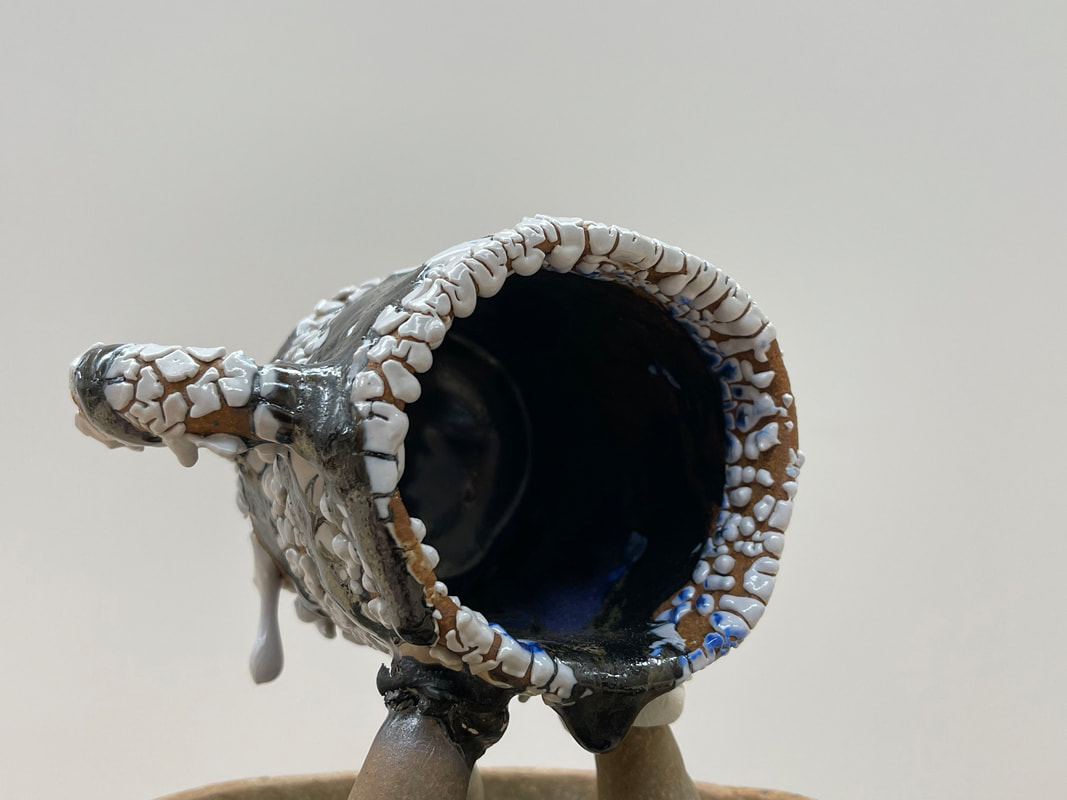
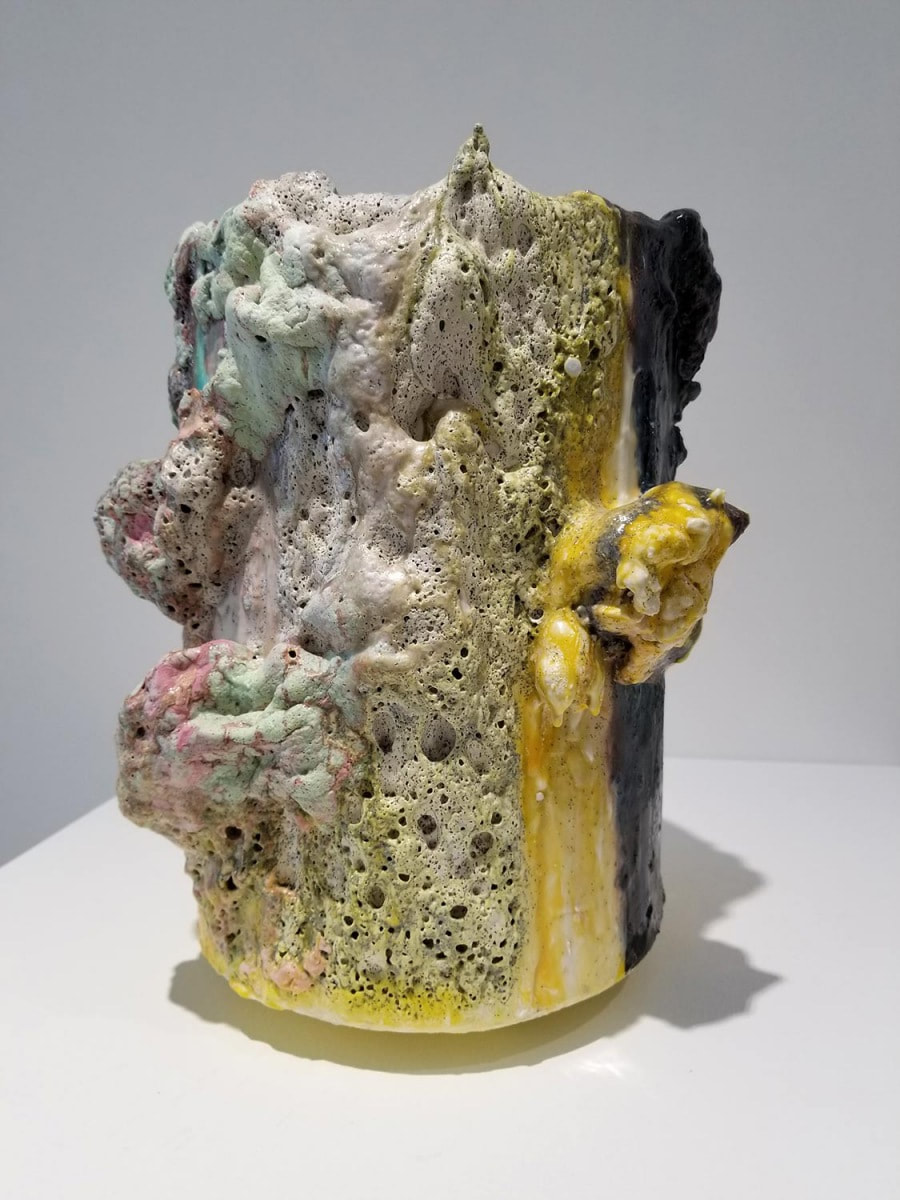
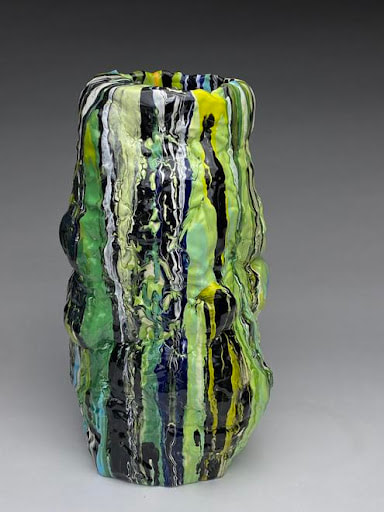
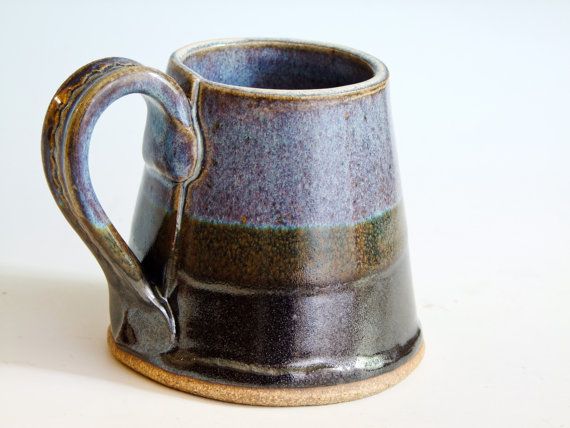
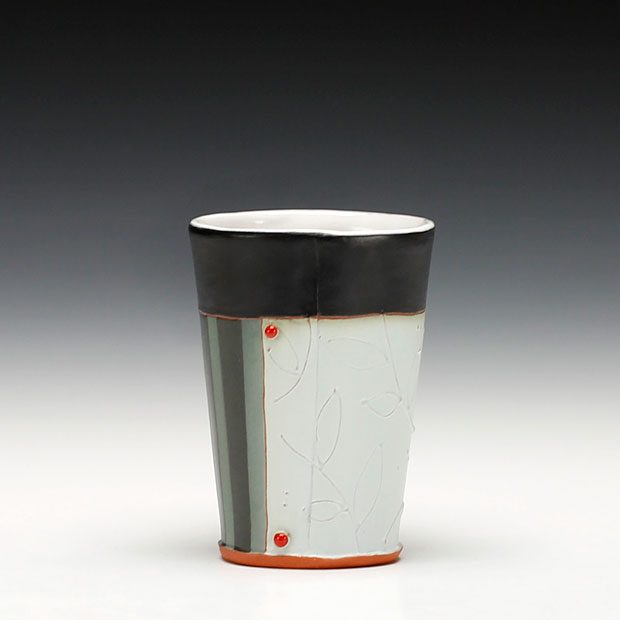
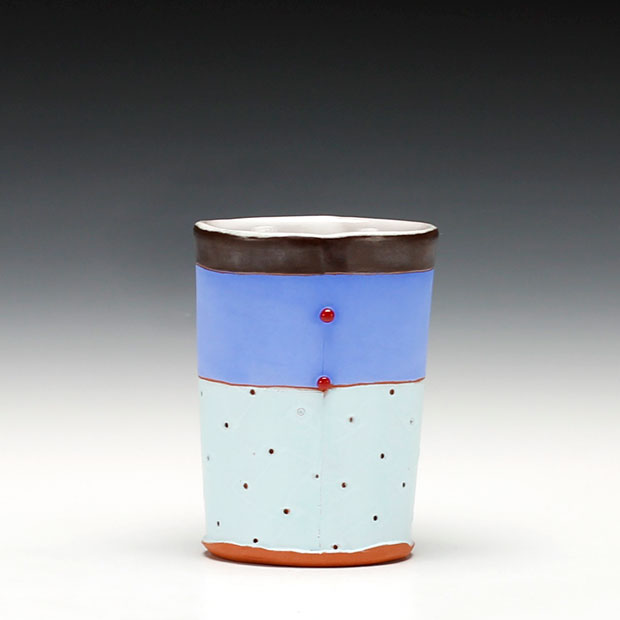
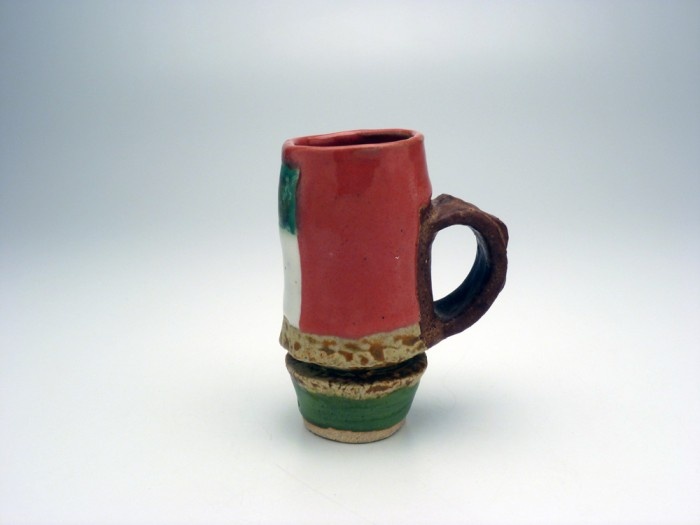
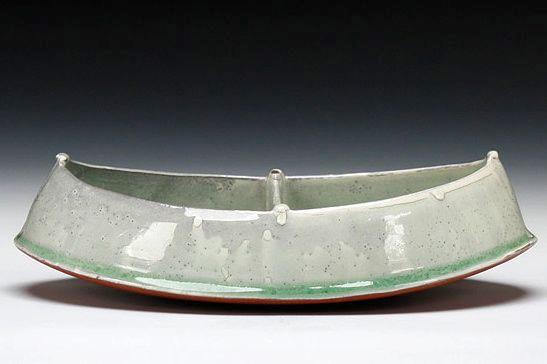
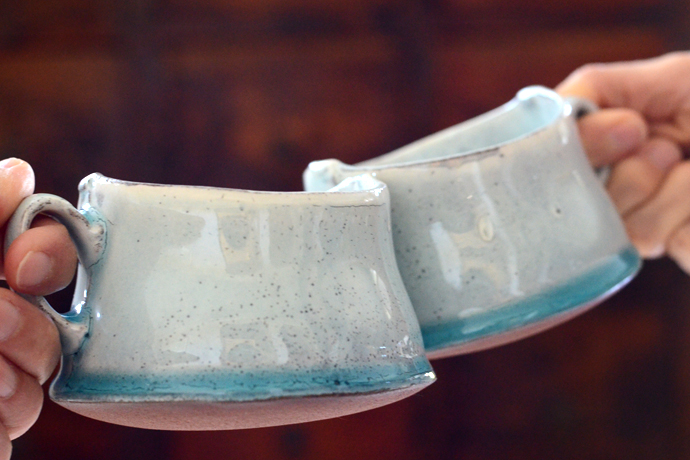
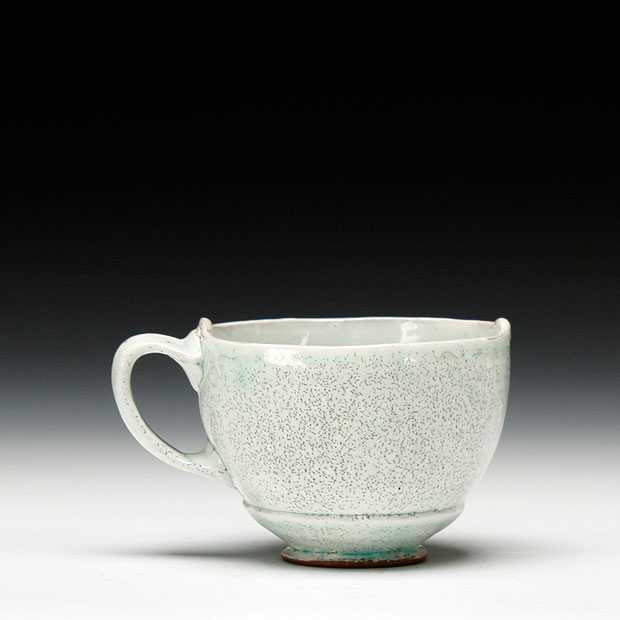
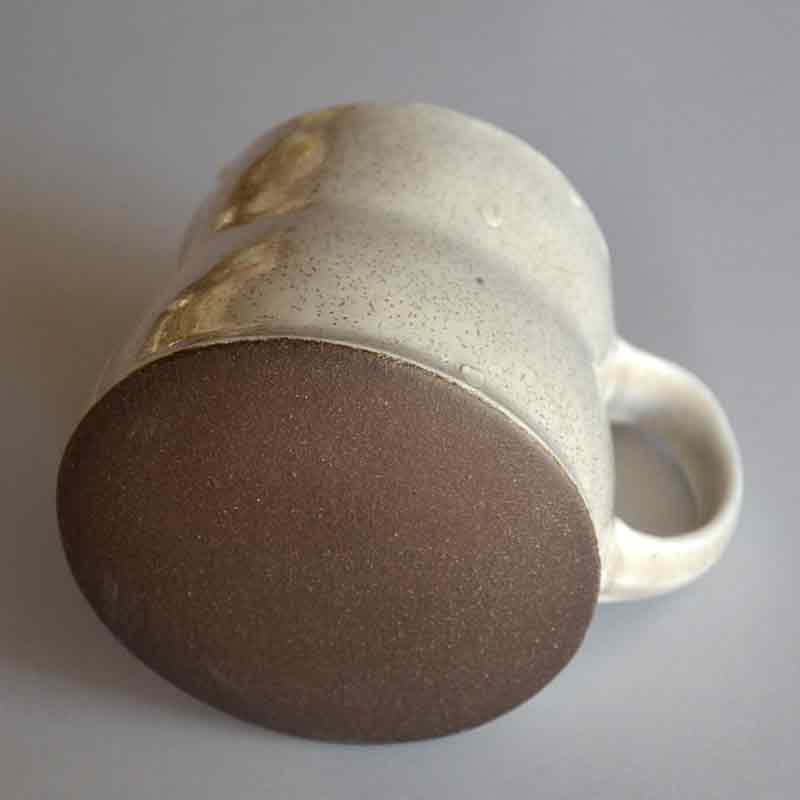
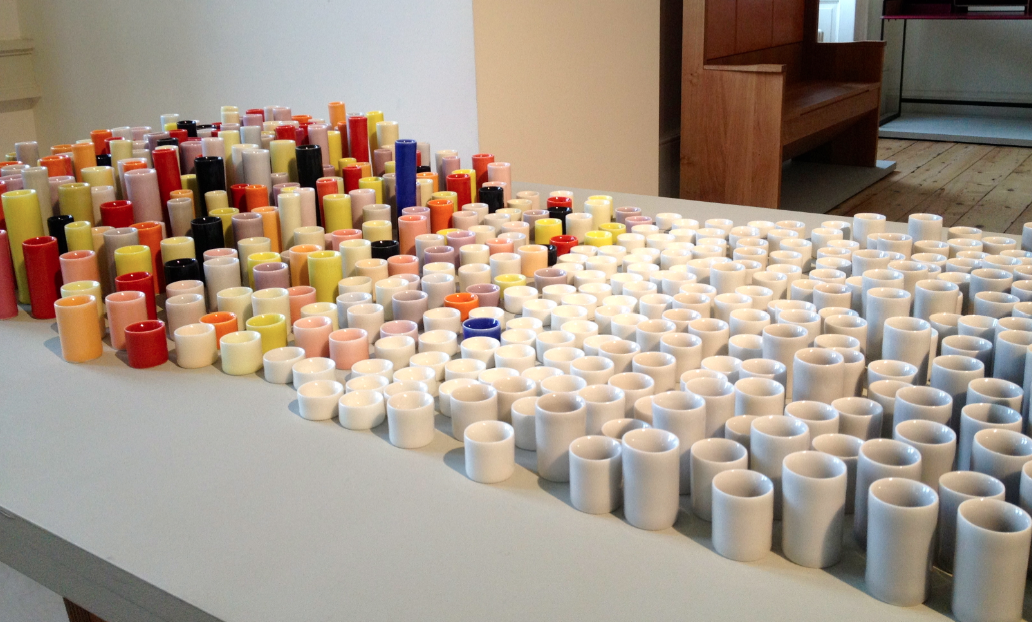
Orientation, Gravity and Melt: Rethinking glazing and firing positions

Overview:
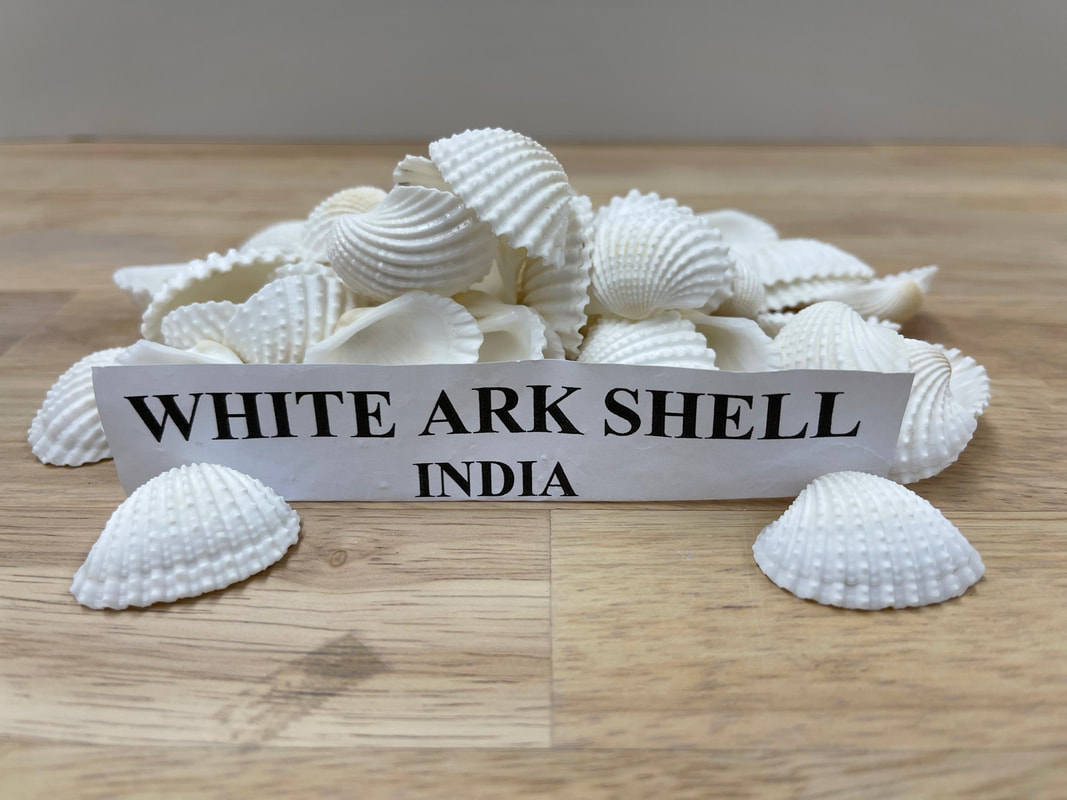
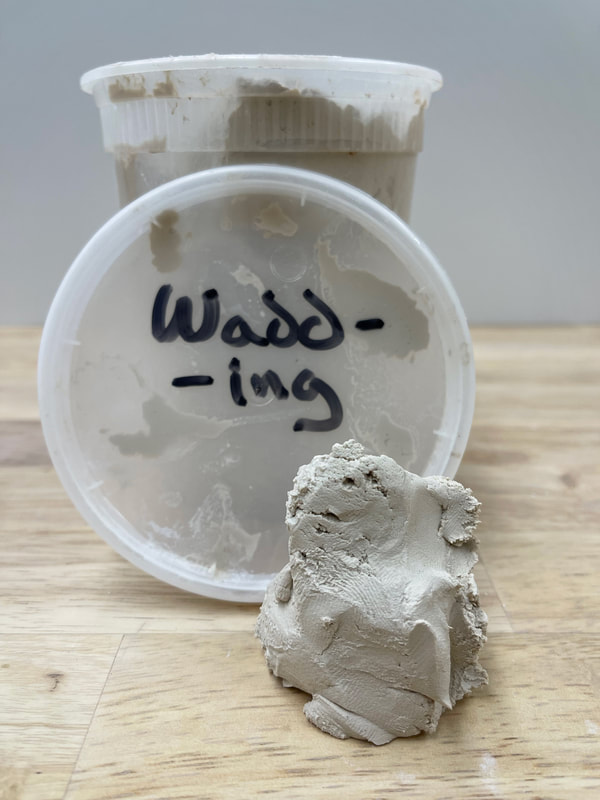
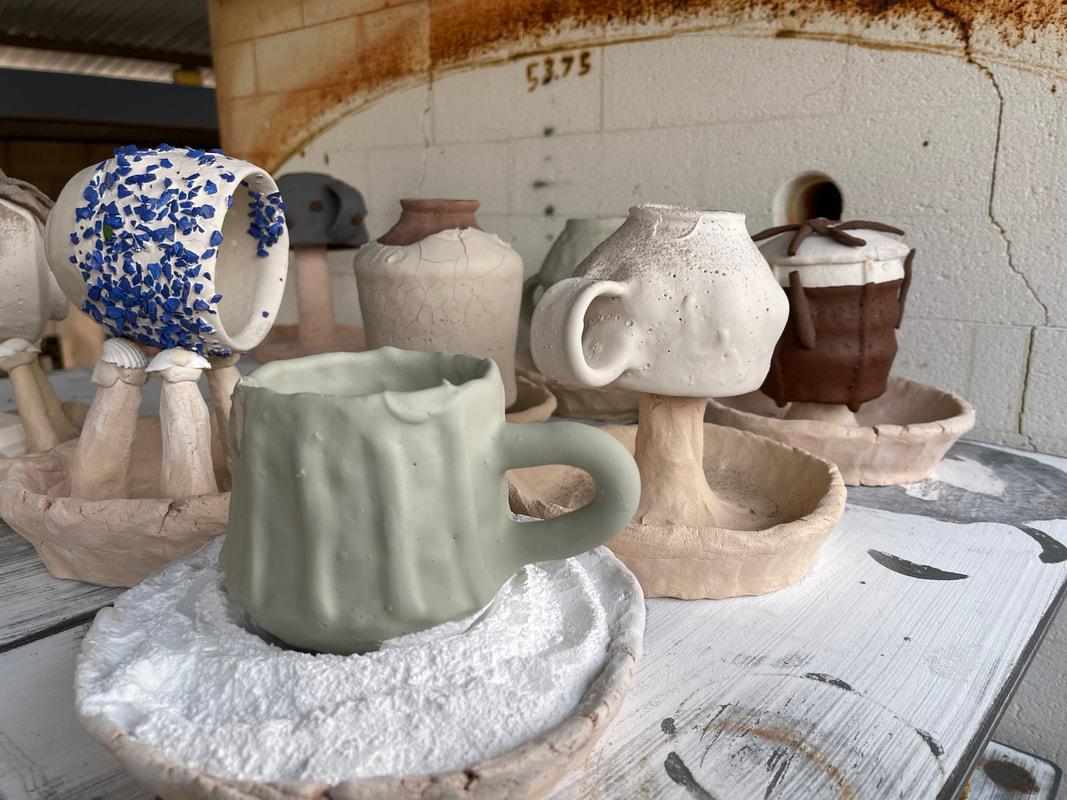
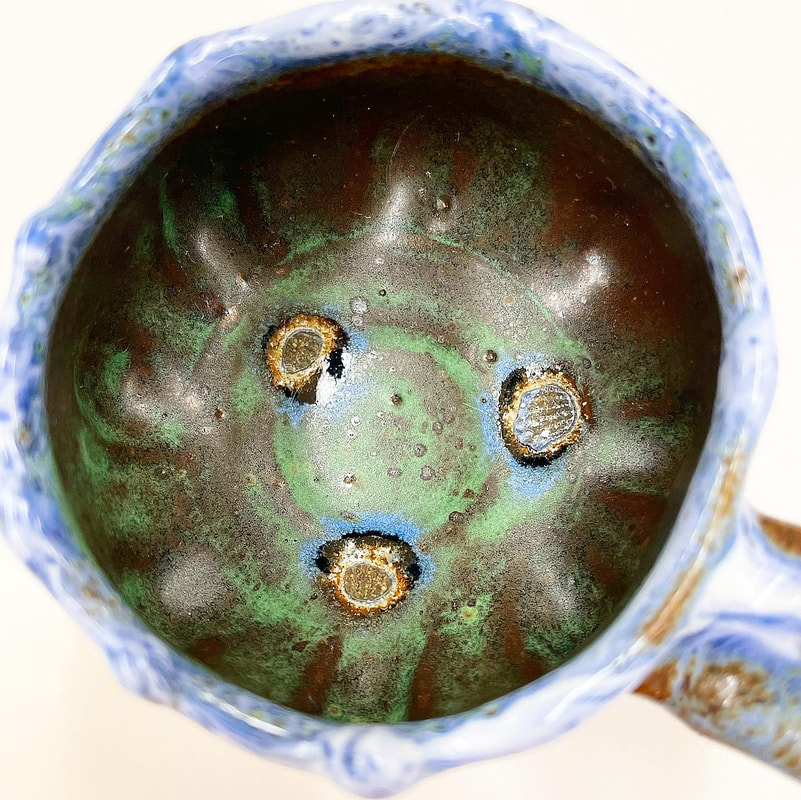
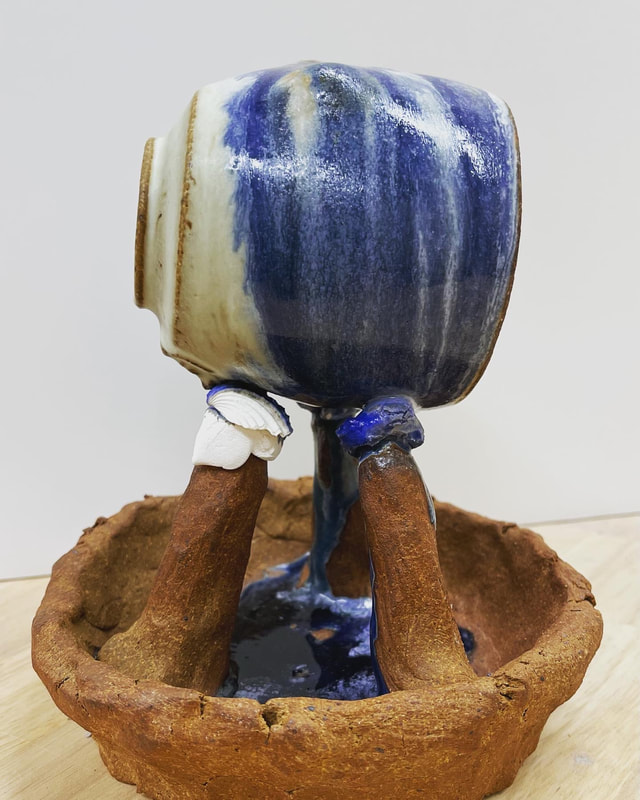
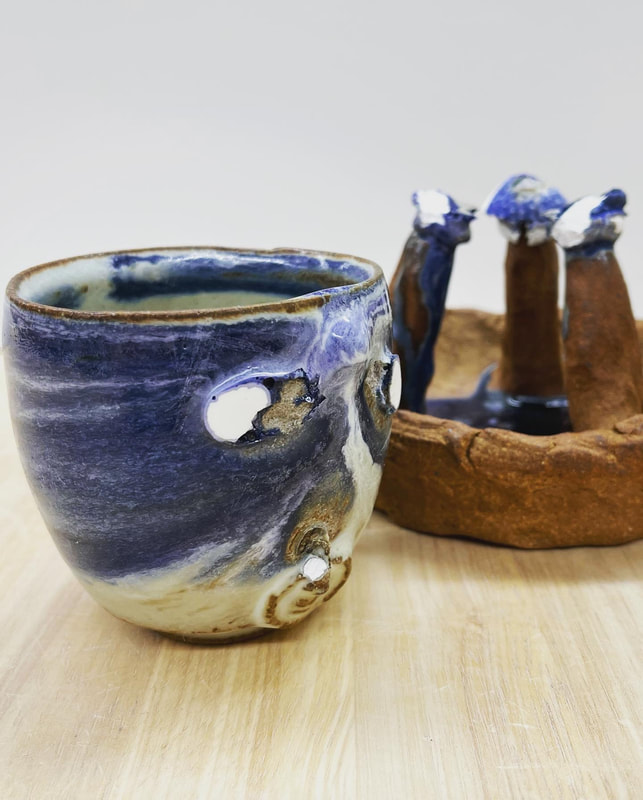
In this assignment students will take into consideration the elemental aspects of an objects possible orientation in the kiln and how such orientations can effect the over all surface appearance. Basic elements in discussion will be the orientation of an object as it is fired, the effects of gravity on glaze and how the melt characteristics of a glaze can be used to create dynamism in surface movement. We will introduce studio made tools such as stilts, catch basins (cookies) as well as introduce materials such a wadding, alumina hydrate and sea shells and their various uses in glaze play. Students are encourages to take educated risks by setting up experiments that push percieved boundaries on how glaze and surface can be developed in a complex and unconventional manner.
The Project.
Each student will be asked to produce the following items:
3 cups.
HAND BUILDERS: Produce 3 hand built cups (1 cup made from slab techniques, 1 cup made from coil techniques, 1 cup made from pinch techniques)
WHEEL THROWERS: Produce 3 wheel thrown cups ( 1 cup that is altered, 1 cup that has heavy surface texture, 1 cup that with a smooth surface)
3 support tools.
1 STILT cookie
1 POST cookie
1 PLATE cookie
With these CUPS and COOKIES students will play with how cups can be supported and oriented in various ways such as SIDEWAYS, TILTED, UPSIDE DOWN and NESTED in ALUMINA HYDRATE. Please make cups in a scale that will allow for utilitarian functionWith the various orientations glaze flow can be directed in ways that will contrast the objects final utility orientation (normal upright position you would have a cup in if you were to use it for drinking).
In addition to orientation, glaze volume and interactions will be explored. Through the use of the COOKIES glazes can be applied in excess and eutectics can be explored. Excess glaze that would normally be a Run and Stick issue on kiln shelves, can be avoided by suspend the cups from the stilts or in alumina nests. On still glaze excess will flow off the cups and into the COOKIES catch area or held in suspension by the Alumina Hydrate. Students are encouraged to push traditional limits of glaze volume applied to the cups and encourage glaze runs and movements.
Kiln wadding will be used as a support materials to help sea shells hold their position and shape in the firing. Please follow instructions and demos regarding tilting and sea shell use. These elements are important in ensuring you can separate your cups from the COOKIES.
Objective:
Through this project and the experiments in glaze associated with it, students should gain a new perspective in glaze as both a sculptural surface and as a flowing, moving materials. Through the combinations of glaze, glaze volume, formal structure of the objects (cups) and orientation in the firing, students will experience a sample of the endless possibilities these elements and combinations of these elements can create. Students will also learn to identify glaze characteristics and put them to use in creating dynamic glaze combinations that capitalize on the developed glaze systems (cookies and stilts that allow for excess, runs and experiments).
Key objective targets:
Juxtaposition of object orientation in relationship to gravities effect on fluid glaze.
Experience non conventional methods of glaze application.
Experiment with glaze interaction and eutectic.
Gain understanding on how an objects surface changes glazes interaction (flow, breaks, surface interactions).
Gain experience in breaking traditional methods of glazing and begin to explore new methodologies that lead to personal styles.
Gain experience in building studio tools and systems for personalized production methods.
Gain experience in identifying glaze eutectics, and glaze characteristics by visual observation of test tiles.
Gain introductory level experience in using basic hand building methods (coil, pinch, slab).
Gain introductory level experience in surface manipulation of thrown forms.
Gain introductory level experience altering wheel thrown forms.
Time Line:
Two weeks for CUP and COOKIE production in greenware in prep for Bisque Firing
One week for glaze demos and glazing of cups.
Resources:
Digitalfire.com
Artists:
Gareth Mason
Dick Lehman
Lauren Mabry
Tony Marsh
Cheryl Anne Thomas
Wadding / Kiln Wash Recipe:
By volume. 50/50
Alumina Hydrate
Edgar Plastic Kaolin
Add water and mix to thickness desired. Thick like clay for wadding and watery like a glaze for kiln wash.


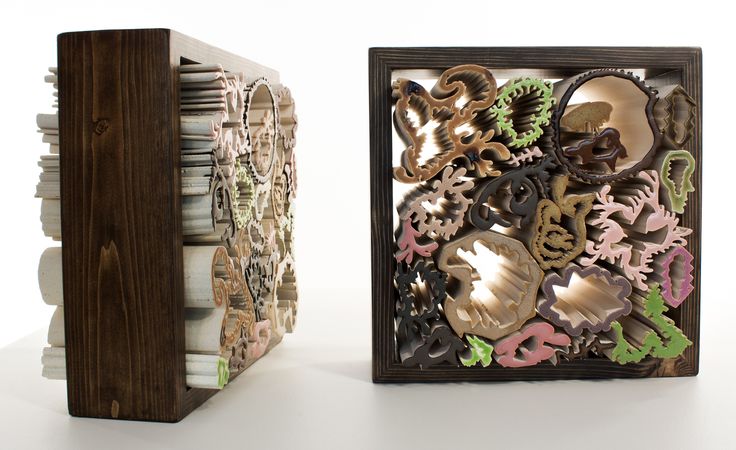
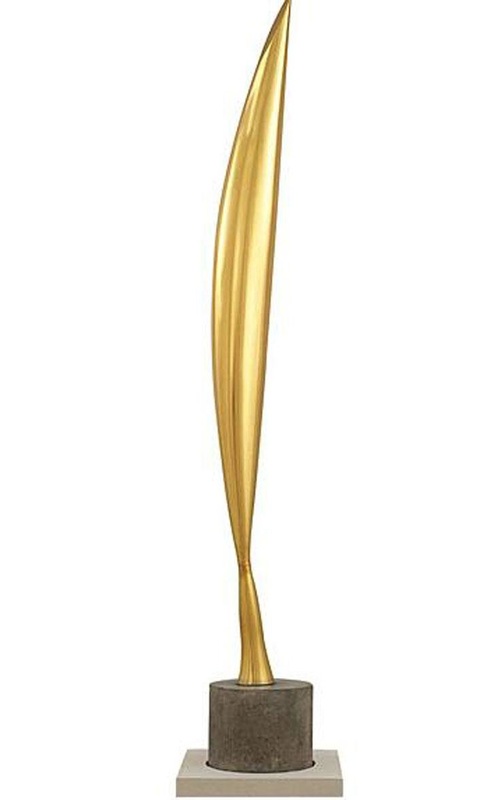
#10
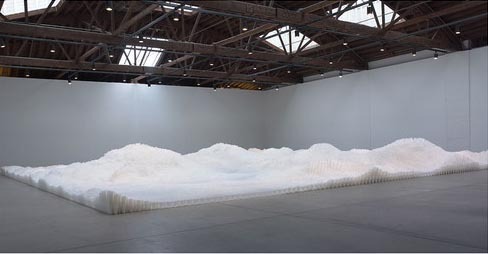
In Plain Sight

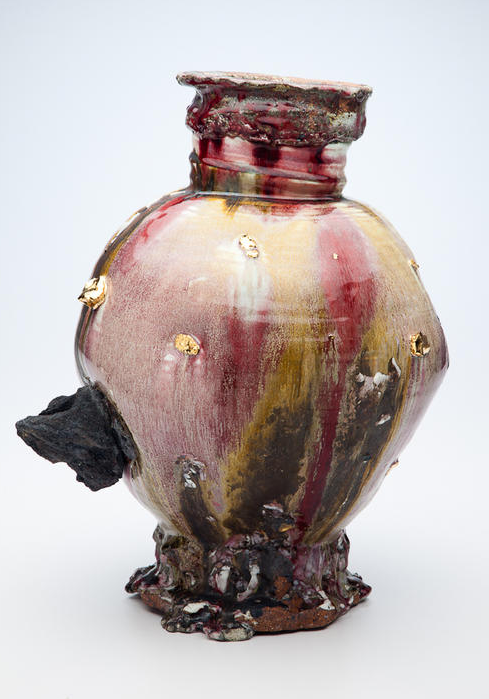
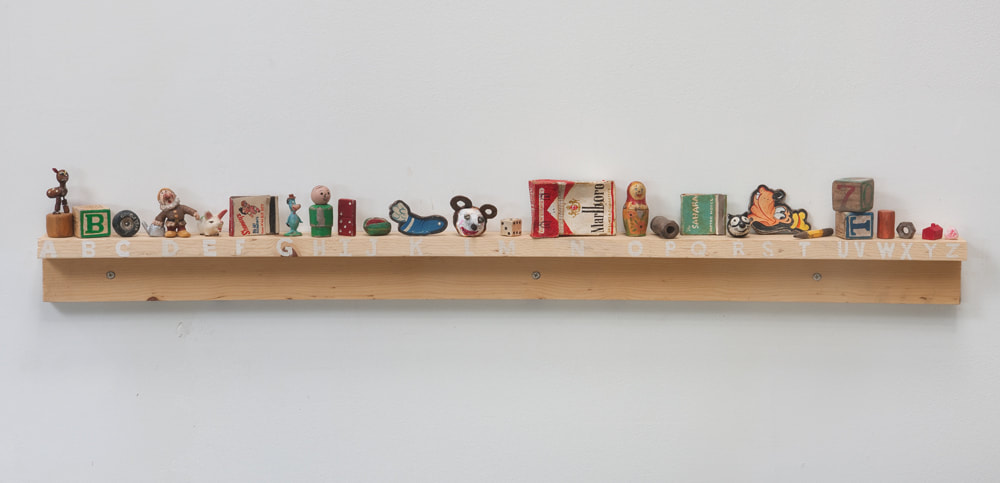
In this assignment students will be jumping in and getting right to material play. The the production of simple objects, conversations about the nature of producing work, releasing work to an audience and challenging material assumptions will begin. Basic stoneware clay will be used for the production, followed with gold leaf. Objects will be installed on the campus grounds in inconspicuous locations. Playing with various installation means, the sculptural works will be placed, installed and hidden for the public to discover. In this process students will discuss the social impact of public artworks as well as the personal impact of producing objects that are destined to be given to the public rather than kept for ones self.
The Project:
Each Student will be asked to produce a simple objects for a single piece of clay. The objects should be thoughtfully conceived and play into the student concert and drive his or her narrative. Objects should be somewhat simply crafted and play with a scale that fits within the landscape of ones palm. Small, easy to craft, easy to manage. Clay will be the primary construction material. No other materials may be used in the construction of the objects for this project. Students will shout locations suitable for installation. When choosing a location students should think about how they want the work to live and be discovered. Look for places that seem to be natural suited for placing an object ( a buildings nook or ledge, maybe the top of a post or hidden within a natural element such as a trees). At works placed for the public will be left for the public to consume. Students are highly encouraged to let the work be discovered by others and collected by the public. Please do not collect the work yourself as you are part of the project and meant to facilitate the art experience, not participate as the audience.
Objects:
Student will be require to produce 3 identical objects. (do you best to make identical works)
Objects should be small in scale and fit within your palm.
1 Object will be kept for display and you personal collection
2 Objects will be placed/installed on campus for the public to find and collect.
3 TOTAL OBJECTS
Surface:
All student works will be covered in gold leaf.
Students are highly encouraged to completely gold leaf their work.
Gold will be a foundational component of the project and used as a discussion point about materials choice and materials influence in ones art work.
GOLD LEAF
Installation:
Students are required to scout a location on campus that best fits their concept of the installation of their work. Look for a place that could be a SLOW reveal (trees, hidden within a book) or fast reveal (on a post, out in the open, in highly trafficked areas). All installed work is intended for public discovery and should be left undisturbed by class participants. Do not tell of the location or instruct people where to find the works, rather allow the natural process of discovery to happen. The purpose of the project is to encourage observation by the public as well as provide moments of discovery. One the work is installed let its one life and journey begin.
Timeline:
Students will have two class sessions to complete the construction of their objects. They will then be fired in the kiln. Students will have an additional class session to GOLD LEAF them and prepare the works for installation. Students will in the following class session install 2 of the work on campus in an inconspicuous fashion as not to draw attention to the location of the placed objects. The final object (one that has not been installed on campus) will be presented in the display case in the student center along with an explanation of the project. The objects displayed in the case will be returned to the students after the display comes down. This final object will remain the possession of the project and serves as a moment of the experience. Students may do as they wish with the final object. Keep it or again place it for the public to discover.
Goals:
Gain experience moving clay into dimensional shapes of choice.
Discuss concept and how to best facilitate you concept in sculptural object made of clay
Understand material qualities and how material choices affect concept and or narrative of your work.
Explore the role of curator through installation of you work on campus.
Learn to discuss and verbalize your artistic decisions.
Engage critical dialog about your art as well as the art of others through critique and class discussion.
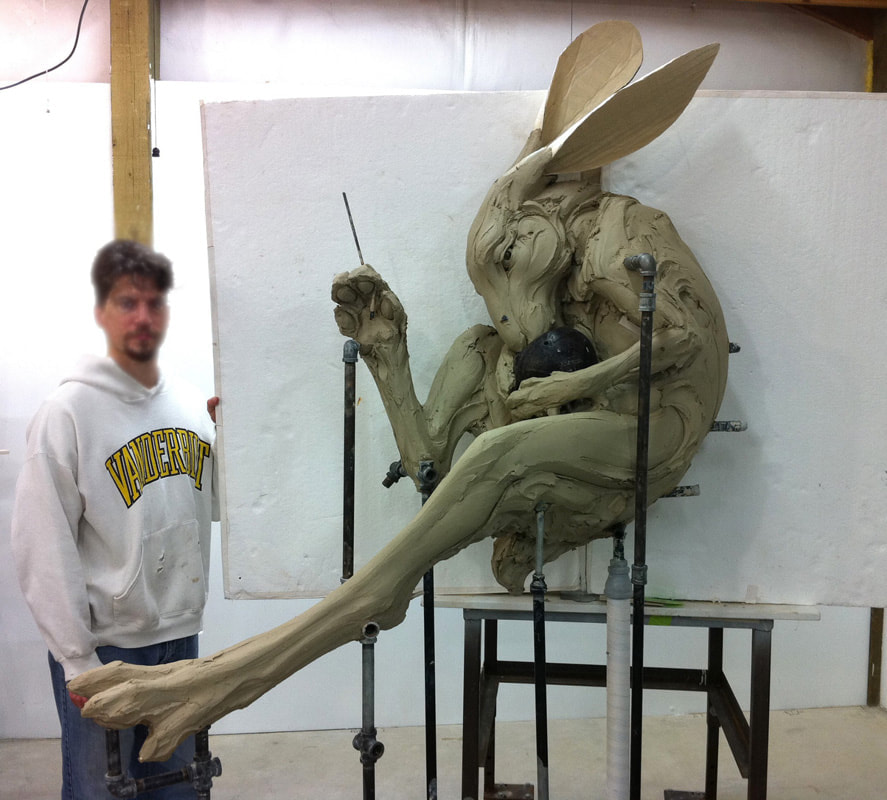
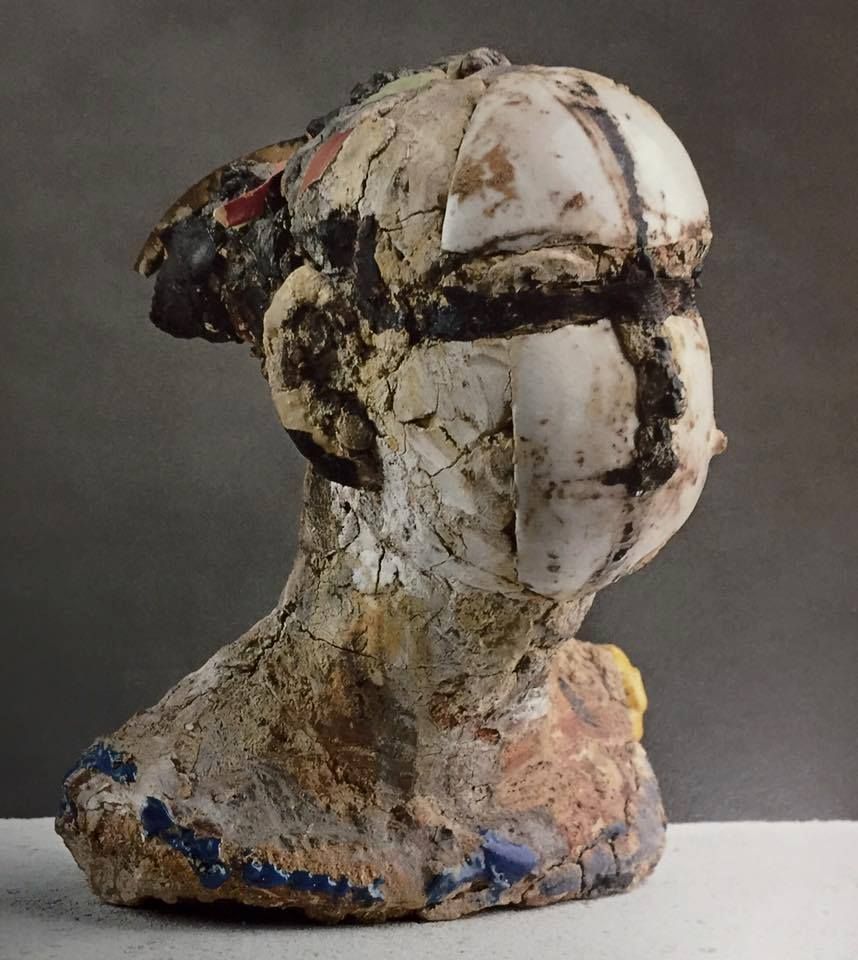
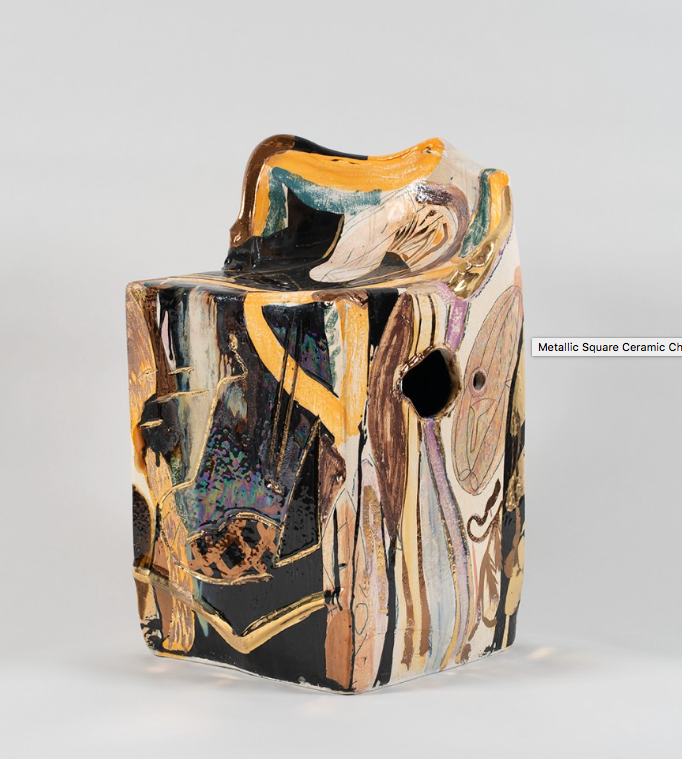
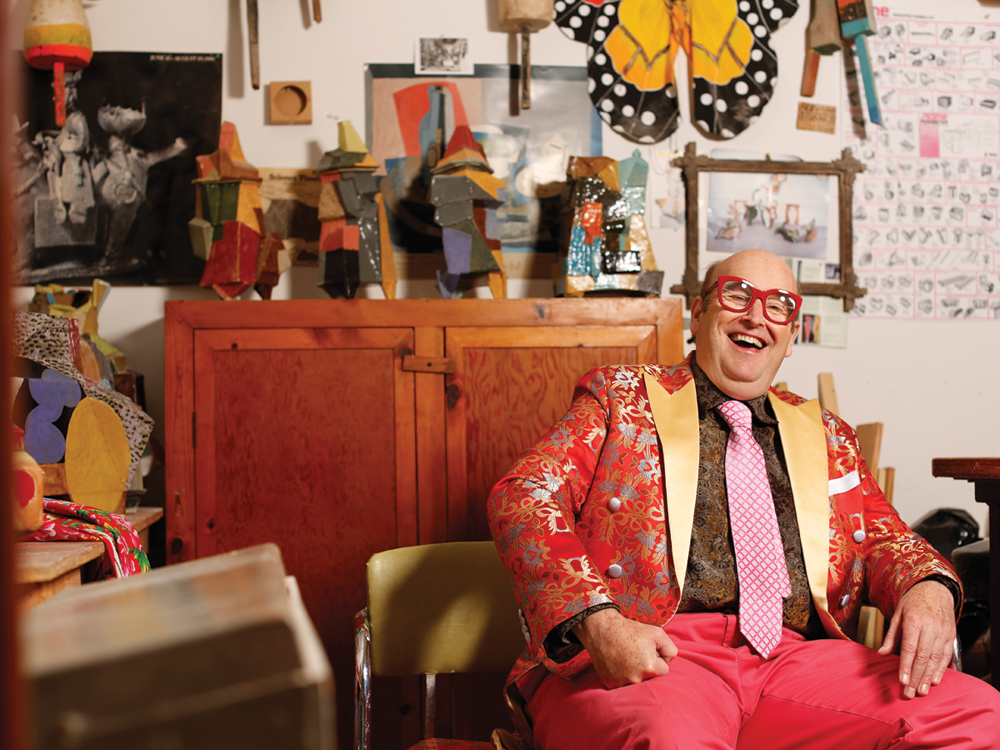
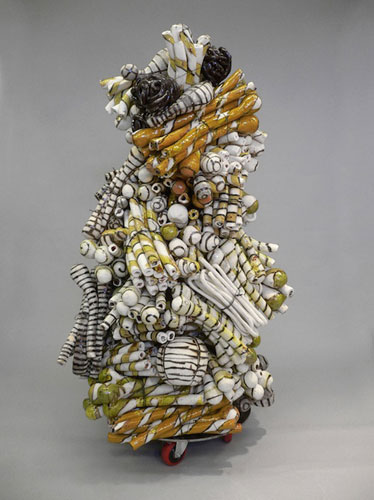
#9
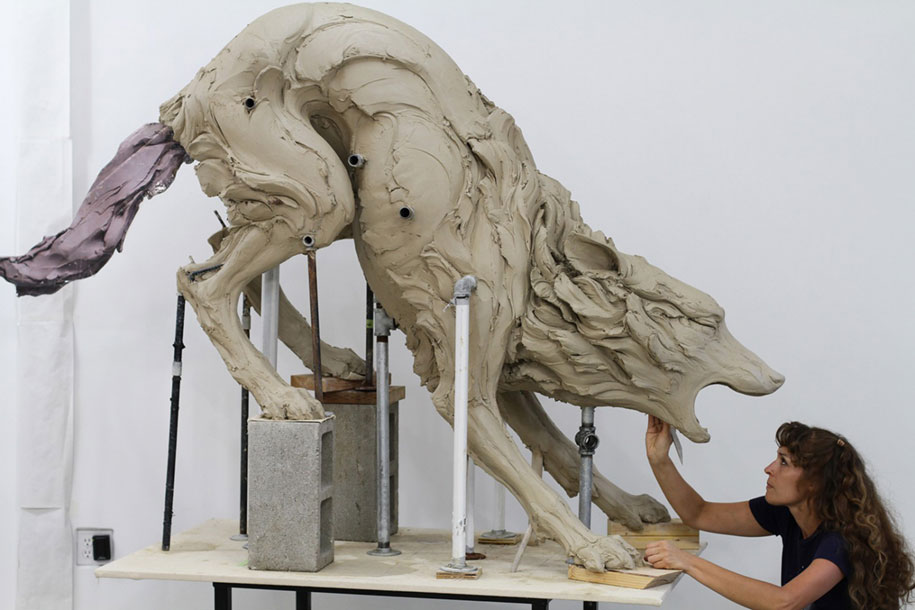
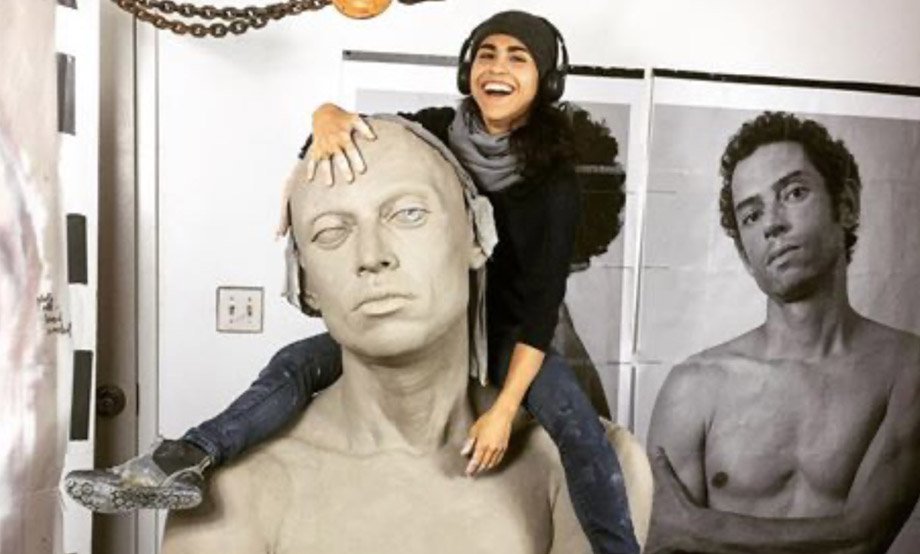
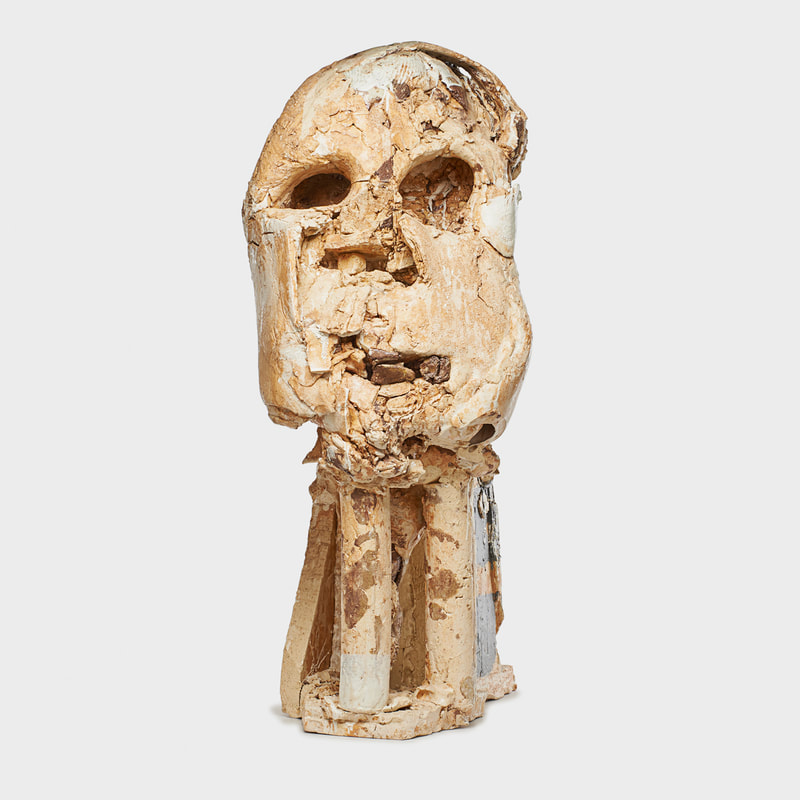
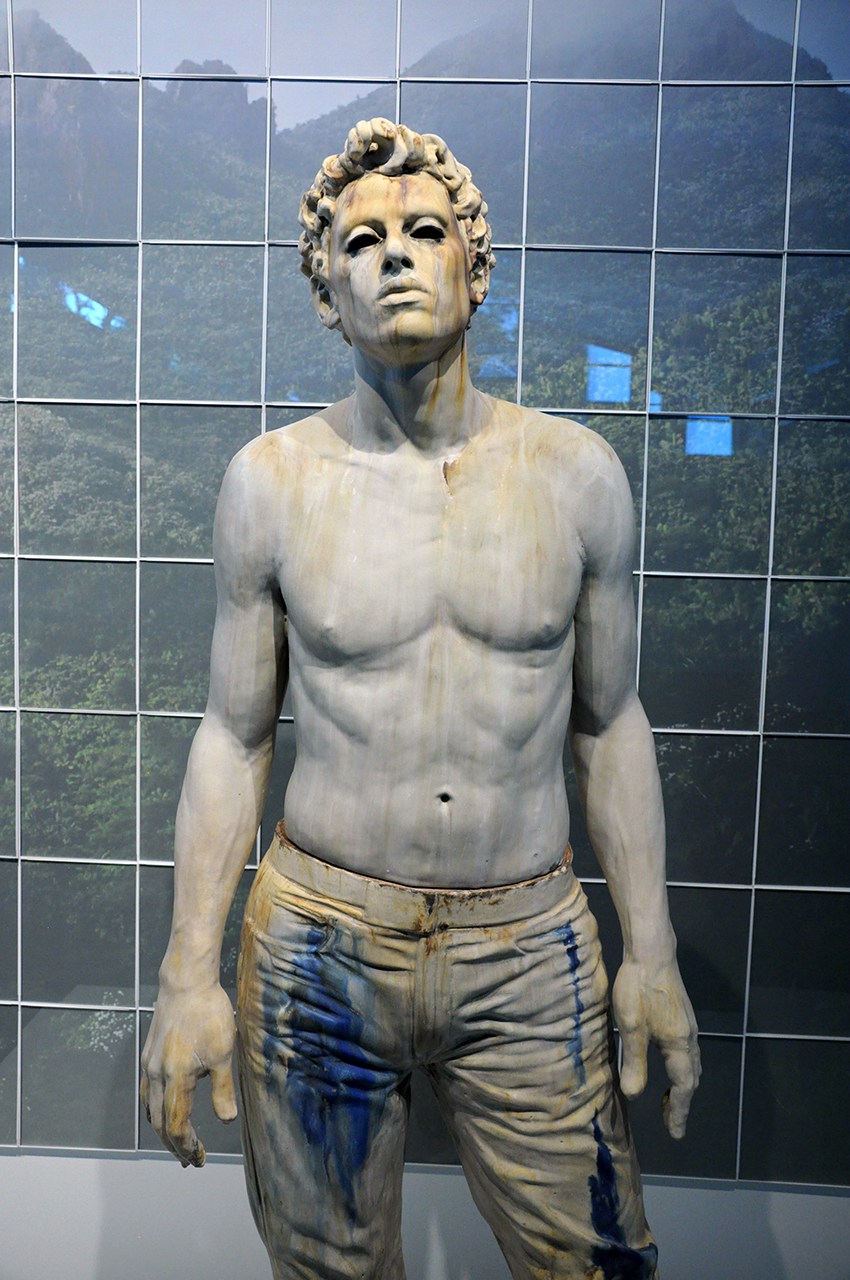
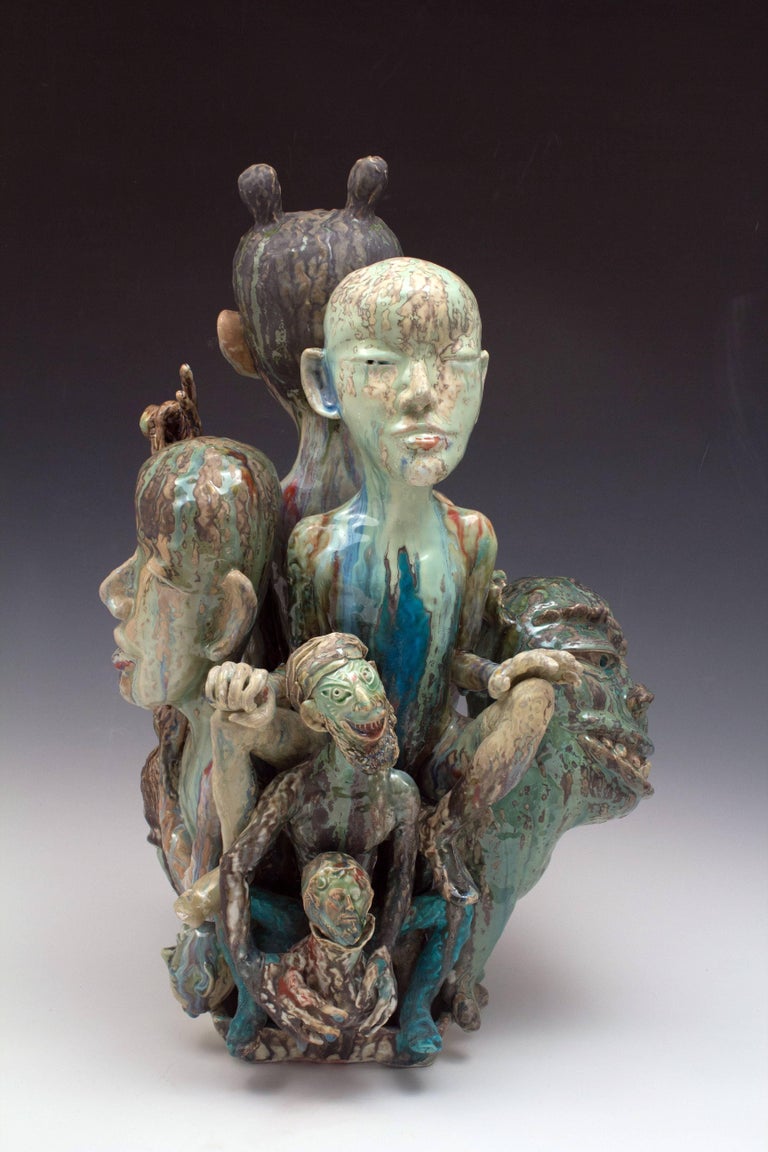
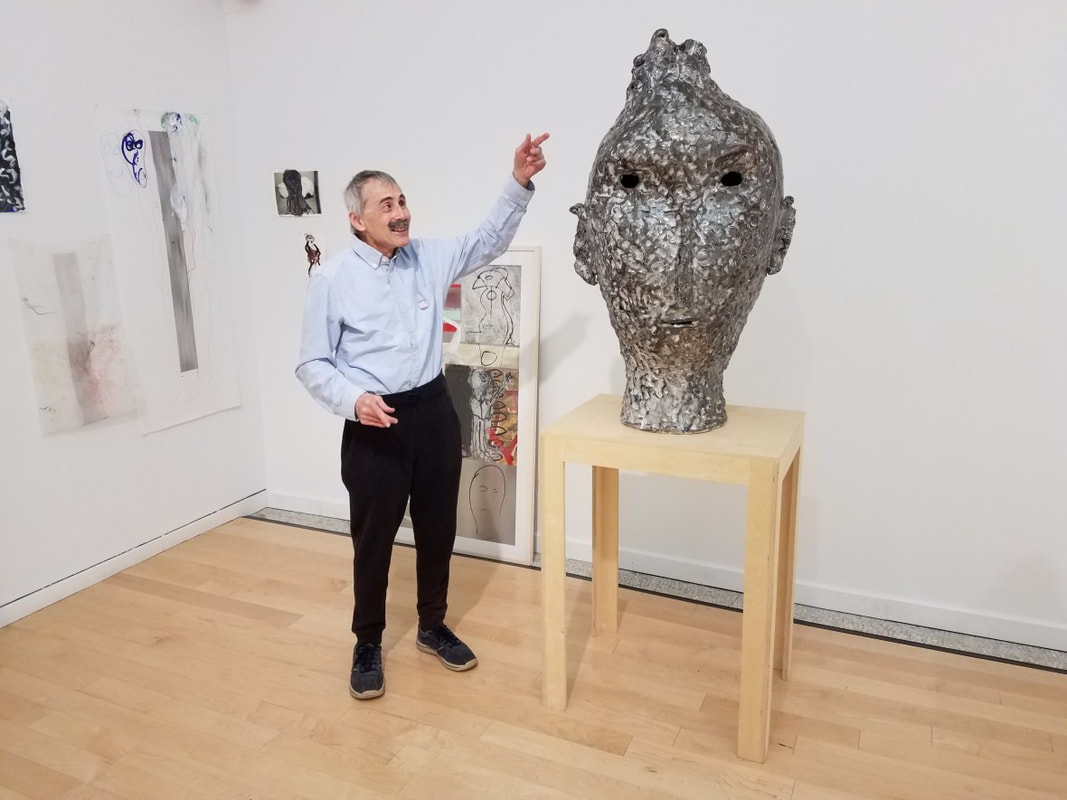
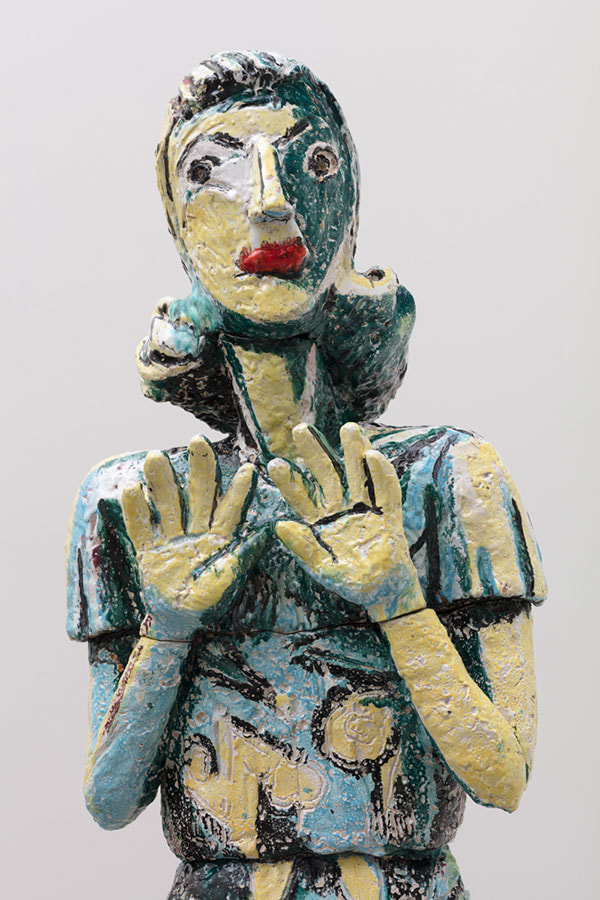
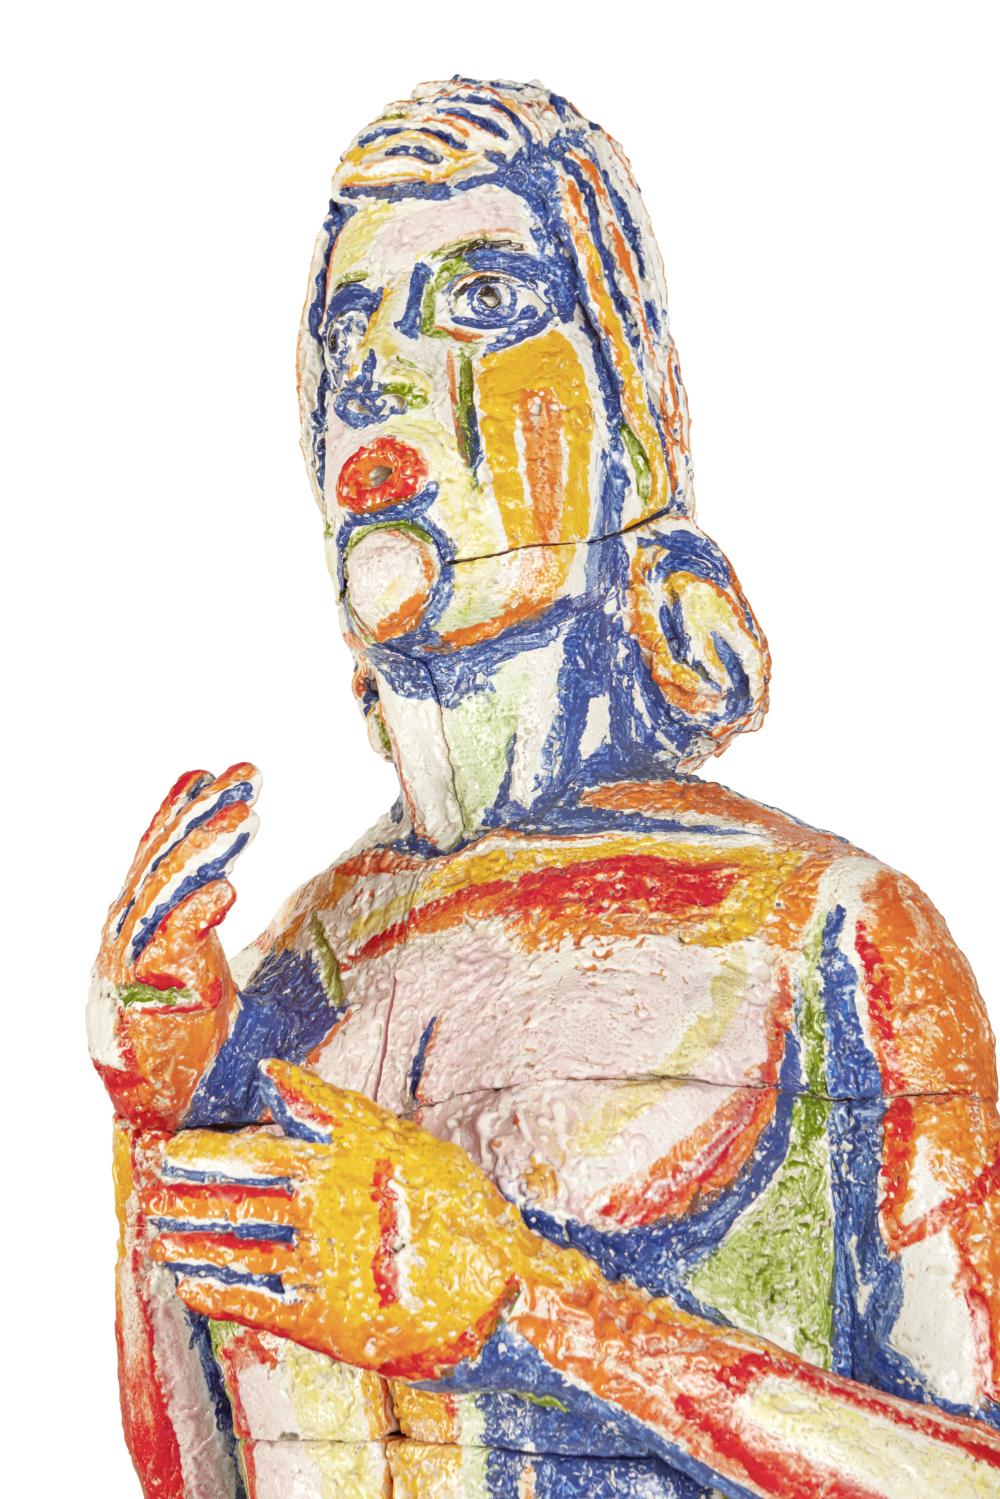
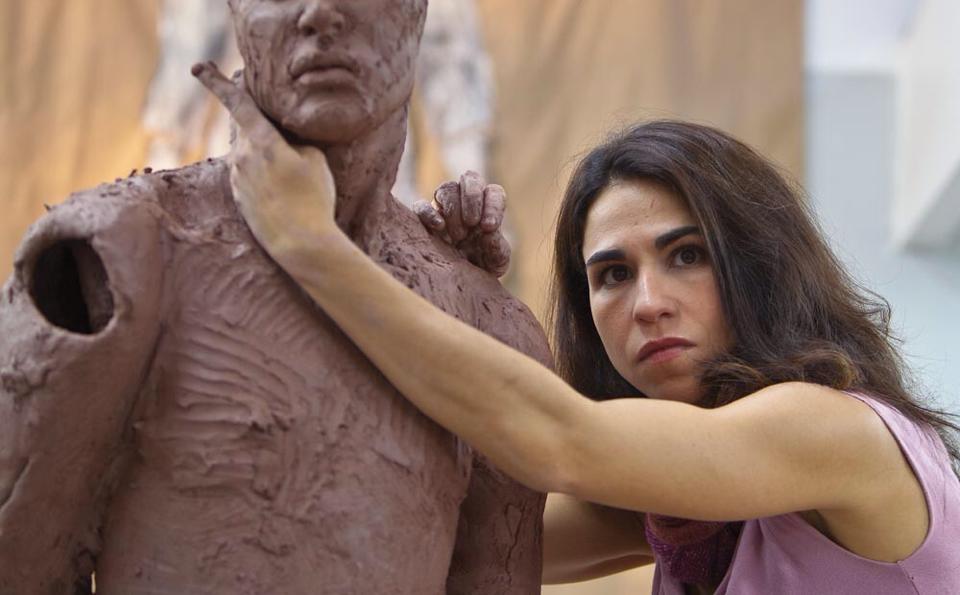
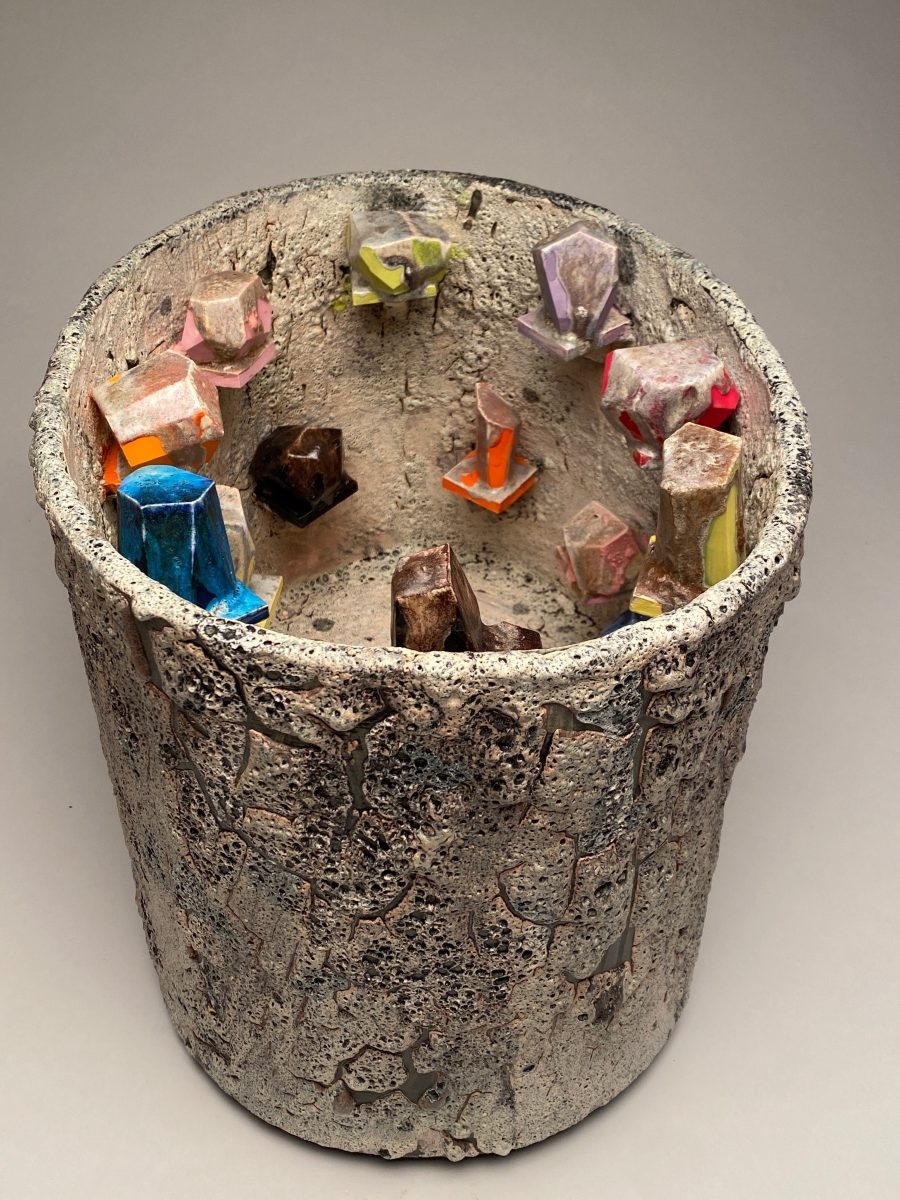
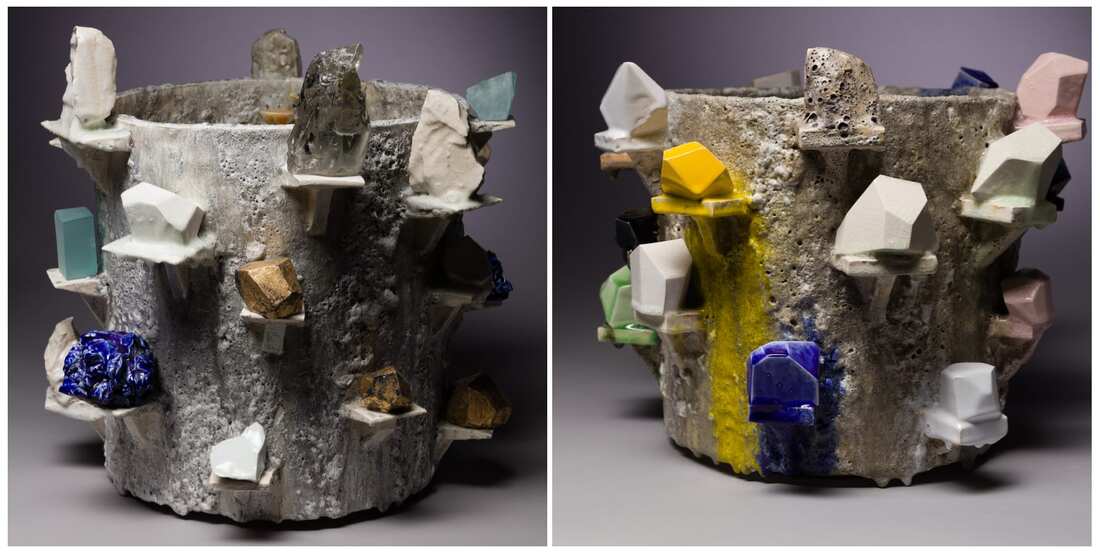
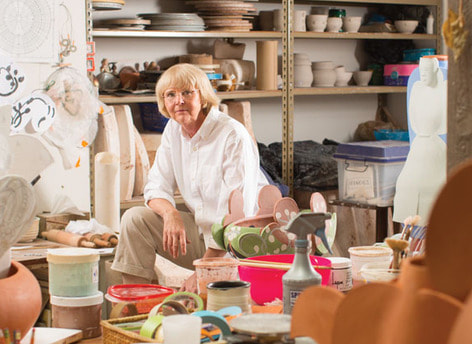
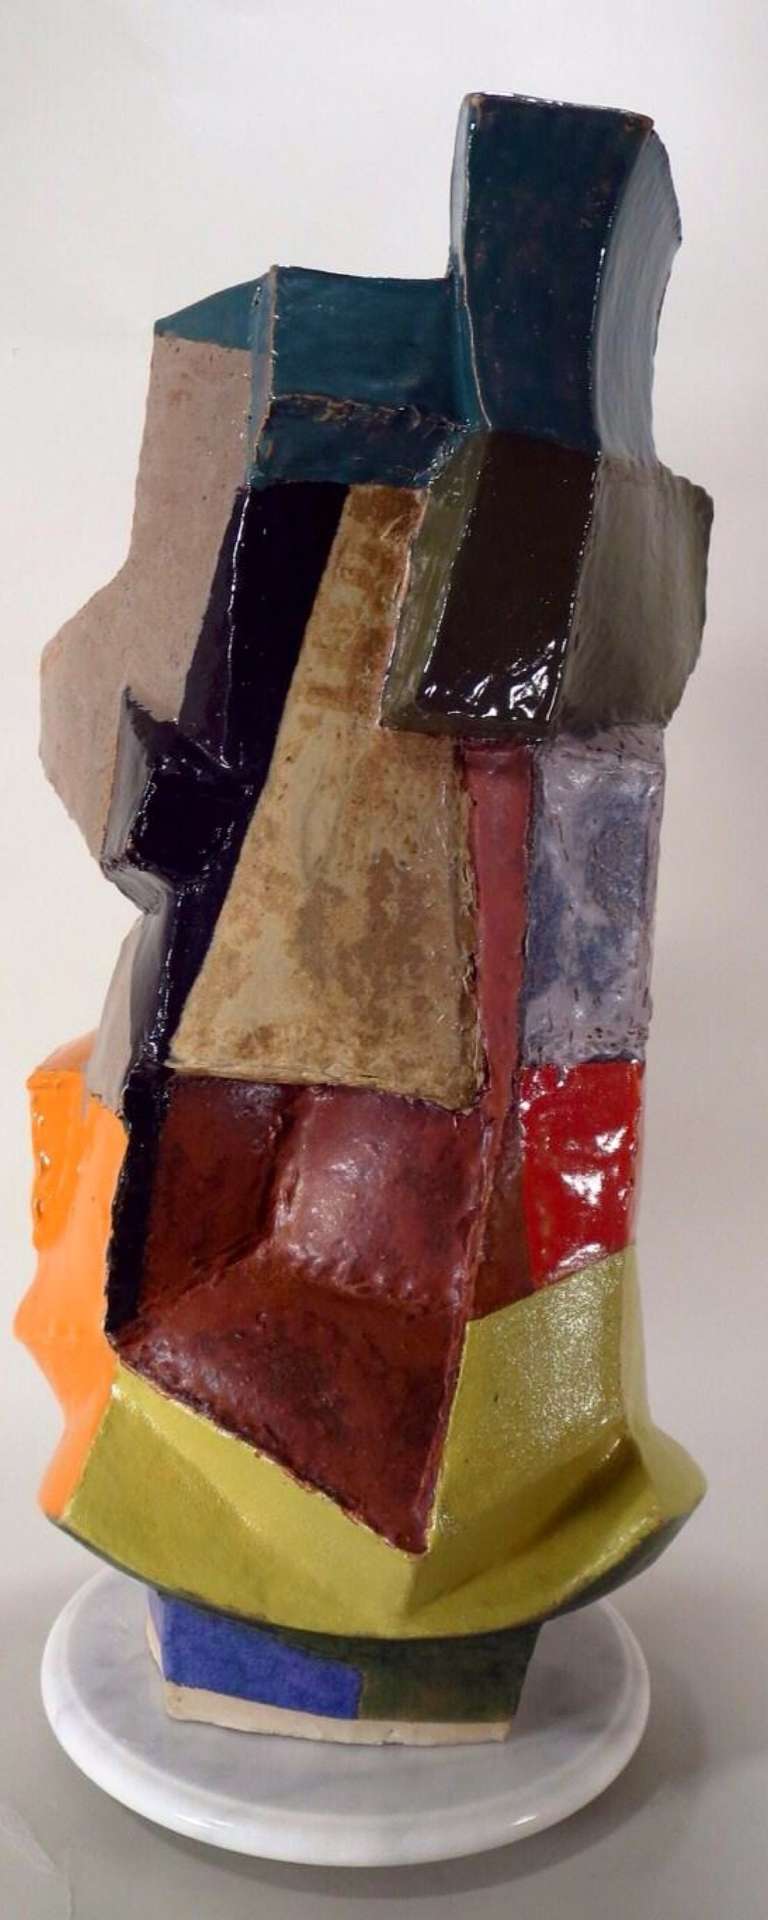
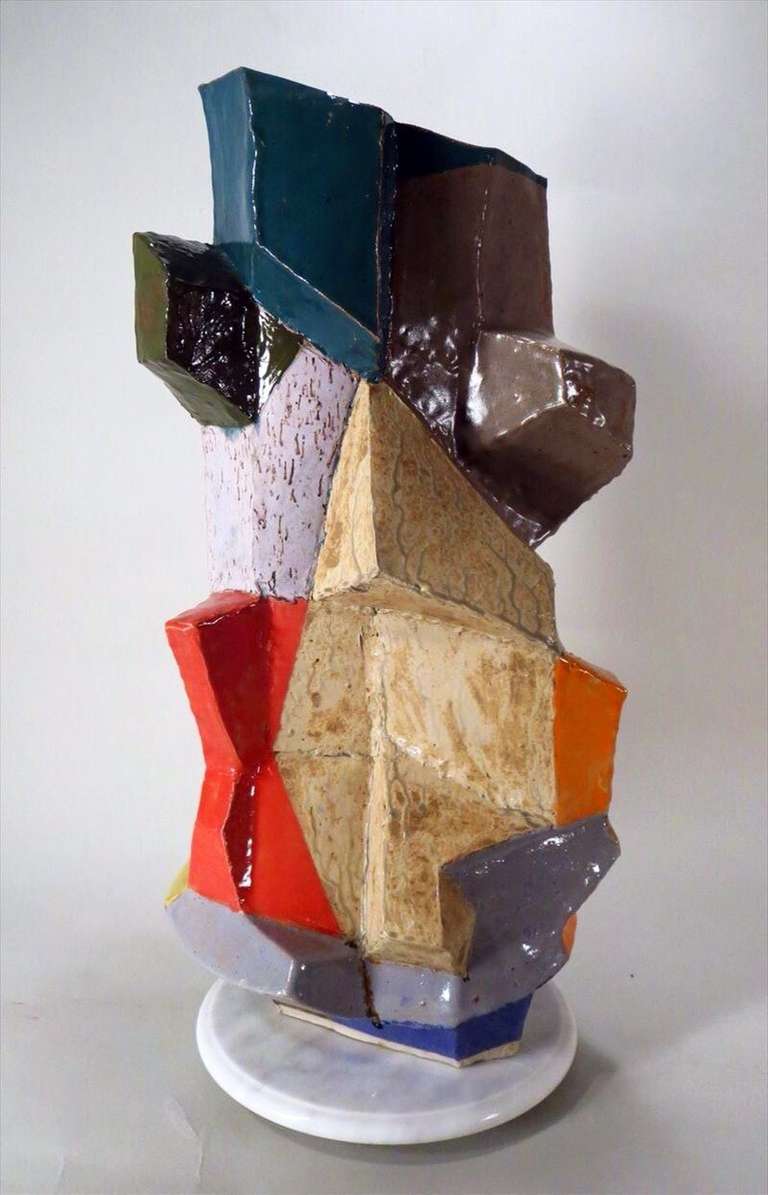
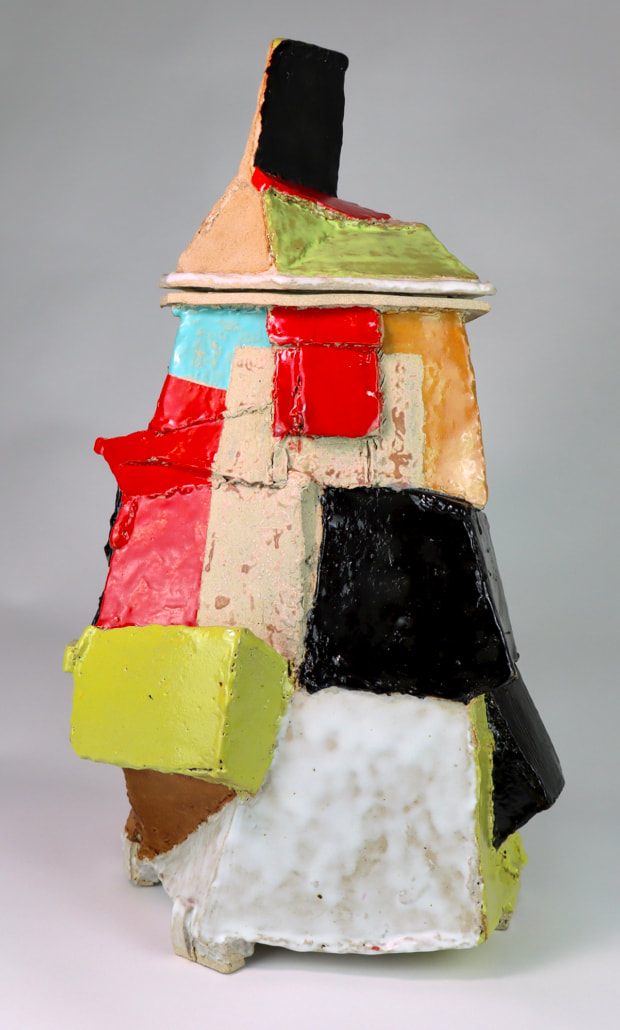
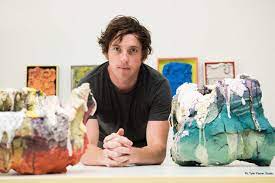
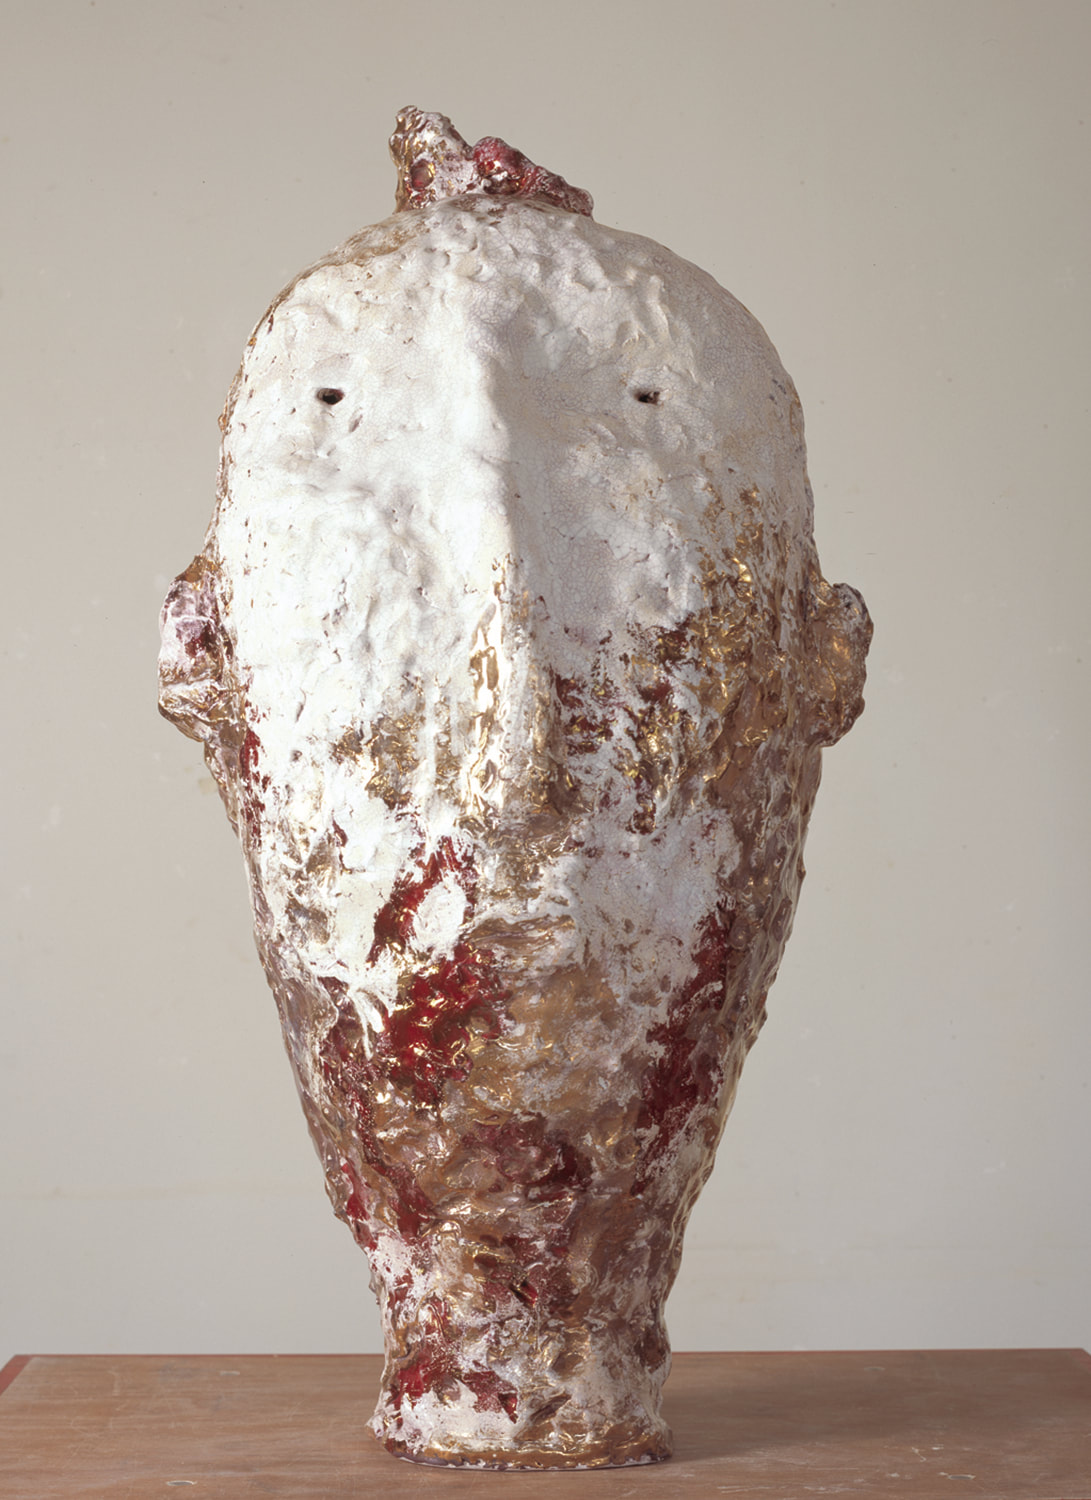
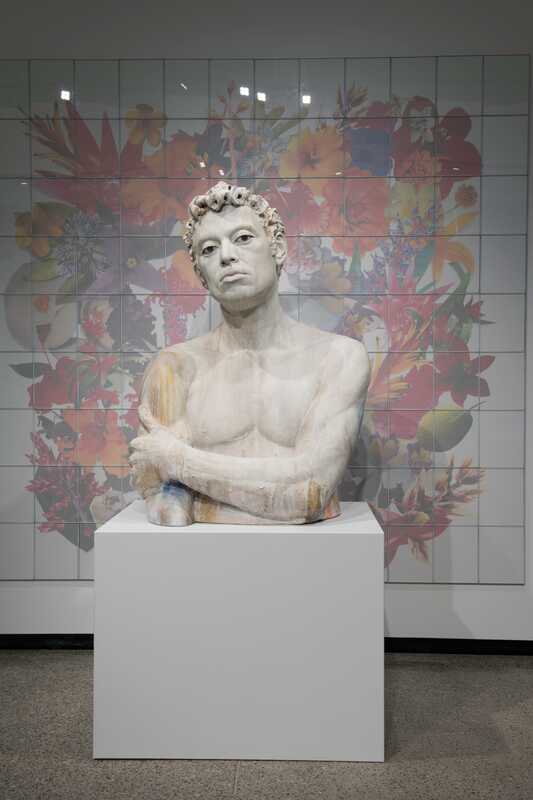
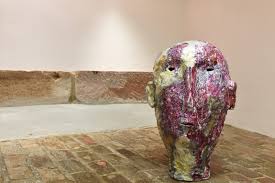
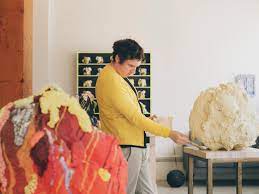
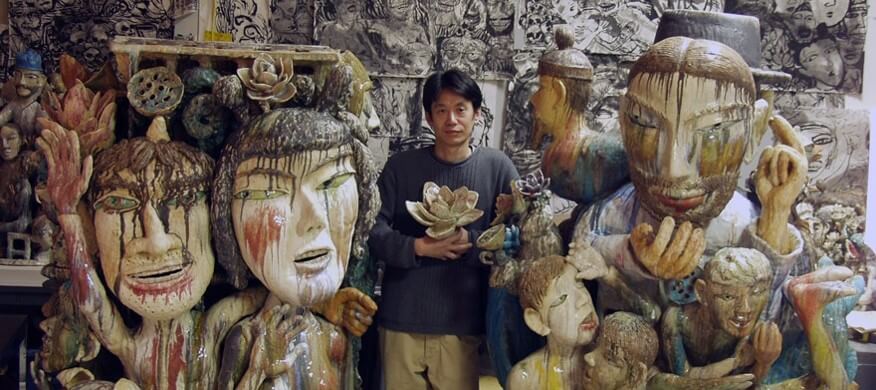
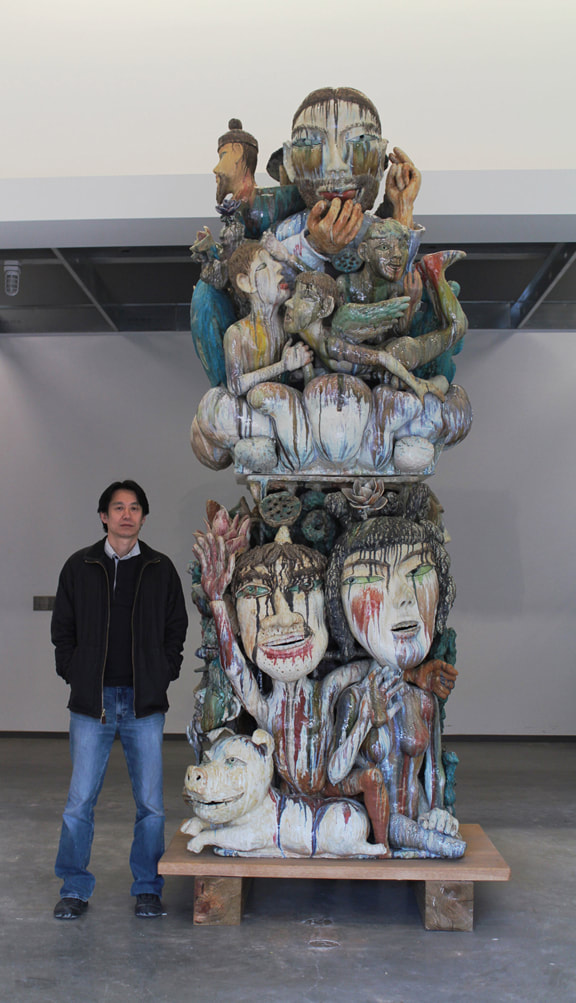
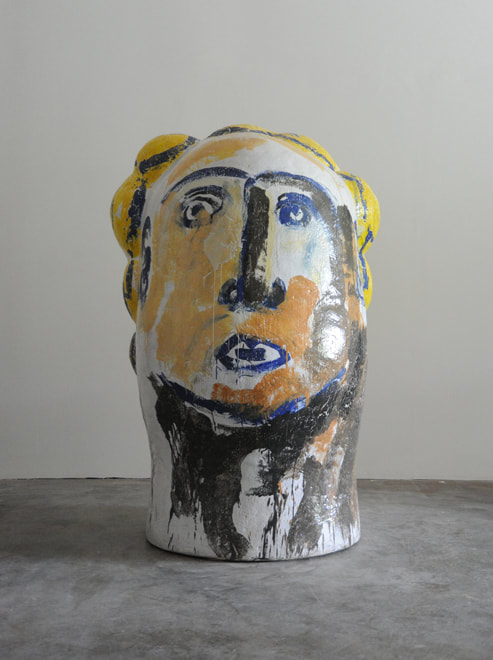
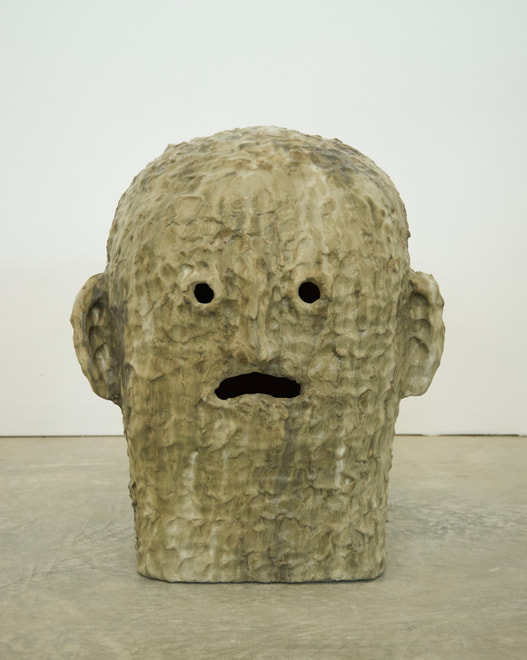
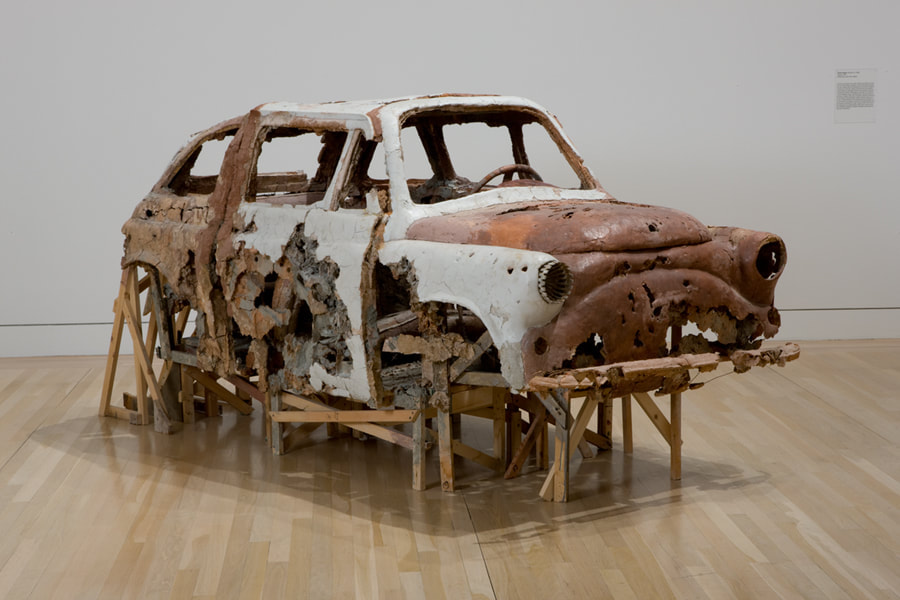
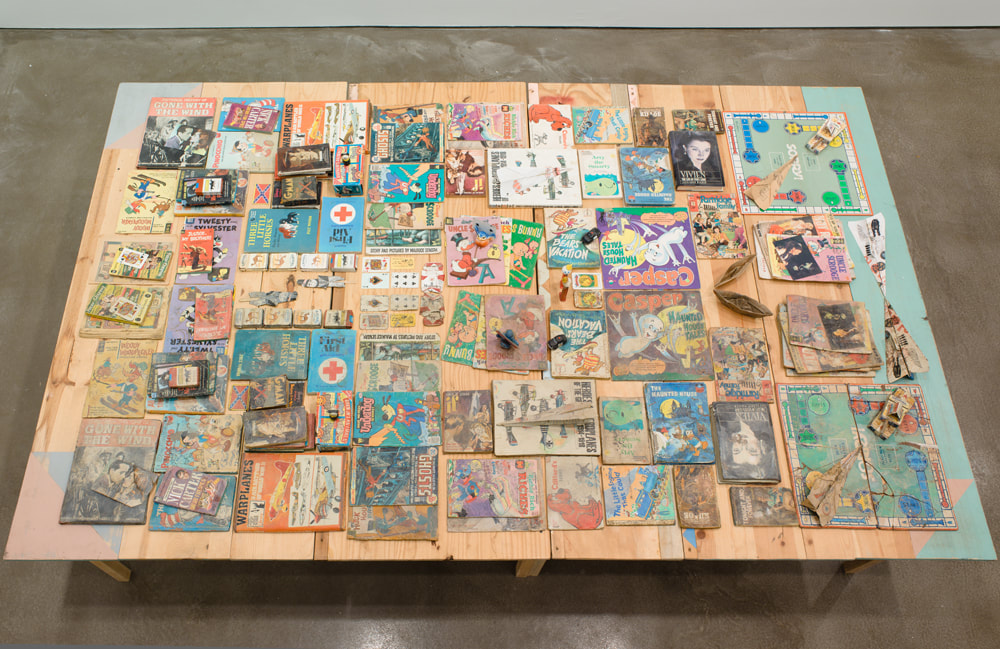
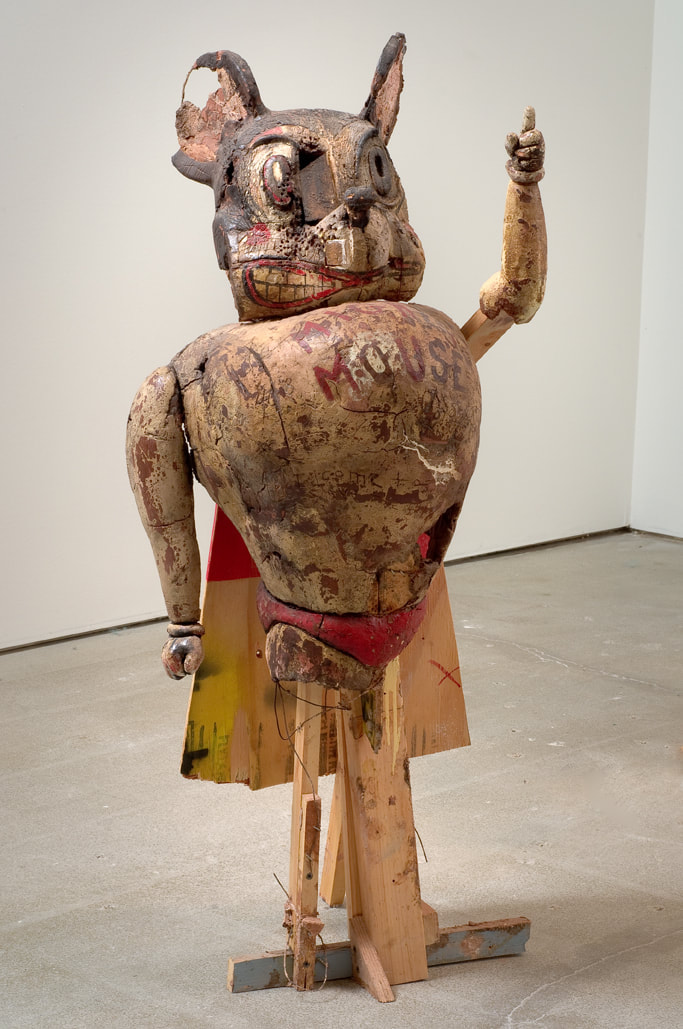
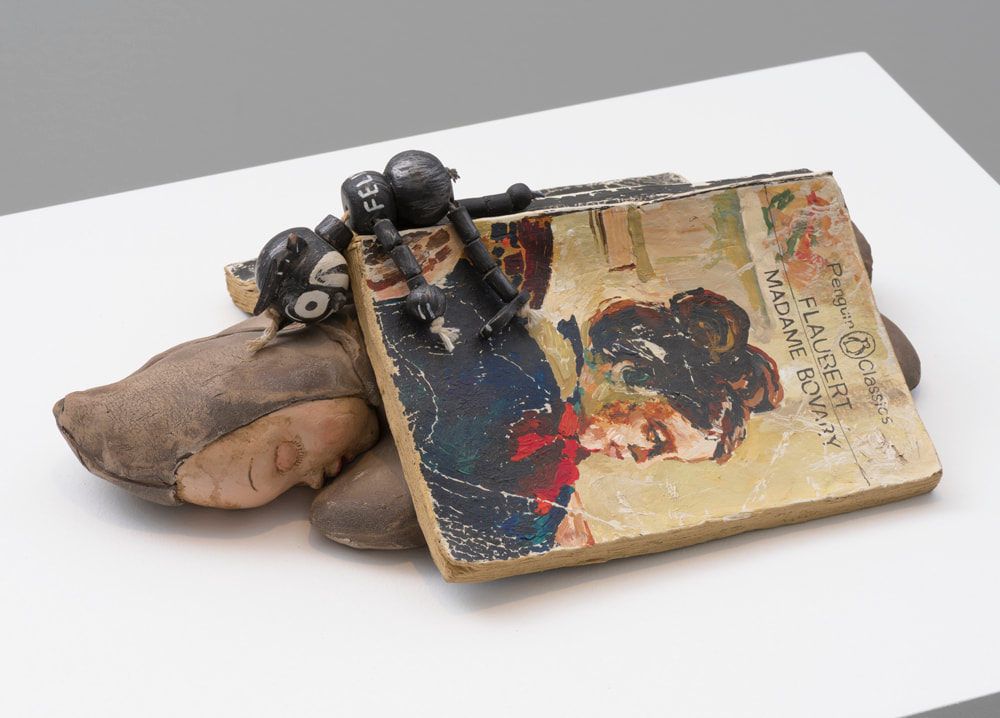
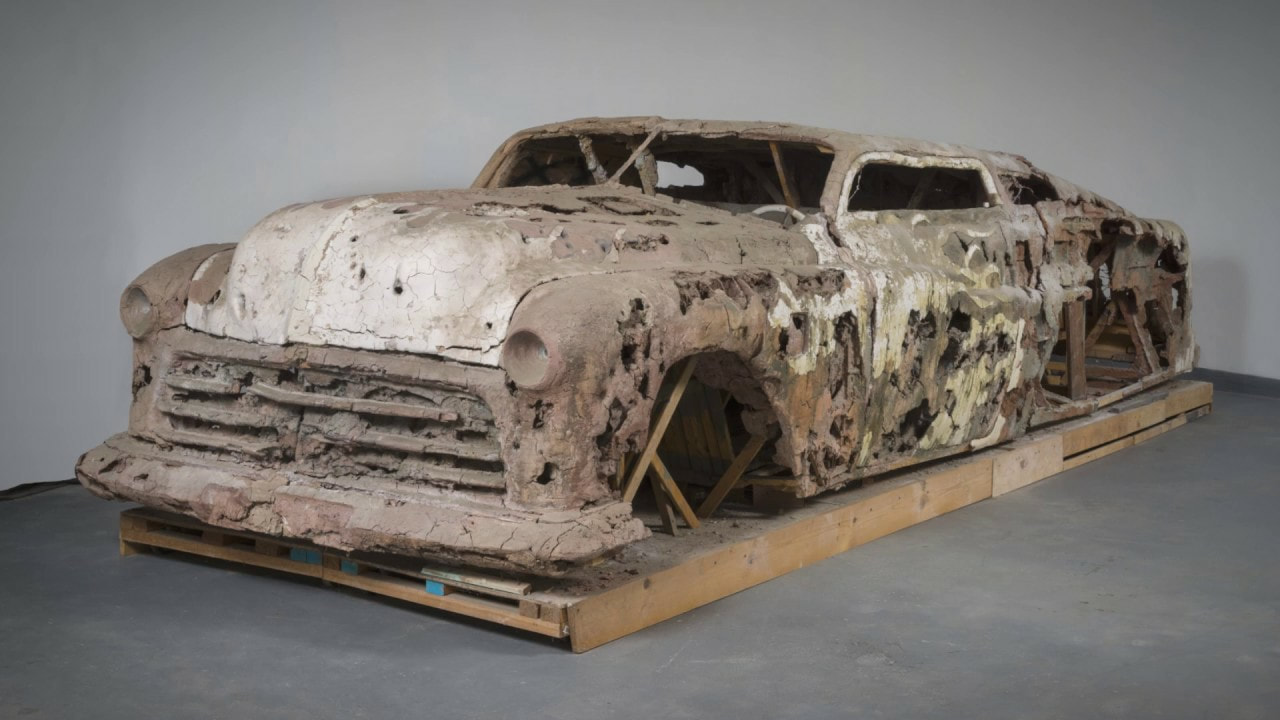
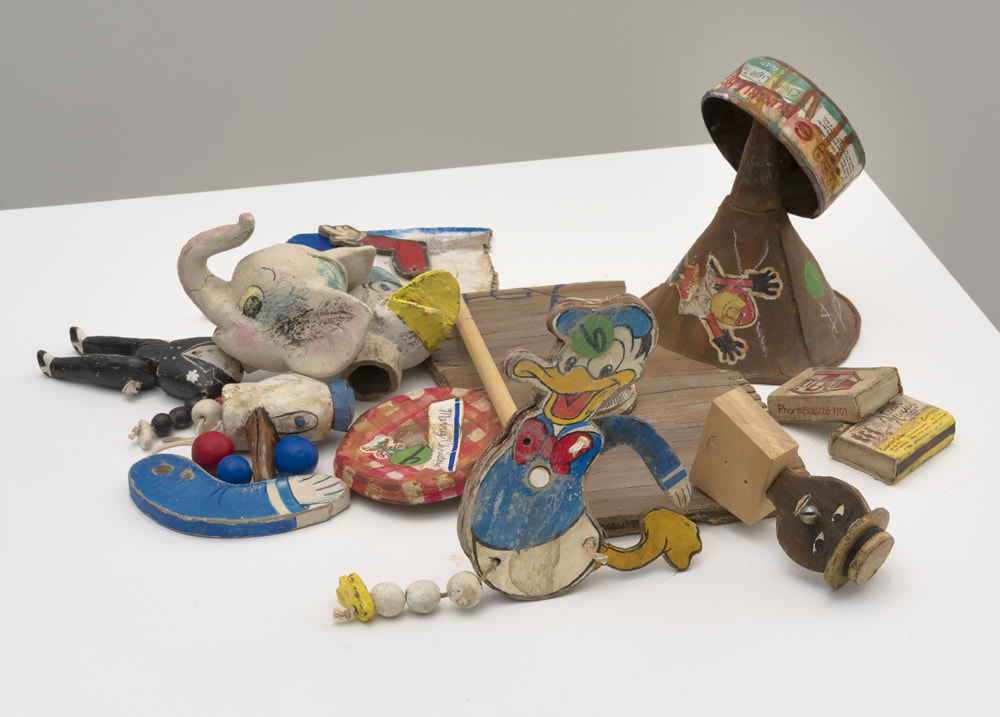
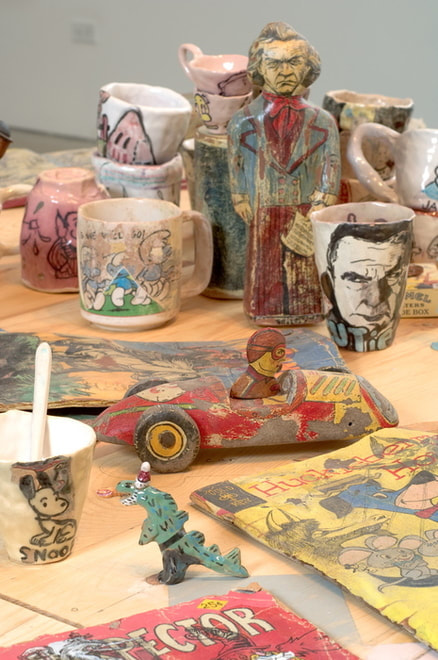
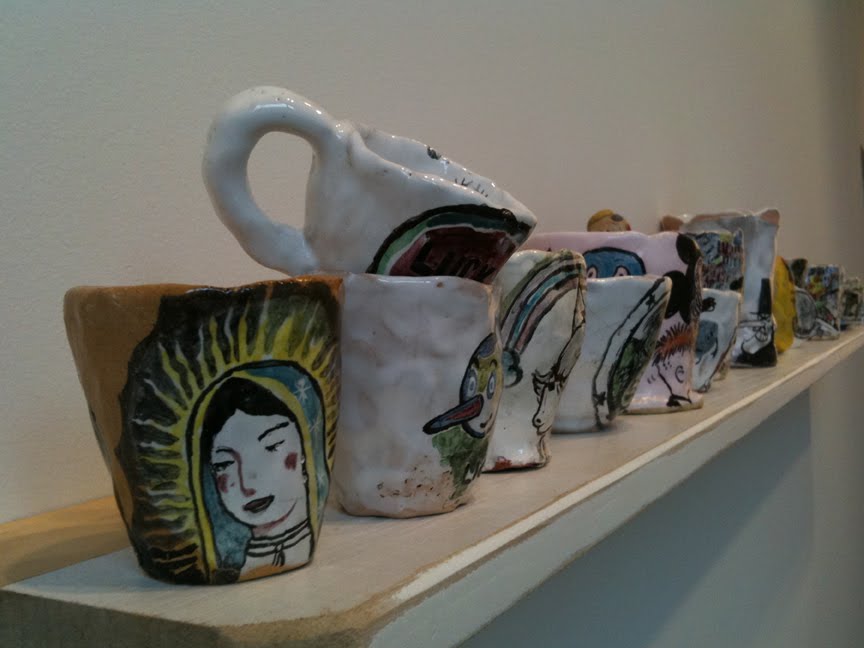
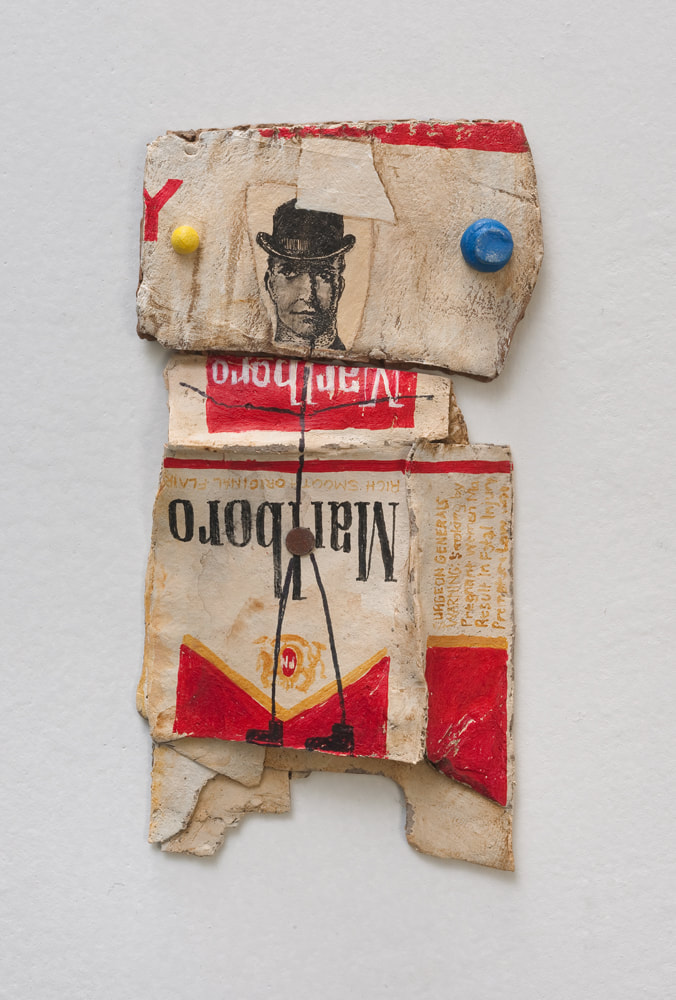
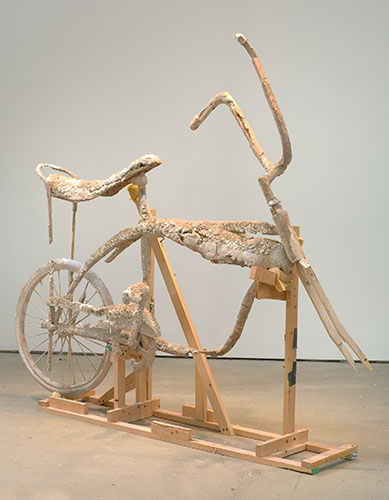
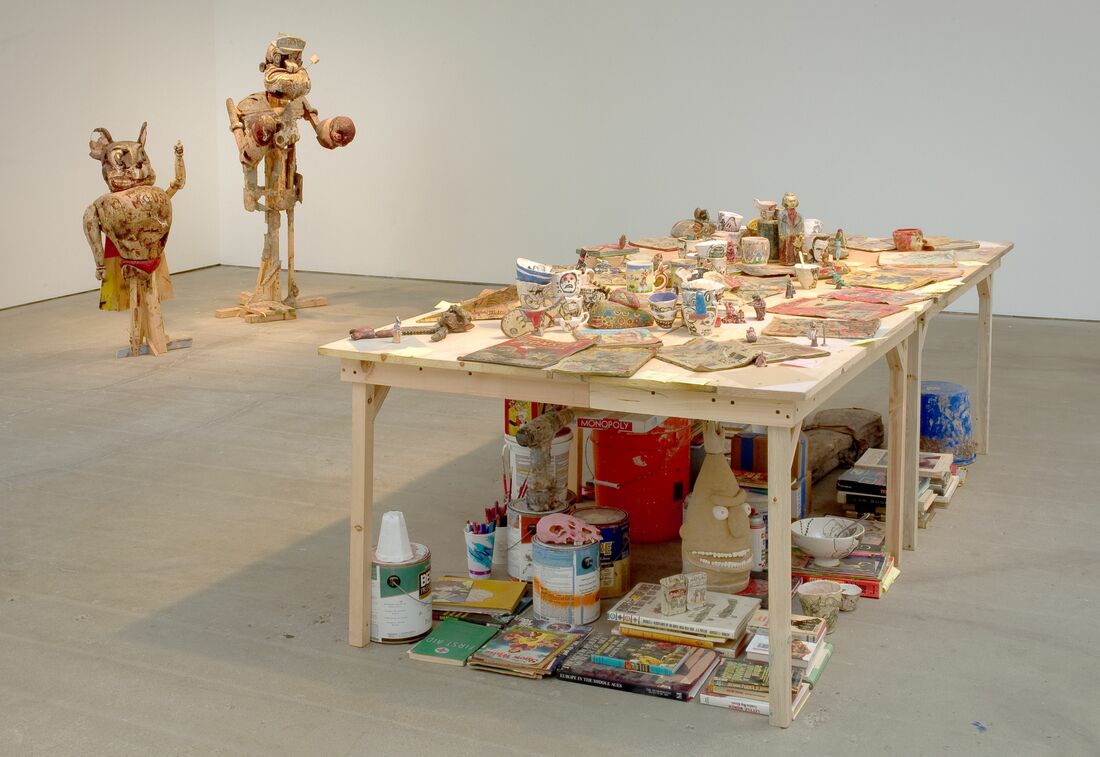
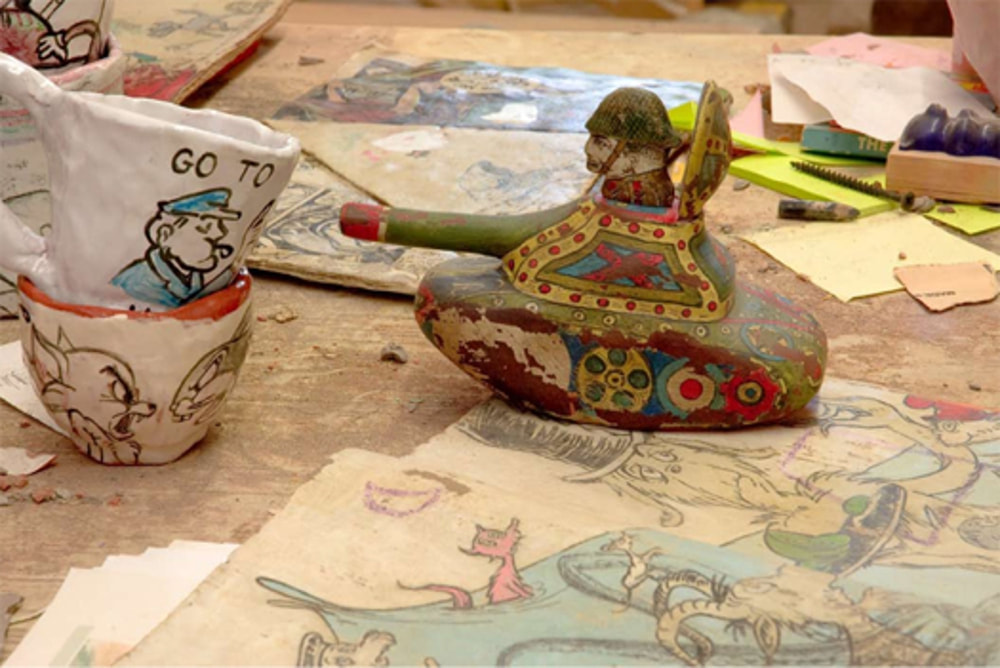
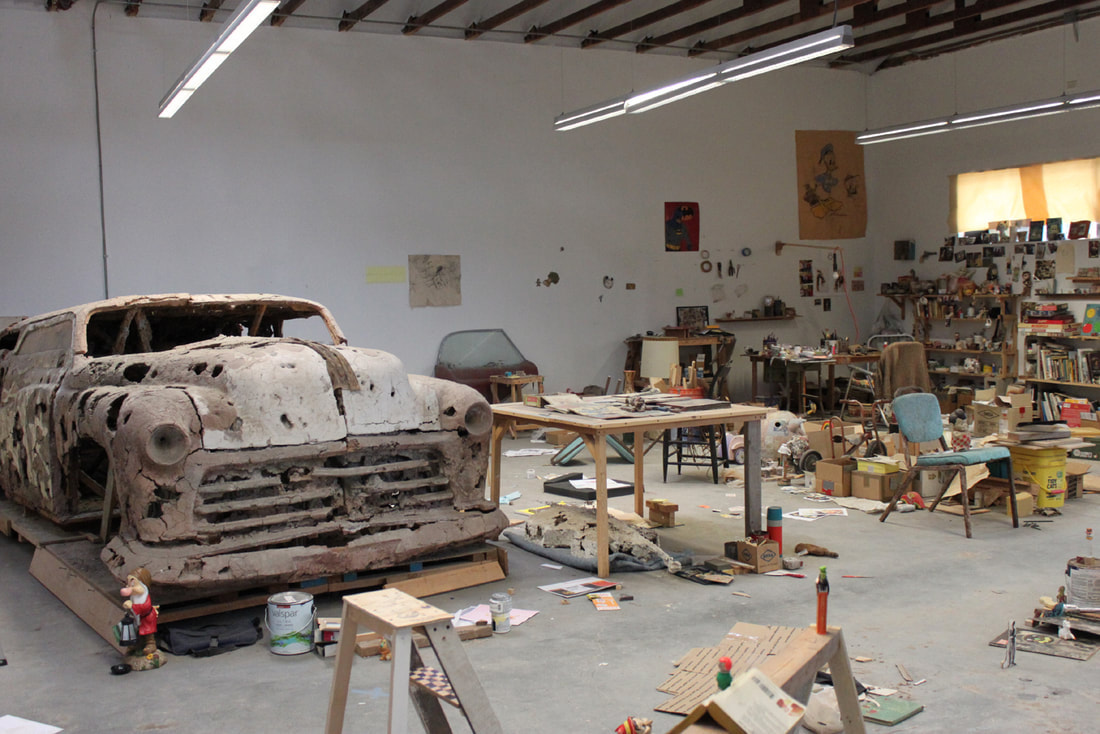
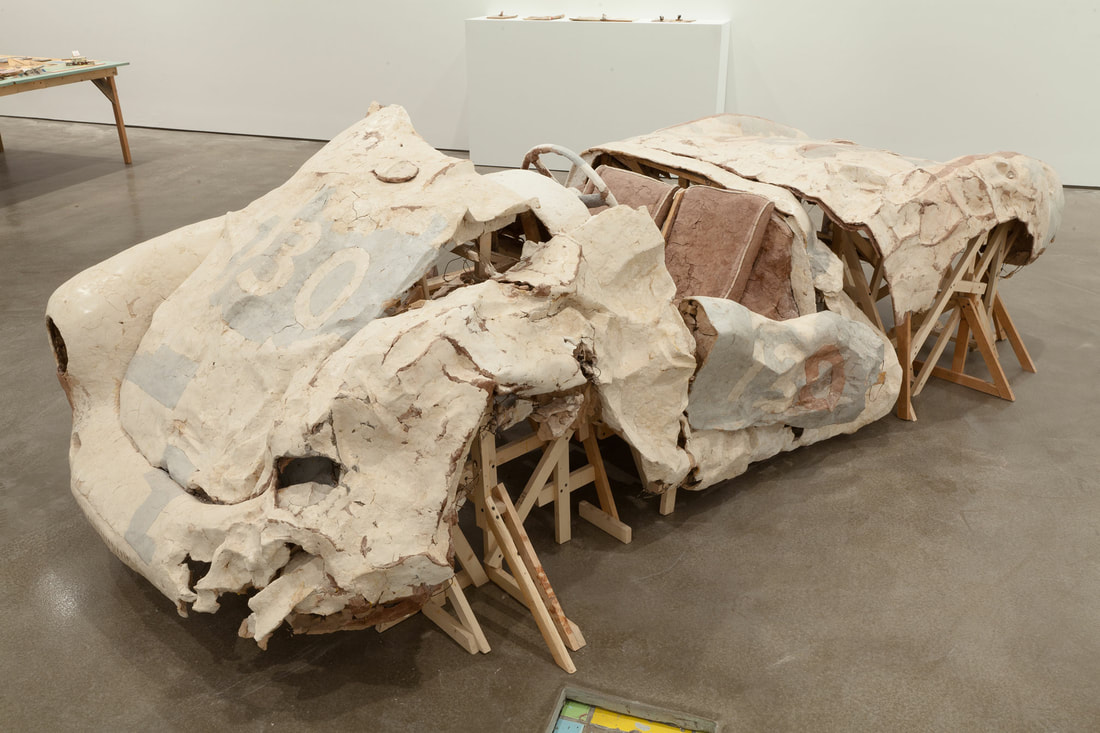
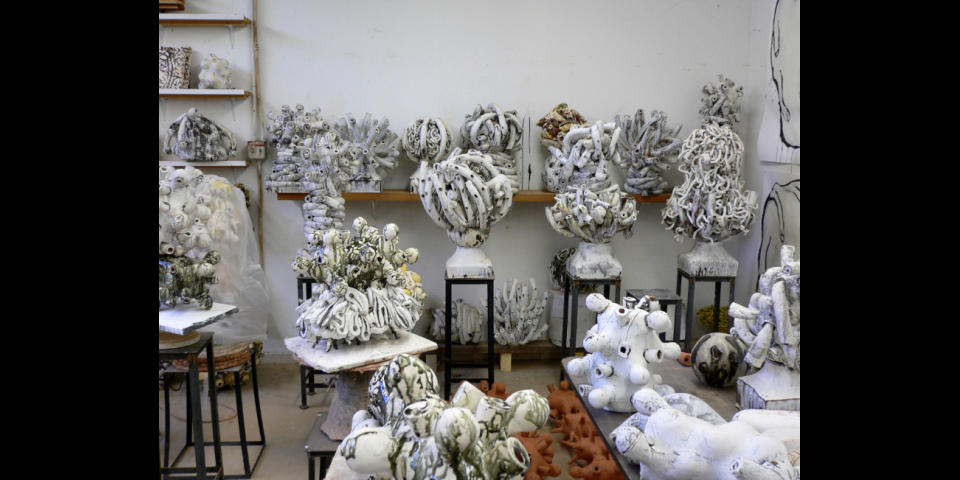
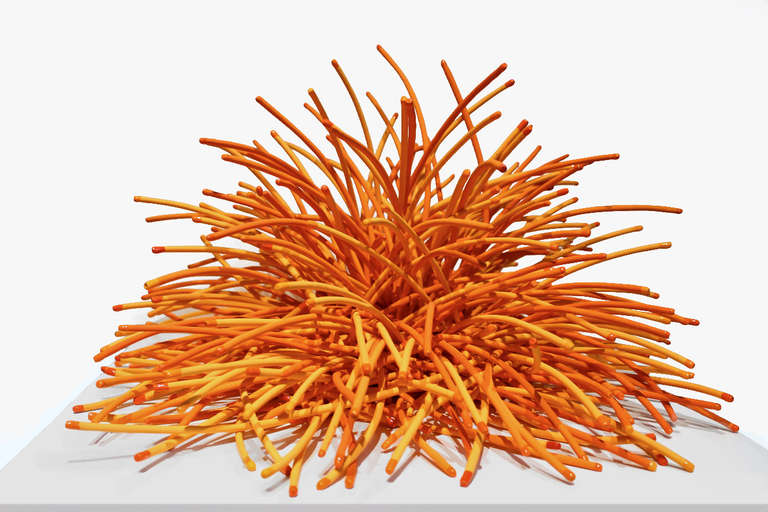
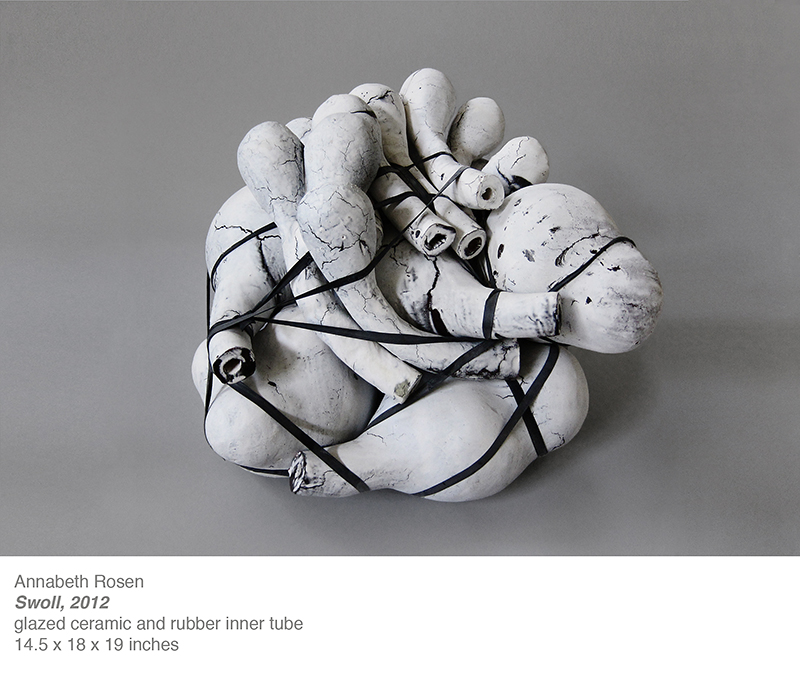
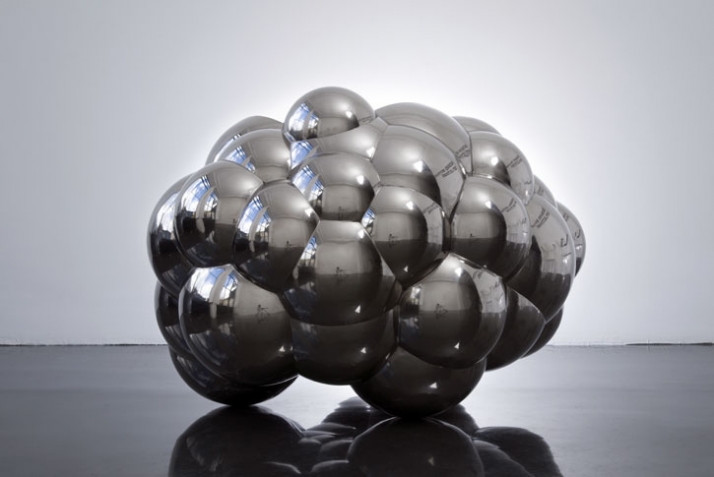
Kristen Morgin: BossIn this project we will be exploring the the works of Kristen Morgin, with an emphasis on the methodology and approach to making with unfired clay. Kristen undeniable signature style is a brilliant contrast to the traditional academic models of make, fire, glazed and fire again. Playing with clays natural phenomenology of plasticity, immediacy and unfired fragility, Kristen presents a counter orthodoxy to ceramic traditions. In this projects we will belong to touch on the brilliance of this contemporary sculpture who has transformed perceptions of contemporary sculpture in clay.
The Project: Students will be asked to study Kristens work, looking for architectural methods and begin a post construction dialog on technique and process. Looks for and try to identify the way her work possibly evolved in construction and use these observations to direct your own attempt at constructing an unfired ceramic sculpture with the aide of an armature and other materials (wire, wood, glues and paint). Subject: In this project students will be working with trigger words. These trigger words are used as a generator of subject and form. Students will be assigned in random fashion their own triggers to work from. As per class discussion students are asked to be honest in the process and utilize the natural response generated by the triggers. There should be a connective reasoning to the trigger word and the objects produced. Great lengths should not be need to explain the correlation, but rather should be evident in the work produced. Materials: Students are tasked with creating their sculptures using the following: Clay (scrap from the buckets or remnants from previous projects) Tie Wire Wood Wood Glue Paint Parameters: Students are encouraged to plan the scope of their project based on their abilities and semester timeline. Four weeks remain of the semester. Works should reflect the available work time. (no tiny single pieces, push to your limits) |

|


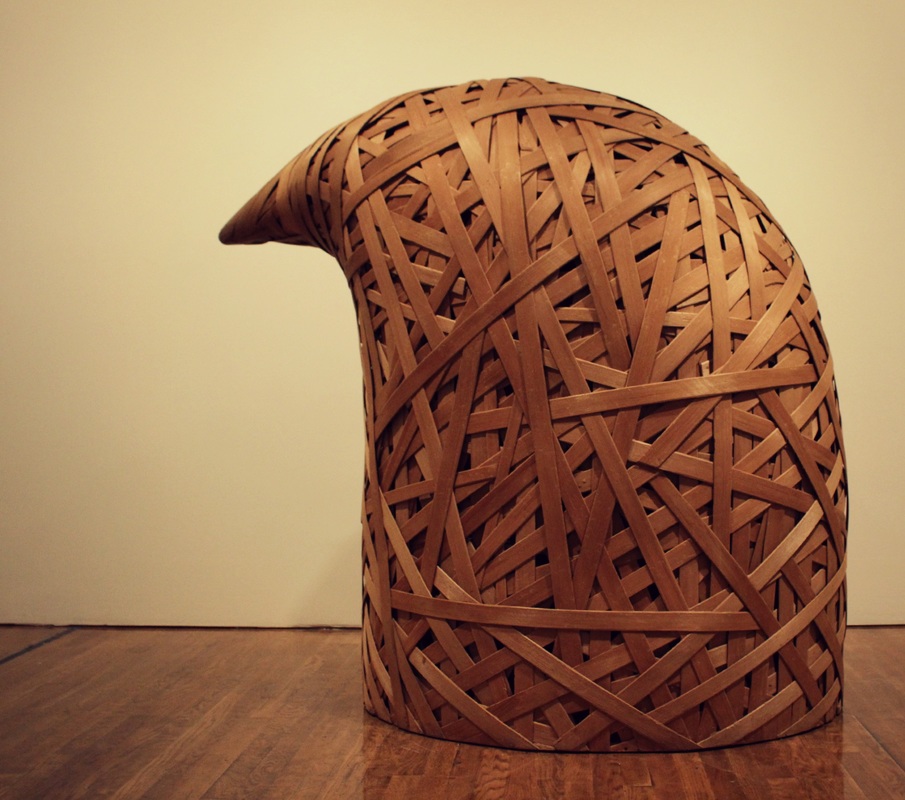
#8
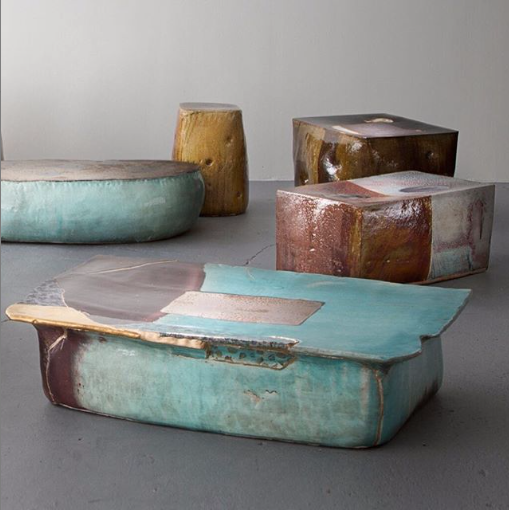
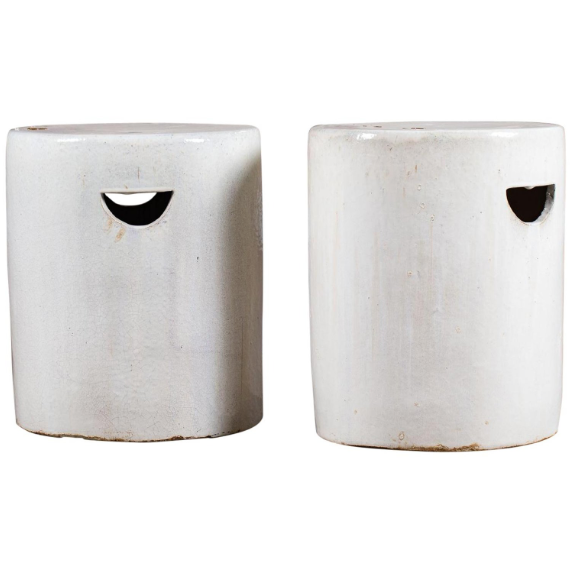
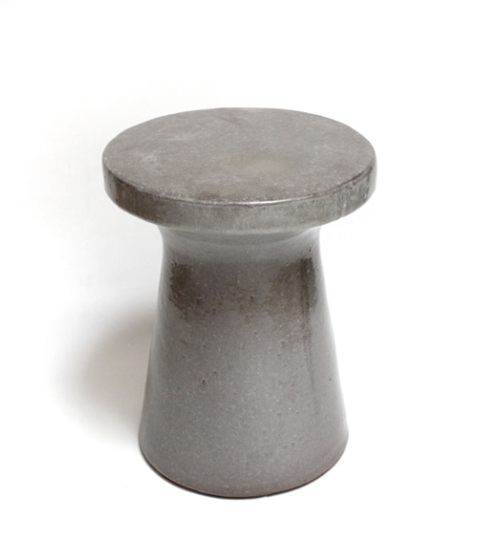
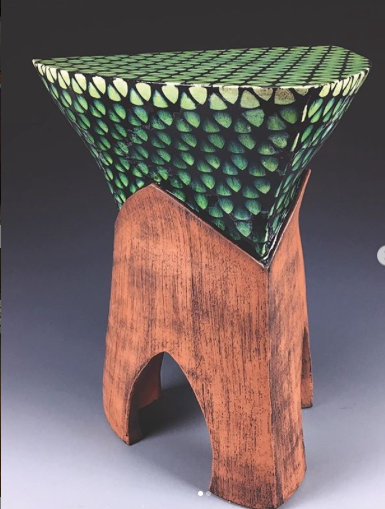
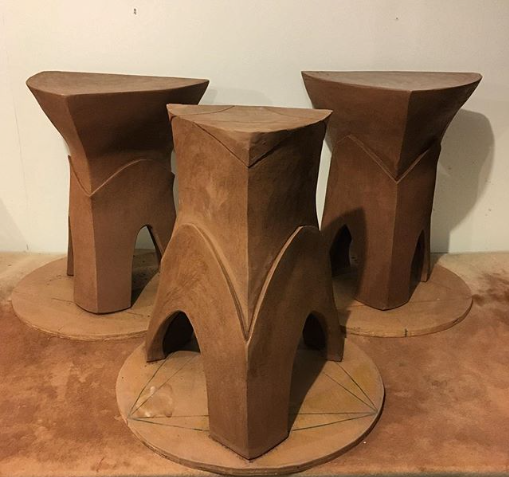
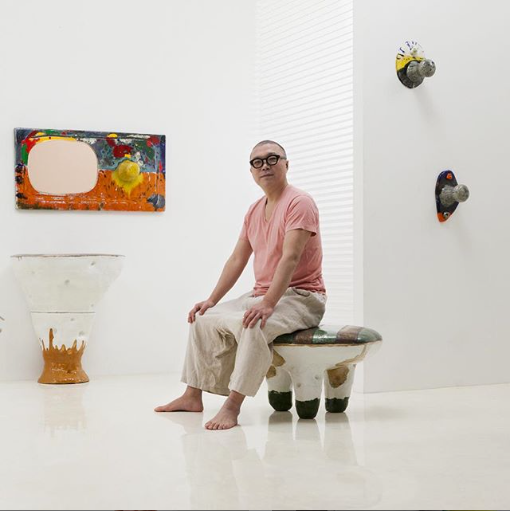
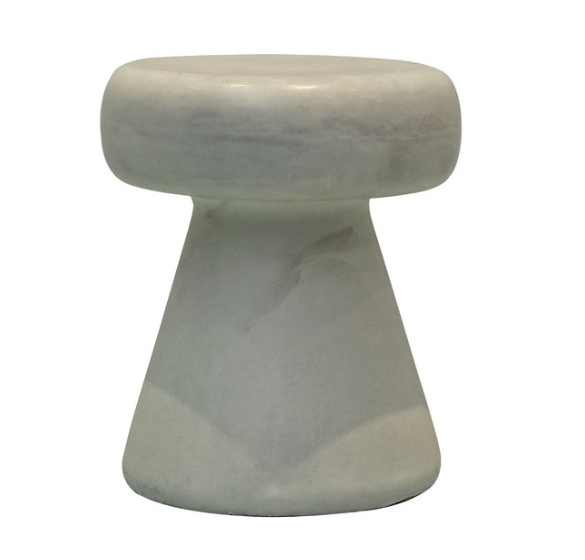
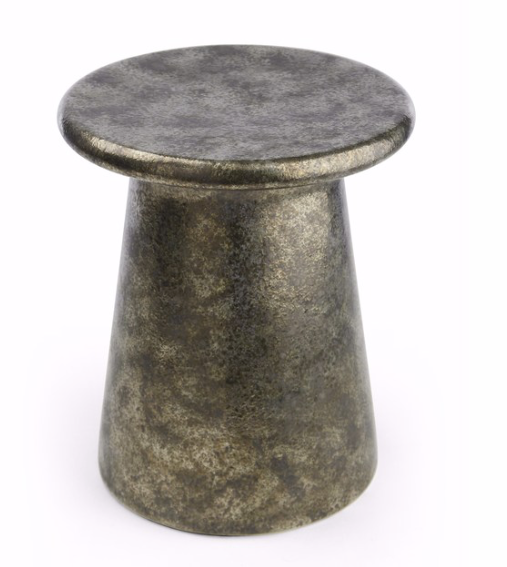
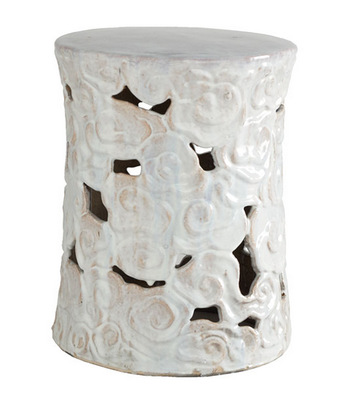
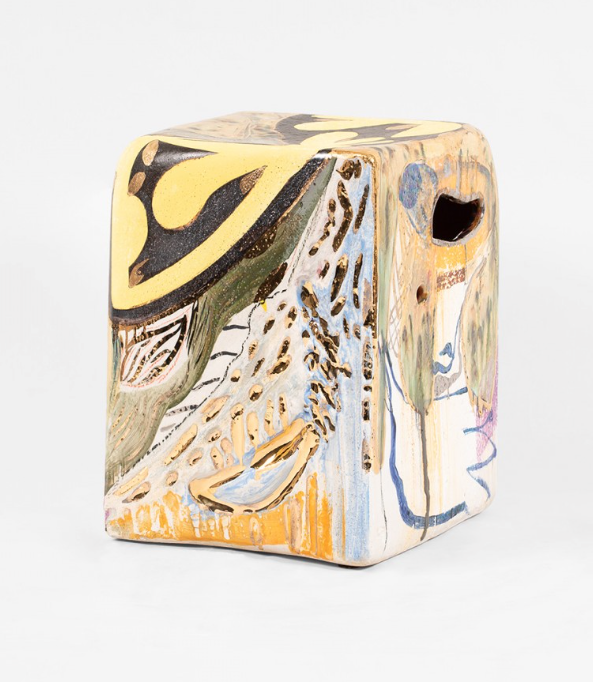
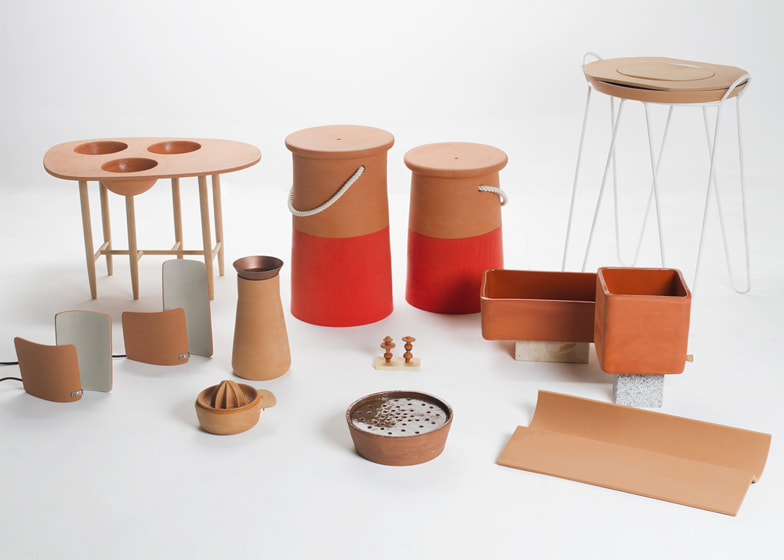
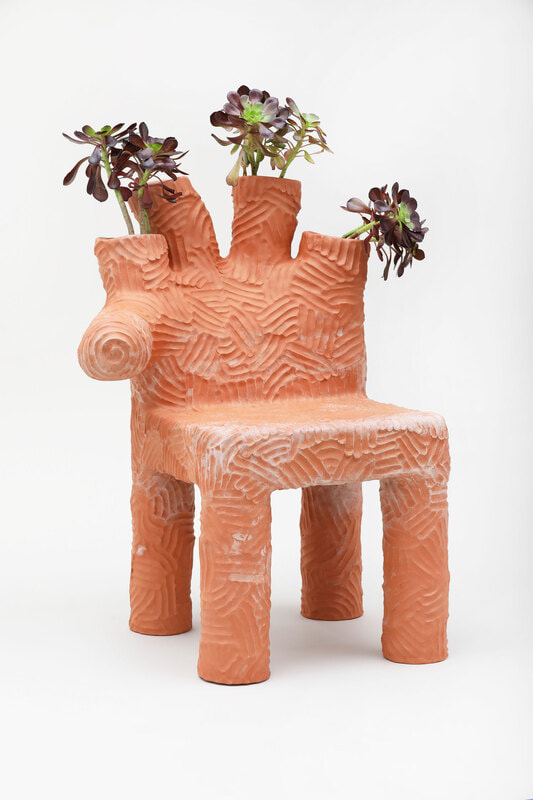
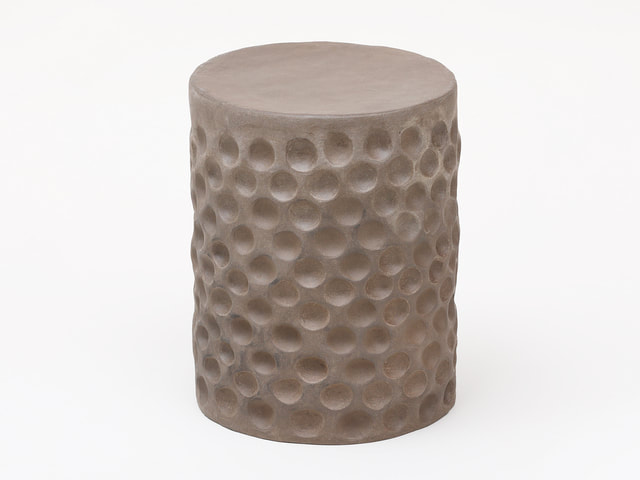
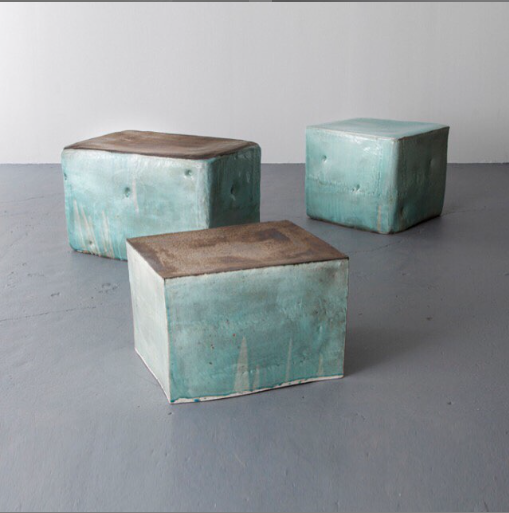
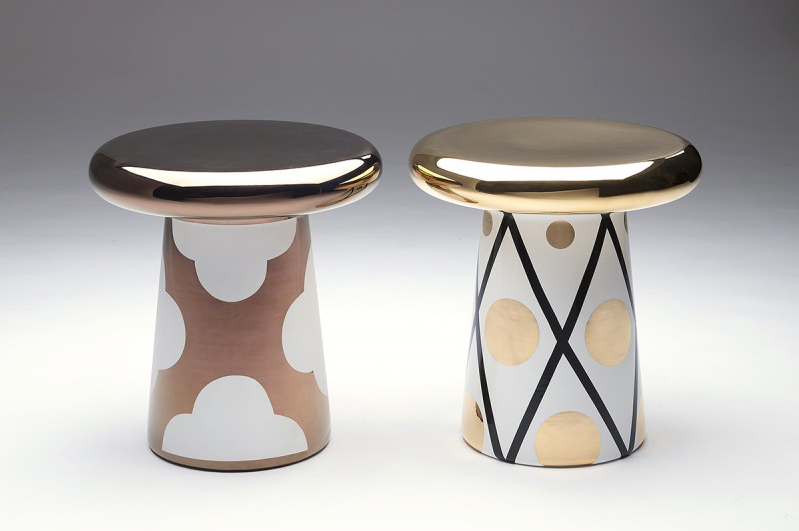
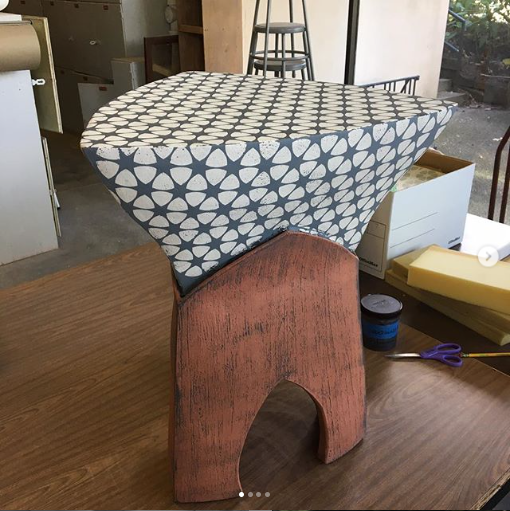
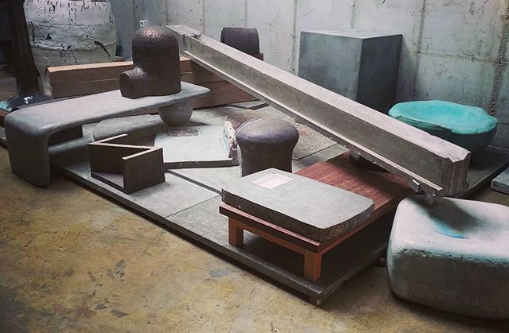
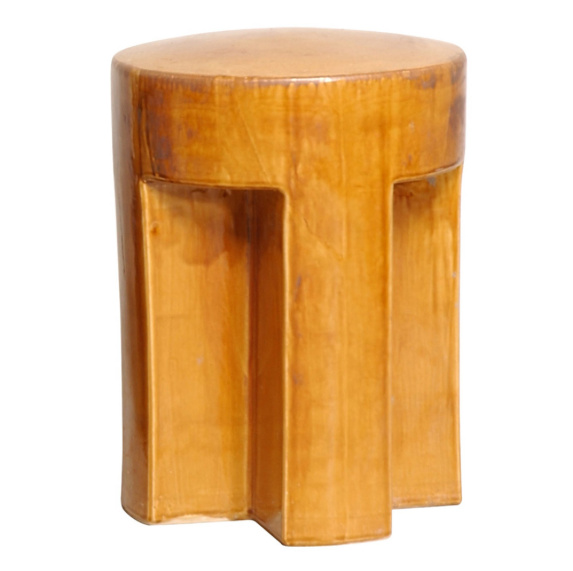
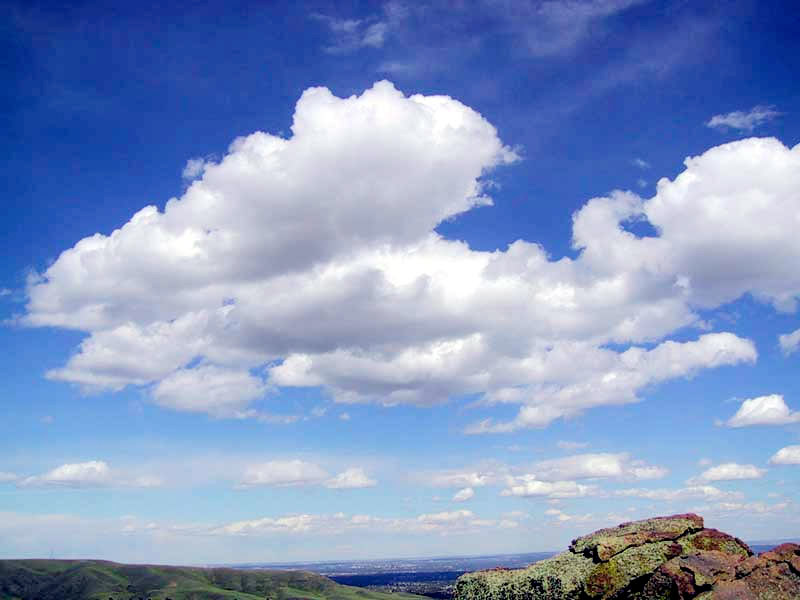
Rest and Relax |

|
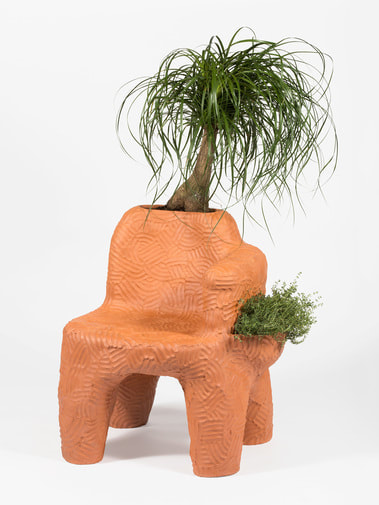
Overview:
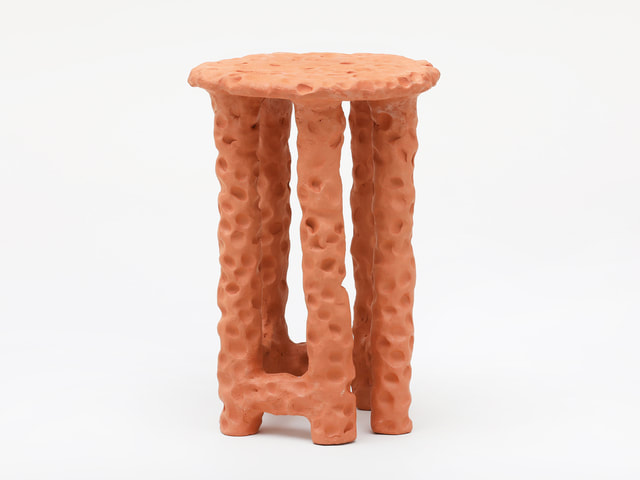
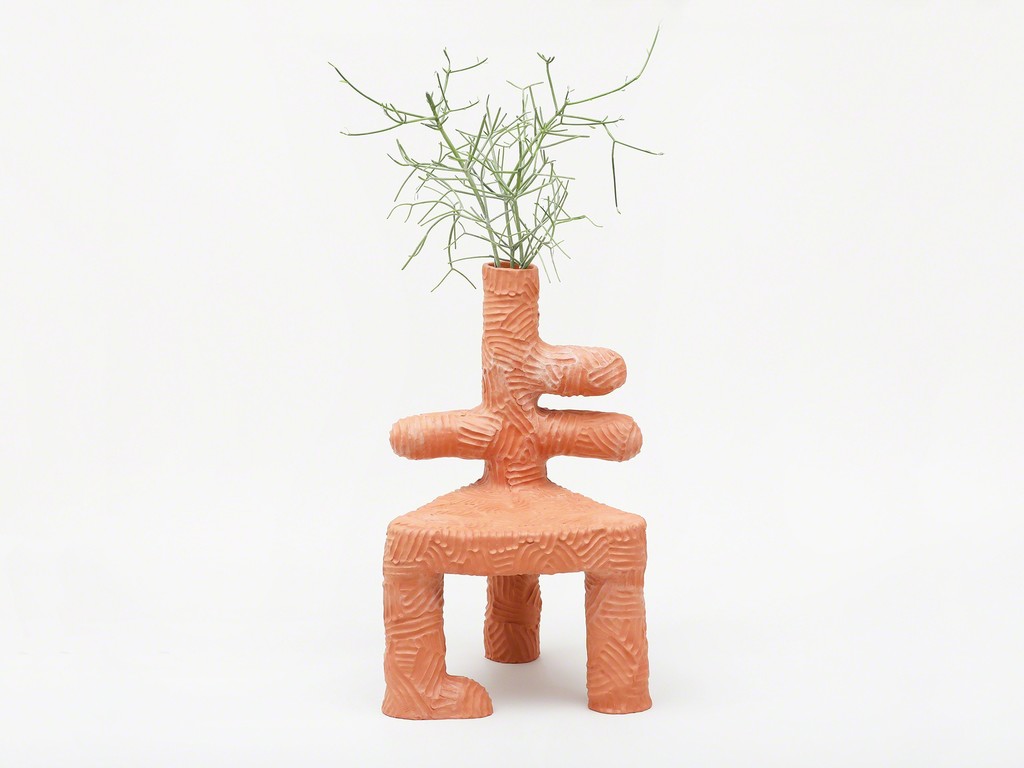
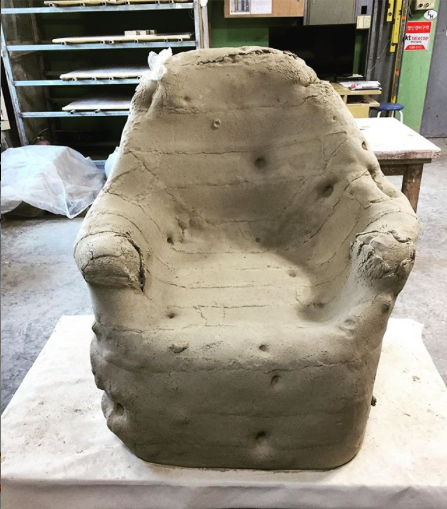
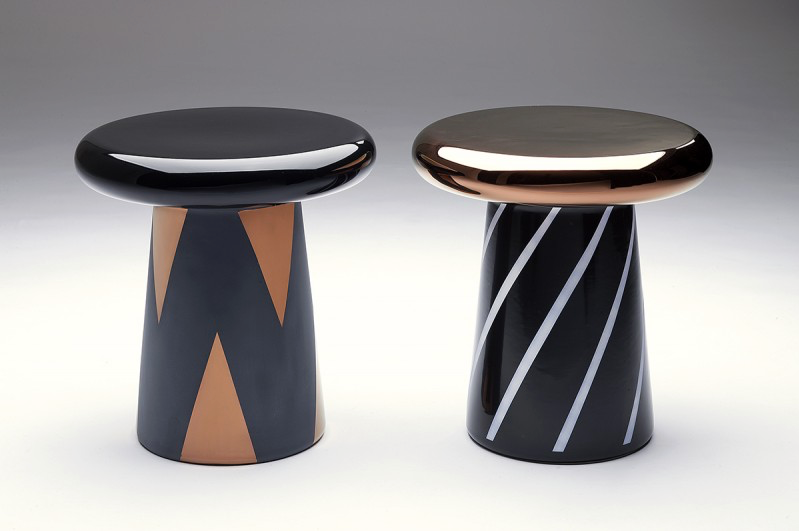
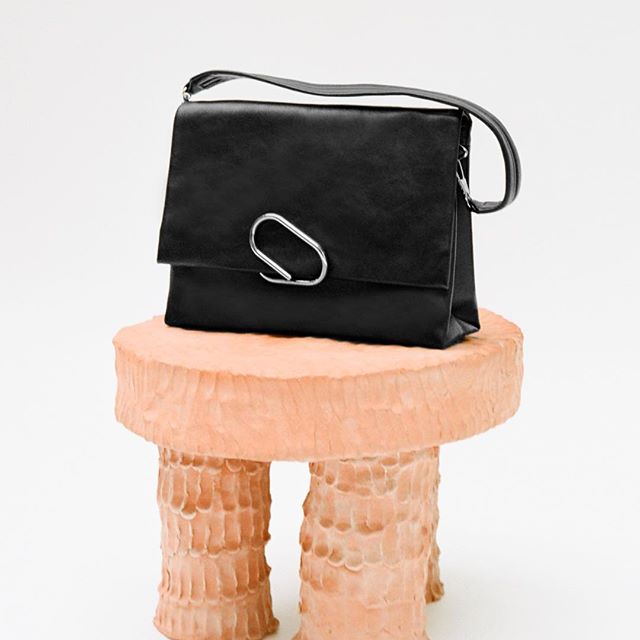
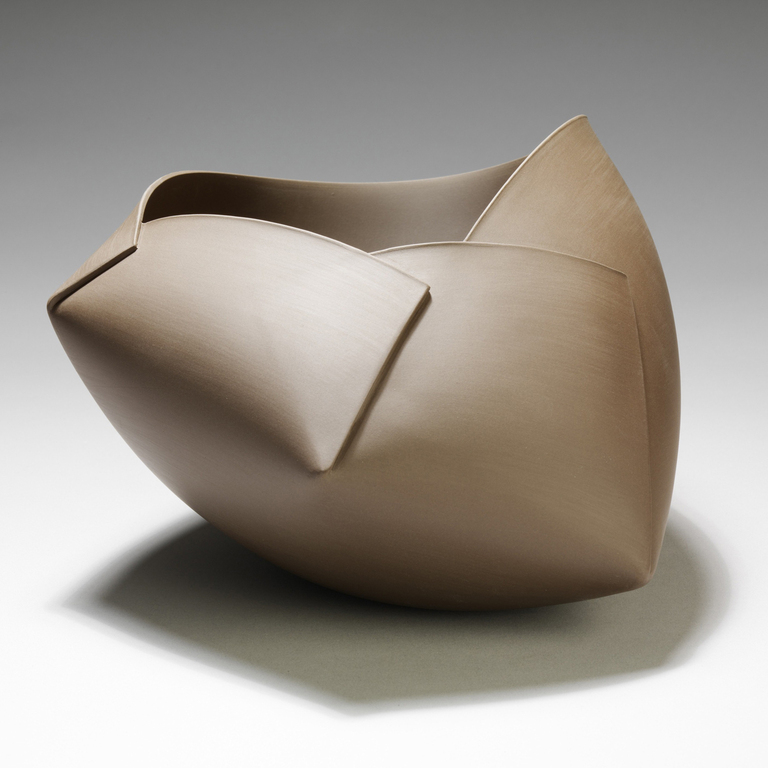
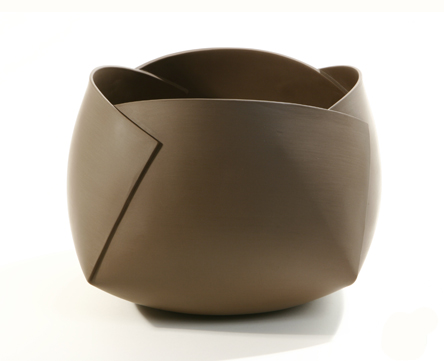
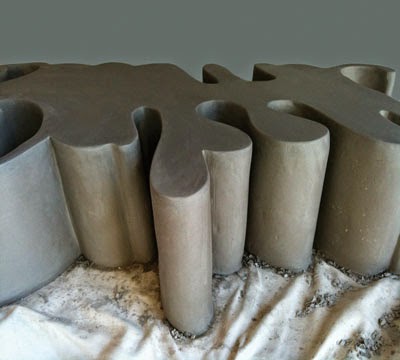
In this project we will be exploring scale and functionality. Students will be working on large scale objects that will be destined for use as furniture/ seating elements. For the execution of this project student will be guided through hand building technique that will allow for large scale development and through wheel throwing methods that will allow the same. Coil and throw will be the main wheel throwing methodology, and hand builder will explore coil and pins as well as slab forming processes. Moisture management, planning and structural considerations will be the focus of this assignment. In the end we will all have a seat and talk about the process.
In this project we will be exploring scale and functionality. Students will be working on large scale objects that will be destined for use as furniture/ seating elements. For the execution of this project student will be guided through hand building technique that will allow for large scale development and through wheel throwing methods that will allow the same. Coil and throw will be the main wheel throwing methodology, and hand builder will explore coil and pins as well as slab forming processes. Moisture management, planning and structural considerations will be the focus of this assignment. In the end we will all have a seat and talk about the process.


Assignment:
Each Student is required to do the following:
Construct a singe person seating object (stool, chair, etc..).
Objects must be able to support the maker (design and structure must address physical duties of object).
Objects must be 20" in height.
Must have surface decorations that include but not limited to slip and glaze.
Must be made of recycled clay or stoneware clay of your choice (firing to Cone 5)
Wheel Throwers:
Works should be made using the demonstrated coil and throw techniques.
Works will be made on your personal bats using your personal bat pins.
Works should be made from a thrown base made from a solid lump pf clay and expanded using coils or ribbons to build height and mass.
Works should have a seating area that is comfortable and usable by the maker.
Works should be 20" in height in green state.
Hand Builders:
Works can be executed using any handbuildind technique of your choice.
Works should be build at a thickness that takes the function and purpose of the object in mind (durable).
Works should be made on a ware board that addresses the scale and size needed for proper functionality.
Works should have a comfortable and usable seating area that is usable by the maker.
Works should be 20" in height in green state.
Glaze & Surface:
All works must be glazed using the studio glazes. Slips are encouraged as well to build a complex surface rich with visual dynamics. Students are welcome to use any surface decorating method they choose, but objects must include fired surfaces including glaze or slips. Additional room temperature finish can be applied post glaze firing.
Goals:
Learn to scale up work in a way that addresses structural needs of the object being constructed (thickness).
Explore possibilities of ceramic objects and re-evaualte definition of utilitarian objects in clay.
Improve moisture management and how to maintain workability of a clay object through longer building engagement.
Learn to build forms progressively and sectionals to create cohesive finished forms.
Improve design and planning abilities.
Gain understanding of clay movement in firing to address issues of heavy footed objects.
Improve glazing and decorating abilities to address large format objects.
Resources:
Students are encouraged to research and explore furniture and other large scale ceramic objects. There are a number of artists exploring this area of clay production.
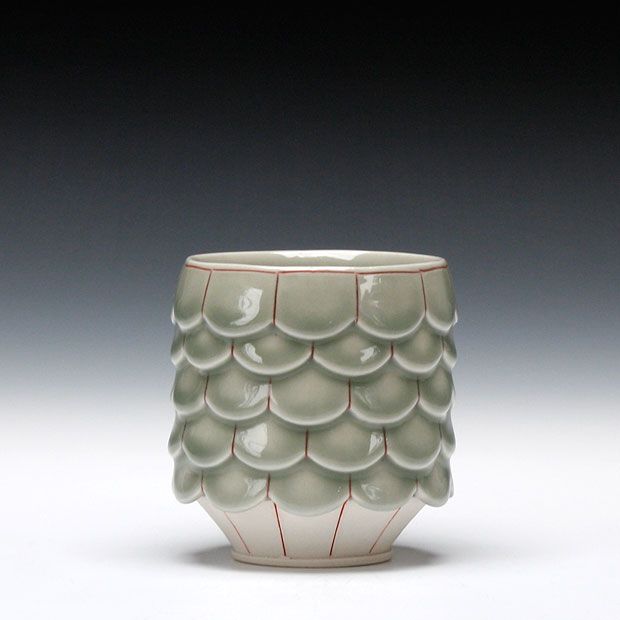
#7
Slab-n-it: Exploring soft and hard slab constructions.
Slab building.
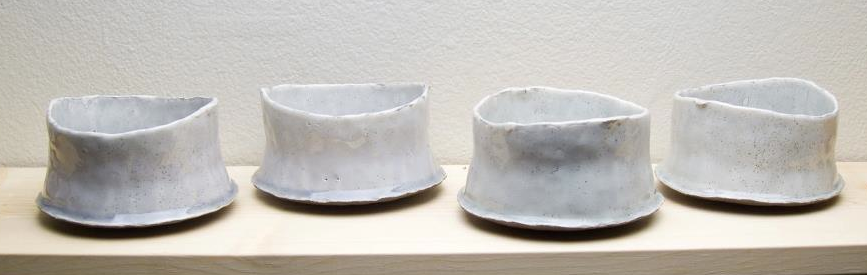
Slabs are an essential method of clay construction and will the subject of this project. Students will explore methods of handling soft slabs (slabs that are fresh to soft leather hard) and hard slabs (slabs that are firm leather hard and rigid). Through this project students will explore the potentials of slab building as a vehicle for interaction with clay.
Project: Students will build two forms of their choice. These forms can be either utilitarian, sculptural or mix of the two. Students must make one piece utilizing hard slabs and one piece utilizing soft slabs. These methods and associated techniques will be covered in class demos. Requirements: 1 form made form soft slabs 2 from made from hard slabs Must not exceed 12" in any direction Notes of attention: Mishima Scrafitto Resources: Artaxis.org Accessceramics.org centralcalclay.com Artists: Anne Van Holey John Mason John Gill Andrea Gill Mark Digeros Birdie Boone Jen Pierre Larocque |
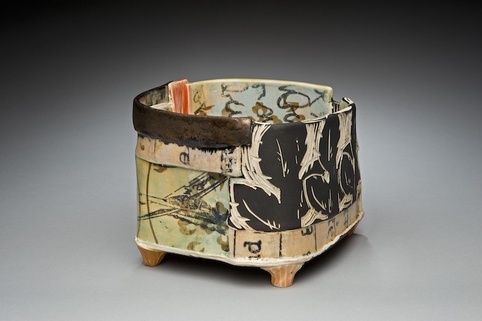
Image Library:
|


#6
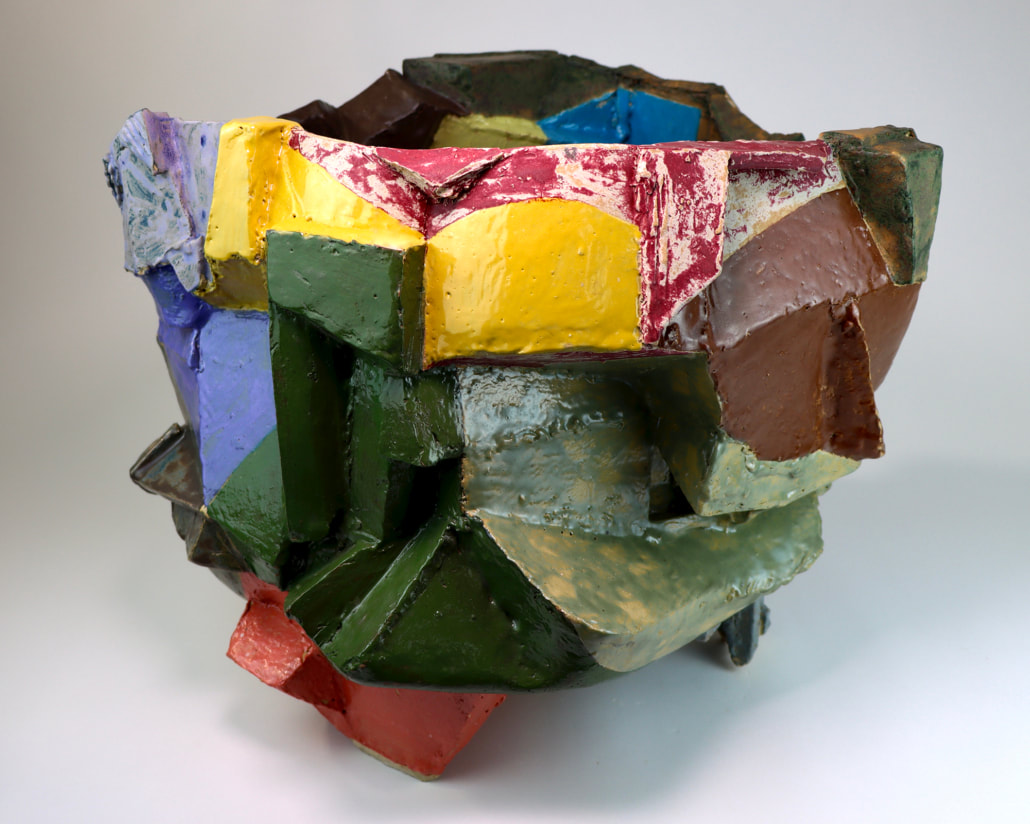
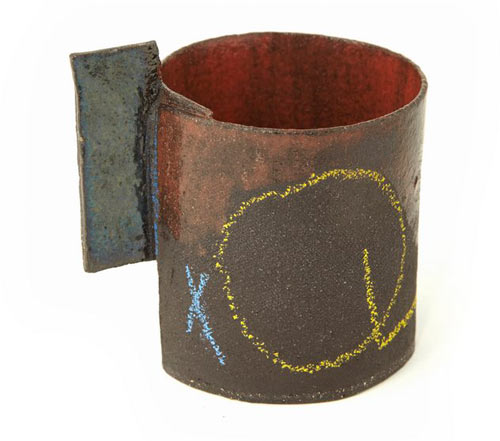
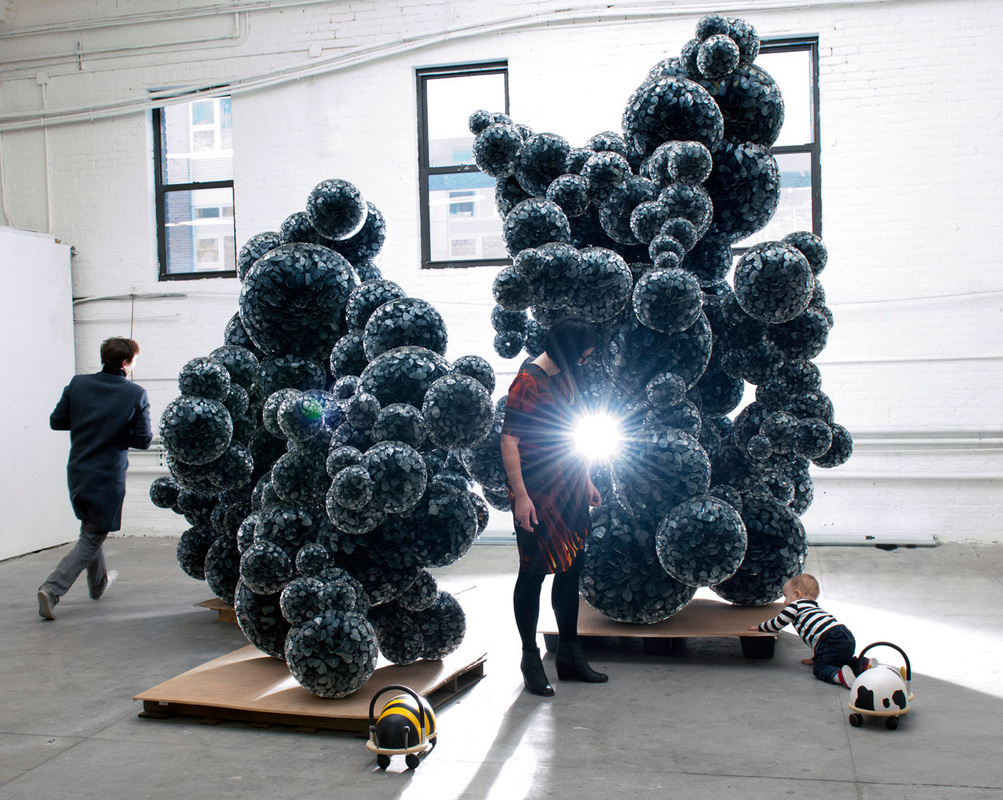
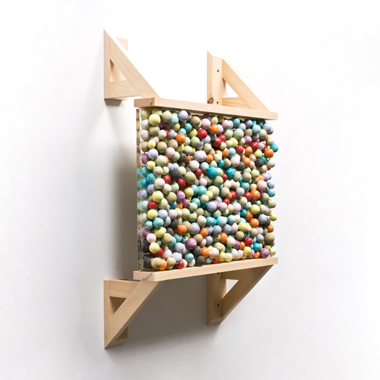
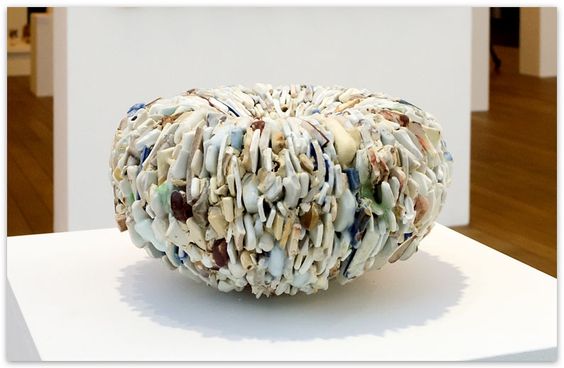
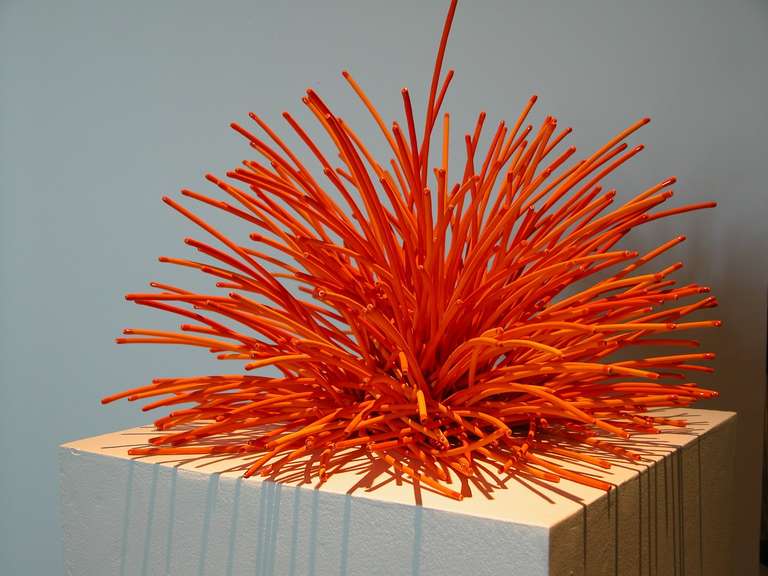
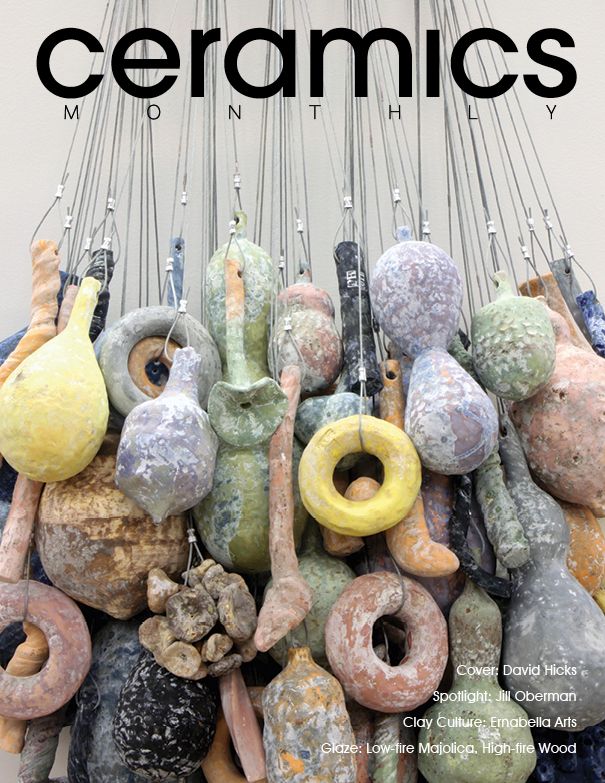
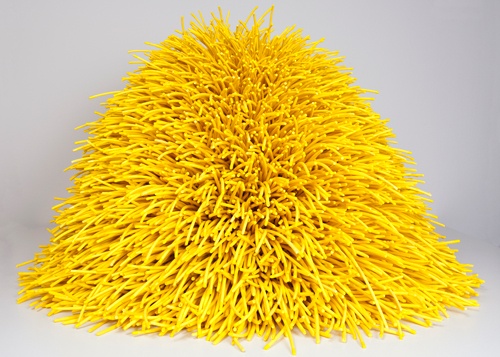
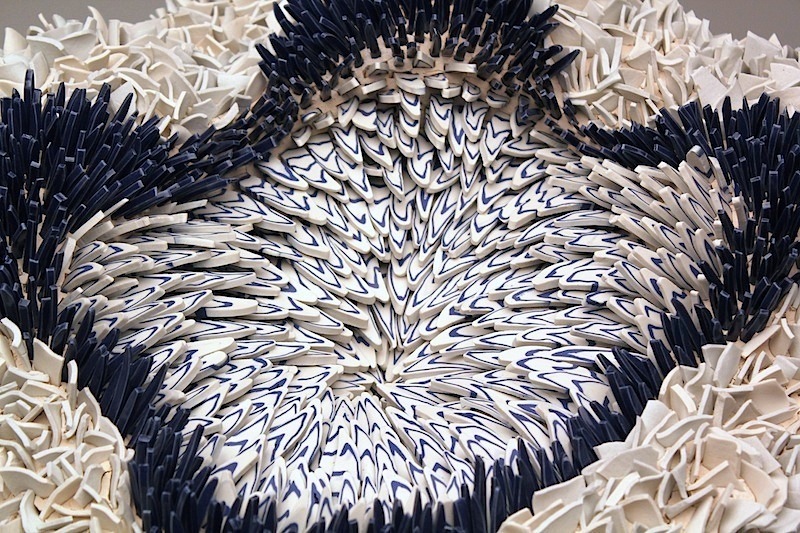
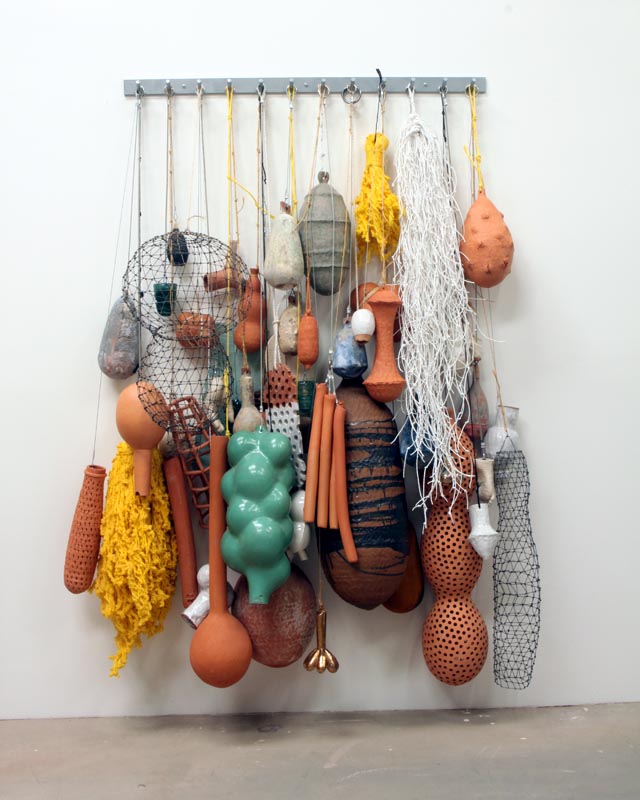
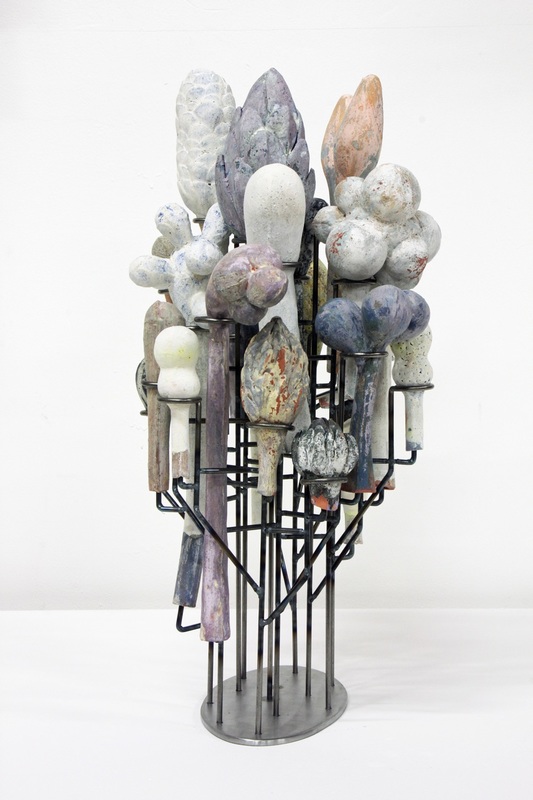
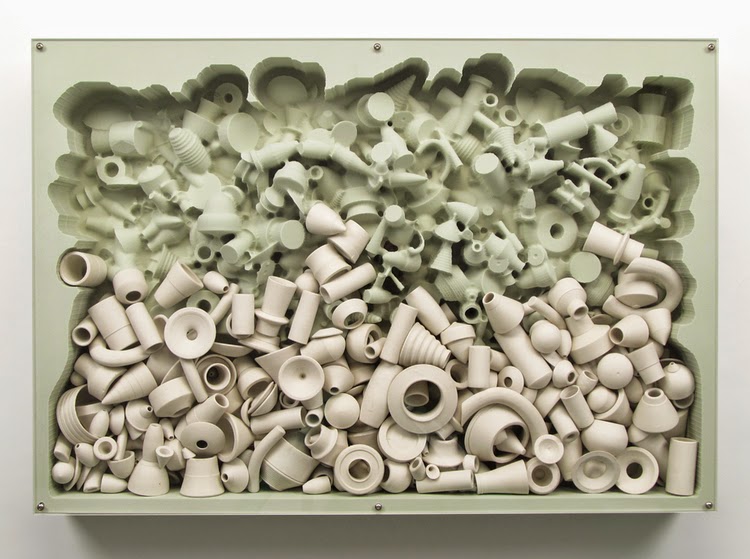
Non Traditional Interactions: Ceramic Constructions and Assemblages
Assemblage/Construction Multiple/Many
|

|
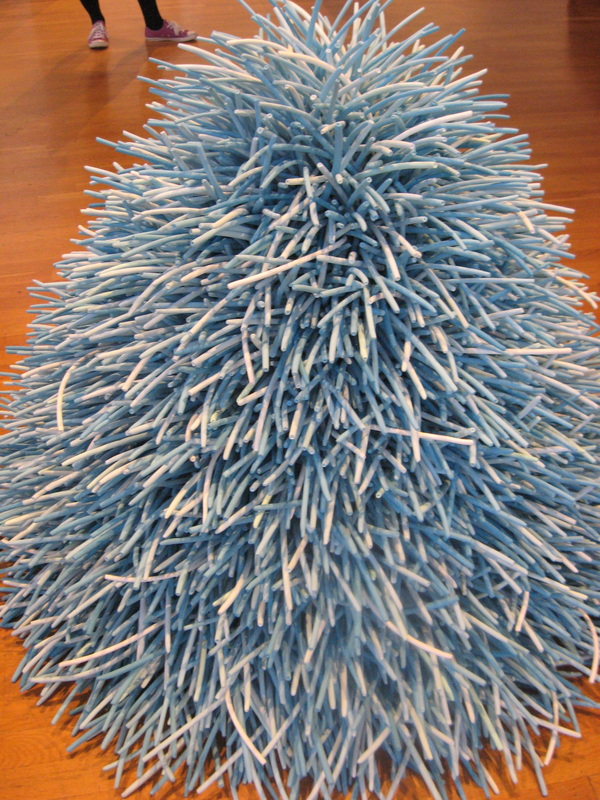
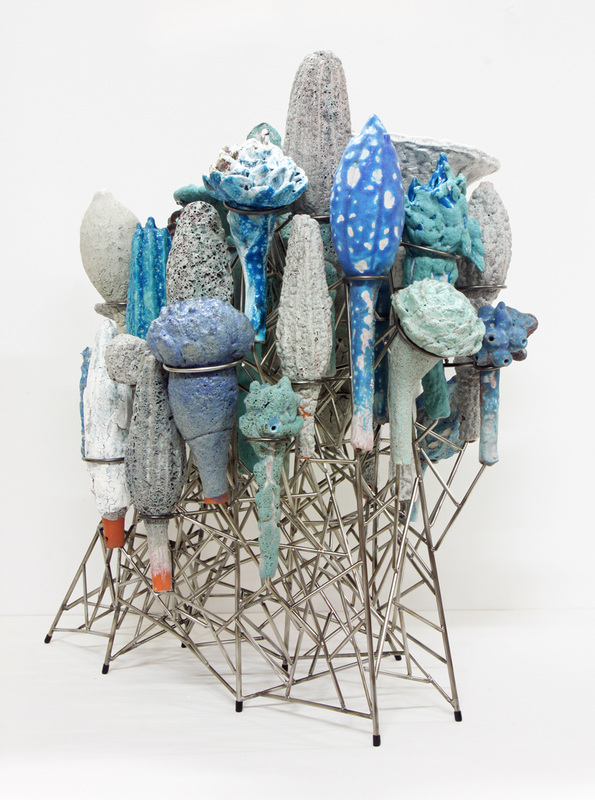

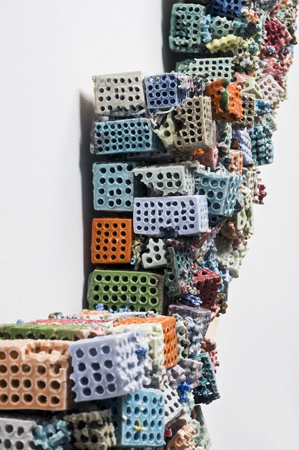
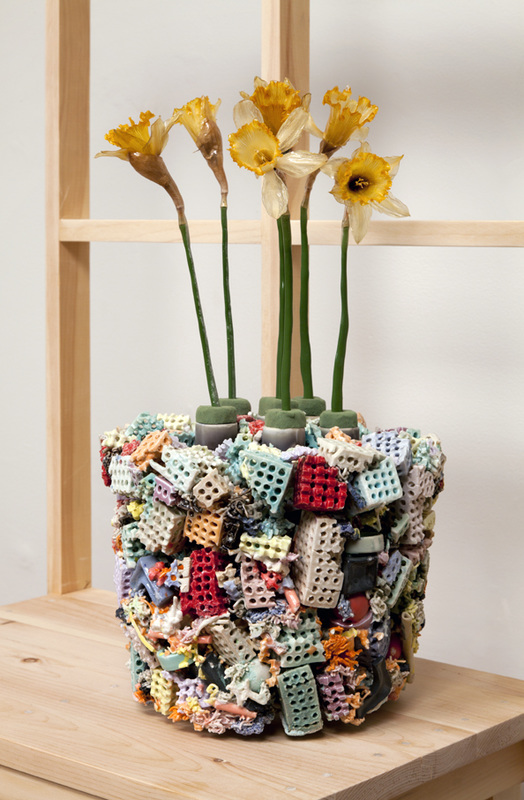
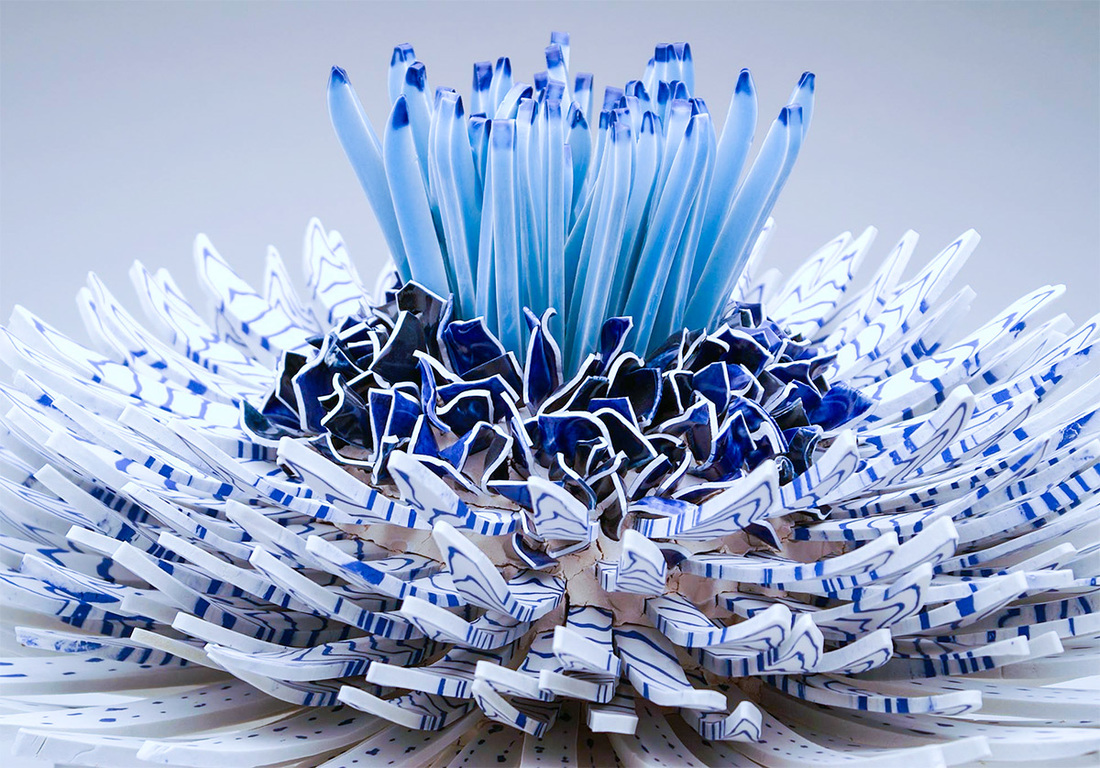
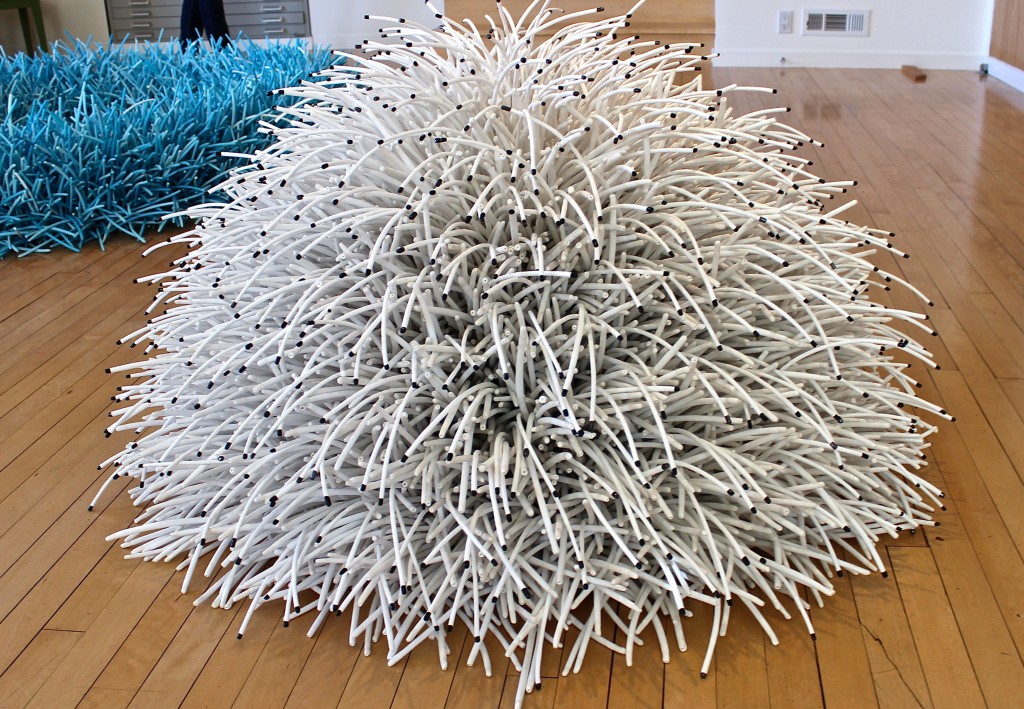


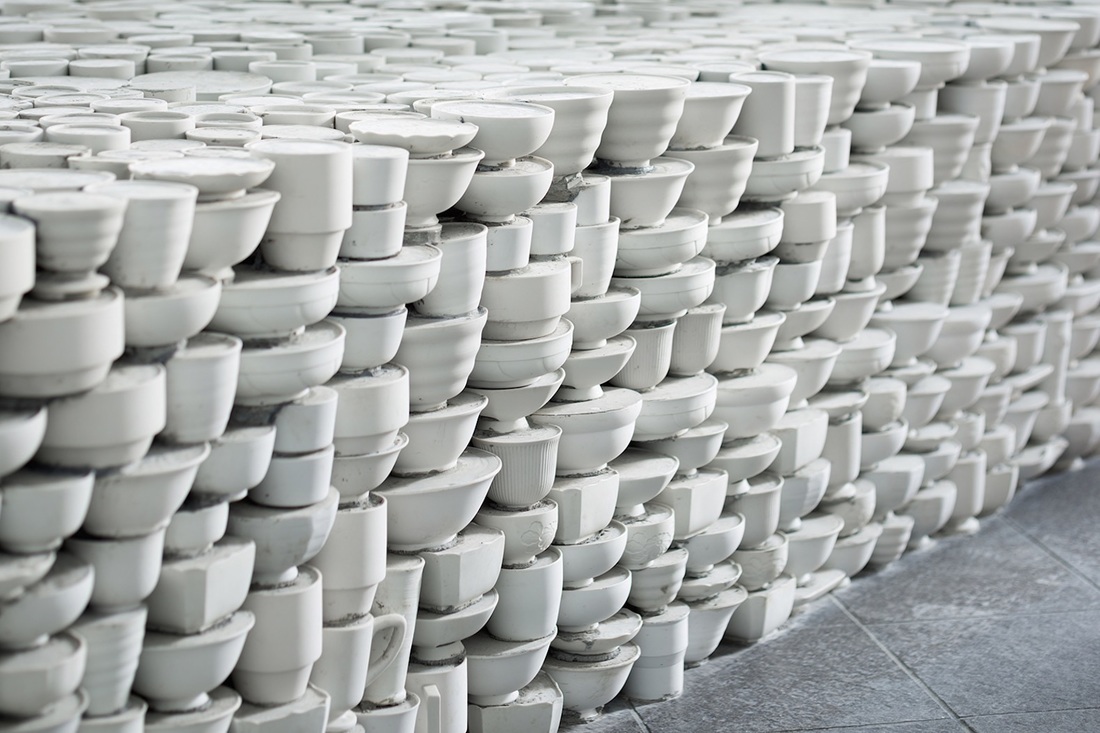

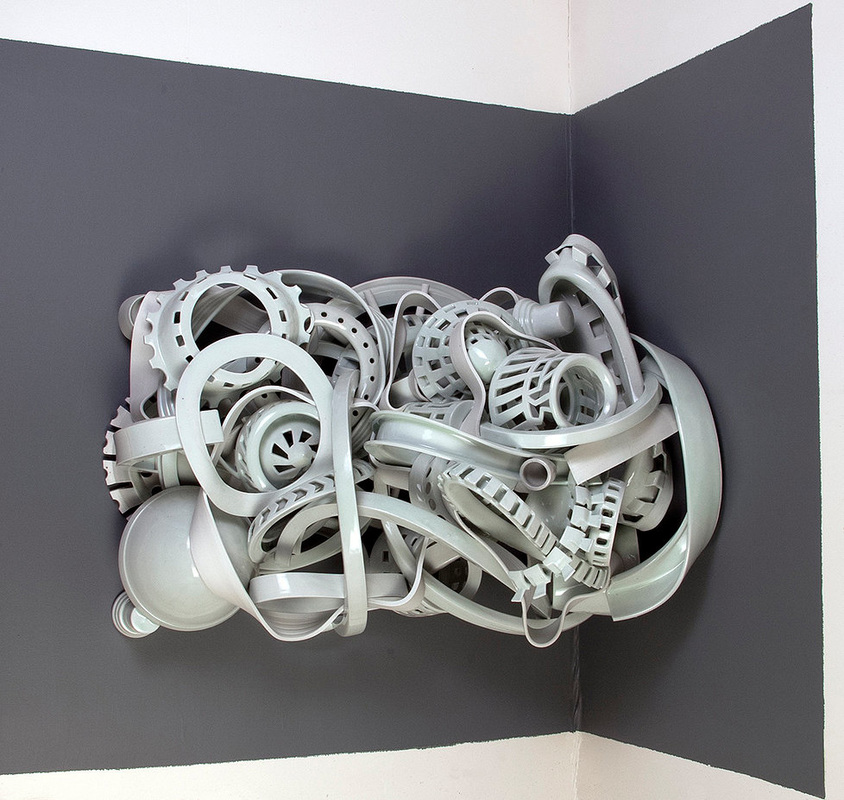

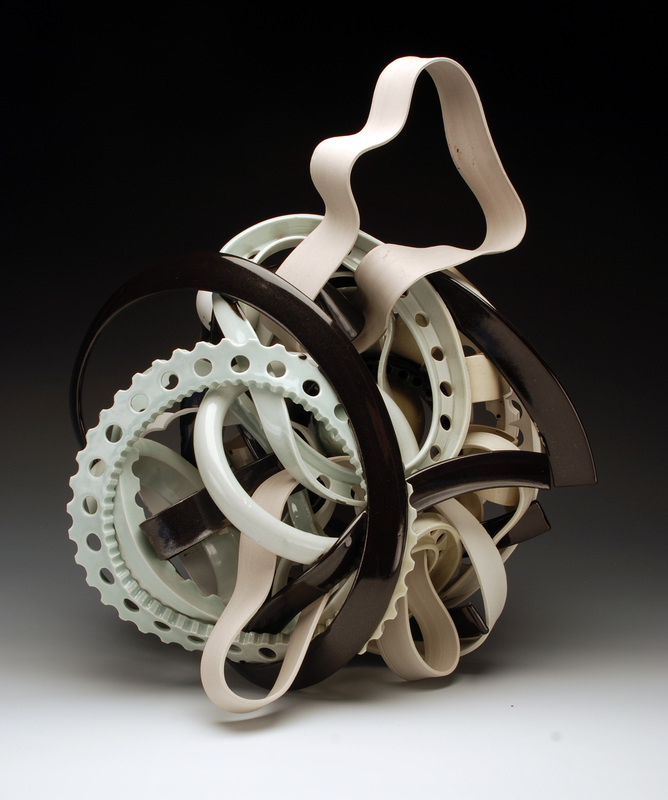
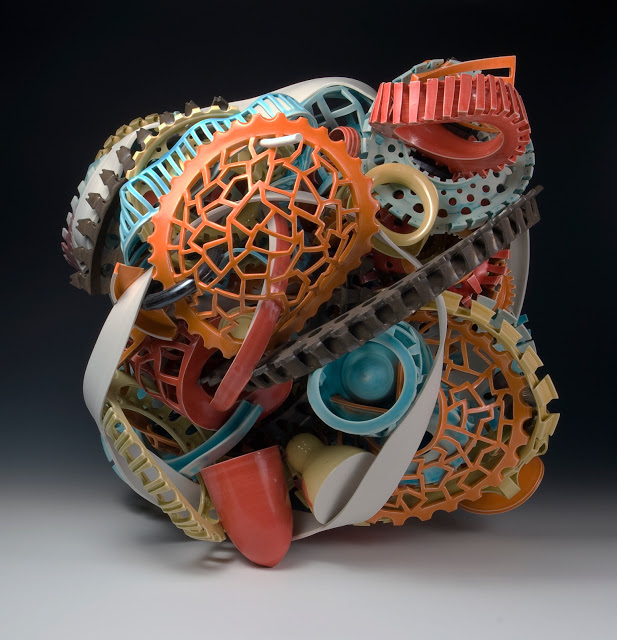
Topics for class discussion:
When does a materials take the font stage of the conversation of the sculpture and why?
Are conversations on materials and production distractions of the sculptural content?
Does a sculpture need to be purely singular in material to be considered a sculpture in that material?
Example: Home much clay does it need to contain for it to be ceramic sculpture?
Whats more important to you in your work, concept, process, execution, content, permanence?
What level of control do you need to have of its material to own a sculpture as wholly yours?
Do you need to work with "wet" clay to make ceramic sculpture?
|
|
|
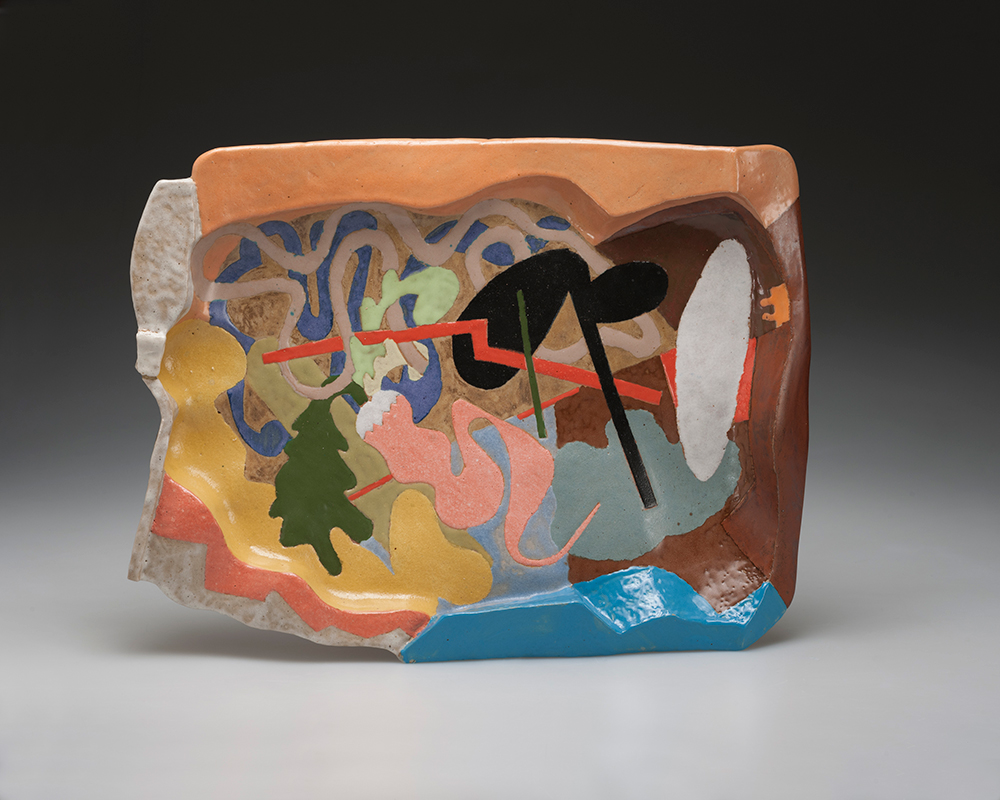
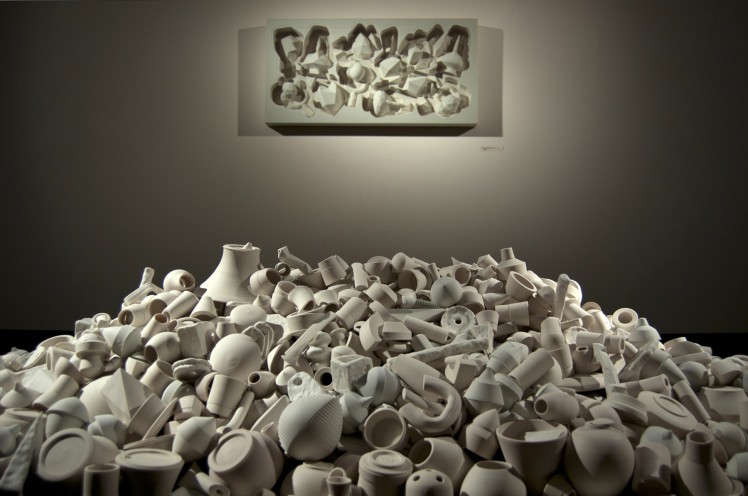
#5
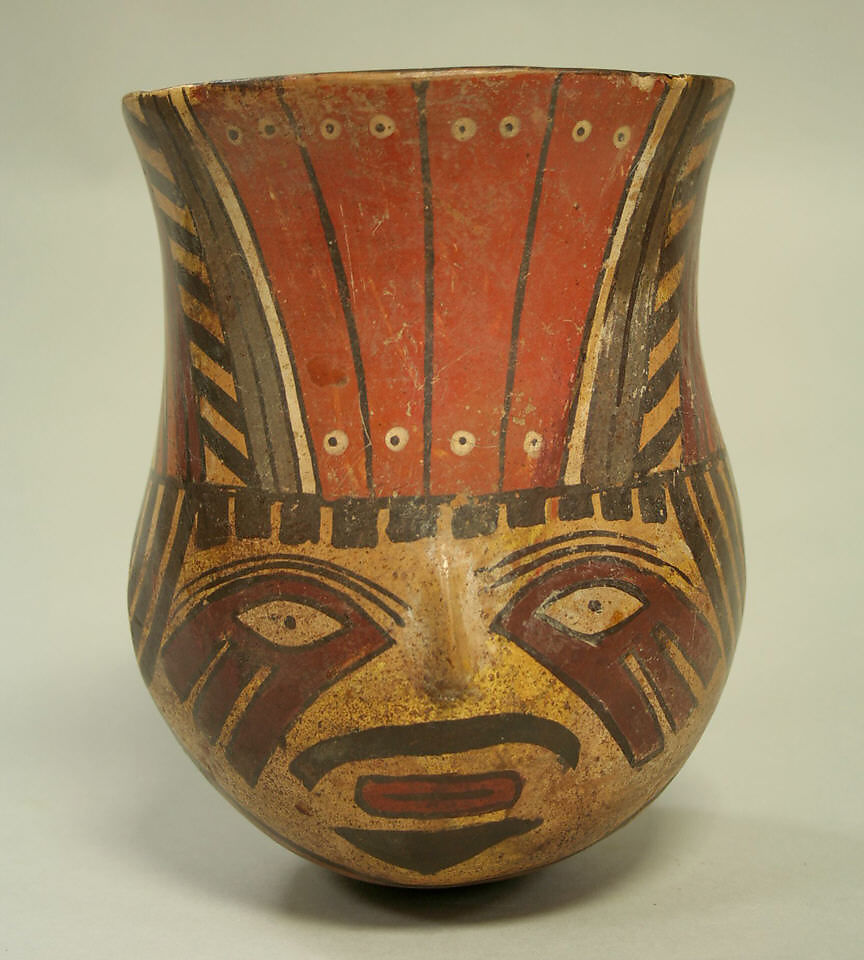
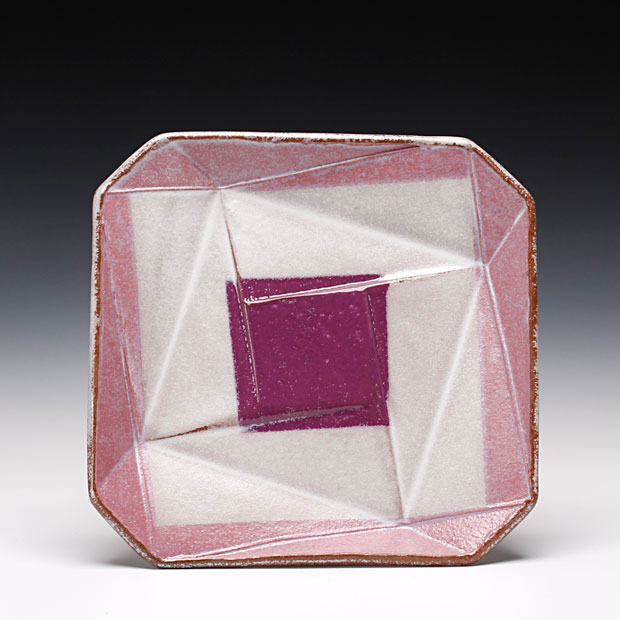
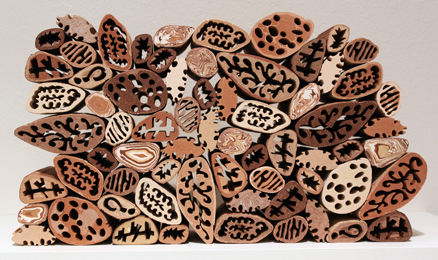
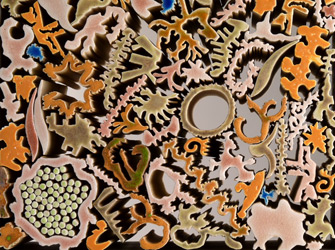
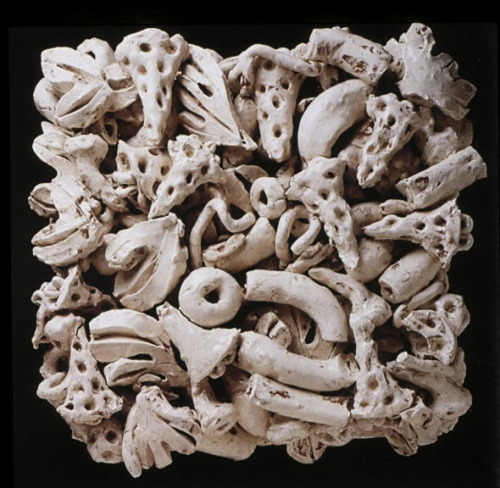
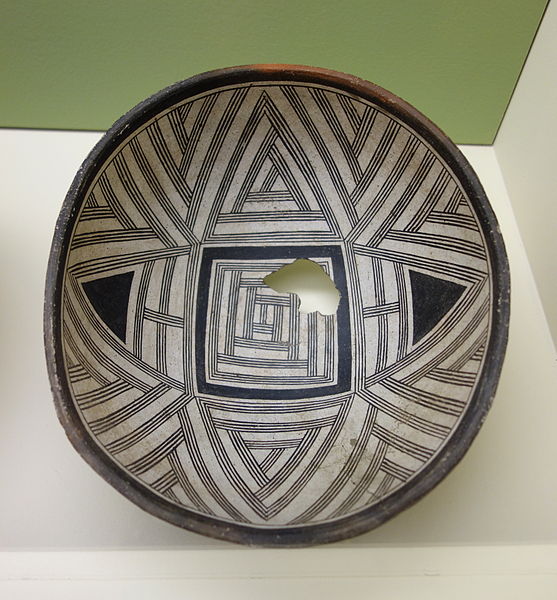
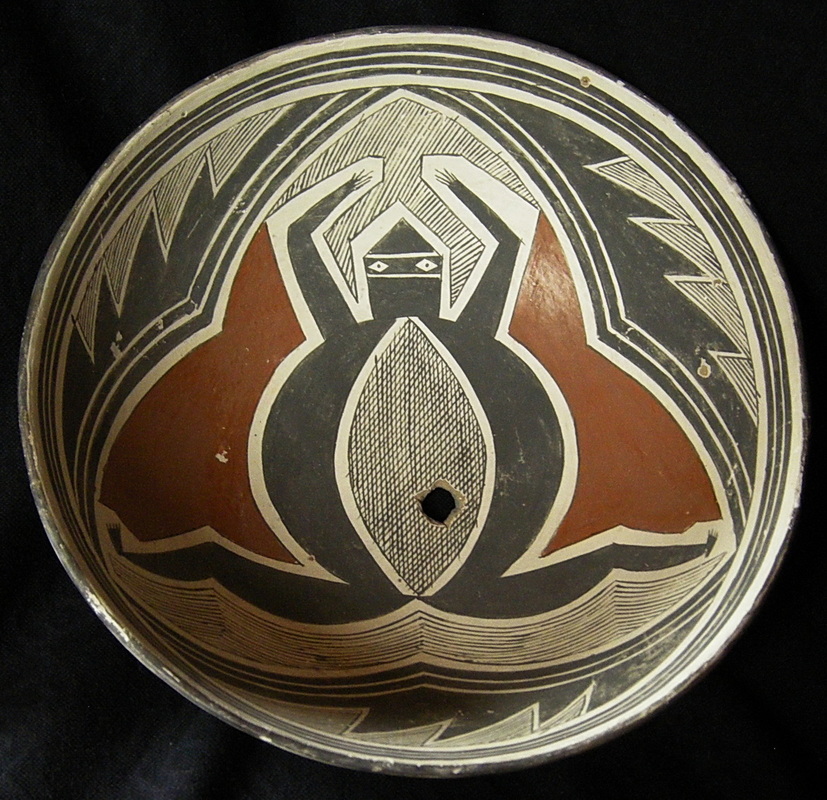
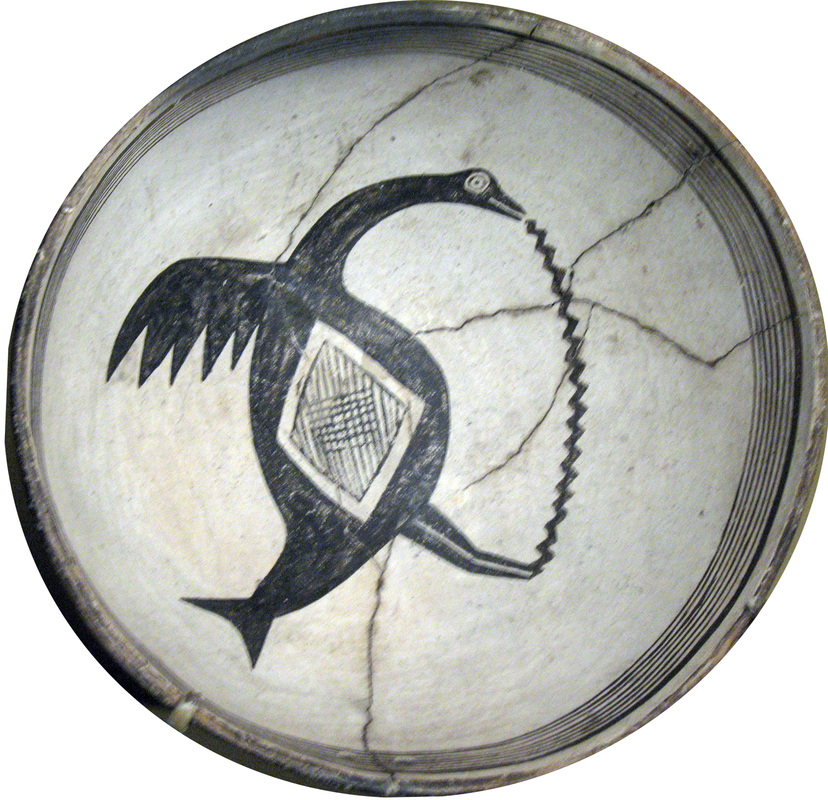
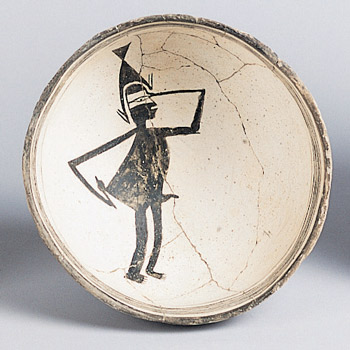
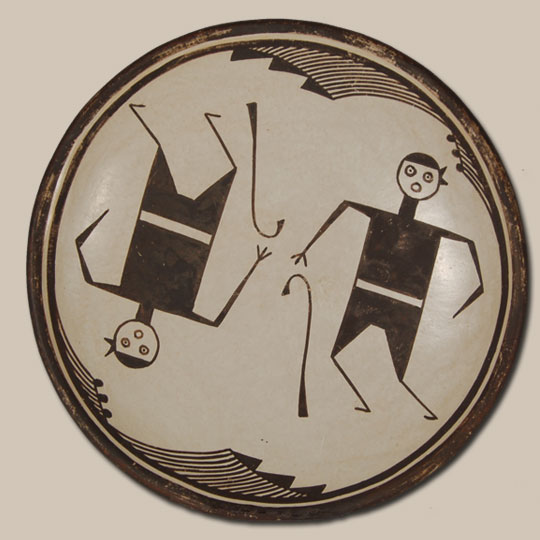
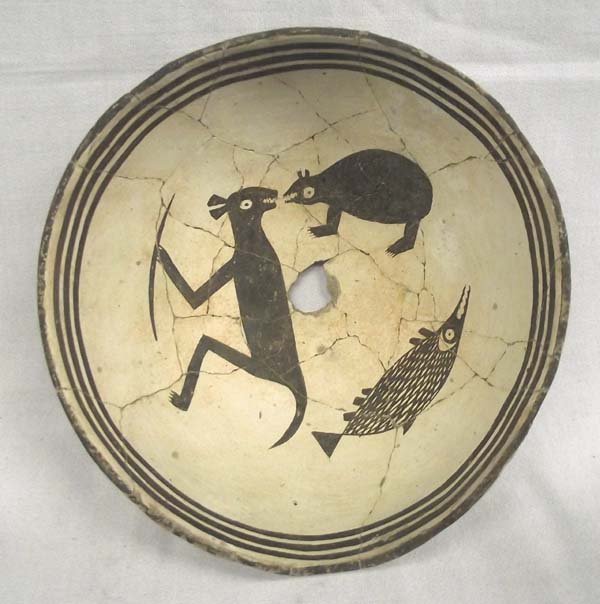
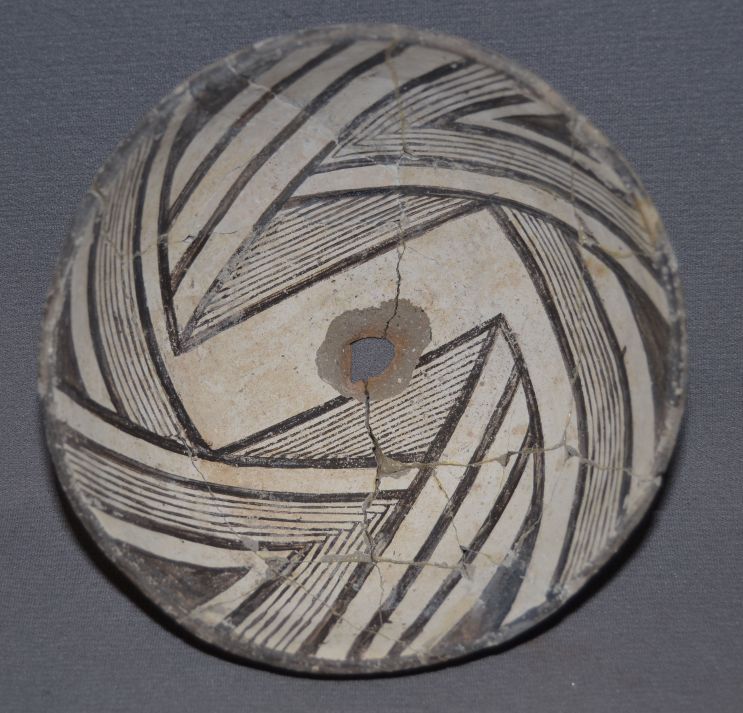
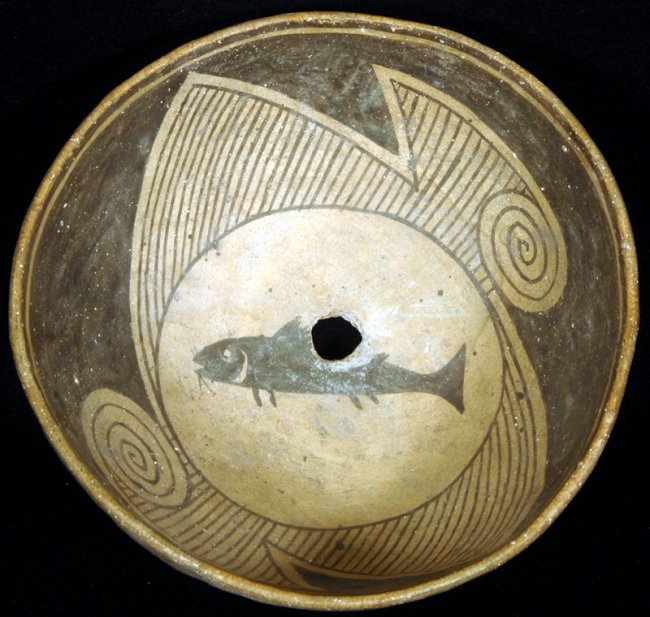
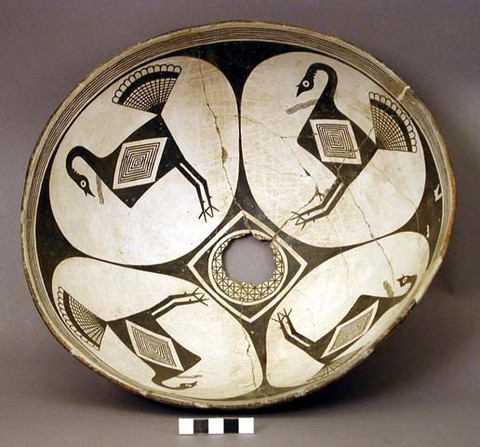
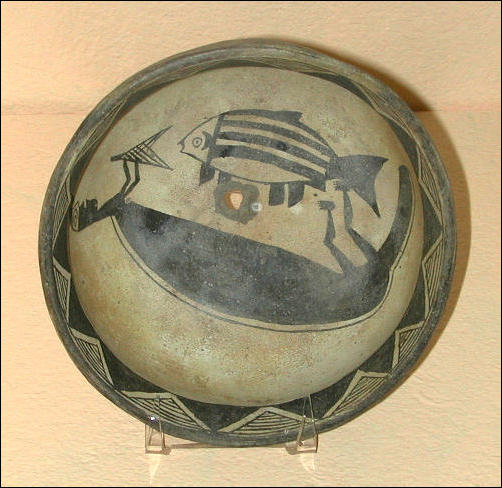
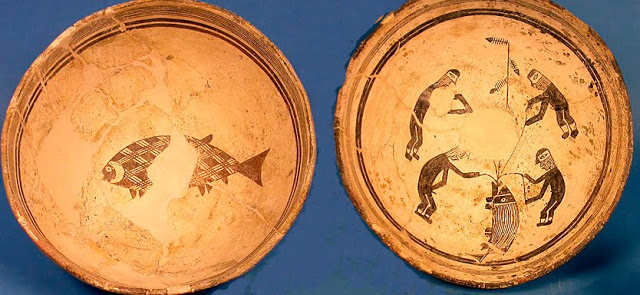
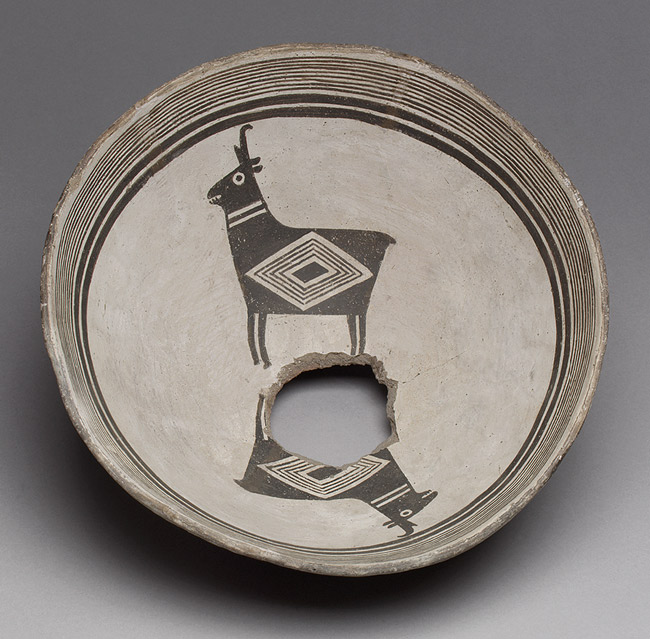
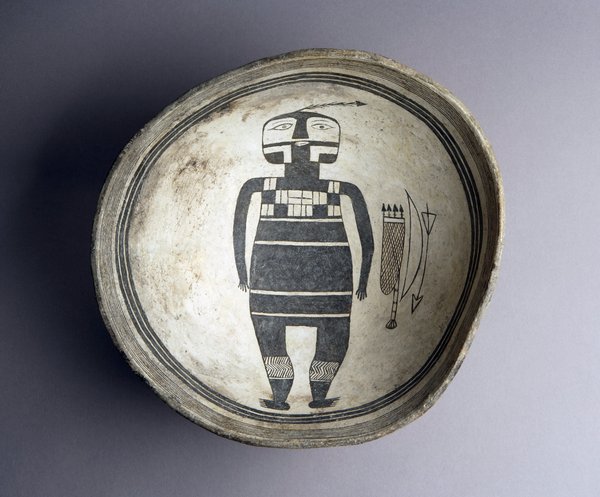
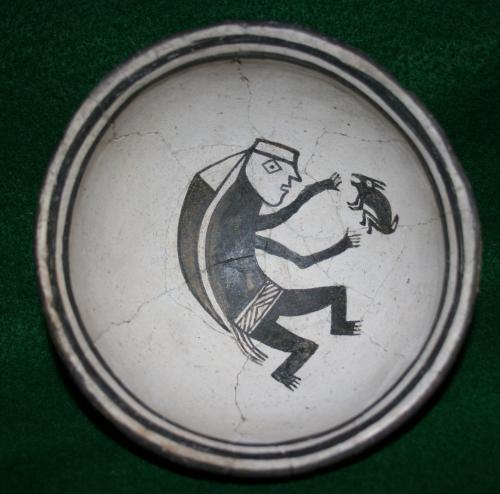
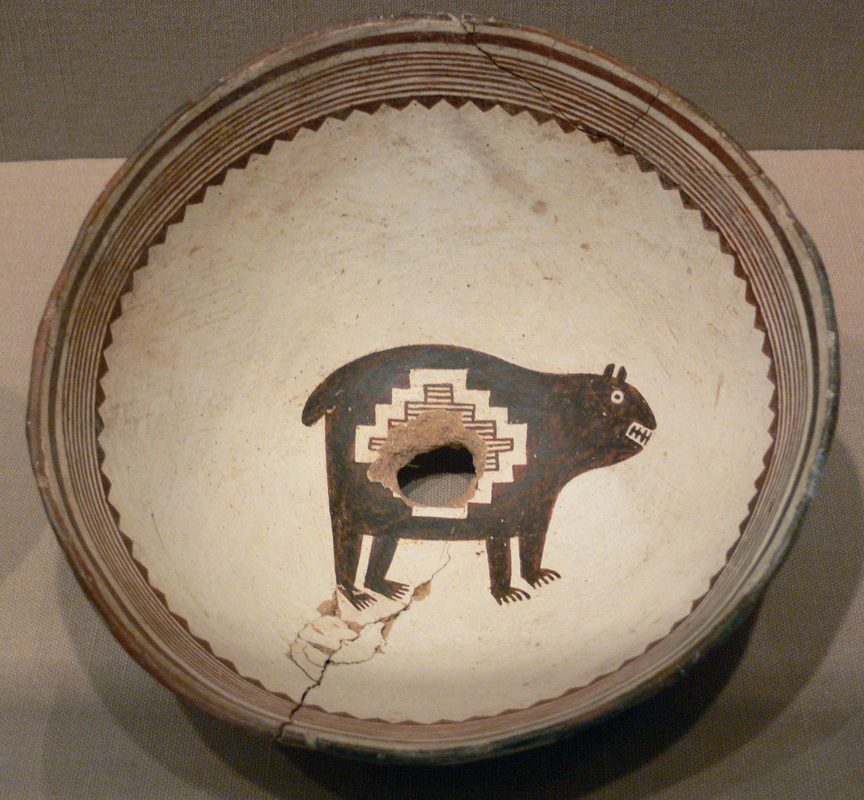
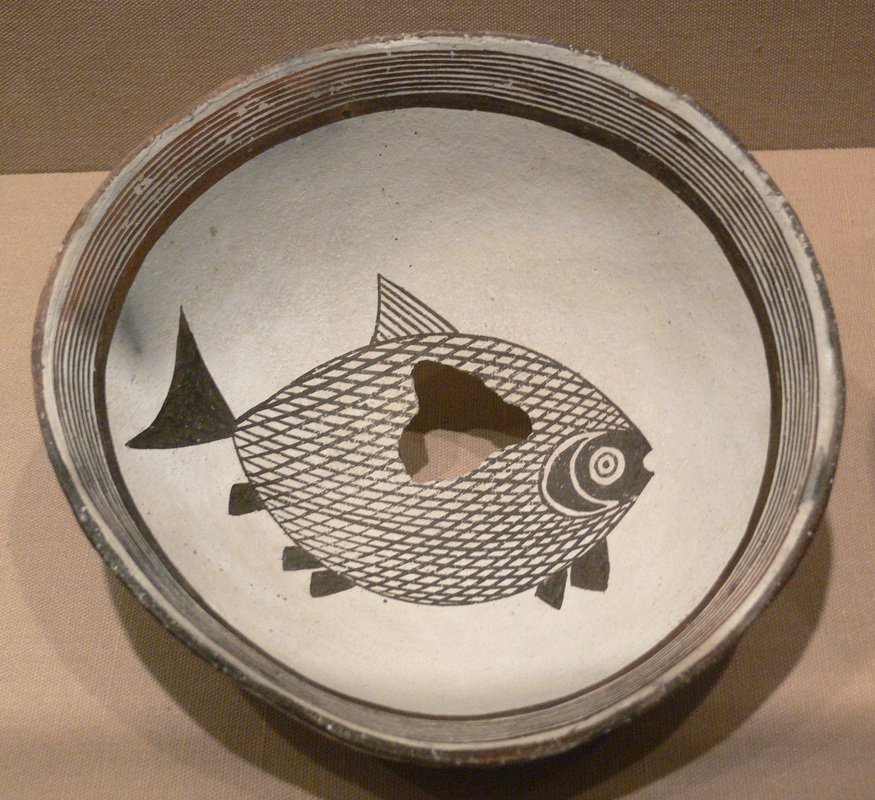
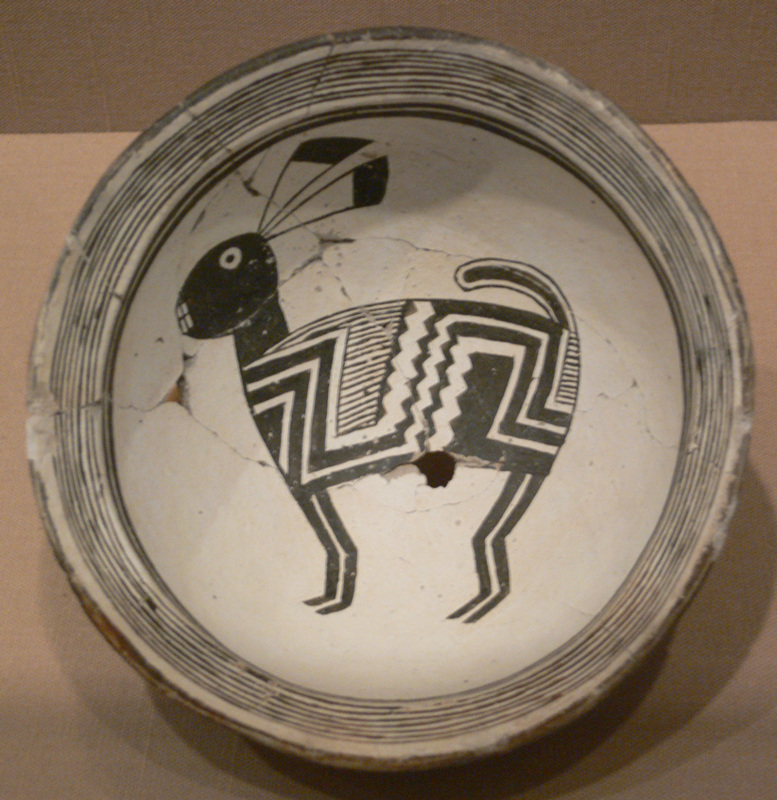
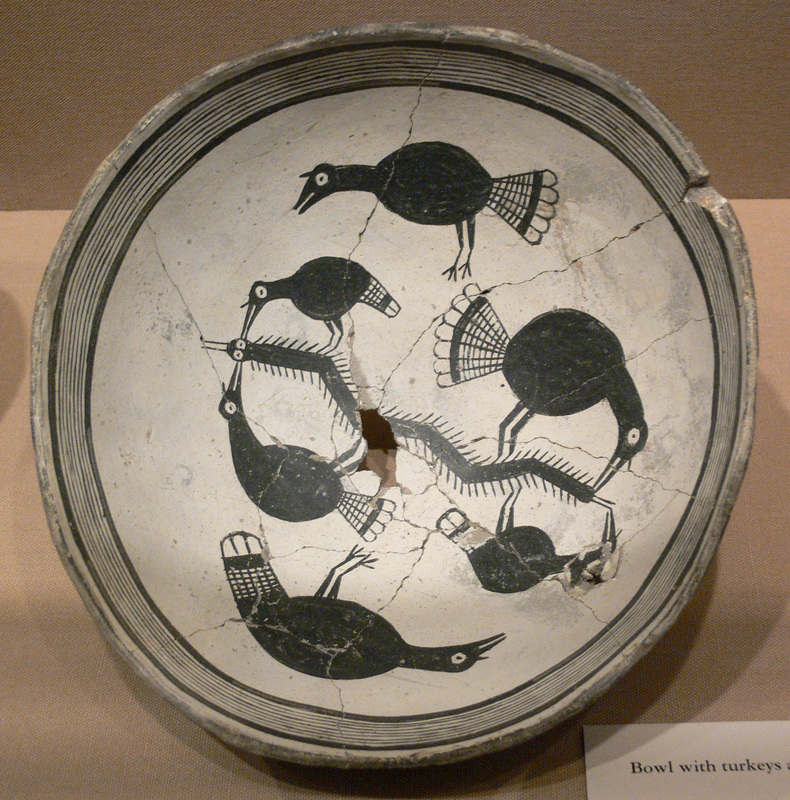
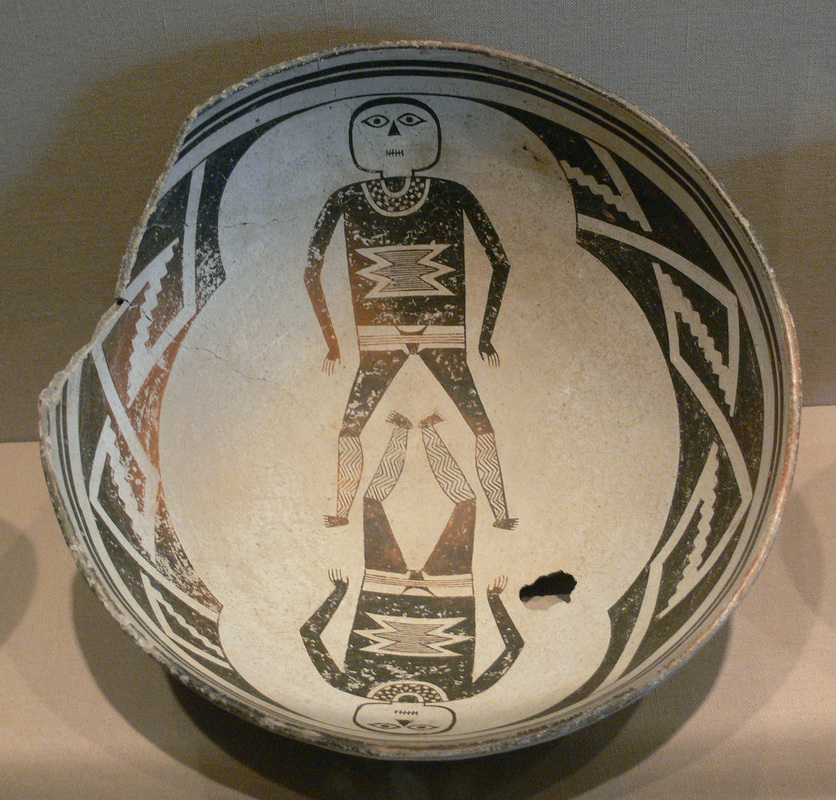
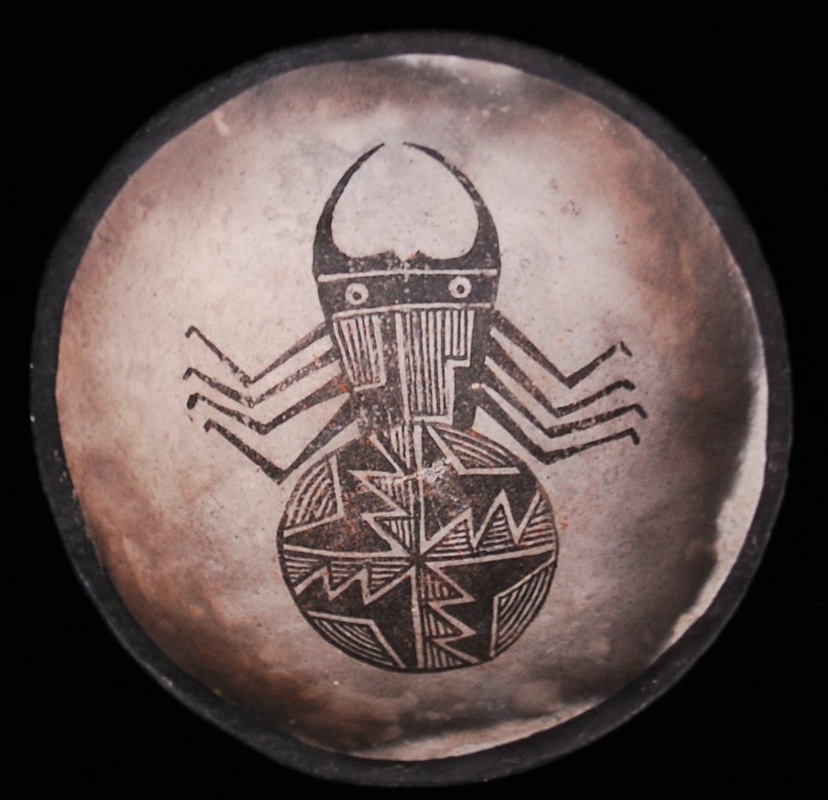
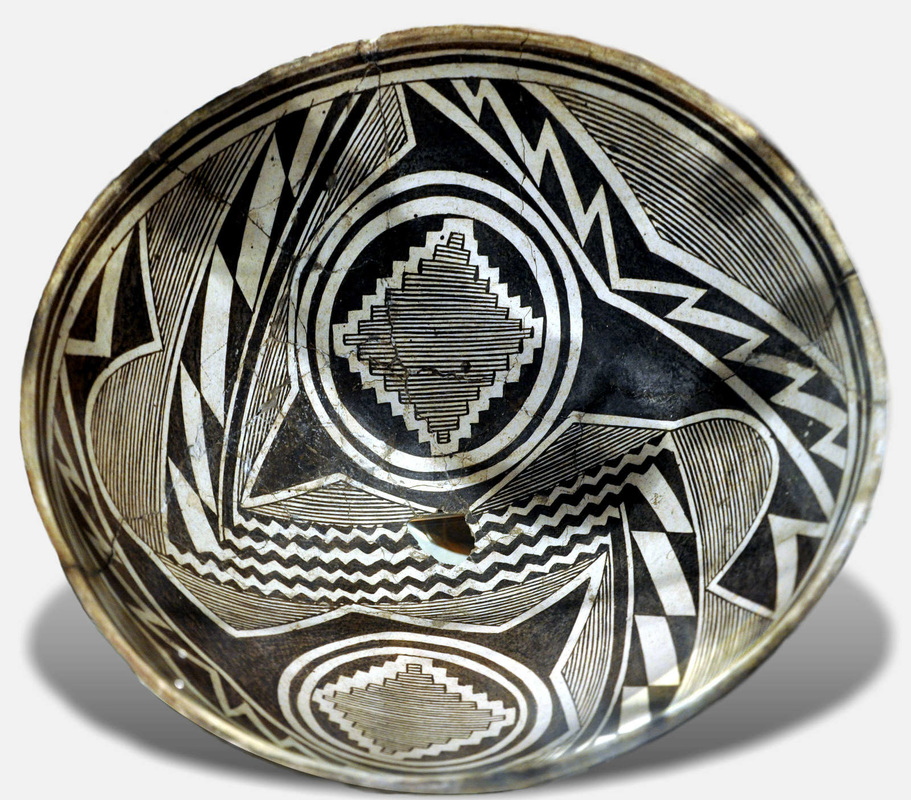
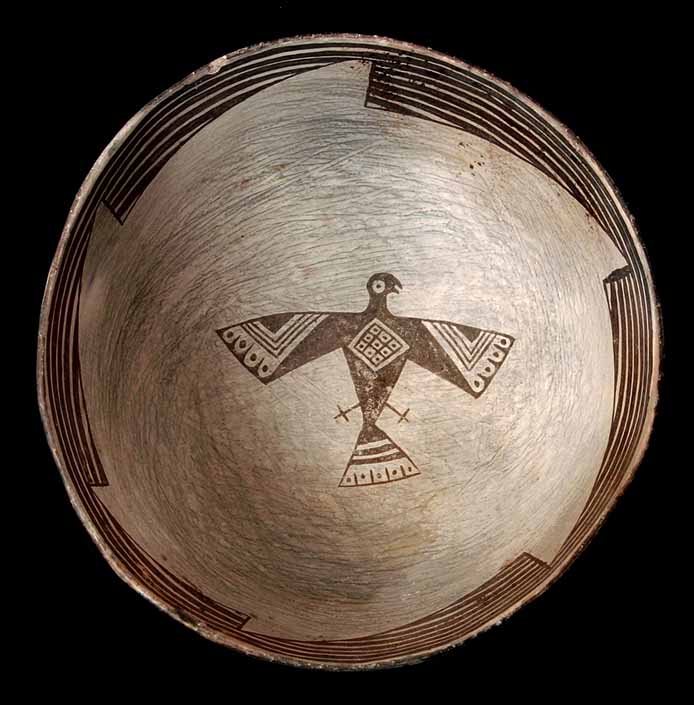
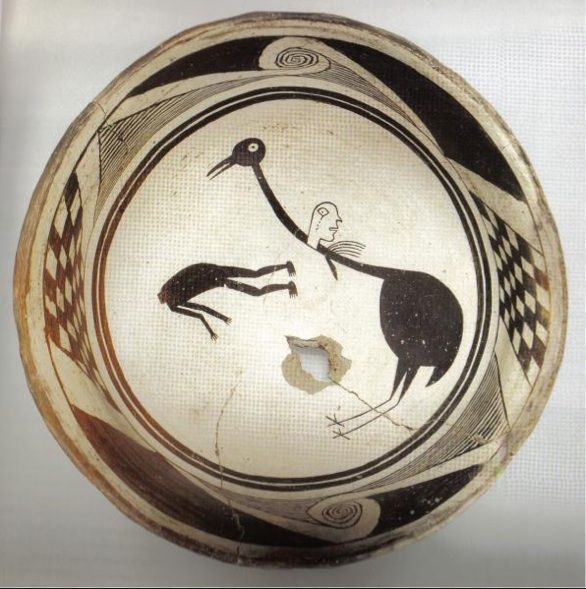
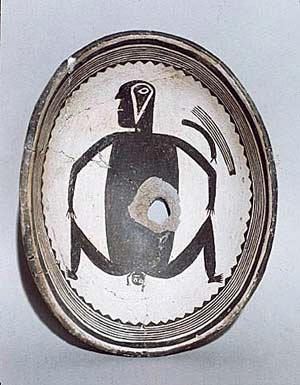
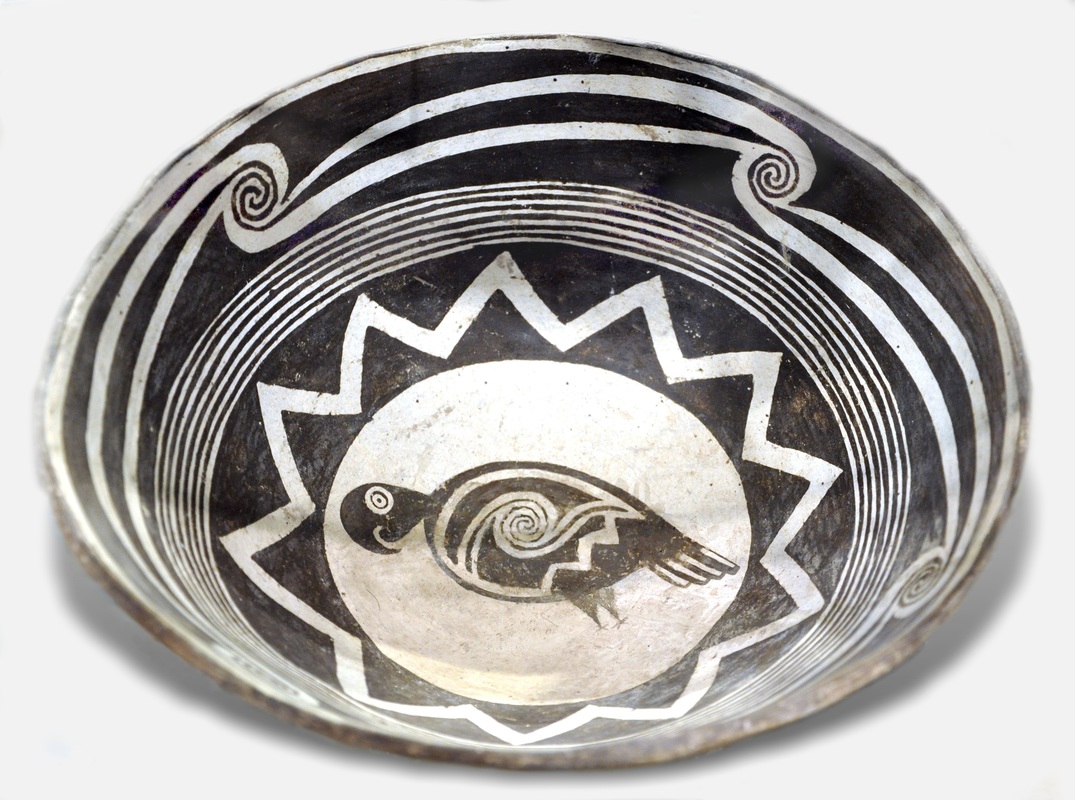
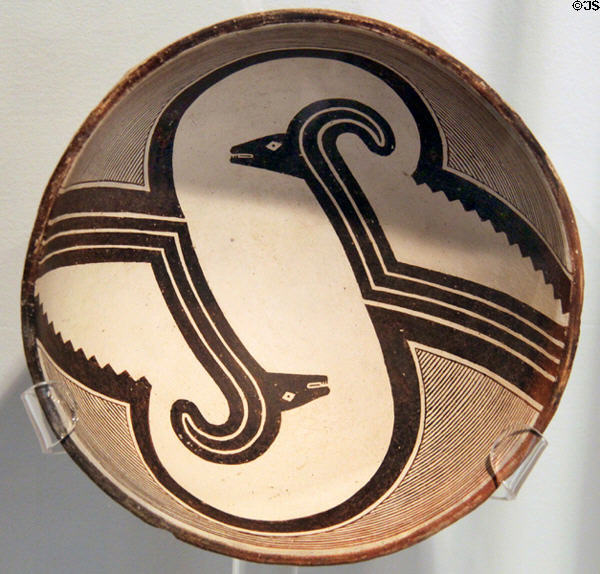
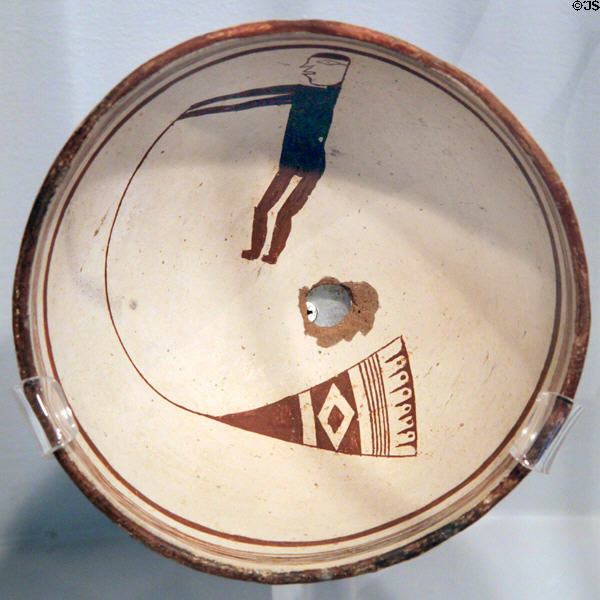
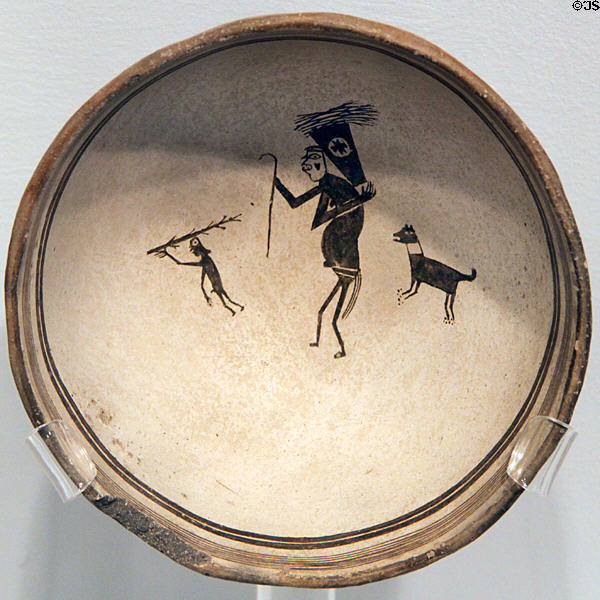
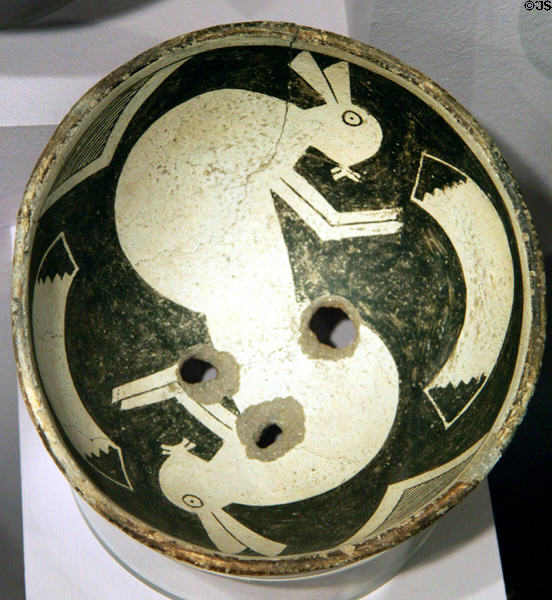
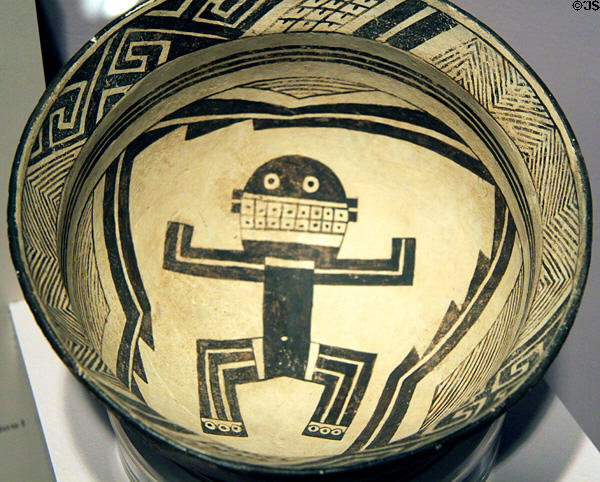
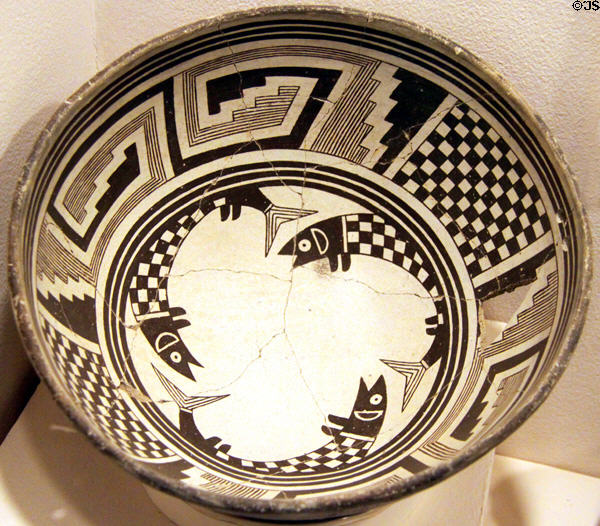
Mimbres: Pottery, Iconography, Design, Mythology, Ceremony
Condensed History:
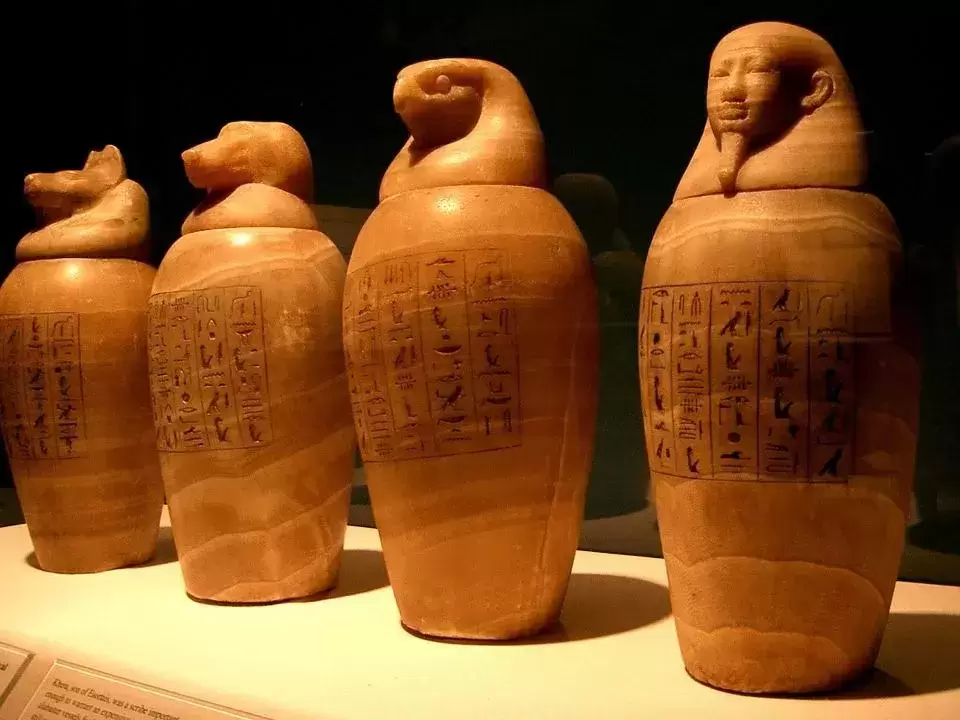
The Mimbres occupied the somewhat isolated mountain and river valleys of southwestern New Mexico from about 1000 to 1250 AD. Recognized as part of a larger group known as the Mogollon, the Mimbres were concentrated around the Mimbres River, named by early Spanish settlers for the abundance of mimbres or small willows found along its banks. The name Mimbres, or Mimbrenos, was adopted as the official name of the culture at the turn of the century. Known primarily for their exquisite painted pottery, the Mimbres culture is of interest to archaeologists and anthropologists, as well as art historians and collectors.
Contemporary research on the Mimbres culture relies heavily on comparisons with more modern Puebloan pottery and practices, as widespread commercial looting has destroyed many sites over the years (Hegmon 2002). According to such comparisons, as well as the presence of female burial sites complete with pottery-making tools, it is generally accepted that the artists responsible for creating the pottery were women, who received their training from relatives (Hegmon 2002). Although there are no maker’s marks on any of the pottery, Leblanc has argued that the most spectacular designs were created by one or a few painters. Research conducted by Leblanc and Ellis in 2001 suggests that a handful of potters making between 50 and 100 bowls a year could account for all Mimbres black-on-white ceramic production. If Leblanc and Ellis are correct, the Mimbres represent a different model of craft production in which specialists were not concentrated in one area, but spread throughout the society (Hegmon 2002). The earliest classification of the designs painted on the pottery was set forth by Jesse Walter Fewkes (1850-1930) in Designs on Prehistoric Pottery from the Mimbres Valley, New Mexico (1925). In this work, Fewkes divided the designs into three types; geometric, conventionalized, and realistic. Within these three types, Fewkes also identified a number of themes including: human figures performing various activities; the representation of multiple animals ranging from realistic to whimsical; and varied geometrical designs ranging in complexity. Although more extensive stylistic classificatory systems have been established since Fewkes’ simplistic model, the basic themes of human, animal, and geometric designs are well represented throughout the Natural History Museum’s collection. Though the images painted on the pottery are identifiable as human, animal, or geometric, their intended meaning remains a mystery. As J.J. Brody notes in Mimbres Painted Pottery (1977), regardless of the difficulty in interpreting the images, it is clear that “the paintings were made at the very least to commemorate the real or imagined existence of a being or thing.” In other words, whether or not the designs simulate reality or fantasy, the fact remains that, in terms of iconography, such images have the potential to illuminate the deceased Mimbres culture. Woosley and McIntrye note that “the painted pottery seems to voice more of a potter’s individuality and cultural connectedness through graphic expression”—suggesting that the artists creativity “ in terms of approaches to design layout, decorative motifs, and composition” could have largely determined images represented throughout the pottery (Woosley and McIntyre 1996: 205). Though there is no published study analyzing the designs as a whole, research focusing on certain categories of images have been attempted to better understand what is being portrayed. In fact, interpretations by Hopi people have been utilized in an effort to illuminate the significance of this imagery, (Hegmon 2002) In addition, artists and art historians have also offered their interpretations of Mimbres iconography, lending more diverse assumptions as to the significance of such imagery. Despite conflicting interpretations of the painted designs which exist throughout the archaeological and artistic worlds, the use of the pottery is less controversial. The majority of the bowls and pitchers were most likely made to be used in everyday subsistence activities; however, some archaeologist suggests they served a purely mortuary function (Brody 1977, Bray 1982) As Fewkes would discover in his excavations of the Oldtown and Osborn ruins, the deceased were buried in an upright crouched position with a bowl (often, but not always painted) placed over their heads. The decorated bowls were “killed” through the use of a sharp object, which served to pierce a hole in the bottom of the vessel (Fewkes 1914). Archaeologist J.J. Brody suggests that the act of piercing the bowl and placing it over the head of the deceased allowed the spirit of the dead to escape the body. Archaeology of the Mimbres Although Southwestern archaeologists were aware of sites in the Mimbres Valley, none were of particular interest because of the richness of neighboring Pueblo ruins. Nearby sites including Chaco Canyon, Cliff Palace, Mesa Verde, and Pueblo Bonito enticed countless excavations and publications, while the seemingly unimpressive and clearly uninhabited Mimbres sites were, for the most part, neglected. Despite brief publications by Adolph Bandelier, Clement Webster, and Walter Hough, the Mimbres Valley did not interest or inspire archaeologists until the 1920’s and 1930’s — years after Fewkes’ initial excavations at the Osborn and Oldtown ruins. Considered, perhaps, a precursor to the widespread excavations of the following decades, Fewkes’ trip and subsequent publications undoubtedly drew attention to the artifacts and culture of the Mimbres Valley. During the summer months of 1914, Fewkes toured the vicinity of Deming, New Mexico, the location of E. D. Osborn’s ranch, and the treasured pottery that had prompted his trip. What Fewkes found when he arrived was the aftermath of rudimentary excavations littered with pottery sherds and skeletal remains. Despite the desperate state of the sites, however, the unique designs on Osborn’s reconstructed pottery encouraged Fewkes to conduct his own excavations at Osborn’s ranch (ruin) and Oldtown ruin (Fewkes 1914). In the years following his first trip to the Mimbres Valley, Fewkes published three volumes: Archaeology of the Lower Mimbres Valley, New Mexico(1914), Designs on Prehistoric Pottery from the Mimbres Valley, New Mexico (1923), and Additional Designs on Prehistoric Mimbres Pottery (1924). Based on his final publication regarding the Mimbres pottery, it is clear that Fewkes returned only once in 1923 for the purpose of purchasing more of Osborn’s collection. Having accomplished the latter without further excavations, it follows that Fewkes’ final two publications were the result of further study and speculation of the collections accessioned by the U.S. National Museum. Although Fewkes passed away only six years after his final publication, never to return to the Mimbres Valley, research on Mimbres culture and pottery has persisted into the 21st century, constantly bringing new life and meaning to Fewkes’ collection here at the National Museum of Natural History. Text from: Smithsonian, National Museum of Natural History |


Images Library
Project:The Project.
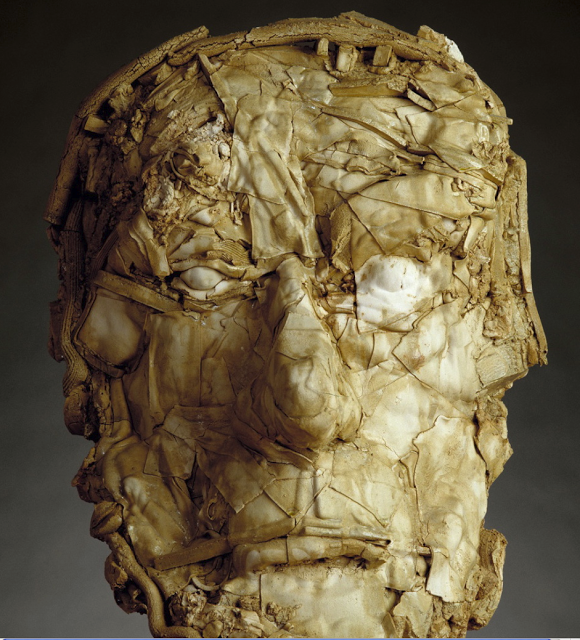
Goals: Explore the ability for the vessel to serve as a pictorial ground. Work within a limited ceramic palette (black ,white and terracotta slips). Further build upon the basic skills of hand building with clay. Gain perspective on North American ceramic history and Native American Ceramics. Requirements: Each student is required to produce two pieces for the assignment. 12 " minimum diameter, 20" maximum diameter Limited palette of Black, White & Red One piece must be based on an original Mimbres design One piece must utilize Mimbres Style while exploring contemporary Iconography. This contemporary piece should illustrate a contemporary issue, utilize modern iconography or geometric pattern. Both pieces should by decorated in the Mimbres style (bold line, limited palette, incorporate a decorative border on the interior rim and utilize geometric pattern. Resources: Wikipedia: Mogollon Culture Smithsonian, National Museum of Natural History Al Farrow: Mimbres Series Princeton Museum of Art: Video Mimbres Archeology Cafe: Mimbres Pottery VIDEO Dr. Pat Gilman Examples of Contemporary Iconography
|


#4
Triggers:
|
Hand Building Triggers
We will begin to explore the processes of manipulating clay into various forms, shapes and varied scale. In this projects we will cover the basic fundamentals of hand building techniques. Coil, Slab and Pinch are the basic methods of building we will cover in this introduction to hand building. We will spend the beginning of the project demoing and discussing these processes and techniques. Once the demos are complete we will jump right in and begin to build. Please take notes and ask questions during the opening demos as the techniques will not be the focus of the project, but rather they will be tools for you to complete your ideas. |

|
Trigger: something that initiates a process or course of action
Where do you start in creating a sculpture? How do you get an idea or form to work from? What do you make? These questions can often be a difficult aspect of building sculpture. In this projects we will address this issue through the use of trigger words. As the definition above states, a trigger word is a word that initiates a process or course of action. You will be working through a trigger word to find the inspiration for your sculptural work. You will be given a word, this word will be the starting point. What does this word make you formally think of?
For example if you got the word: ELEVATE
You might think of the following forms or items: High heel shoes, a ladder, a ballon etc...
These could be items to work from as a sculptural object, or your starting point for your projects.
Project Requirements:
Construct a sculpture based upon your trigger. Works should not exceed 12" in height.
Utilize at least two of the basic hand building methods in your sculpture (coil, slab, pinch) Utilize sketches to plan your project and to work out ideas before you commit.
Goals: Understand the fundamental processes of hand building and the basic techniques associated with them. Develop ability to handle clay in a efficient focused manner. Begin to understand the transitional process of ideas into formal objects made of clay. Create Sculpture that embodies your conceptual ideas and conveys them to the viewer. Learn to manage moisture levels of sculpture under construction. Further develop your ability to use slips, glaze and other decorative techniques from previous projects.

#3
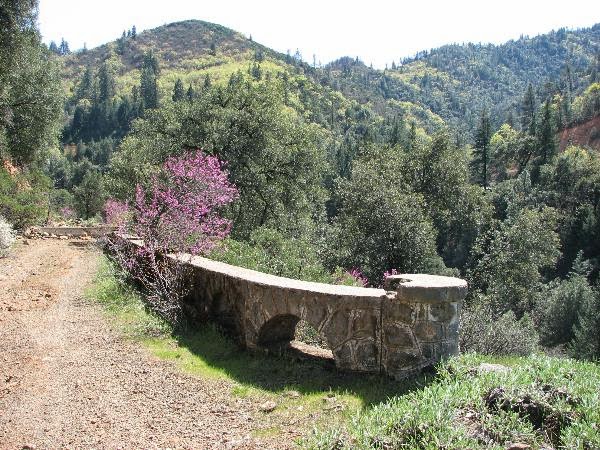
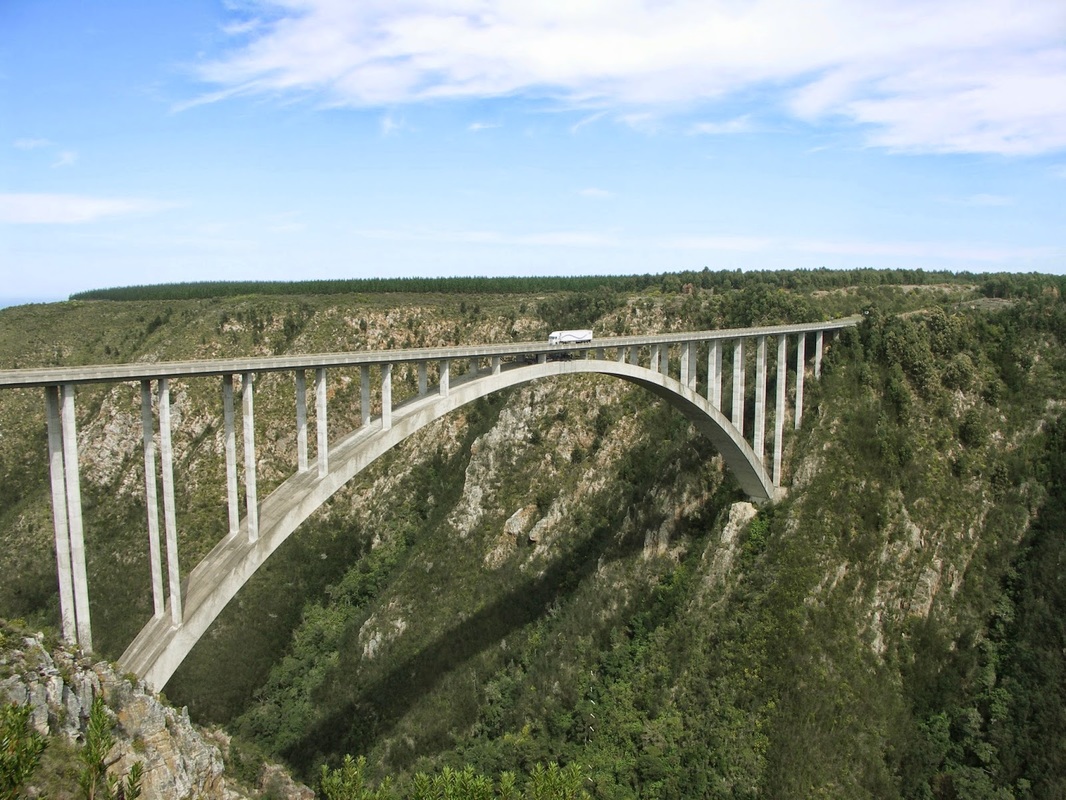
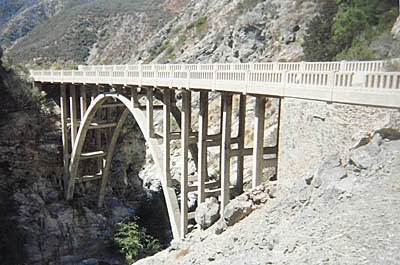
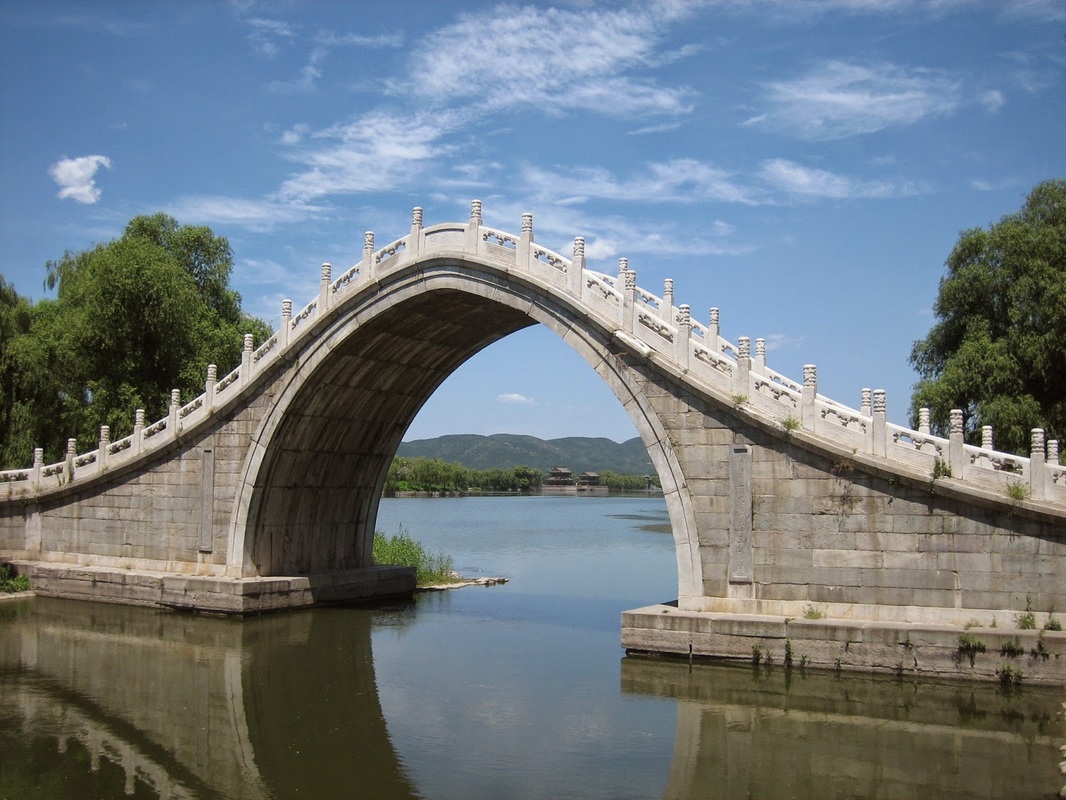
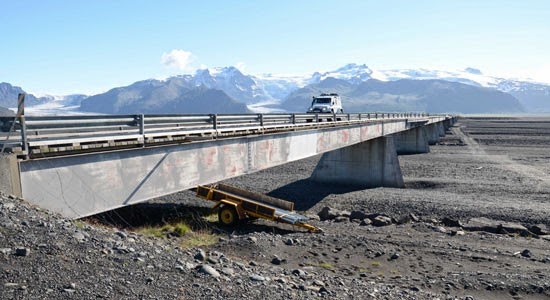
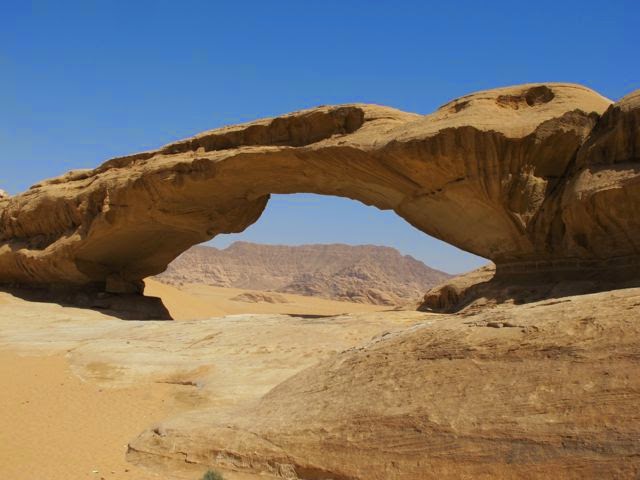
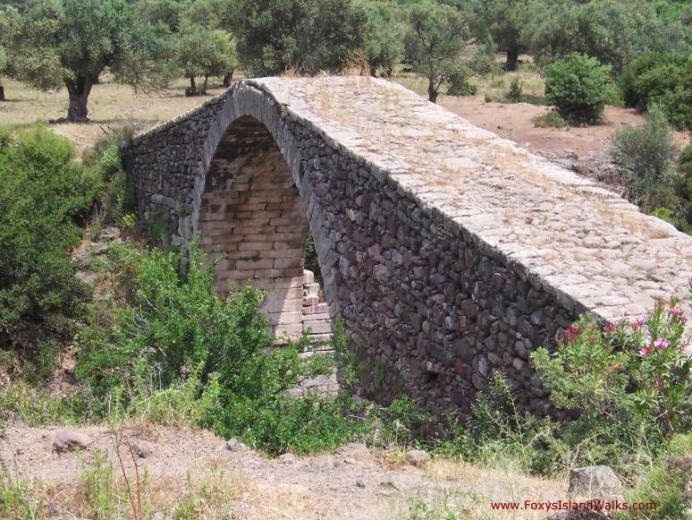
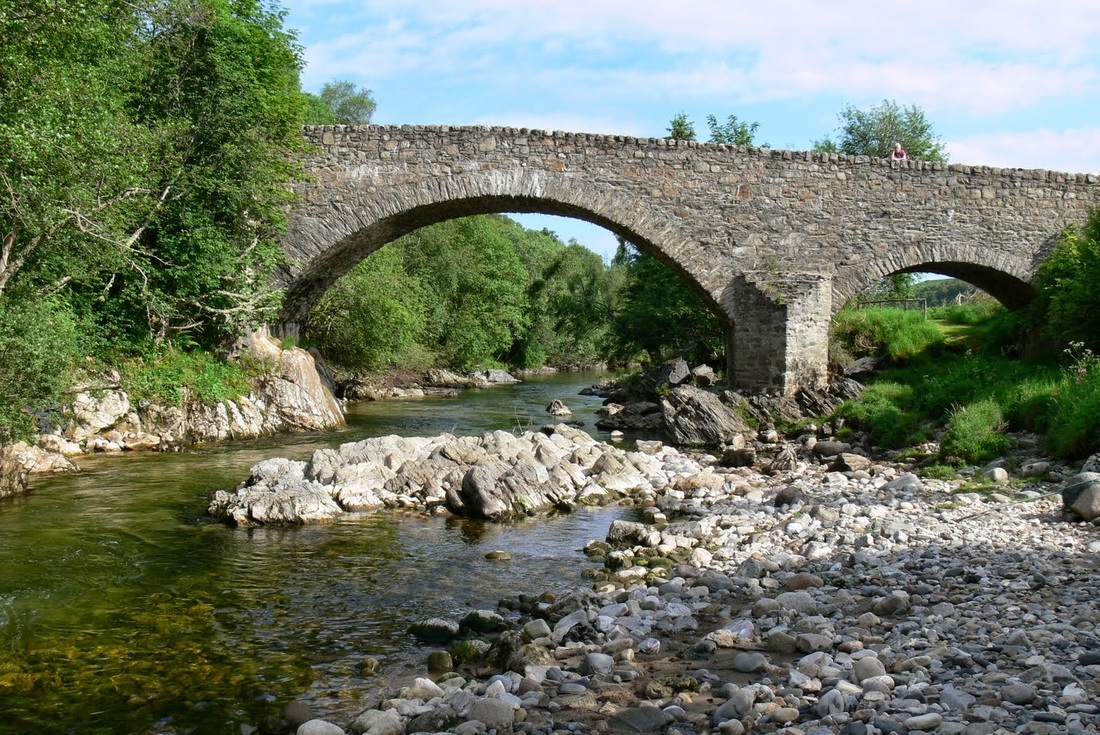
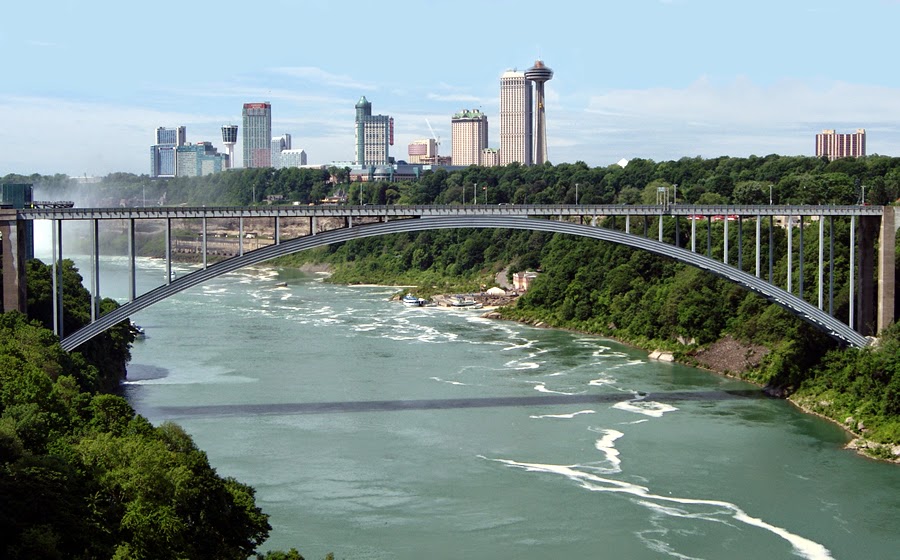
Bridge To Nowhere...
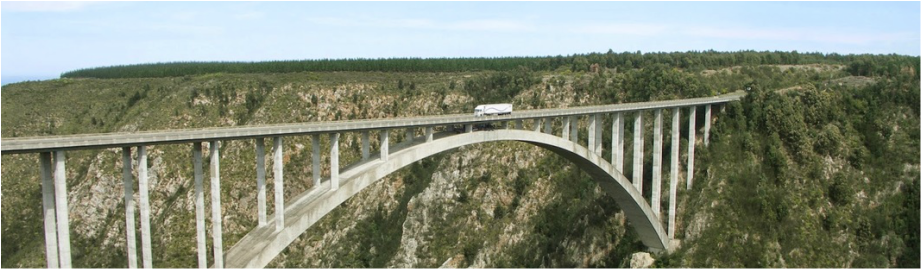
In this very quick intro to hand building project you will be working in groups. The groups will be assigned and the groups will be asked to attempt a specific task.
Hand building is a broad term used to describe the forming and shaping of clay without the aide of machinery or potters wheel. The primary methods of handling and shaping clay are coil, slab and pinch. We will discuss these processes in class through demo and lecture. For this first project of "hand-building" you will be using these basic techniques to build a structure of clay. This structure will require you to plan and utilize these techniques as well as the capitalize on the properties of clay when wet and when dry.
Remember:
Dryness equals strength, but creates brittleness.
Moisture creates plasticity and flex, but has little strength.

Project Requirements:
Each group will be asked to do the following:
Build a structure using basic building techiques. This structure must SPAN a gap of 24". This means your structure will need to be wider than 24" or it will fall between the gap.
Use only 25 LB of clay to complete this task. (one bag of clay)
Only clay can be used in this project. (no foreign materials)
Structure will be GREEN. (un-fired)
Must incorporate stress tube. (pvc pipe that will hold measuring bucket, this will be provided for you on the first day of the project)
Create a structure that will span the 14" gap for 5 Minutes without falling.
Create a structure that has a pleasing aesthetic appearance.
Project must be completed in one week. (two classes)
NO part of the Structure may touch the ground, only contact are allowed is the surfaces on either side of the 24" open gap.


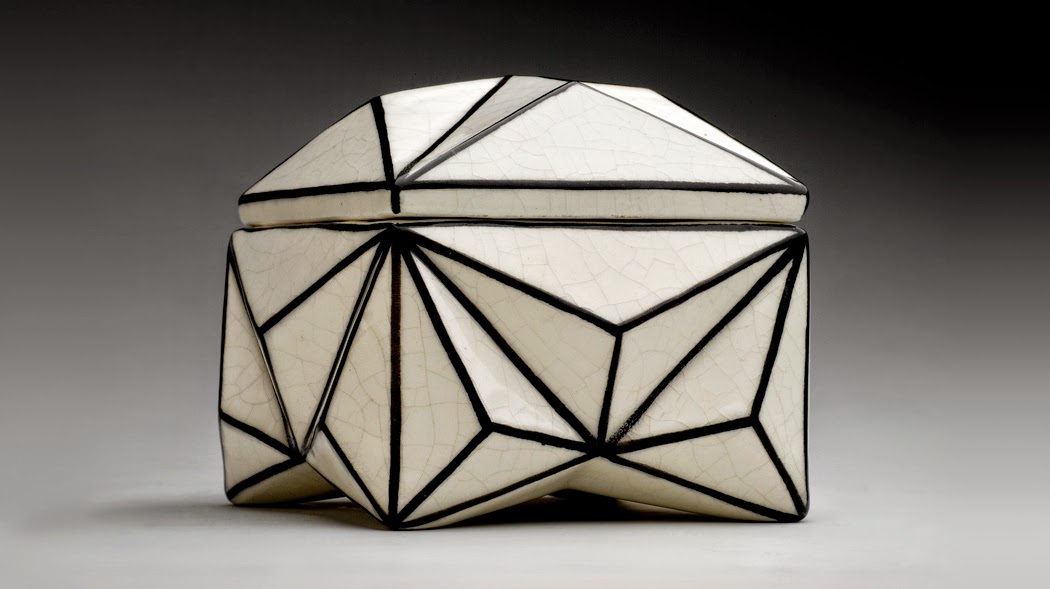
#2
|
|
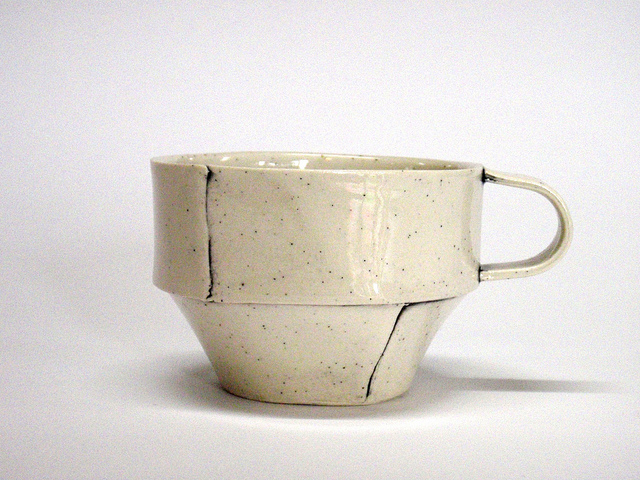
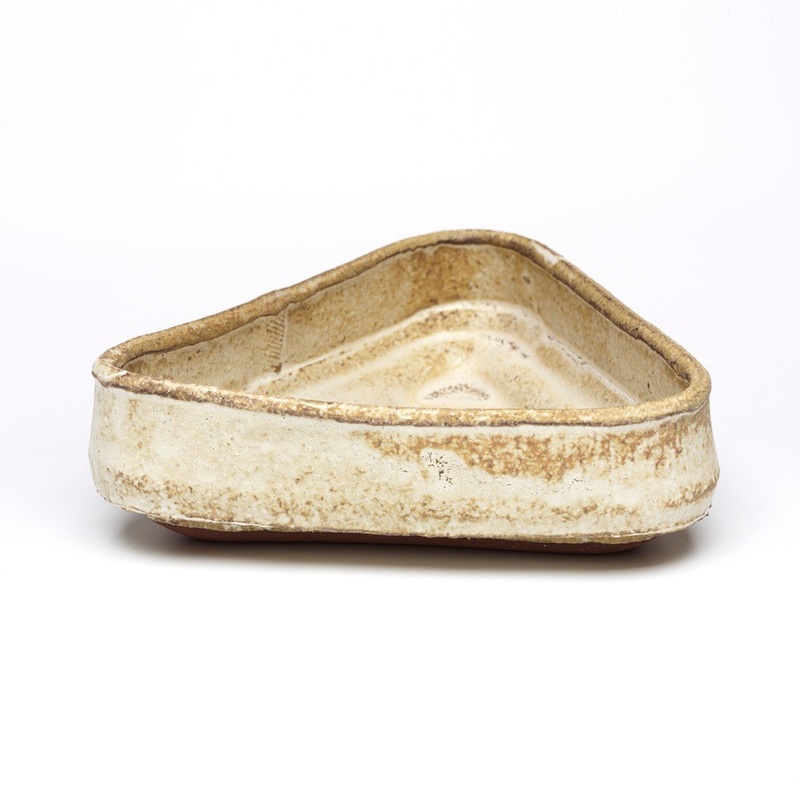
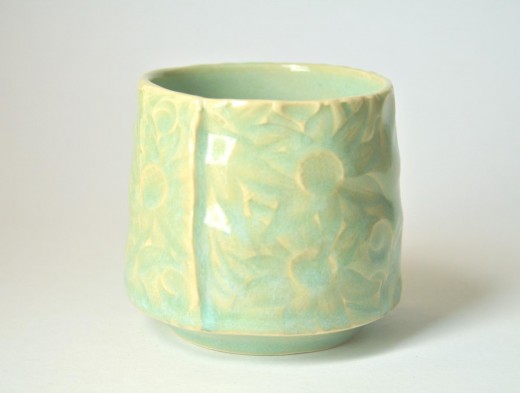
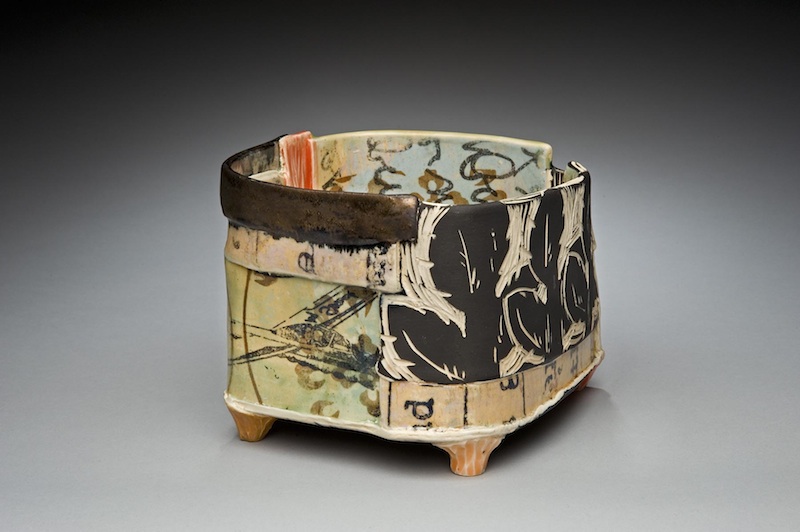
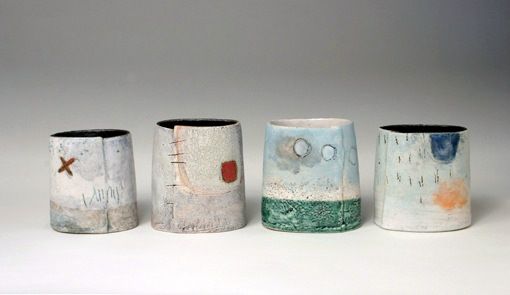
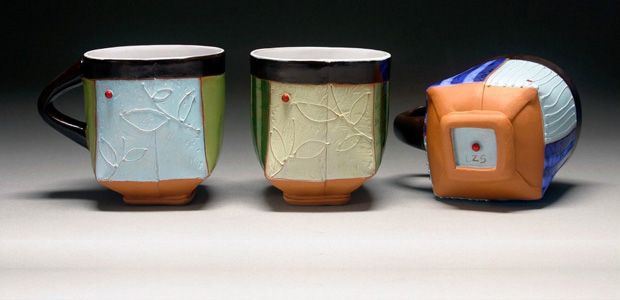
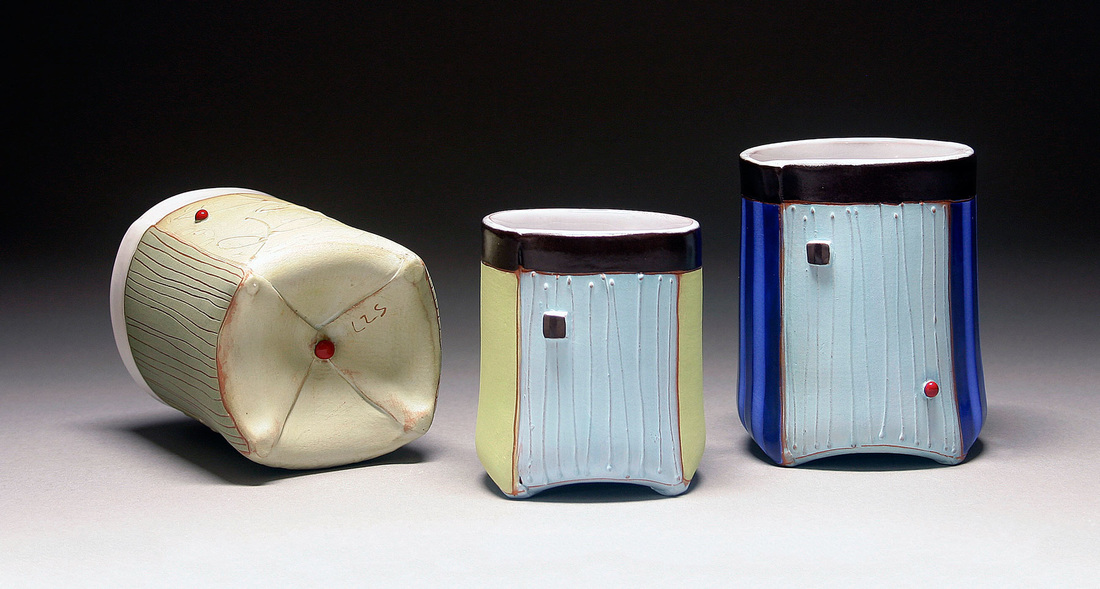
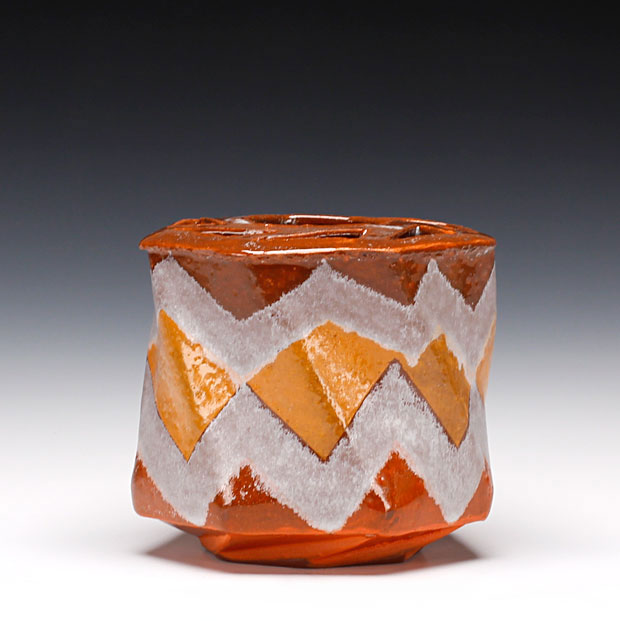
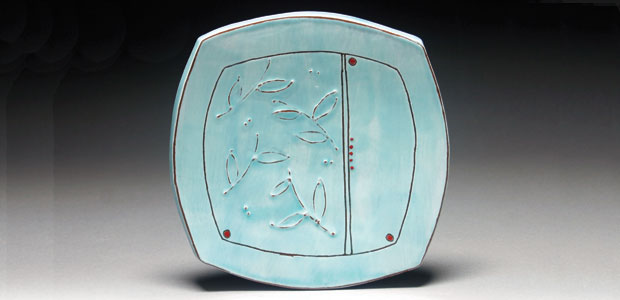
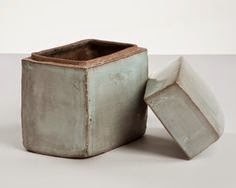
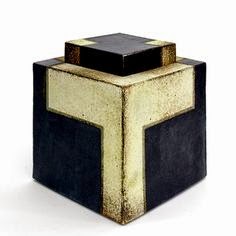
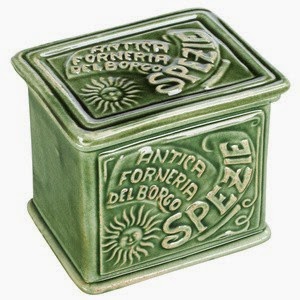
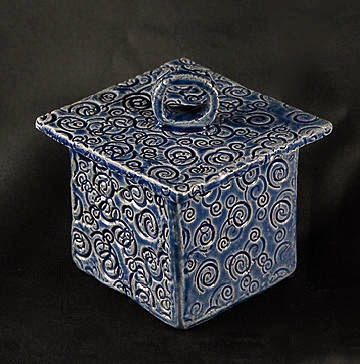
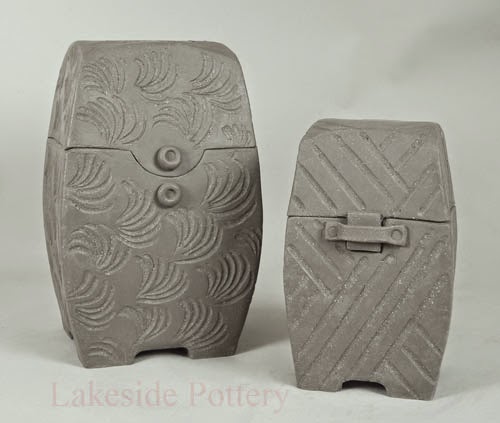
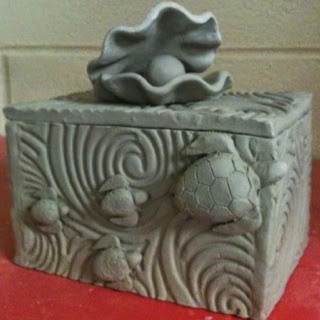
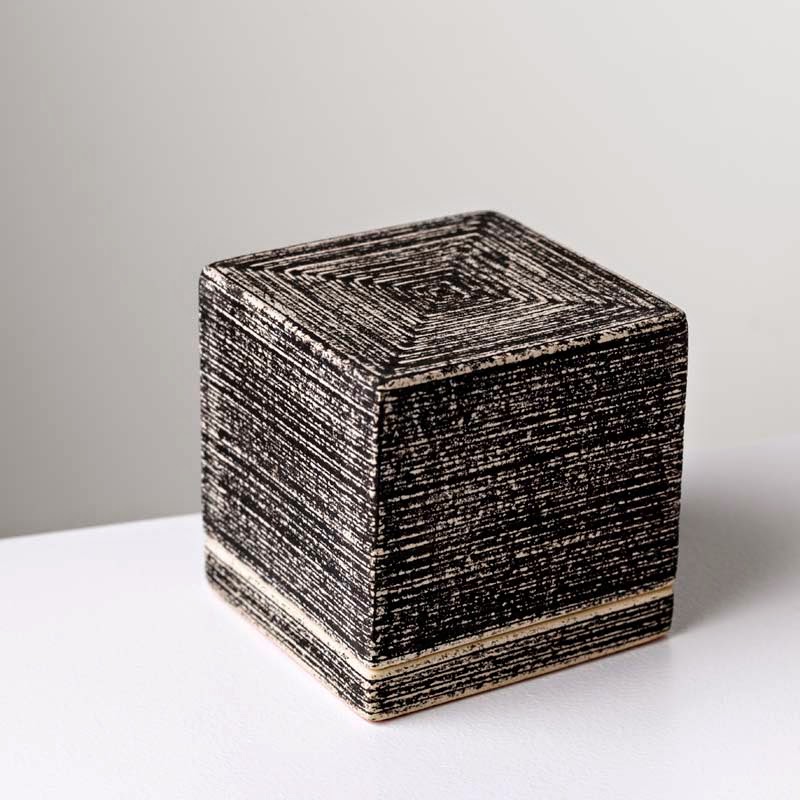
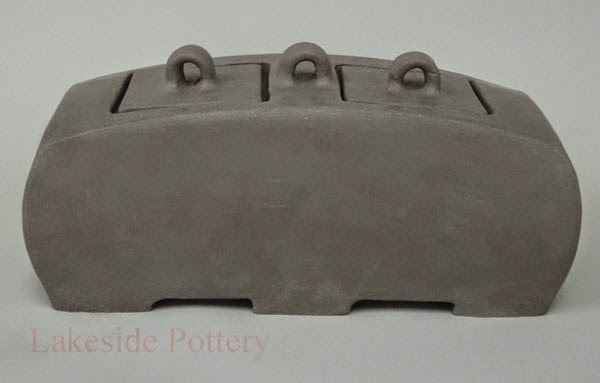
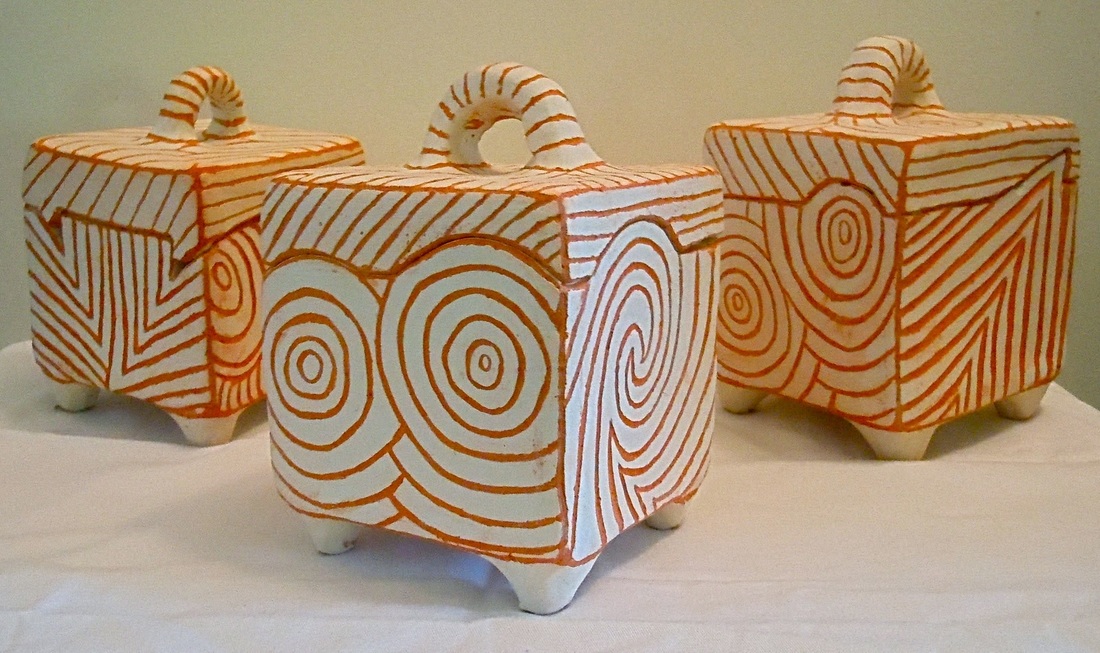
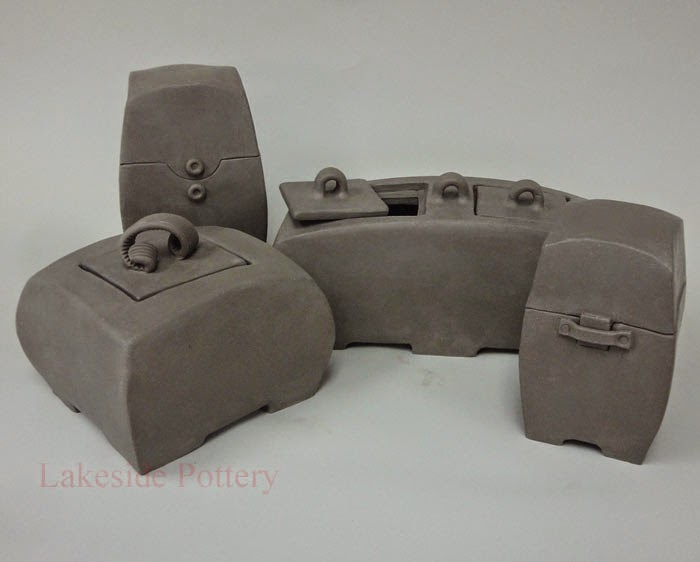
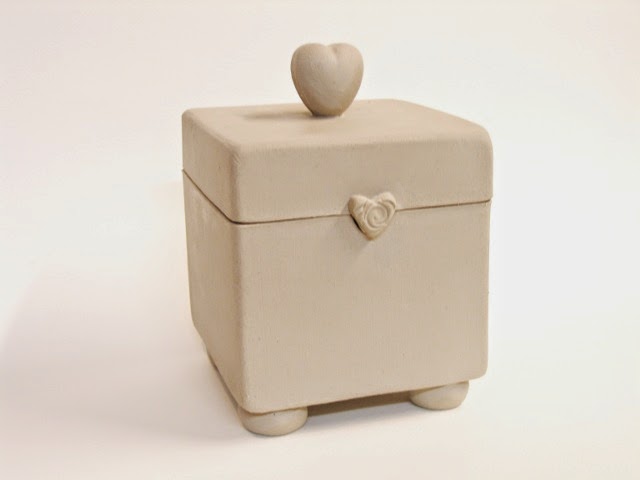
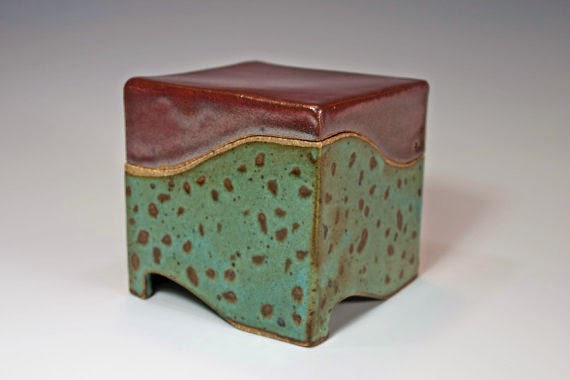
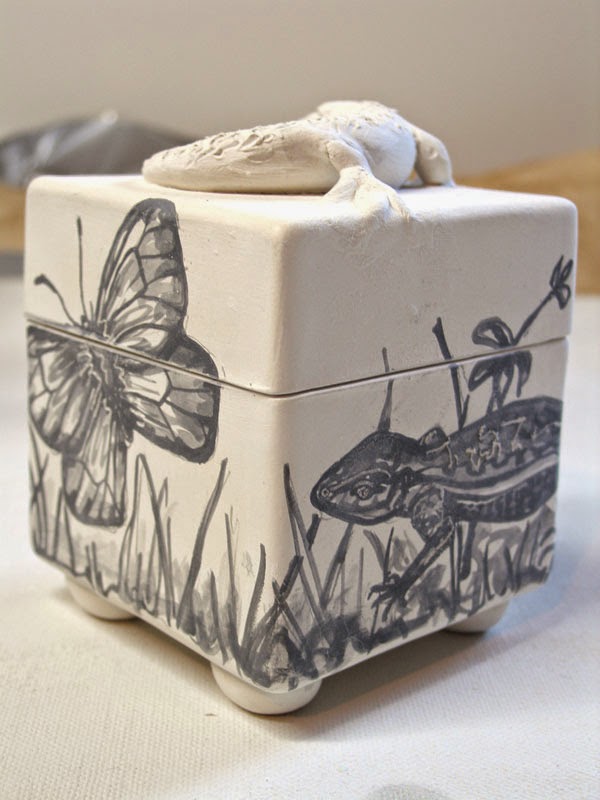
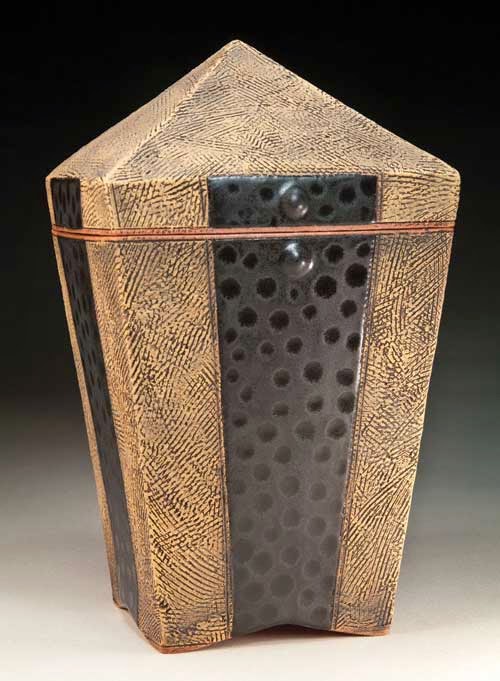
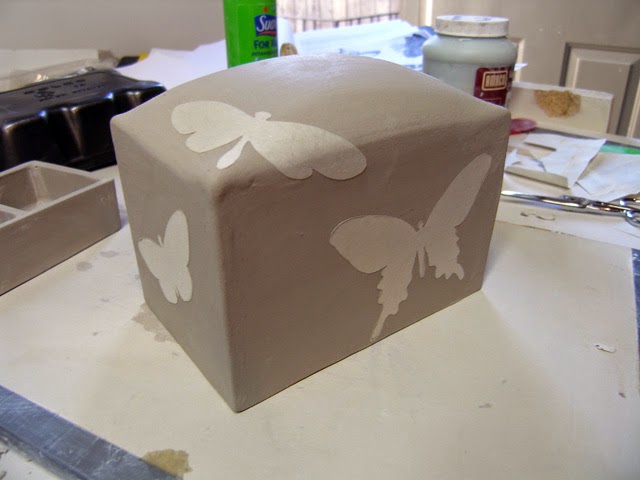
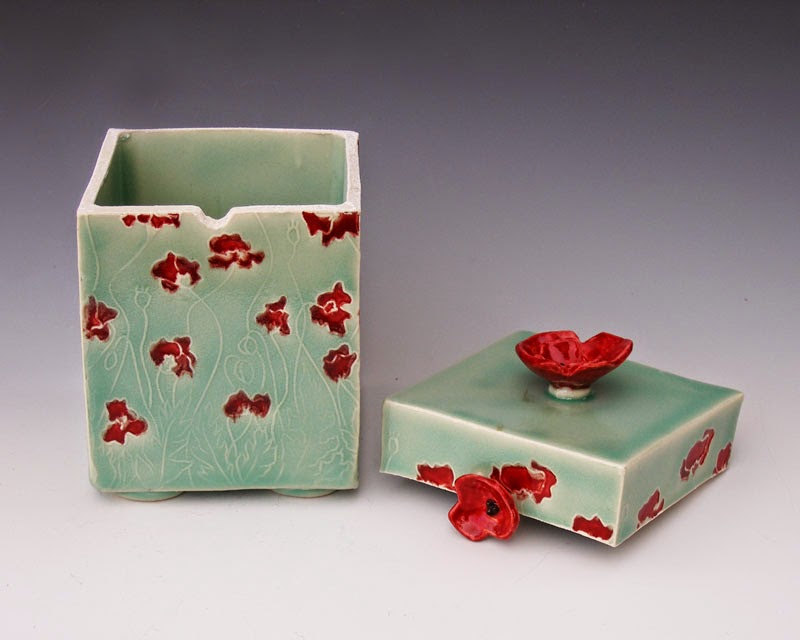
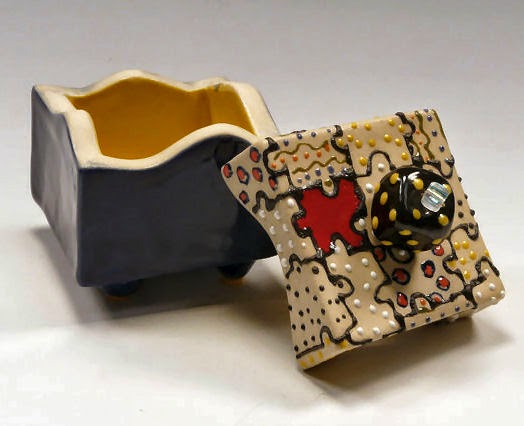
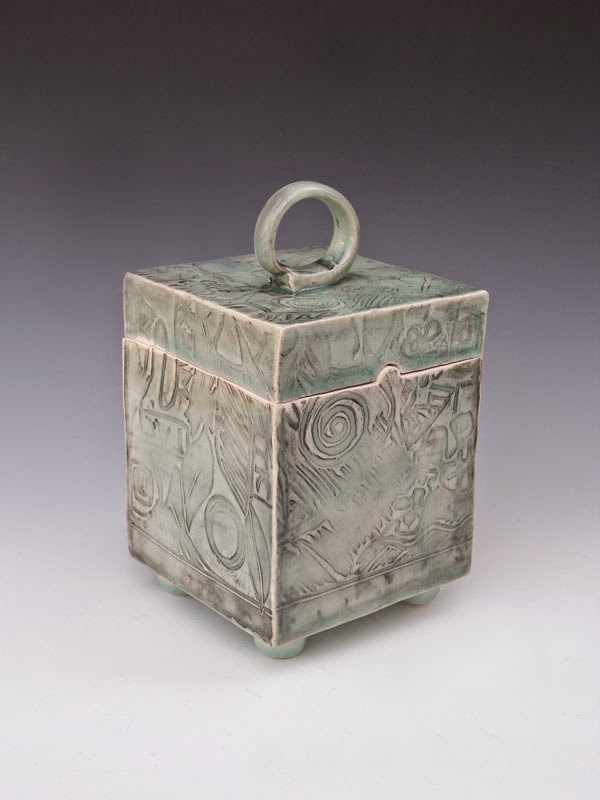
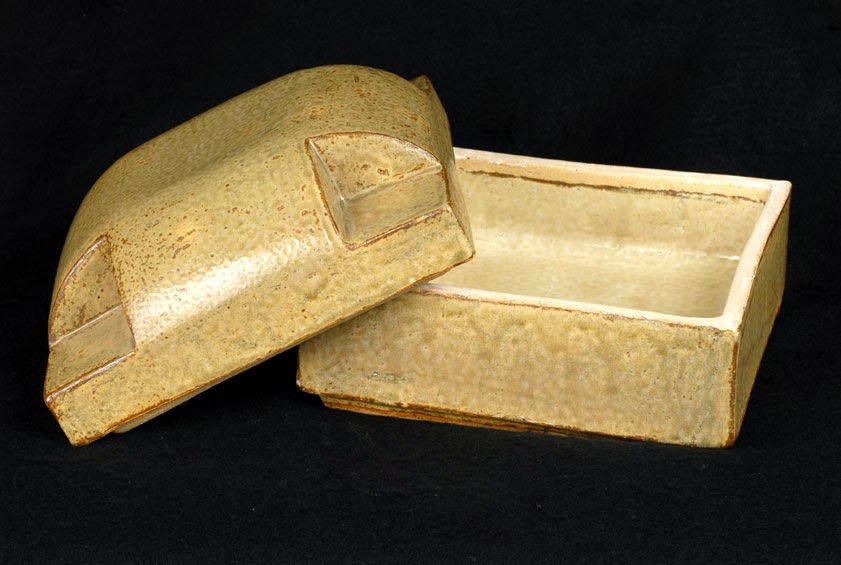
In this projects we will be working through a fundamental building and forming technique called slab. A slab is essentially a sheet of clay that can be rolled or thrown by hand. Once your slab is formed it can be cut, shaped and formed in endless ways. It can be used soft allowing you to wrap around things and or form is shape. It can also be used stiff allowing it to retain its flatness, creating hard lines and structural components and forms. There are limitless ways to use slabs of clay to create your ideas. In this project we will explore this fundamental technique and work within its possibilities.
The project:
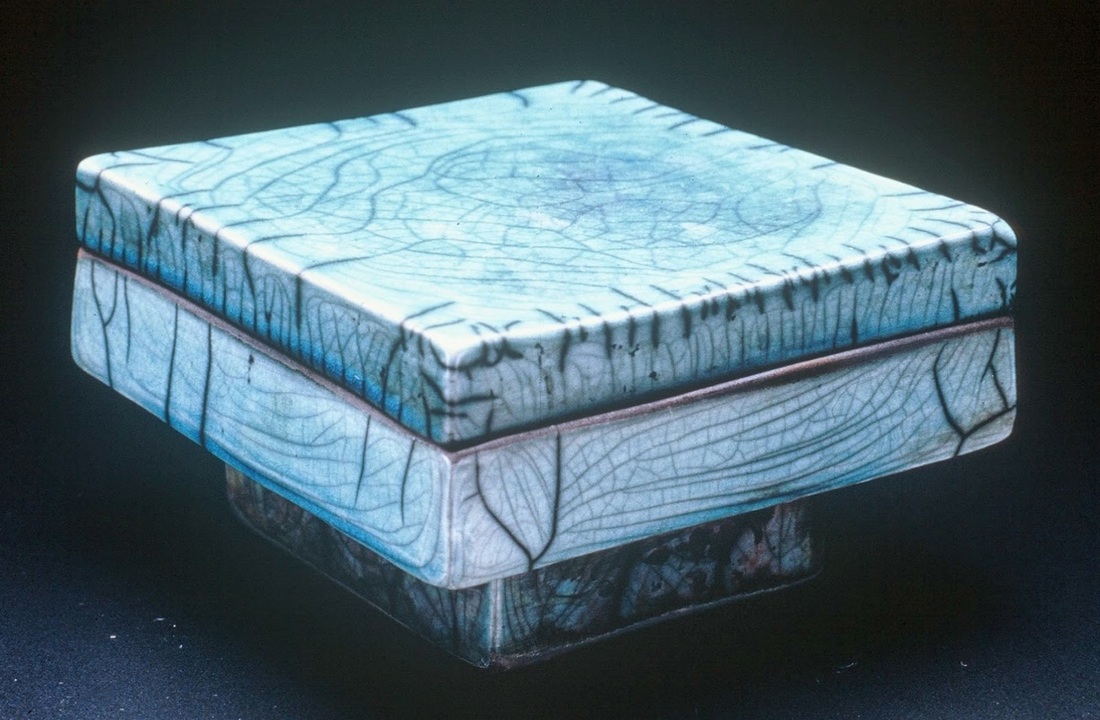
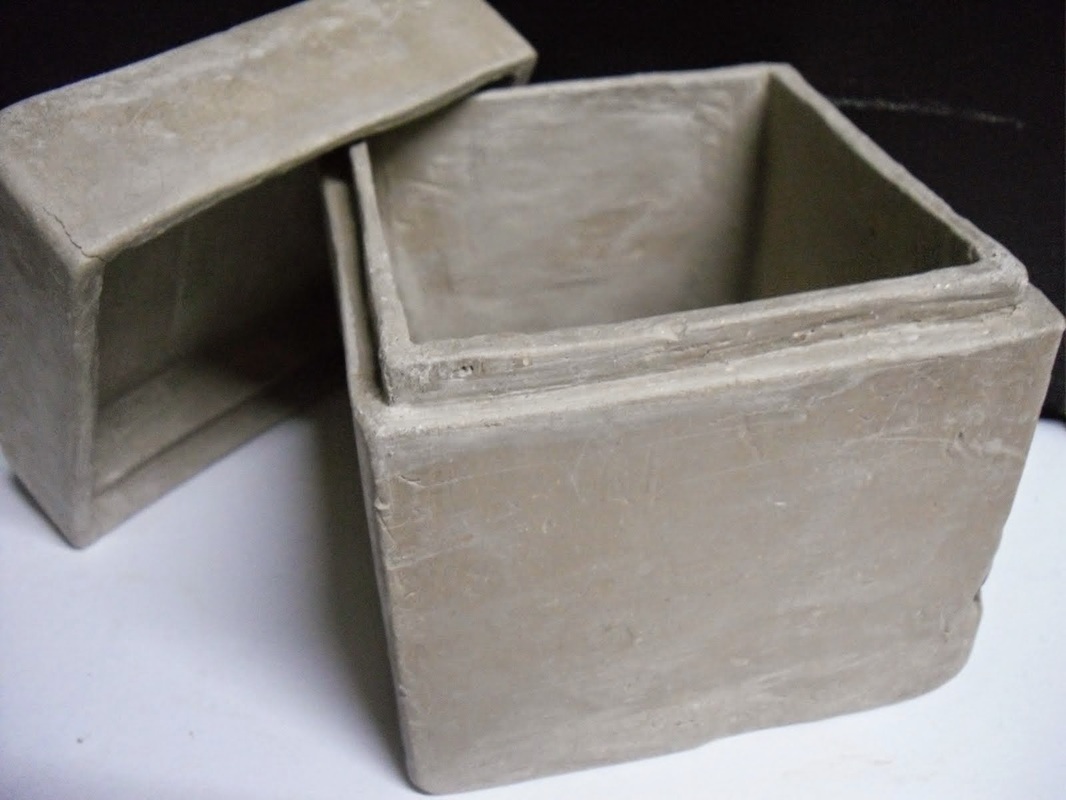
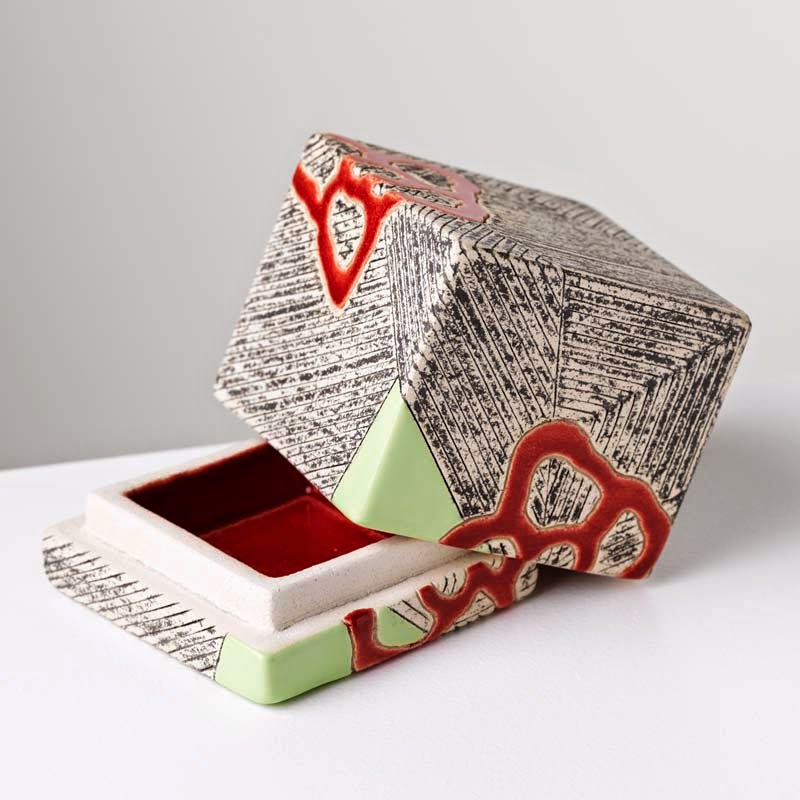
Each student will be asked to create a lidded box form. This box must have a well fitting lid, foot and accessible interior space. In addition to these formal aspects of the box form. I will be asking you to engineer a method for keeping the lid closed and fashioned to its base. This additional element of keeping your box shut does not have to be ceramic, it can be done by string, wax, cordage or anything else you can create. The sealing of the box should be pleasing and not interfere with the boxes atheistic but add to it over all visual quality.
Goals:
Learn and utilize techniques and methods of slab construction, including both hard and soft slab.
Utilize the score and slip method
Build and understanding of lid designs and functions
Further build upon decorative surface techniques of slipping, carving, sgraffito, glaze
Parameters/rules:
Slab built box form
Utilize both hard and soft slab in your box forms construction
Lidded
Have a foot
Be Seal-able by use of additional non ceramic element
Have surface treatment that includes glaze
No larger than 8" in any one direction.
Possible conceptual direction and ideas for this project:
What is a box used for? It is a means for containing, protection, storing, hiding and presenting/giving.
Consider these uses and build your form with one of them in conceptually in mind.
What bout the idea of building a form that is meant to a gift box. But rather than a gift that is presented, it is a gift that is found. Build your container and design a means of sealing it, Then place something inside of it that is of value, not necessarily high value, but maybe some money, a gift certificate (you could contact a restaurant and explain to them you idea of paying it forward and ask for a donation, sandwich coupon, etc). Then when sealed with your offering inside, place it someplace for someone to find it with a note inside explaining the gift and encouraging them to do the same with the box.
Sealing and storage could be another direction to take. Maybe you have a habit or aspect of your life you wish to change. Your box could serve as a symbolic means of change. You could create a box that had an aesthetic design that embodies this need for change. Inside if it could be a note or item from this activity, habit, or behavior you wish to stop. Place it inside, sealing it and then dispose of it. You could bury it, throw it into the river or hide it someplace in the area (country, campus, city where ever) and then walk away. It becomes symbolism connected with your art and combined with public and or a unknown participant (the one who may find your box)
Resources:
www.artaxis.org
www.accessceramics.org
Google search "ceramic box"
The project:
Each student will be asked to create a lidded box form. This box must have a well fitting lid, foot and accessible interior space. In addition to these formal aspects of the box form. I will be asking you to engineer a method for keeping the lid closed and fashioned to its base. This additional element of keeping your box shut does not have to be ceramic, it can be done by string, wax, cordage or anything else you can create. The sealing of the box should be pleasing and not interfere with the boxes atheistic but add to it over all visual quality.
Goals:
Learn and utilize techniques and methods of slab construction, including both hard and soft slab.
Utilize the score and slip method
Build and understanding of lid designs and functions
Further build upon decorative surface techniques of slipping, carving, sgraffito, glaze
Parameters/rules:
Slab built box form
Utilize both hard and soft slab in your box forms construction
Lidded
Have a foot
Be Seal-able by use of additional non ceramic element
Have surface treatment that includes glaze
No larger than 8" in any one direction.
Possible conceptual direction and ideas for this project:
What is a box used for? It is a means for containing, protection, storing, hiding and presenting/giving.
Consider these uses and build your form with one of them in conceptually in mind.
What bout the idea of building a form that is meant to a gift box. But rather than a gift that is presented, it is a gift that is found. Build your container and design a means of sealing it, Then place something inside of it that is of value, not necessarily high value, but maybe some money, a gift certificate (you could contact a restaurant and explain to them you idea of paying it forward and ask for a donation, sandwich coupon, etc). Then when sealed with your offering inside, place it someplace for someone to find it with a note inside explaining the gift and encouraging them to do the same with the box.
Sealing and storage could be another direction to take. Maybe you have a habit or aspect of your life you wish to change. Your box could serve as a symbolic means of change. You could create a box that had an aesthetic design that embodies this need for change. Inside if it could be a note or item from this activity, habit, or behavior you wish to stop. Place it inside, sealing it and then dispose of it. You could bury it, throw it into the river or hide it someplace in the area (country, campus, city where ever) and then walk away. It becomes symbolism connected with your art and combined with public and or a unknown participant (the one who may find your box)
Resources:
www.artaxis.org
www.accessceramics.org
Google search "ceramic box"


#1
3D Modeled and Hand-Made mashup.Overview: Technology is quickly becoming a go to asset for art production. We find it in out photography, image making and object making. Ceramics has been incorporating digital technology for years in the production of objects, models and in this example, tools. For this project we will be incorporating digital tech into our analog studio production. To accomplish this task students will be designing 3D objects that will used as extruder dies (tools). These dies will be used to produce extrusion ribbons in various profiles that can be used either for Handles, Feet, Rims or any other type of addition to a vessel and or sculpture. In this introductory assignment your digitally designed extrusions will be used on the vessels produced in class. Students will be required to produce forms that will accommodate and utilize the extrusions of their design. The extrusions can be used in obvious ways as well as not so obvious ways. Lets see how we can use this addition of tech to create new and exciting ways to produce in the studio. |

|
Assignment:
Each student is required to do the following:
Design one extrusion in Photoshop to be converted into a printed 3D Object (extruder die).
Produce 25lbs of work (one bag of clay)
Make a minimum of 5 separate objects from the 25lbs. (eg. 10 TWO-pound cups and one FIVE-pound bowl, OR 5 FIVE-pound bowls)
The objects made can be of any form , proportion, dimension etc. Just produce forms that utilize your designed extrusions.
All work must be read for bisque firing in 3 weeks.
All works must be made of LOW-FIRE clay (Steves White or Durango)
All Works must be Glazed using Studio Glazes for this particular Assignment (transparent colored base glazes)
Directions:
Digital Designs for Extruder Dies.
Students will be working in groups of 4 (FOUR) to create a digital image to be translated into a 3D object.
Images will be produced in photoshop in class in groups.
Designs must be saves as a .psd (photoshop document and emailed to me for production ([email protected])
Please take notes during the class demo of this process. These is also a tutorial in the rescue section below.
Vessel Production.
Students in the Hand-Building section of the course will be required to hand-build their vessels using any hand-building technique the choose (pinch,coil,slab or any combination or technique they like).
Students in the Wheel-Throwing section are required to wheel-throw their vessel forms.
Regardless of the method of production HAND or WHEEL, each student must use 25lbs. of clay and produce a minimum of 5 (FIVE) separate objects. Objects do not need to be similar and or part of a theme. I would encourage you to create a variety of forms to incorporate your 3D designed extrusions.
Glaze Decoration.
We will be exploring low fire transparent glazes for this project. Students using Steves White Clay will not need to prep their surfaces for glaze. Students using Durango Clay (red clay) will need to incorporate white slip onto the surface to best utilize and capitalize on the transparent glaze bases. If no white slip is used on the Durange, the glaze results will be poor and the chromatic values of the glazes will not be visible,
We will be using our studio transparent glaze base for this project. The glaze will be tinted in hues of Green, Blue, Yellow, Purple as well as Clear (un-tinted).
Studio wet pigments will also be demonstrated and available for use in glazes, but are not required in the completion of the project.
All work must incorporate the project glazes. NO UN-GLAZED work is allowed for this project.
Goals:
The goals for this project are:
Understand the practice application and incorporation of digital technology in a ceramics studio.
Gain basic design and editing skills associated with Photoshop software.
Utilize the principals of design in creating images/design for translation into 3D objects.
Build upon basic wheel-throwing and hand-building techniques learned in the into ceramics course.
Understand and build familiarity with various clay bodies.
Gain materiel understnaing on how to select clay bodies for given tasks (transparent colors).
Gain skills associated with using the extruder.
Gain skills associated with constructing objects from various production methods (extrusion, digital, wheel-thrown, hand-built).
Build upon studio time management skills and material processes (maintaining moisture, controlled drying, production deadlines).
Resources:
Studnets will have various in class demonstrations of the processes required to successfully complete this project. In addition to the in class demos, there are video tutorials on the digital aspect of the assignment. Students are encouraged to engage their classmates and instructor with conversation about the nature of the project, possible solutions, and problems encountered as they work though the assignment workload. Dialog and exchange is important when working through new and unfamiliar tasks. Speak up and share your thoughts, we will all benefit from the open exchange of ideas and concerns.
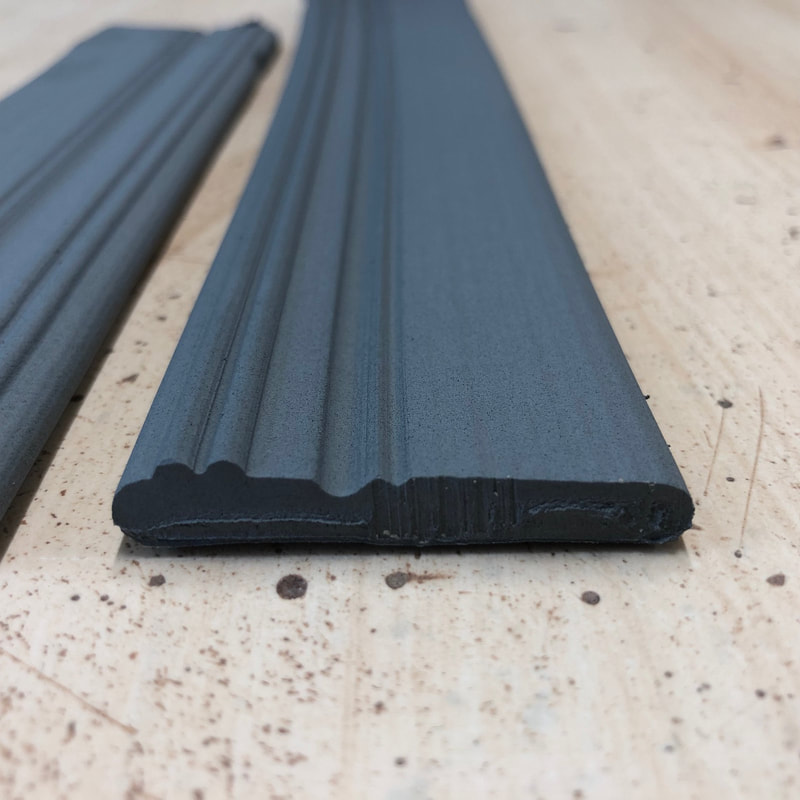
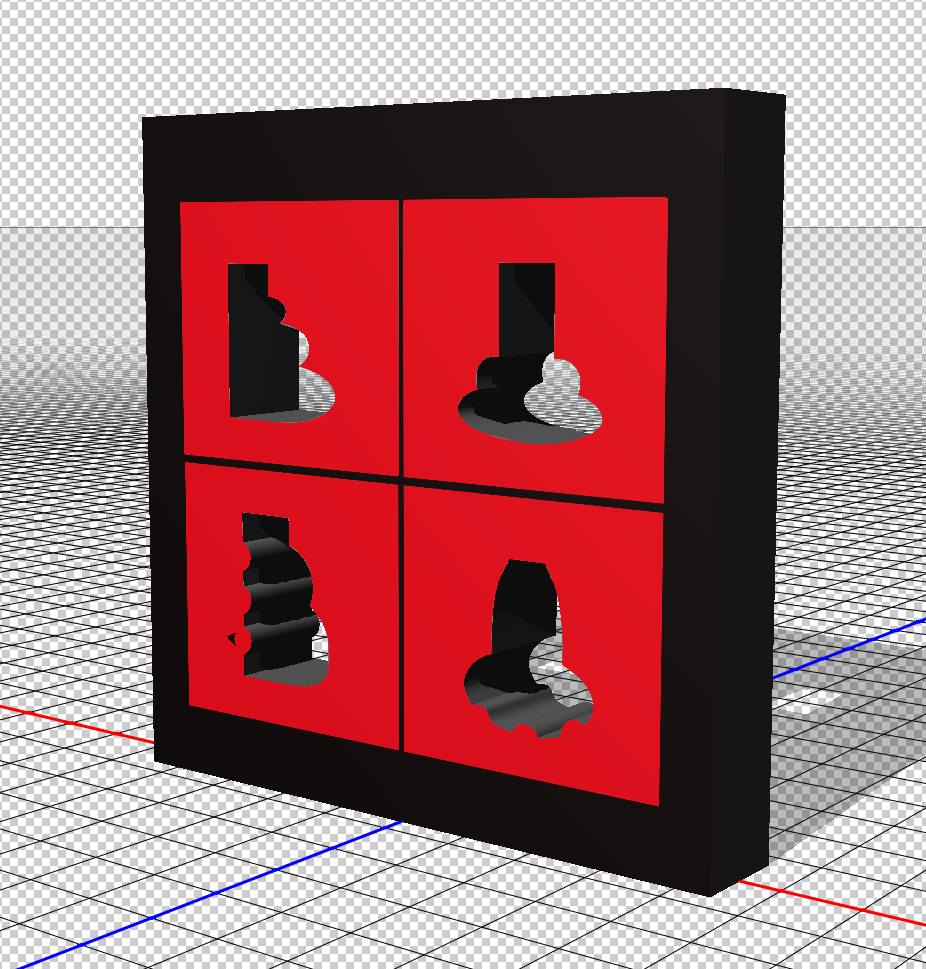
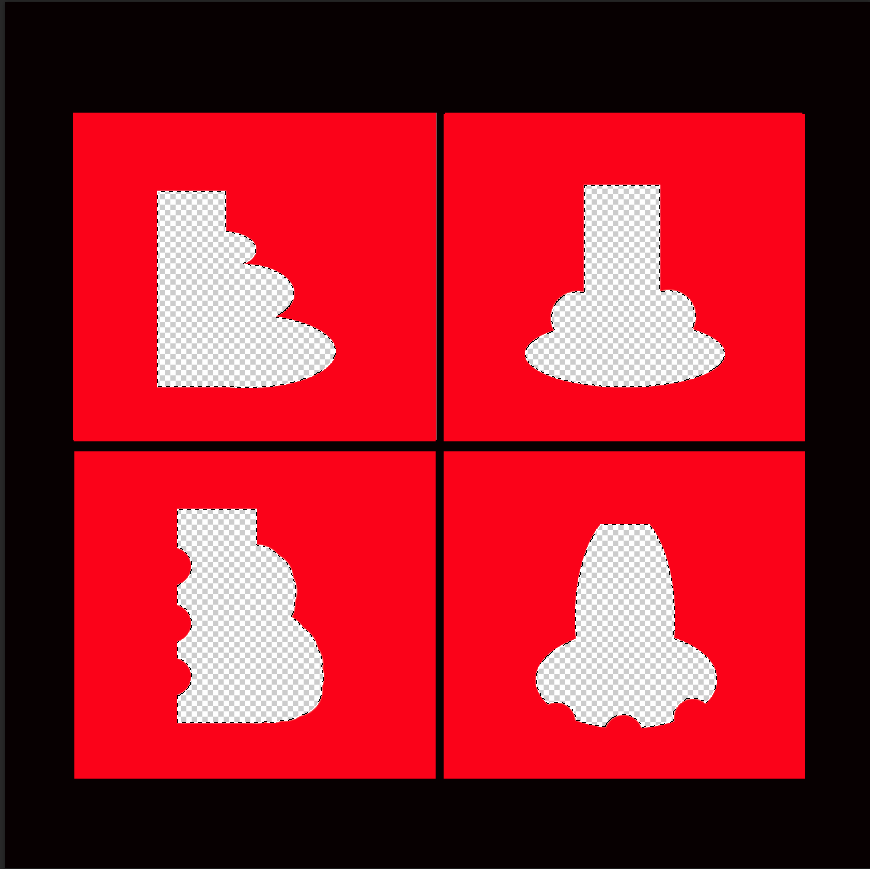
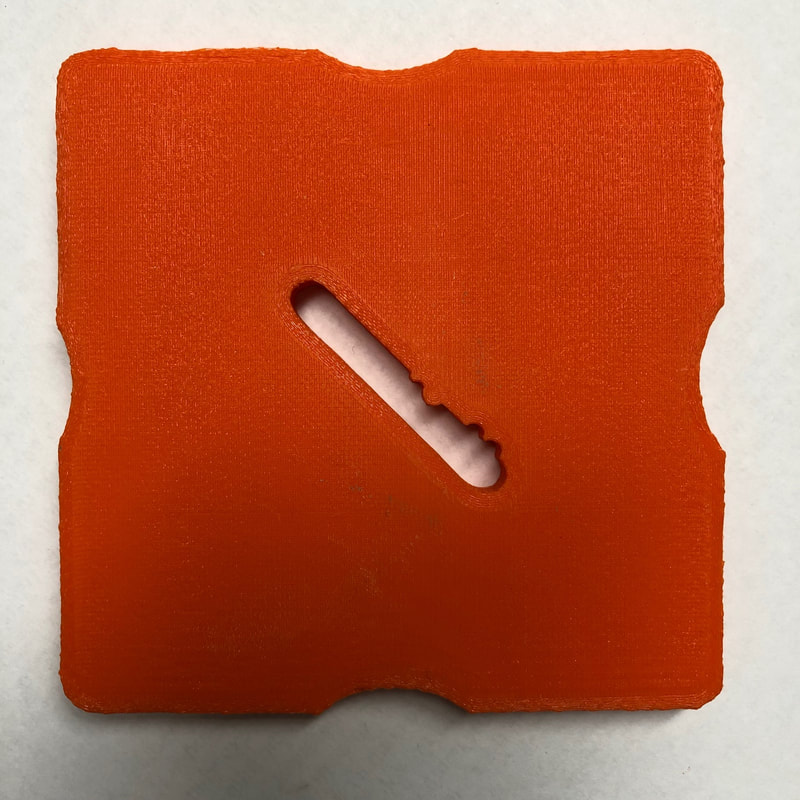

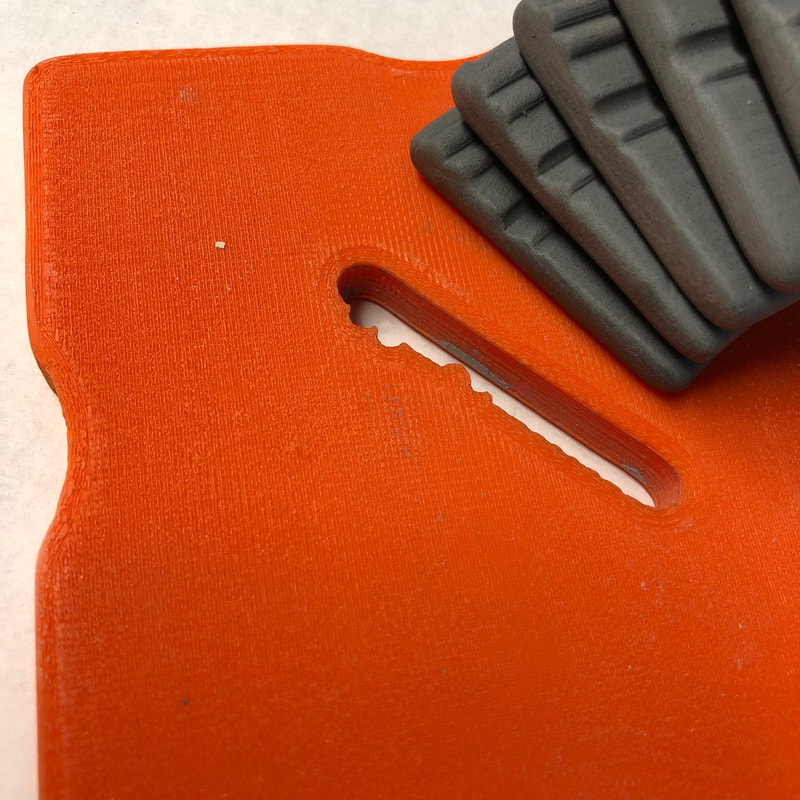
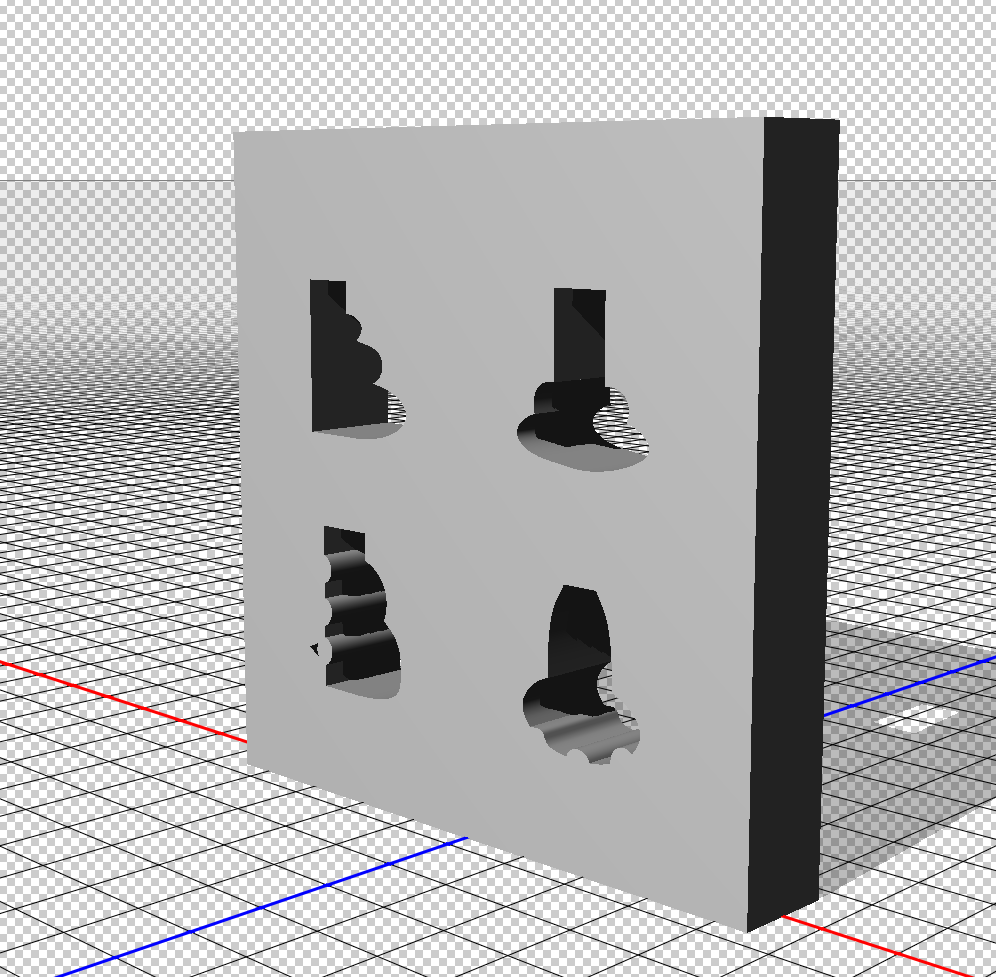
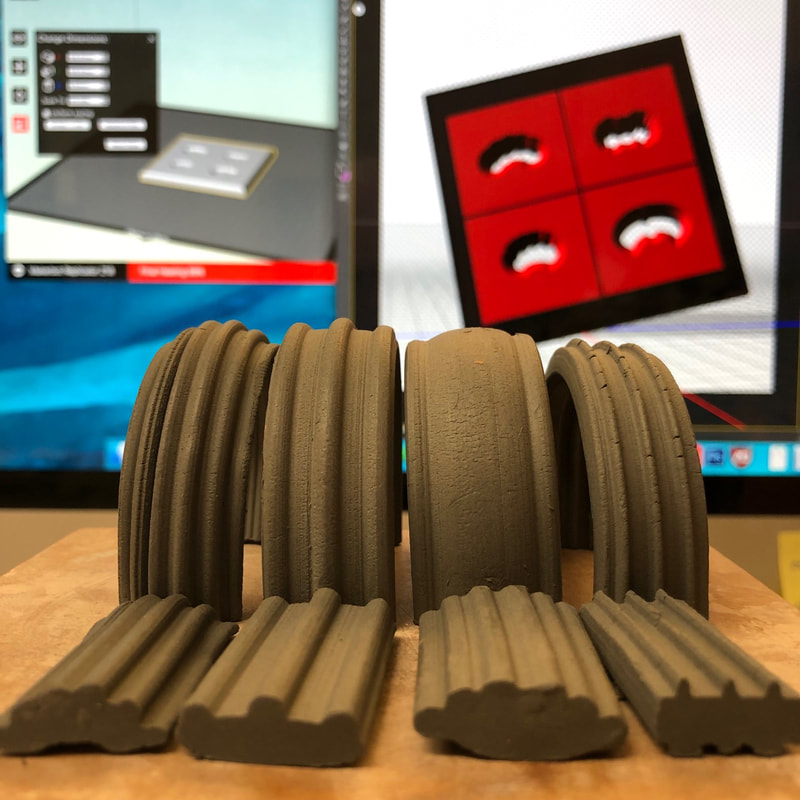

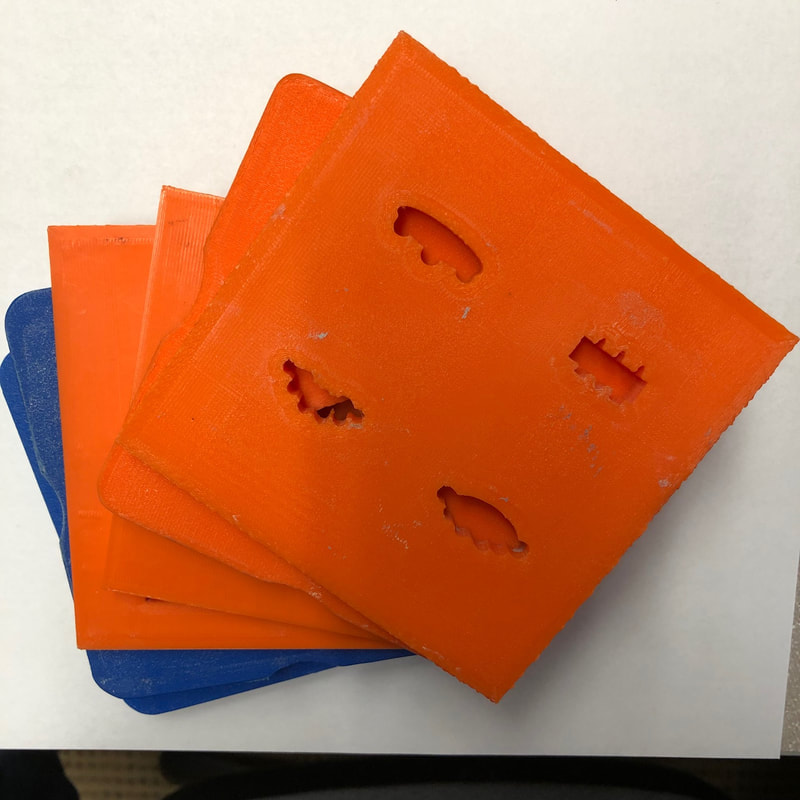
Files.
Included are some of the files we will be using for this assignment. IF you already have Photoshop at home or elsewhere feel fret take these files. Play with them, use them, modify them to meet your needs.
Included are some of the files we will be using for this assignment. IF you already have Photoshop at home or elsewhere feel fret take these files. Play with them, use them, modify them to meet your needs.
Template to 3Dmodel demo from David Hicks on Vimeo.
|
| ||||
