Reedley College
Art 10 Projects
Fall 2022
Exercise
Centering,Pulling & The Cylinder
Alright folks time to get your hands dirty.
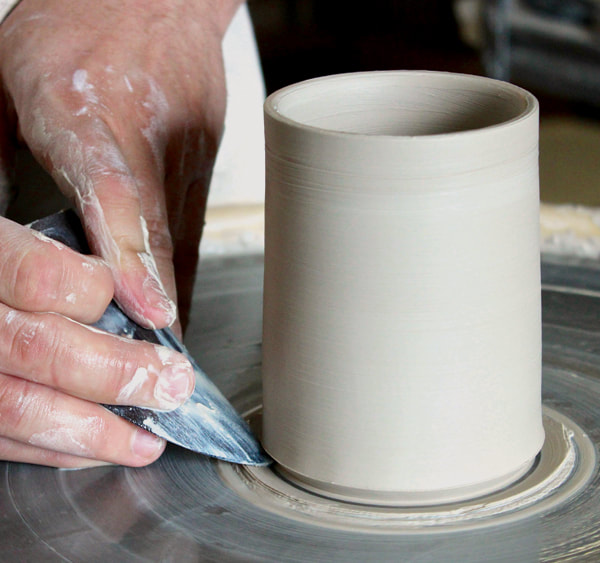
Welcome to the ceramic process. As stated in class, we will perform a number of exercises to help prepare and train for the major graded projects. The first exercise we will be working through will be the process of centering and developing basic cylinder forms on the potters wheel. These skills are essential to the class and will be the foundational processes employed with all projects on the potters wheel. Its important you take your time and focus on developing and understanding of touch and how to control all the elements of the wheel throwing process. Touch, wheel speed, body position and controlled movement as some of the major elements to explore and focus on while you practice.
This training process will be demonstrated in class and be broken down into simple to follow steps and processes. Please remember to take notes and reference them until you gain familiarity with them. The goal of this practice exercise is for you to build the ability to center the clay on the wheel and create a even and balanced cylinder form. This basic form will be broken down into the following steps. Please make sure to pay attention during class demos and ask questions. Below is a rudimentary breakdown of the process and will covered multiple times in class demonstrations or at request for individual refreshers. The goal of the exercise is to get the entire class comfortable and familiar with centering and cylinders. Once we have this covered we'll progress to the first major project. Dint rush and build bad habits, work slow and connect with you movement and actions.
1. Center the Clay
2. Belly Button
3. Go to Depth
4. Open Cylinder
5. Flatten and Compress Bottom
6. Collar Cylinder
7. Pull Cylinder Walls To Raise Height
8. Compress Rim after Each Pull
9. Straighten Cyliner Wall with Rib
10. Undercut Foot For Removal From Wheel
Each student will be required to produce a finished cylinder with a flat bottom (1/2" thick), straight walls, even walls, level and rounded rim as well as undercut foot. Once you have completed this task your cylinders will be cut and examined. Students who complete this task will be encouraged to continue to throw cylinders to build confidence and ability. Cylinder making, with practice will become a simple task that you can perform on demand. Practice makes your skills get better, so get to the wheel and move some clay! Have fun.
Cylinders
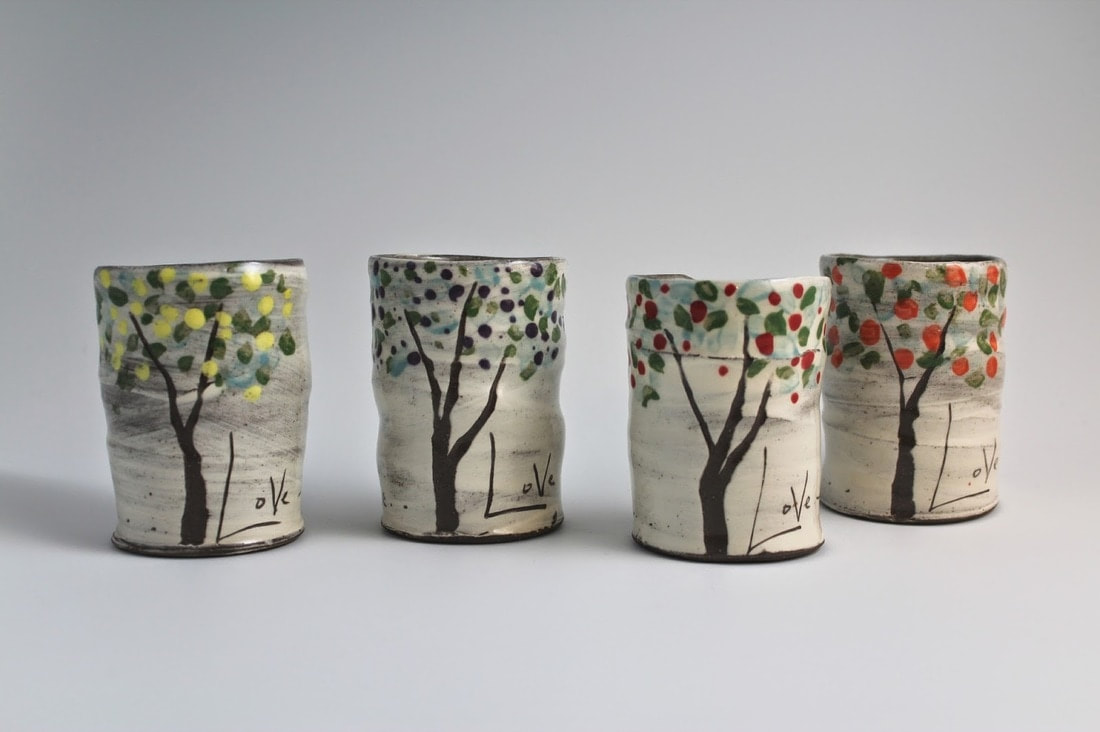
Now that we have begun the process of producing cylinders on command, we will begin to put those cylinders to use. Cylinders are going to serve as a foundational form for the wheel throwing projects in this beginning level course. The first excursive will be the production of cylinders to specific proportions. As demonstrated in class you will be asked to produce SIX cylinders; TWO that are tall and narrow by proportion, TWO that is low and wide by proportion and TWO that are either convex )( or concave ( ) in shape and. You will also be using your sprig molds to decorate these cylinders.
Work for this first assignment will not be trimmed but rather thrown with a thin foot area. Work should be cleaned and bottoms should be addresses in terms of cleanliness and refinement. No sharp edges should be present and bottoms should be smooth and cleaned of debris and burrs. Works executed in this assignment will use a basic palette of black and white for decoration. Since we will be working with Steves White clay, which fires white, the incorporation of Black slip will serve as the main decorating material. All bisque fired works will then be glazes in the studio LOW FIRE clear glaze to highlight and present the black and white decorations.
Last but not least, you are expected to stamp/mark each of your pieces with your personal chalk mark. A chalk mark is a way to impress a pattern or mark on a ceramic piece. This mark will serve a your signature for your work. All work produced by you must have the same chalk mark! This is necessary for identifying you work and keeping tract of who's work belongs to who. While at first thought this may seem unnecessary, you will soon find that with the large number of students producing a large number of cylinders, a sea of vessels will soon arrive, making finding and ID'ing your work a somewhat difficult challenge. You chalk mark will help you keep track and came work as you own. Any work not chalk marked with your personal (you only have one) chalk, will not be counted or graded, so please chalk you work.
Point Value: 100pts.
Requirements:
6 Cylinders total
2 must be tall and narrow by proportion
2must be low and wide by proportion
2 must be Convex or Concave
3 must utilize SPRIG molds (see project sprigs below)
Areas of focus:
Craftsmanship: well made, free of defect or poor workmanship
Lip: Clean lips that show ability to control rim
Proportion: does the form have the required proportions (tall/narrow short/wide)
Sprigs: how can we use these simple tools to create pattern, decoration, texture and conversation
Goals:
Students will learn to control vessels of small scale and direct the form to meet personal aesthetics and visual liking.
Build upon and gain control of basic cylinder production.
Improve wedging and clay recycling skills.
Begin to make connections to formal details and the user interaction and experience of the forms produced.
Sprig Molds |
|
|
Sprig Molds:
Sprig molds are small pressings of clay that capture texture and surface relief from objects and surfaces. The beautifully simple nature of clay makes it an ideal medium for making sprig molds. Gently pressing a smooth ball of clay onto a textured surface creates a negative impression into the clay. When dried and bisque fired these impressions (sprig molds) can be used to emboss surface, create decorative buttons and communicate information from the textural source of the mold itself. Bisque fired clay is naturally porous and allows clay to be pressed into it and will released with that texture.
Student are encouraged to explore the possibilities of their sprigs as to how they may relate to their personal history. Students are also encouraged to use a discerning eye to look for texture and form that is both crisp and detailed as well as artistically relevant and curious. Sprigs should add visual and tactile information to the surfaces they are used upon. Understated and illegible molds often detract from the composition and provide no added value to the formal and or conceptual makeup of the work being produced. Choose surfaces and objects that generate good molds. Test your molds when bone dry to see if they provide enough detail and are legible. Illegible molds should be recycled and not fired.
Point Value: Students sprig molds will be incorporated into the above project (1A) as a required element to complete the project. While this homework project has no independent point value, the sprig molds will be part of project 1A and be a required element in the decorative process. Students who do not complete this project will not be able to achieve full credit in project 1A.
Requirements:
Produce a minimum of 5 sprig molds
Molds should be of objects or surfaces that have strong surface relief as well as personal significance
Sprig Molds should have the students initials on them as an ID
Project Goals:
Understand the potential for clay to be used as a mold material.
Explore the potential of incorporating surfaces and texture that originates from sources other than oneself.
Explore the potential for communication and transfer of personal history through objects.
Test the possibilities of adding elements and texture on ones ceramic works surface to increase visual impact.
Experience additive/constructive process of joining clay objects together.
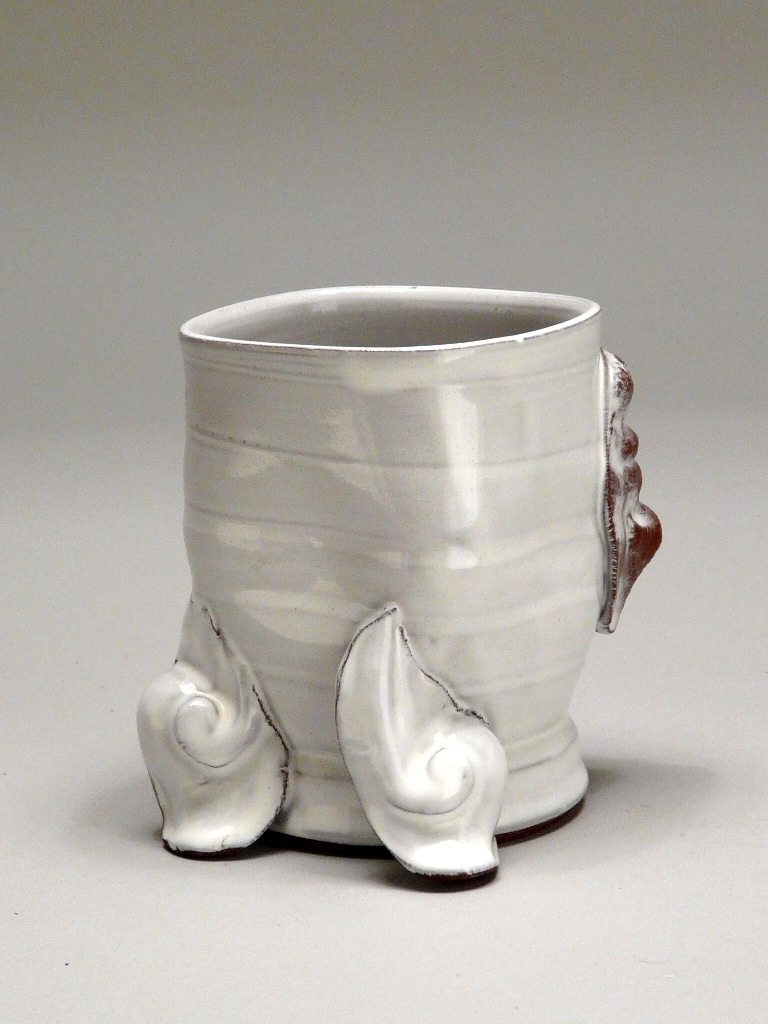
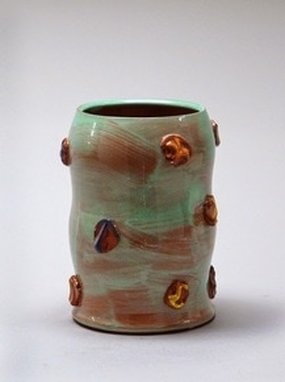
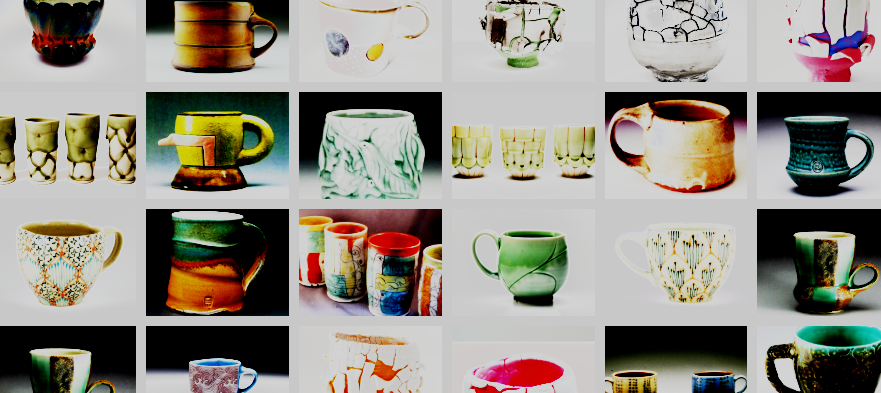
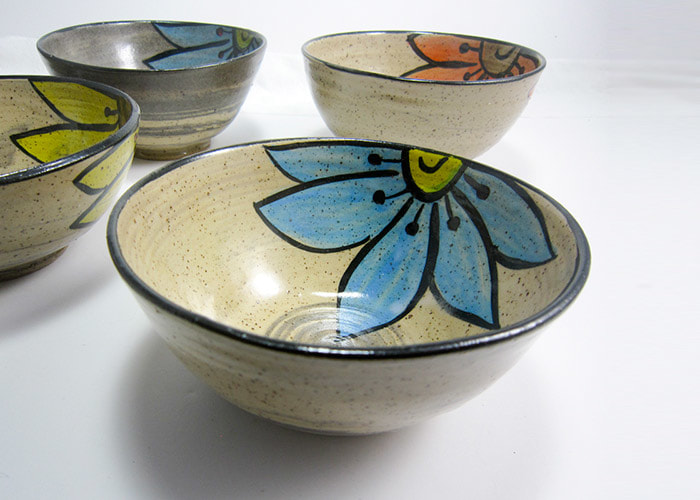
Cup Library Review
Class,
For this short weekend project I would like you to do a little research and begin to explore the possibilities of you first assignment. Im asking that you do a little exploring of the class resource site www.centralcalclay.com and review the cup library. Take a look at whats possible just wishing the provided examples. There are endless possibilities when it comes to your current project. This endless and infinite realm of forms and functions can be a difficult think to come to terms with as young artists. The best way to do this is to find examples that interest you and catch your attention. Everyone has different attractions to form, its important to start to identify your taste and interests and build work that addresses those personal interests. Equally important to finding the forms that interest you is being able to explain why your interested. Why do you like it? hats attractive about it to you? How could you describe the formal shape of the cup? All of these questions are important to address as they begin to address you ability to verbalize your thoughts on sculptural objects and formal items that are not usually talked about in most situations. Color is only one thing to address, but go beyond the color, look at the form, the handle, the texture or anything else you find of interest and talk about it.
The assignment:
Find one cup you like and tell me why you like it. Describe why your interested in it, whats attractive about it to you. Copy and paste a picture of the cup and include a paragraph explaining you interest and attraction to the cup. The project is due in class on Monday. Please bring a printed copy of you response that includes an image of the cup from the library on the centralcalclay site as well as an online submission via canvas.
Point value: 20
Cup Library
Cups!!!
Here we go folks. All the skill we have been training for are going to come into focus. I the project we will be focusing on the production of drinking vessels. These very intimate objects will be an opportunity to explore form, text, functionality and much much more.Students will be asked to produce 10 finished cups for the assignment. These cups will have several specialized areas of focus, including scale, intended purpose (hot or cold beverage designs), lips, detailed trimming and handles. Do you think you can handle it? (yes that was intended to be a cup joke). This project will include multiple demos on creating from that are crisp, organic, altered, trimming with detail, handle making and a little taste of tool production. Please make sure your attendance is good, because we will seen and doing a lot in the course of this assignment.
Requirements:
10 finished cups total.
of the 10, 5 must be designed for a hot beverage.
of the 10, 5 must be designed for a cold beverage.
of the 10, I would like 5 to have handles. (any 5, hot or cold designs, your choice. Feel free to put handles on all if you like.
of the 10, 5 should have non wheel made alteration. (alteration demo)
All must be trimmed
All must have your chalk mark
Point Value: 100 Points (major assignment)
Areas of focus:
Trimming: trimming finer detail and taking advantage of the opportunity to add details and personal designs.
Form: play with you forms to create unique shapes and designs. Remember to give you work a breathe (expand its volume capabilities)
Scale: use you personal experience with drinking and you own kitchen cupboard to produce your works (scale should be usable and functionality should be in the foreground)
Lips: these objects will touch you months and delicate parts of the body. Care should be used to creat forms that are not aggressive or uncomfortable in use.
Handles: handles have many purposes such as grip, heat protection for the user and aesthetics. Use these concepts in your design and production of handled cups.
Advice:
Produce 20 cups that you can choose and select from in your final presentation. You will always produce the best ones last. The more cups you have to select from the more likely your grade will be higher. Doing the bare minimum is not a safe way to work through a production oriented assignment. Also....play. You should have fun in designing and building these small object. Make work you want to use and want to share. If you do this you truly love what happens on you wheel.
References:
Look at and study the cup library on the website. Its full of great images and ideas to work from or towards.
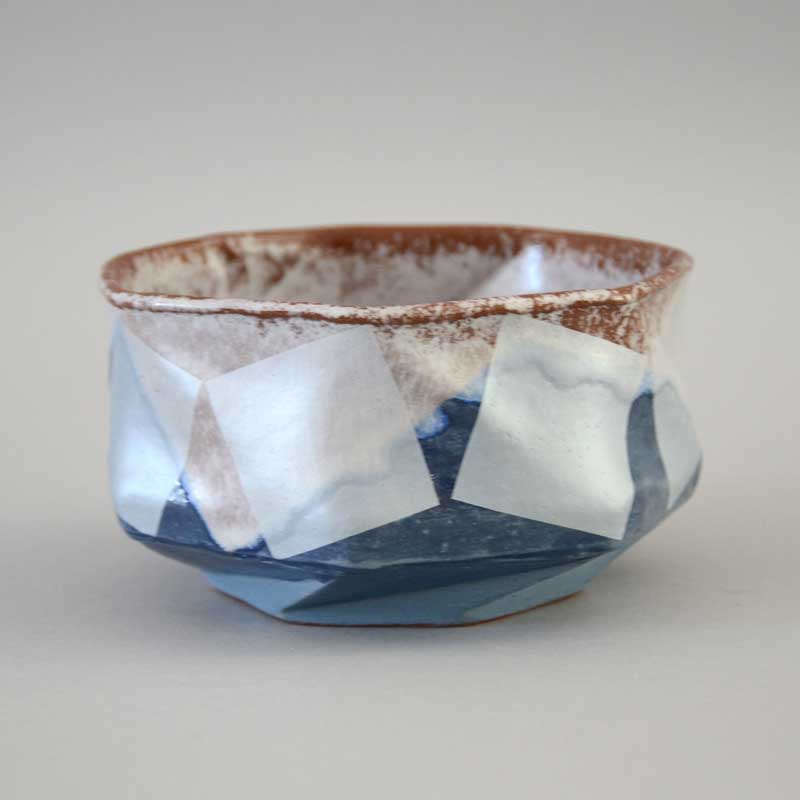
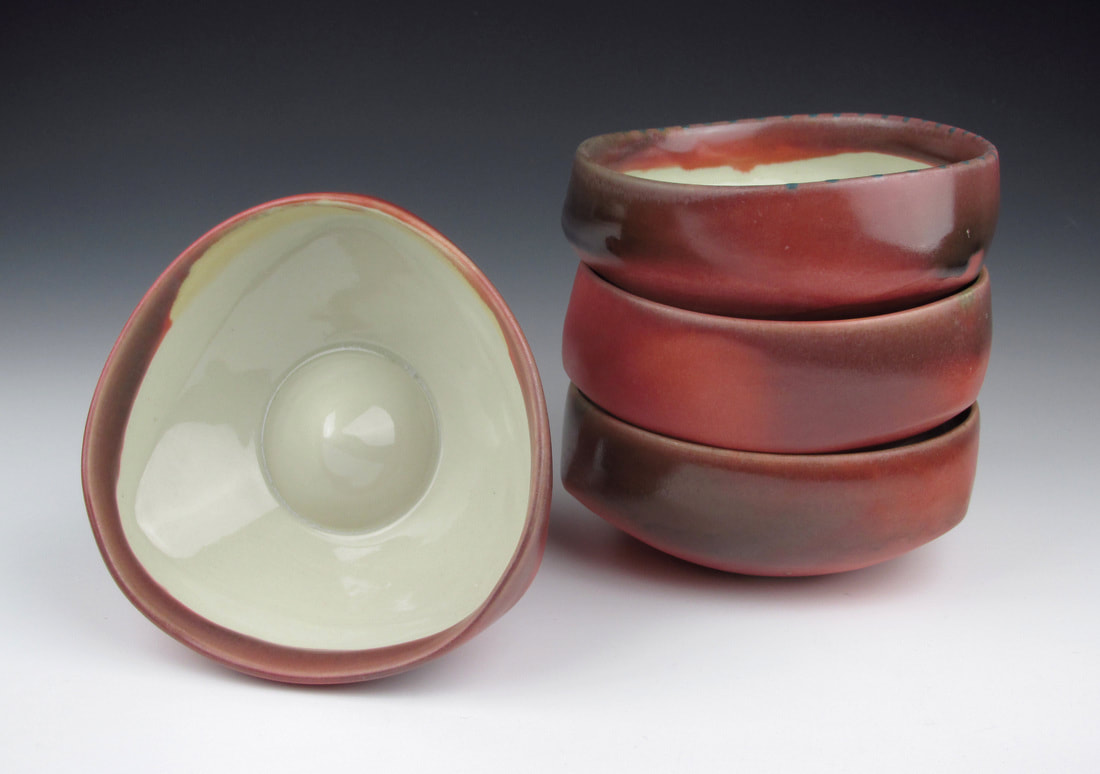
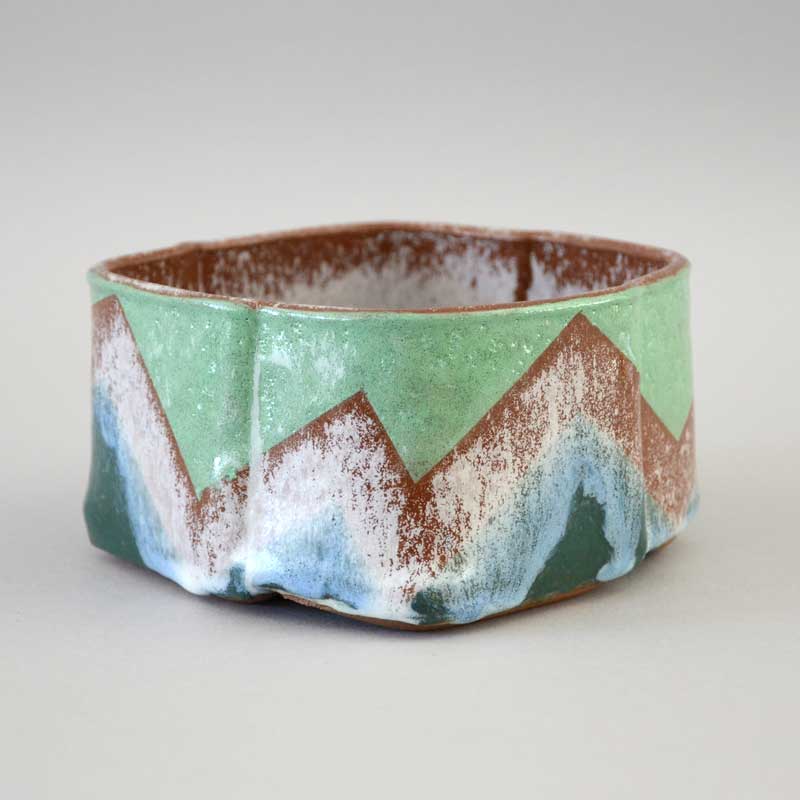
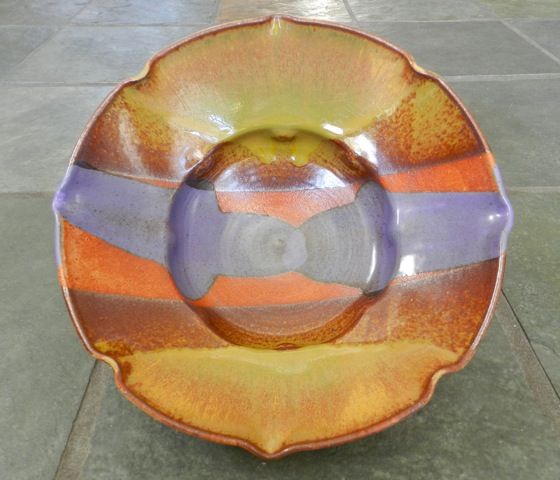
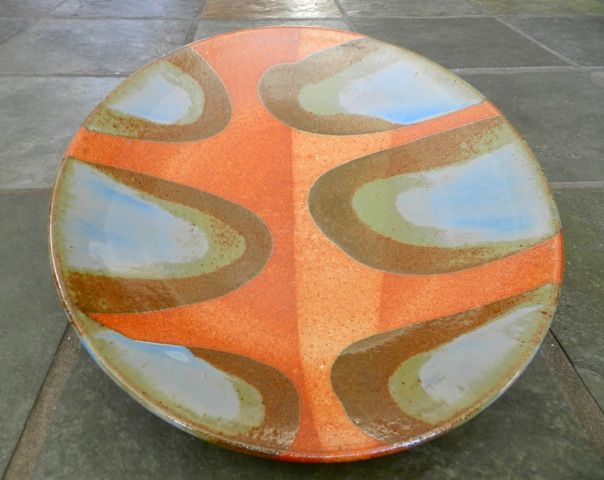
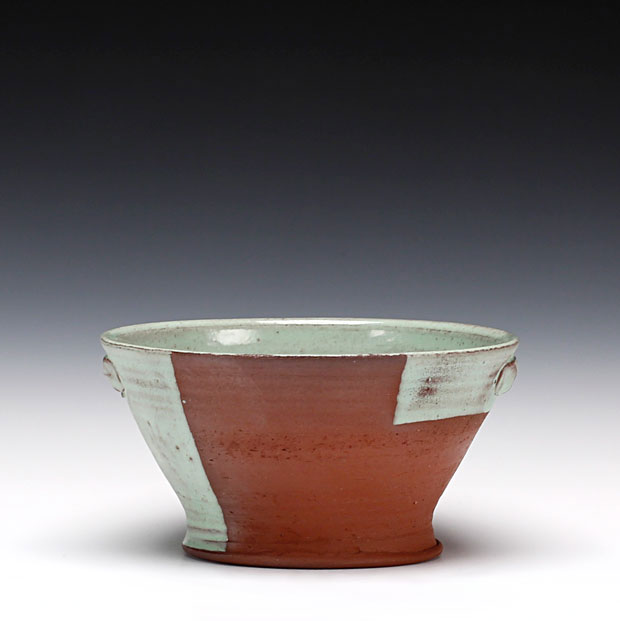
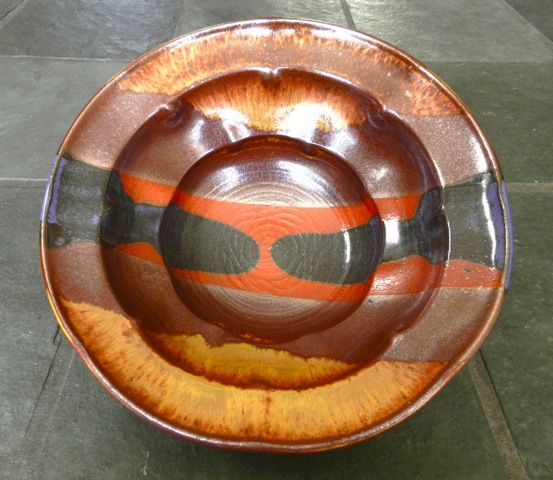
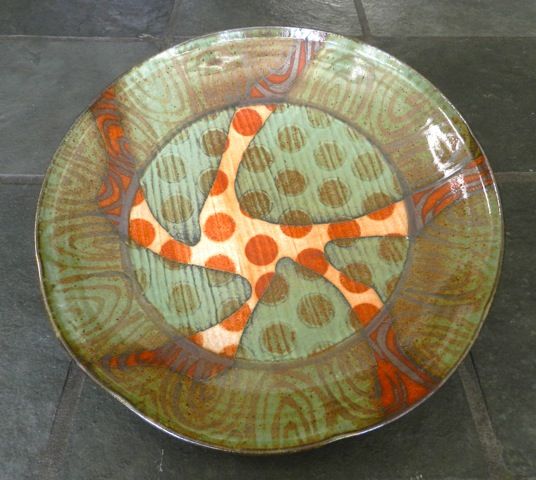
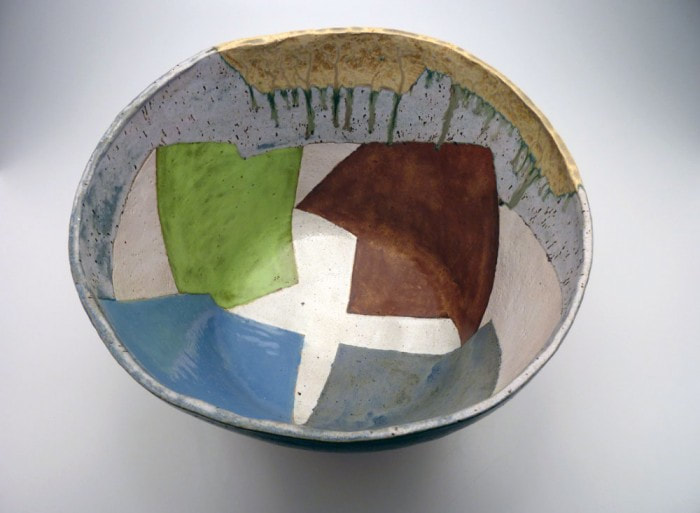
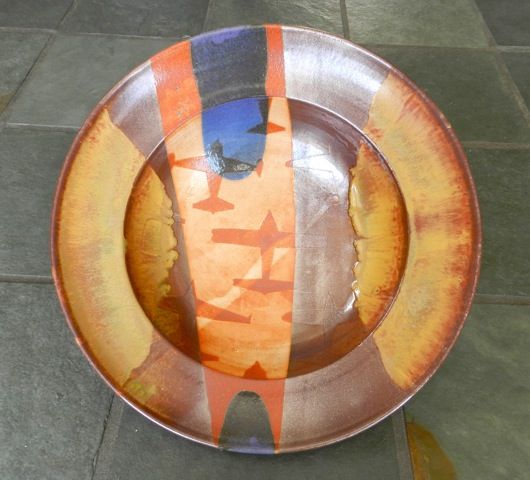
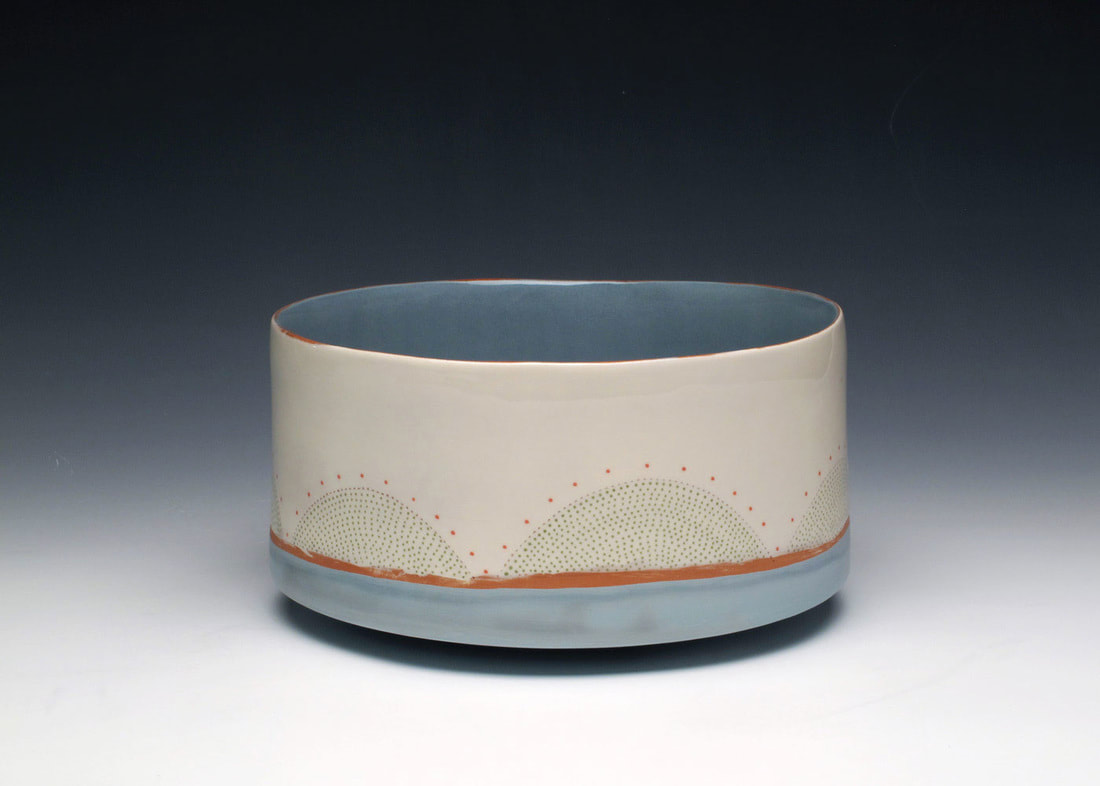
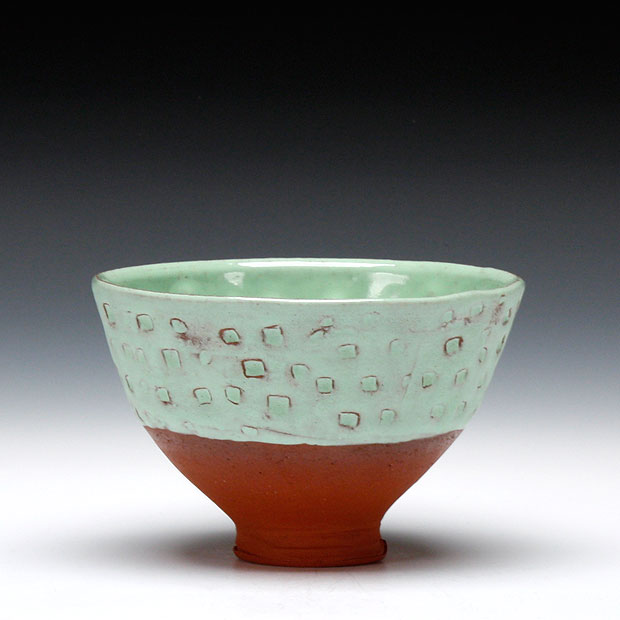
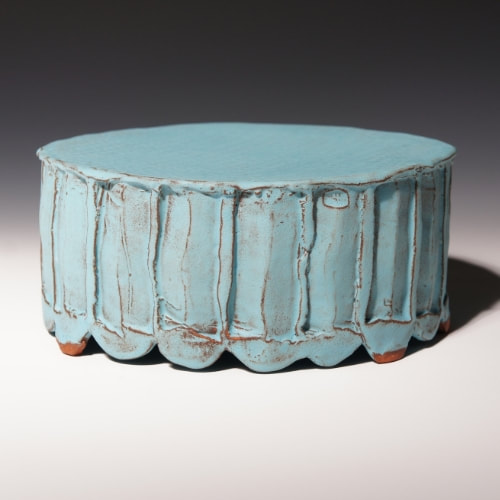
Bowls

|

|

|
Overview:
For this project we will be exploring bowl forms and how to produce them on the potters wheel. We will engage the bowl in a number of ways, all of which will explore the basic functions and potentials of the form we know and call a "bowl". One of the concepts I would like you to keep in mind for the structure of this beginning level project is "utilitarian". Be mindful and understand that a well made utilitarian bowl can be just a beautiful as it is functional. I would however like to keep things focused on how your bowl form works in this introduction to bowls. Outside of the framework of this project you can and are encouraged to explore decorative objects and sculptural vessels that place the utilitarian aspect farther down the the list of important elements, but for the graded part of the project, be UTILITARIAN minded.
u·til·i·tar·i·an
yo͞oˌtiləˈterēən/
adjective
adjective: utilitarian
1.
designed to be useful or practical rather than attractive.
synonyms:practical, functional, pragmatic, serviceable, useful, sensible, efficient, utility, workaday, no-frills;
Thoughts on the project:
Open forms: Form should be open in nature and without curves that make serving difficult (inward sloping lips or body lines)
Transitory form: Form are meant for things to enter and exit the space of the bowl, not designed for long term storage. (closed forms)
Specialized forms: A design that is specific for a purpose. (serving tureen, salad bowl, ice cream serving bowls, soup bowl, rice bowl) These purposes will dictate and inspire a specific shape and scale. Be mindful of the intended purpose and design work specifically for that bowls intended purpose.
Decorative Form: While this project is meant to explore utilitarian bowls, pay mind to the decoration and visual presence of the piece. How can you make the visual aspect of the bowl attractive and curious while maintaining a utilitarian direction? (sprigs, formal alterations of the bowl when wet or leather hard, trimming for texture and visual effect as well as for the foot)
General guide to proportions for this project: ( your bowl form must be wider than it is tall)
Point Value; 100 Pts.
The project:
Each Student will be asked to produce....
SIX (6) Bowl Forms. (1 at FIVE pounds) (3 at THREE pounds) (2 at ONE pound)
All Bowls must have a TRIMMED FOOT
2 of the bowls must be ALTERED
1 of the bowls must be designed as a serving bowl and include a serving utensil(s) made of clay
Bowl Library on this site
www.artaxis.org
www.accessceramics.org
www.strictlyfunctionalpottery.net/


Project 4.
Bridge to Nowhere
A Bridge to Nowhere
Overview:
For the Final project you will be working with all the skills we have learned over the course of the semester. For this project you will be tasked to work in groups to construct a structure that must address a number of challenges. Point will be assigned for the successful completion of outlines challenges. Points will be set as follows in the challenge description.
1) The first challenge for your structure, the most important challenge, is that your structure must be able to span a unsupported distance of 24" (think of a bridge over a 24" gap). It must maintain its span for a total of 5 minutes un-aided or touched by team members. Structures that survive the 5-minute challenge will receive 70 points. Any structure that fails to hold for the five minutes and fails structurally will only receive 50 points. (70pts; pass, 50pts: fail)
(This 5 minute testing period will be the group oral presentation period, be prepared to explain you design and decisions made as a group.)
2) The second challenge your structure must address is the ability to support weight greater than itself. Project structures will be tested to see which one can hold the most added weight before they come crashing down under the added load. The weight will be measured and the group with the strongest structure will be granted additional points. Each structure must have a testing tube inserted laterally across the measured center of the structure (tube will be provided). The load that each structure can hold will be measured and tracked. The group with the highest load capacity will receive 20 points, second highest load 10 points, third highest load 5 points. Failure to achieve a 1st, 2nd, or 3rd place finish will receive zero points. It’s a competition, build to win! 1st: 20pts, 2nd: 15pts, 3rd: 10pts. 4th: 5pts.
3) The third challenge is a beauty contest. Each team will be asked to create a structure that is aesthetically pleasing. You should work to create a structure that is visually attractive, tells a story or exemplifies quality craftsmanship. The groups will be judges by a guest judge who will Judge and rank the structures. The first, second and third place winners will receive additional points. 1st: 15pts, 2nd: 10pts, 3rd: 5pts. 4th: 5pts.
NOTES:
Students are encouraged to build a competitive attitude in response to this project. You will be competing for points; therefore you should be careful about divulging your tips and methods of success.
Groups should delegate tasks to group members.
Group members are required to be present for the remainder of class session in the semester. DO NOT be the anchor in your group.
PLAN, PLAN, PLAN but be flexible with your design.
Think through the required challenges and be strategic
Advisor:
As your instructor, I will act as an independent advisor to all teams, not sharing vital team information with other competitors. There will be ZERO demonstrations for this final project. Past the first day of project instruction, teams will be expected to work as a group and ask for advice as needed. Instructor will not tell you how to complete the task but rather will answer direct equations regarding the teams designs and or issues as they develop. Groups must rely on the information and experience they had during the course of the semester, and put hat information to work.
Point Value: 100 Pts.
Groups that win best of show, time, weight could possibly will a total of 105 point! Any points above 100 will be granted as extra credit and applied to cumulative course grade.
Requirements:
Each group will be assigned in random order.
Each structure must span a distance of 24". It must be longer than 24" to achieve this task.
Structures must be constructed using hand building techniques (coil, pinch, slab)
Structures must be made of clay only, no alternative materials may be included (exception of testing tube).
All works will be unfired, and may be decorated using slips only.
All structures must be built using no more than 50LBs of clay (two bags),
(50 Lbs. is the limit, failure to comply with this will result in disqualification and an over project grade of 50 POINTS)
Areas of focus:
Group Dynamic and Communication
Teamwork, Delegation and Planning
Craftsmanship and Construction (techniques that lead to strong structural integrity)
Basic Ceramic Construction
Timing and Moisture Management
Time line:
Students will have approximately 2 weeks for construction.
Structures are due May 9th (Mon-Wed Classes) and May 11th (Tue-Thurs Classes)
Resources:
Students are encouraged to plan and to critically explore the potential designs for your structure. Think about bridges, structural beam, and architectural methods of spanning open distances.
